
Planning a Pergola on a Sloped Patio
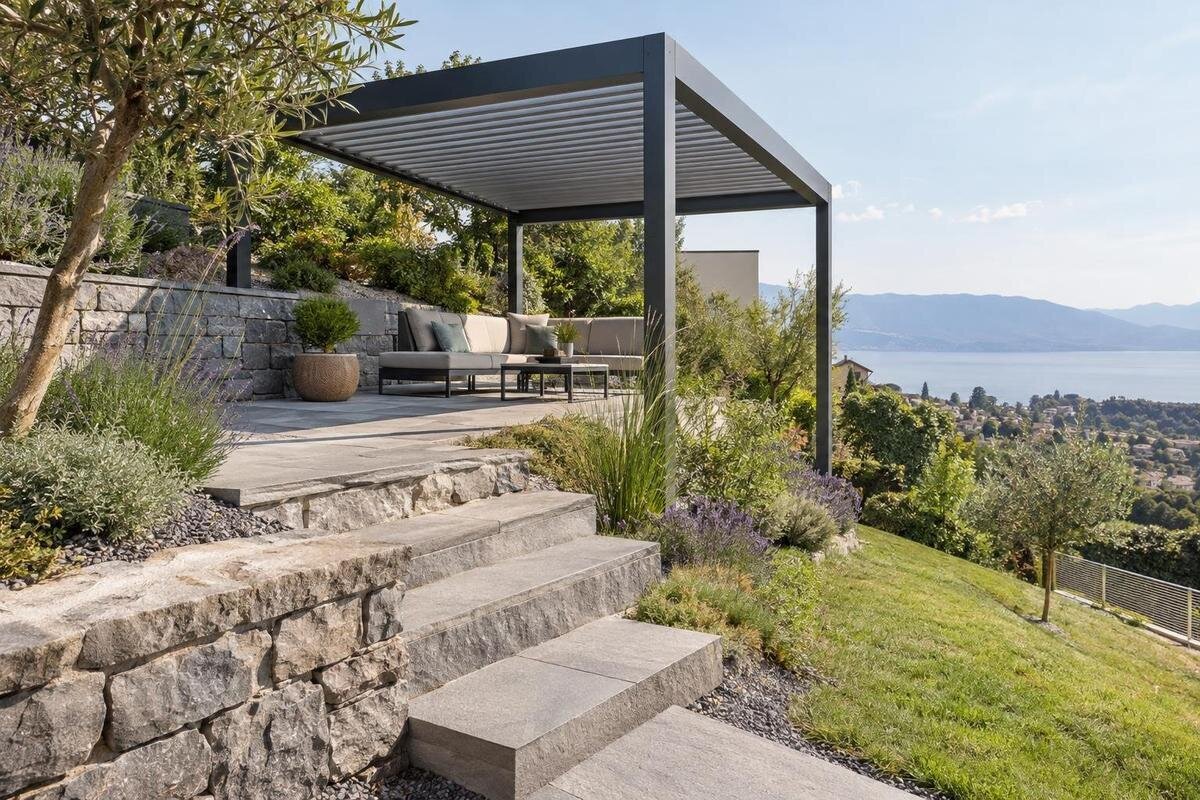
Pergola site planning
Planning a pergola on a sloped patio means resolving two different geometries: the slope that moves water across the finished surface and the roof plane specified for the chosen model. Survey the whole footprint, then check how its approved post arrangement meets the measured elevations. The patio’s pitch by itself neither rules out a pergola nor proves that a particular layout will work.

01
A sloped patio does not determine the roof plane
A sloping patio is a site condition, not an instruction to tilt a pergola. The paving may slope toward a drain or edge, while the pergola’s top geometry comes from the chosen model. Confirm whether its approved drawings call for a level roof plane or permit another arrangement; neither a product name nor a promotional photo settles that point. Show the finished patio surface and intended roof line as separate references on the plan. The support arrangement has to accommodate the elevations at the actual post locations. If the patio slopes in more than one direction, record each direction rather than describing it with a single arrow.
The elevation difference between support locations matters more than whether the patio looks noticeably sloped. A longer footprint may span a greater change in surface height than a shorter one on the same patio, while rotating the footprint may put the posts at different elevations. That does not mean rotation will solve the problem; it means each proposed layout needs its own measurements. When considering the Bloomcabin Bioclimatic Aluminum Pergola, identify the exact size and configuration before requesting a review. Its listed 97–258 sq ft range helps identify the available area range, but the selected layout must be checked against the actual support locations rather than the patio’s overall appearance.
Confirm the roof geometry in the model drawings
Start with the chosen model’s installation drawings, not the patio outline alone. Identify the intended roof plane, the edges that establish it, and the positions where posts are meant to meet the ground. If the drawings show a level top, keep that reference separate from the patio elevations; if they permit another geometry, follow the documented limits. Note which line or surface a drawing uses as its reference, since the top of a member and its underside are not the same clearance point. Keeping the roof outline and post locations together on the plan helps make the proposed arrangement easier to review.
Ask for a side elevation or equivalent view that shows the roof geometry alongside the finished surface at each support. It should distinguish overall height, clearance beneath the frame, post dimensions, and the reference elevation used for the layout. Those measurements answer different questions and should not be treated as interchangeable. For the Bloomcabin Lean-To Pergola, request documents for the particular size and configuration being considered. Check that the plan view and elevation describe the same version, including any connection to the building shown in the design. If a dimension or reference line is unclear, have it explained before using it to compare the pergola with the patio.
02
Survey elevations across the actual footprint
Survey the area the pergola will actually cover, not just the patio’s approximate overall slope. Mark the proposed footprint, every intended post location, the high and low sides, and any place where the surface changes direction or dips. Patios can have a slope in more than one direction, or a localized transition that is not apparent from the house. Include nearby drains, edges, steps, thresholds, and joints because they may affect support placement or water flow. An installer or survey professional can establish elevations consistently; a visual estimate or a single measurement at the center may conceal differences at the corners.
Record the finished surface elevation at each proposed support point using one common reference, and identify the surface material there. A simple table keyed to the site sketch makes the measurements easier to compare than a collection of unlabeled photos. Include the date and distinguish measured elevations from estimates or proposed changes. For the Bloomcabin Pergola, use the exact model footprint to label the support points; its listed 97–258 sq ft area range does not establish their positions. Photograph each location and a wider view showing how the points relate to one another. Keep the labels consistent across the sketch, measurement table, and photos so the reviewer can trace each measurement to its location.
Keep the posts within an approved arrangement
Post layout is where the patio slope meets the model’s designed arrangement. Do not assume that posts can simply have different lengths, take arbitrary extensions, or be shifted until the frame fits. The approved drawings should identify post positions, the permitted configuration, and any allowable adjustment for the chosen model. Ask whether the posts must remain plumb and how the frame is meant to relate to differing surface elevations. These details depend on the design documents, not a general rule for pergolas. Get confirmation of the arrangement in writing rather than relying on a verbal assurance that an installer can make it work.
Overlay the proposed post locations on the survey and flag conflicts before ordering: a drain grate, utility cover, stair edge, or narrow strip of paving may fall where a support is shown. Separate a conflict with the post itself from one involving its base or the space needed for installation. When requesting a layout for the bioclimatic aluminum model, ask for the documented base dimensions and any permitted adjustment details as well as the post positions. That information helps the reviewer assess the whole support area, not just a point on the plan. If a conflict requires moving a support, record the revised location and elevation and obtain approval for the changed arrangement.

03
Preserve the patio’s drainage path
The patio’s slope may be there to guide surface water toward a drain or edge, so include drainage in the layout rather than treating it as a finishing detail. Mark the direction of flow, low points, channels, drains, and the route water takes beyond the pergola footprint. Do not assume a new support or footing will leave that route unchanged: construction may intersect a drain or create a barrier that changes how water moves. Ask the installer to review drainage against the proposed support locations and any work planned in the paving. Show drain access on the plan as well, so routine access is not overlooked.
Consider water from the pergola separately. If the selected model has a roof or a feature for collecting or directing rainwater, obtain its documented discharge arrangement and show where that water would go. For Bloomcabin’s lean-to model, ask which drainage details apply to the exact configuration under review. Then identify whether any outlet would discharge near a doorway, step, walking route, or patio edge. Existing drains also need accessible covers for inspection and cleaning after the pergola is installed. A qualified site professional can assess the proposed discharge route and whether changes to the drainage system are needed; the direction of the patio slope alone cannot answer those questions.
Check clearance on the high and low sides
Check usable height across the patio, not just at its center. If the roof is designed to stay level while the surface rises or falls beneath it, the distance from the walking surface to the underside will vary across the footprint. If the model specifies another roof geometry, assess the clearances for that arrangement instead. Ask the installer to mark finished surface elevations and underside heights at the corners and along entry routes; a single center measurement can miss a tight spot. Do not set the roof height by eye or assume an adjustment for slope leaves all clearances unchanged.
Plot how people will use the space: door openings, gates, steps, usual walking routes, and any fixed lights or service equipment. Show the movement of doors and gates, not just their closed positions, and distinguish fixed obstructions from furniture that can be relocated. When reviewing the Bloomcabin Pergola layout, compare its documented vertical dimensions with these routes at their actual surface elevations. Pay particular attention to an entrance on the high side and to steps that bring someone closer to the underside of the frame. Furniture placement also affects circulation: a clear route on an empty plan may become awkward once a dining table and occupied chairs are shown.
04
Assess the substrate before choosing an anchor detail
Visible paving is not proof of a suitable anchoring substrate. The patio may have a finished surface over layers that are not apparent from above; its appearance does not establish the condition or capacity of the material beneath each proposed post. Do not choose anchors or a footing detail from a generic chart or a neighboring installation. A qualified professional should assess the actual substrate against the selected pergola’s approved anchoring drawings and the conditions at the site. Support requirements can vary with the model and what lies beneath the posts, so no single footing size can be prescribed for every sloped patio.
Give the reviewer reliable records such as patio construction drawings, prior repair notes, drainage plans, and photos of the proposed support areas. Distinguish original construction information from later alterations: a resurfaced patio may no longer match an older drawing, and a repaired area may differ from the surrounding construction. For the Bloomcabin aluminum pergola option, ask which substrate information is needed to evaluate the documented anchoring detail. Let the qualified professional determine whether further investigation is necessary and how it should be carried out. Record unknown conditions explicitly rather than filling gaps with assumptions, especially where a proposed post is close to a patio edge or a previously repaired area.
Request a site-specific review for the exact model
A useful site review combines a measured plan with the model documents. Send the proposed footprint and post locations, elevations at those points, slope direction, drainage features, patio edges, entry clearances, and any known substrate information. Ask the model provider or installer to confirm the roof geometry and post arrangement for those exact conditions and identify the approved anchoring detail. The review should name the product configuration and drawings it concerns, so later discussions do not quietly rely on a different footprint or support layout. A generic statement that a pergola suits patios cannot answer a site-specific question.
Clarify who will assess each part of the plan: the model provider for its documented arrangement, and an appropriately qualified site professional for substrate and structural questions. Use the Lean-To Pergola listing to identify the model in the request, then specify the size and configuration separately. Ask who will coordinate the answers if the product drawings and site findings require further discussion. The installer also needs to know which decisions are settled and which require confirmation before work can proceed. A useful response identifies the drawings reviewed, any conditions attached to the assessment, and any missing information; a general assurance without those details leaves the scope of the review unclear.
05
Fixed patio features can affect the post layout
Show fixed features on the same drawing rather than solving them one by one later. Mark the house threshold, steps, patio edges, drain covers, wall projections, paving joints, and access routes that need to remain open. On a slope, moving a support to clear one feature can place it at a different elevation or near a drainage path, so alternatives should be considered together. The point is not to move every obstacle; it is to see whether the approved footprint fits without sacrificing routine access or the patio’s drainage. Tie all measurements to the actual finished surface, not an assumed future regrade.
If the plan depends on changing the patio—raising part of it, rebuilding a strip, moving a drain, or creating a level area—treat that as a separate design decision. The finished transition, water route, and support elevations may all change together. Have the people responsible for the patio work and pergola layout coordinate their drawings, then confirm that the final surface still matches the approved post arrangement. Avoid paving changes based on the assumption that a standard pergola adjustment will make the model fit. The plan should distinguish existing from proposed surface levels so everyone is working from the same site condition.
Document the agreed layout and any changes
Keep a single current record of the agreed layout so that the supplier, site professional, and installer are not working from different versions. It should identify the selected model and configuration, the relevant drawing references, the site survey, and the decisions made during review. Date revisions and state which earlier version they replace. Keep proposed options separate from the arrangement that has actually been accepted for the site. If an answer is conditional on further inspection or information, record that condition beside the relevant detail. This makes it easier to see whether the order and installation plan describe the same pergola at the same measured locations.
Changes after the review need to be traceable too. A different pergola size, a shifted footprint, replacement paving, or a relocated drain may affect information used in the original assessment. Ask the responsible reviewer which parts need to be checked again rather than assuming an earlier answer covers the revised site. Before installation, compare the current plan with the patio and flag unexpected differences for resolution. After completion, retain the final drawings and any documented departures from the initial proposal. The purpose is not paperwork for its own sake: a clear record explains how the roof geometry, support elevations, and site conditions were coordinated for this particular installation.
Frequently asked questions
Can you install a pergola on a sloped patio?
Sometimes, but the slope alone does not determine whether an installation is feasible. The chosen model needs an approved post arrangement for the patio’s measured elevations, and the substrate and anchoring need site review. If the drawings do not address the proposed layout, treat it as unresolved.
Should the pergola roof follow the patio’s slope?
Not by default. The patio’s slope may guide surface water, while the roof geometry comes from the model’s design. Check the approved drawings to see whether the roof plane must be level or another arrangement is permitted; do not tilt the frame to match the paving by assumption.
Can I cut or extend posts to compensate for the slope?
Only if the selected model’s documentation explicitly permits the proposed change and confirms the resulting configuration. Do not cut, extend, or move supports based on appearance or a general rule. Get confirmation for the exact model and layout before work begins.
Are patio pavers or concrete enough to anchor a pergola?
Not necessarily. The visible surface does not establish the condition or structure beneath it. A qualified professional should assess the actual substrate against the model’s approved anchoring drawings. Do not choose an anchor or footing detail based only on how the patio looks.
What should I give an installer for a site review?
Provide the proposed footprint and post locations, measured surface elevations, slope direction, photos, drainage features, patio edges, and any known substrate records. Ask the reviewer to confirm the model’s approved support arrangement and anchoring details, and to identify any site questions that remain open.
A sloped patio may accommodate a pergola when the model’s approved support arrangement suits the measured elevations and the anchoring is appropriate for the actual substrate. The roof geometry remains a separate design requirement from the patio’s drainage slope. A workable layout also preserves water flow and provides usable clearance on both the high and low sides. The key is not to make the pergola follow the paving by assumption, but to establish how the selected design can fit the site.
