
Reducing Glare From Pergola Lights: Shielding and Placement
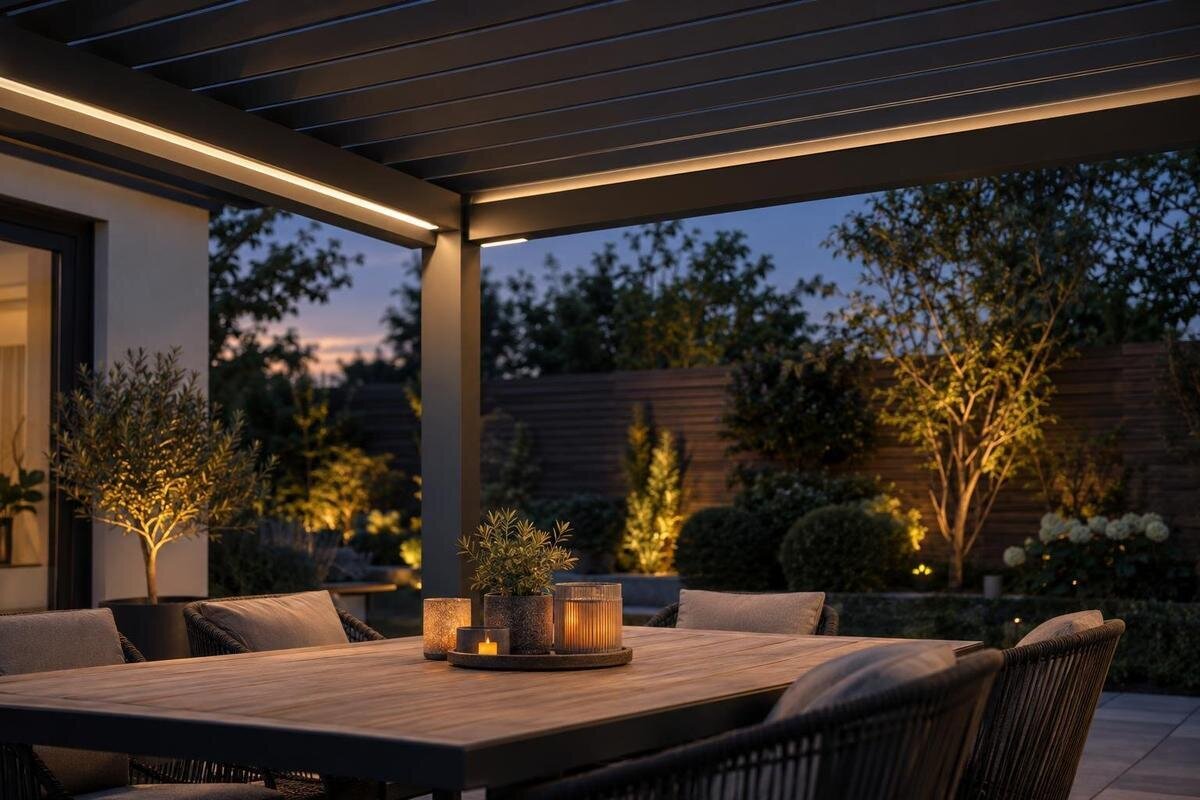
Pergola lighting
Pergola light glare is easiest to diagnose from the places where people actually sit, not from a standing view of the fixtures. After dark, note whether the bright source itself, a reflection, or the overall light level is causing discomfort. A simple plan showing seats, sightlines, nearby glass, and proposed fixture positions makes those differences visible before mounting decisions are made. Placement and manufacturer-designed shielding can then be considered together, while the exact fixture, its outdoor rating, and the permitted mounting location are checked against its documentation and qualified electrical guidance.

Glare depends on what people see
A pergola can feel uncomfortable even when its seating area is bright enough for dinner or conversation. Sometimes the emitting surface appears as a bright point against a dark evening background; in other cases, the whole space simply feels too bright. Those causes call for different responses. Lowering output can help with excessive overall brightness, but it may leave the source plainly visible in the same direct line of sight. Start by noting where discomfort occurs and what the person is looking toward, rather than counting fixtures or assuming every lamp is too strong. A small source in a common view can draw attention again and again.
Make the observation in the setting when the pergola will actually be used. A daytime view can show where a fixture sits, but it cannot tell you how it stands out once the yard and house are dim. From each usual seat, note whether the bright surface, a lit patch, or the general light level causes the problem. If existing controls let you compare lighting zones, use them without disturbing wiring; record what changes when a zone is switched off or lowered. Repeat when conditions differ, and note the time and direction. The pattern points toward repositioning, shielding, reflection control, or a compatible level adjustment. Dimming is not a complete fix if the source remains directly visible.
Draw the seating positions and sightlines
Sketch a simple overhead plan with the pergola outline and its visible structural members, plus the house wall, nearby openings, and any large reflective surfaces. Place the dining table, lounge furniture, and chairs where they will really be used, not in a convenient empty rectangle. Mark which way each chair faces and where people walk in or out. A chair pulled back from a table or turned toward a view can change what someone sees. The drawing need not be a construction plan; its purpose is to show ordinary eye positions and proposed fixture locations together. If you use the pergola for different activities, make a separate sketch for each furniture arrangement.
On a side view, mark approximate seated eye points and draw lines toward the other seats, the house, the garden, and the main entry route. Add fixtures at the actual locations under consideration; any source along a common line deserves a closer look. Draw likely head turns, too, because people look from a companion to a doorway or yard. If you are considering the Bloomcabin Pergola, label the drawing with that model and give each proposed fixture its own number. Use those numbers in your notes so a complaint from one seat can be traced to a specific light. Mark proposed mounting positions as unconfirmed until they have been reviewed.
Separate direct glare from reflected glare
Direct glare occurs when the lamp or LED itself is visible from a normal seat and attracts attention. Reflected glare comes from light bouncing off a shiny tabletop, glazed door, polished floor, or another smooth surface. The distinction matters: a shield may hide the emitter yet leave a sharp reflection on glass, while moving the fixture can change the reflected patch without changing the surface. Note which part of the view feels bright. If the source disappears when you shift your head but a bright streak stays on a surface, mark that surface as well as the lamp. Direct and reflected glare can occur together, so observe both before choosing a remedy.
Glass deserves a separate check because the view through it changes after dark. From a seat facing a glazed door, look for a reflected fixture superimposed on the room beyond; from indoors, check the view out toward the pergola as well. On the drawing for a proposed Bloomcabin Bioclimatic Aluminum Pergola, mark any existing glazing around the site without assuming it is part of the product. Record the seat, reflective surface, and suspected fixture together. If available controls let you switch that fixture off, see whether the reflection disappears. This helps distinguish a reflection of a pergola light from an indoor lamp or another outdoor source.
Keep exposed sources out of common sightlines
Place the emitting face outside the sightlines that matter most, especially across a dining table, between lounge seats, and along a route where people approach or leave. The fixture’s housing may be hidden by a beam while the light source remains visible from a lower chair or the opposite end of the table. Conversely, a position that keeps the emitter out of a seated view may make the beam fall on a useful surface. Review both the source and the area it illuminates; moving a light without checking its beam can solve one complaint while creating a dark task area. Include views toward conversation partners as well as straight-ahead views.
Do not rely on a single rule such as putting every fixture high, low, or at the perimeter. The viewing angle depends on furniture height, the direction a seat faces, the fixture’s aperture, and the actual structure. On a wall-mounted layout, include the adjoining wall, door openings, and the view back across the space. When considering the Bloomcabin Lean-To Pergola, sketch those real surroundings rather than assuming the wall hides an exposed light from every seat. Check the proposed position from the approach path as well as from the chairs.

Choose shielding designed for the fixture
Purpose-designed shielding can block a direct view of a lamp from selected directions. Depending on the fixture, this may involve a recessed source, a baffle, a visor, louvers, or another manufacturer-designed arrangement; these are examples, not features to assume every fixture offers. The shielding needs to match the viewing angles on your sketch. If it blocks the source only from a standing position but leaves it visible to someone reclining, it has not addressed the complaint. Shielding also changes where light goes, so judge the remaining illumination at the table, steps, or other intended task area rather than evaluating the fixture housing alone.
Check whether the exact fixture maker offers a compatible shield or accessory and whether that combination is approved for the intended outdoor exposure and mounting position. A diffuser may make a point source less visually sharp, but a broad luminous panel can still be uncomfortable if it sits directly in view; neither label guarantees a glare-free result. Avoid tape, generic covers, or field-made caps that alter the housing or block an opening. An improvised cover can change the fixture’s intended operation or weather protection. Confirm accessory compatibility from the fixture’s instructions and qualified electrical guidance.
Aim light toward useful surfaces
A fixture can be screened from view yet still create poor comfort if its beam crosses faces or reflects into the usual conversation direction. Where the fixture design and approved mounting allow, direct light toward the table, a work surface, or another intended target rather than across seated eye lines. Consider where the beam ends as well as where the housing sits: a bright patch on a pale surface can become a new distraction, while a narrowly aimed beam may leave nearby areas unpleasantly dark. The goal is not to eliminate useful light; it is to keep the source and its strongest effects away from common views.
Ask for the manufacturer’s light-distribution information for the exact fixture, if available, and compare it with the drawing rather than relying on a product photo. An image rarely shows how the emitter looks from every seat or where its beam falls. When planning around the regular Bloomcabin Pergola model, mark the intended illuminated area separately from the fixture position. Then compare the proposed beam with the table edges and nearby surfaces. Ask the lighting professional to explain any distribution diagram you cannot interpret. A beam reaching the tabletop does not by itself show whether someone across the table will see the source or a bright reflection.
Test the full seating arrangement
Test every seat people use, not just the middle of the pergola. A light may be comfortable at the end chair but visible to someone sitting back in a lounge seat, or harmless while looking toward the yard but distracting when looking across the table. Sit at a typical eye level and turn toward conversation partners, the home, the entry, and any view people naturally face. Include a person arriving on the path; a fixture that is comfortable while seated can still shine into the eyes as someone approaches. The everyday pattern matters more than a single posed view.
Allow for chairs pulled back, a reclined posture, and furniture moved between dining and relaxing. If glare disappears only when a chair is shifted into the walking route or a seat is left unused, the layout has not solved the problem for the whole group. For a proposed wall-mounted Bloomcabin pergola, include seats facing toward the adjoining wall as well as those looking out. Keep a seat-by-seat record: which fixture is visible, which surface reflects it, and whether the problem occurs during a normal head turn. Record occasional seating too, such as extra chairs used for guests. This makes it easier to compare revisions without relying on a general impression that the lighting looks better.
Recheck the roof and structural members
Beams, posts, roof edges, and other structural members can hide a source from one direction and expose it from another. A standing inspection may give a different answer from a low chair, while a view from outside the pergola may reveal a bright fixture that guests inside do not see. Mark actual members and surfaces on the drawing, then check views from both ends and sides. Distinguish the fixture housing from its emitting surface: a beam might conceal the housing while leaving the bright aperture visible underneath. Record that difference rather than marking the entire fixture as hidden. A member that blocks a sightline is not necessarily an approved mounting location.
Where a roof or its louvers move, compare the operating positions expected during evening use. Note whether an edge stops screening a source, whether a new reflection appears, or whether light falls onto a different surface. If you are considering the Bloomcabin bioclimatic pergola, request the exact configuration documentation before adding any assumed roof positions to the drawing. Keep separate notes for each documented position rather than combining them into a single view. Do not attach a fixture to a moving part unless the manufacturer has documented that use. If a proposed position depends on the roof remaining in one setting, flag that limitation for the supplier and qualified installer to review.
Use controls to manage light levels
Dimming is useful only when the exact fixture, driver, and control support it. If compatible, a lower setting may reduce overall brightness and help suit a quieter evening, but it cannot move an exposed source out of a direct line of sight or automatically remove reflections. Evaluate the scene at the levels people will actually select, not just the lowest setting used for a demonstration. The light should still serve its intended task, and a comfortable setting should not depend on people tolerating a source that remains visibly harsh. This is why placement and shielding need attention before fine-tuning output.
Separate switching can also help if the design lets people use a particular fixture only when needed, but do not assume a pergola or light package includes a certain control. When reviewing Bloomcabin Pergola configuration options, ask which lighting and control combinations are supported. For a supported arrangement, record the settings used during your glare assessment and which fixtures were on. Compare those settings with actual needs: a setting comfortable for conversation may leave the table difficult to use. Ask the supplier and a qualified electrical professional to confirm compatibility from the exact fixture and control instructions. Do not assume that a control labeled as dimmable will work with every proposed light.
Confirm fixture and mounting compatibility
Before committing to a fixture position, put the exact pergola model, fixture model, proposed location, shielding accessory, control method, and marked seated sightlines in the same review document. Check the fixture’s stated outdoor rating against the actual exposure and the manufacturer’s permitted mounting position; verify that a shield or diffuser is approved for that exact fixture. Ask what light-distribution information or installation approval supports the placement. If an answer depends on an unverified assumption about a beam, louver, bracket, or accessory, pause and have the relevant manufacturer or qualified professional resolve it.
Discuss the drawing with a qualified electrical professional and the pergola supplier before mounting decisions are finalized. The goal is documented confirmation or a revised location, not a guess based on a product photograph. If the selected structure is the Bloomcabin Lean-To model, include that exact model name in the discussion and request confirmation for the proposed fixture rather than inferring compatibility from the model title. Do not modify a fixture or pergola to create an improvised shield. A professional review can preserve useful light while addressing the view that caused the glare.
Frequently asked questions
Why do pergola lights cause glare even when they are not very bright?
Glare depends on where the source appears in your view and how it contrasts with the surroundings, not only on its overall brightness. A visible light can stand out against a dark yard or appear as a reflection on glass or a polished tabletop. Check which of these is happening from the seats people use.
Should pergola lights go directly over a dining table?
There is no single position that works for every layout. Check whether the light-emitting face is visible from the chairs and whether its beam or reflection crosses people’s usual views. The table still needs useful light, so review the fixture’s beam information and the sightlines together.
Will a shield eliminate glare?
Not necessarily. A compatible shield can block a direct view from some angles, but it may not screen the source from a reclined seat or prevent reflections on nearby surfaces. Confirm that the shield is designed for the exact fixture, then assess the remaining light from the seats that matter.
Can dimming fix pergola light glare?
Dimming may help if the overall light level is too high and the exact fixture and control support it. It does not move a visible source out of a sightline or automatically remove reflections. Treat dimming as a possible adjustment after reviewing fixture placement and shielding.
How can I check for glare before lights are mounted?
Draw the seating arrangement, sightlines, nearby reflective surfaces, and proposed fixture positions. Ask for the exact fixture’s light-distribution information and have a qualified professional review the intended location, outdoor suitability, and mounting approval. If a representative light assessment is needed, arrange it with that professional.
Comfortable pergola lighting comes from viewing the layout from the seats people actually use, distinguishing a visible source from a reflection, and matching any shielding to those angles. Keep the drawing tied to the exact pergola and fixture under consideration, then resolve outdoor suitability and mounting approval before installation. That makes it easier to address the source of the glare while keeping useful light on the areas where people gather.
