
Shading a Pergola Seating Area Without Blocking the Garden View
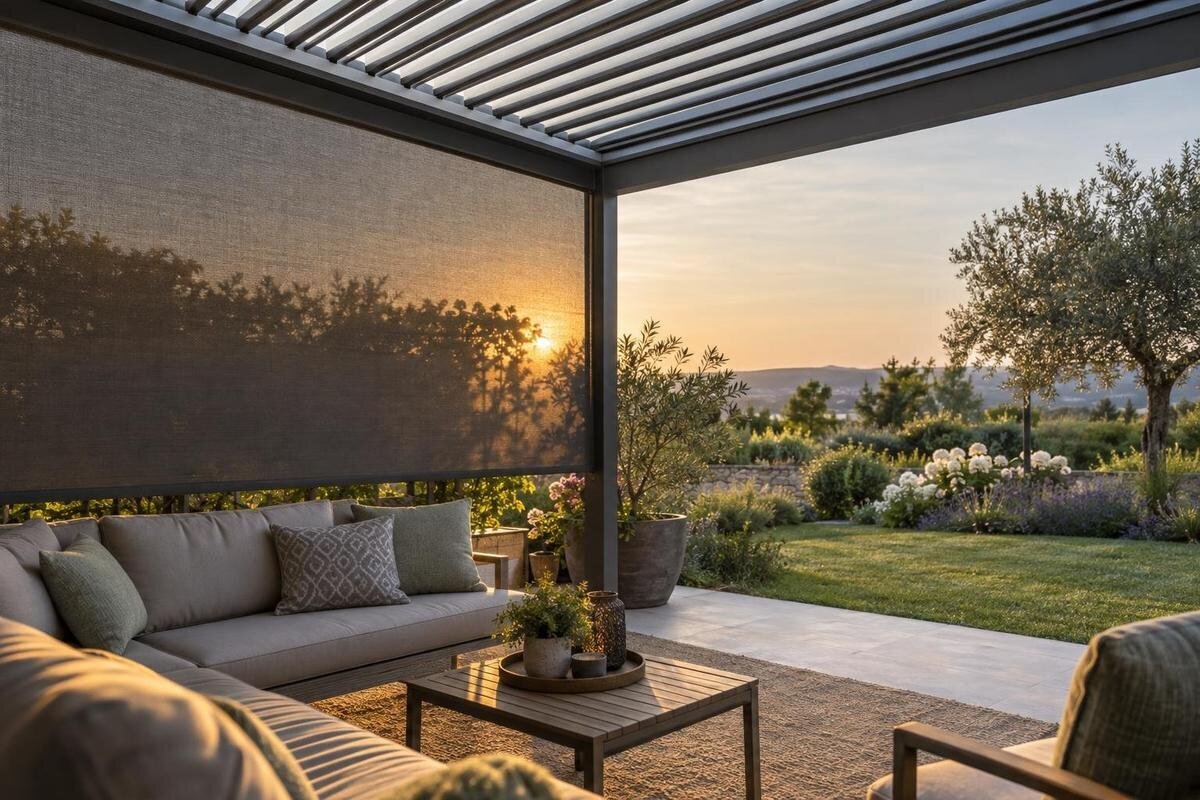
Pergola shade planning
Shading a pergola seating area can block a garden view if the shade material crosses the sightline from your chair. Choose the view you want to keep, then map your seated eye height, the sun’s direction at the hours you use the space, and the side where shade might go. This helps you target the opening that admits unwanted sunlight instead of enclosing every side. A simple plan and a seated test can show whether overhead shade, a partial side treatment, or a small seating adjustment is the better fit.

01
Choose the garden view you want to keep
Choose one primary view before drawing a screen: a garden bed, mature tree, open lawn, or feature at the far edge that you actually want to see from the main seat. “The garden” is too broad for a useful plan; mark a particular target or a view zone with left and right boundaries. Note whether you want a straight-ahead view from the dining chair, a diagonal view from an end seat, or a broader sweep from a lounge chair. Record the target’s height and distance separately. Nearby flowers may sit below your eye level, while a distant tree may extend well above it; those views pass through different parts of the opening. A shade panel can preserve one while obscuring the other.
Sketch the pergola and chairs from above, then draw a line from each principal seat toward its target. A view zone can be wider than one line, so mark its sides as well as its center. Separate essential sightlines from directions you could comfortably screen. If one seat is used most, let it set the primary axis and assess the others as a group; if the whole table should share the view, test every regular place. This avoids treating the entire garden-facing edge as automatically open or closed. A note such as “keep the lawn opening clear from the two end chairs” gives a supplier or installer a concrete plan to discuss.
Measure sightlines from the actual seats
Measure seated eye height with the actual chair and cushion on the finished patio, using a normal posture rather than standing or deliberately leaning back. Record the distance from paving to eyes, and repeat for another seat if its height or recline differs. On a side-view sketch, mark the eye point and the garden target, then connect them with a straight line. This is the seated sightline. An opaque panel crossing that line blocks the target; a more open material may leave it partly visible. The same panel meets sightlines at different heights from different seats, so check both ends of a wide table rather than drawing only the middle chair. Use the cushions you expect to leave in place; they alter seat height.
Check low as well as high targets. A table edge, planter, railing, or a panel’s lower edge may hide flowers and lawn while leaving upper branches visible. Repeat the test from regular chairs, including end seats and a reclined position if you use it. Mark a proposed screen edge on a photograph or hold a rigid cardboard outline in place while seated; treat this as a visual mock-up, not an outdoor structure. Photograph the view at eye level and compare clear and screened outlines. If several people use the same seat, check a range of comfortable postures rather than relying on one exact eye point.
02
Map the sun at the hours you use the pergola
List the hours when you expect to use the pergola seating instead of planning around a generic midday. Mark breakfast, lunch, or evening use separately, then note the sun’s direction and approximate height at each time. A compass reading or sun-path app can orient a simple plan, but verify it outdoors: nearby trees, buildings, fences, and the date of observation affect shade on the patio. Record what feels uncomfortable—the sun in someone’s eyes, heat on one chair, or glare on the tabletop—because these can occur in different places. Repeating observations on another date helps show whether the issue is brief or recurring.
Low-angle sun can travel beneath an overhead cover through a side opening; high sun presents a different problem. Don’t assume one compass side is always responsible or that a noon observation represents an afternoon seating period. For a model such as the Bioclimatic Aluminum Pergola, request roof drawings and operating details before plotting its shade. The model name does not establish the roof’s movement or shading performance. On your sketch, distinguish sunlight arriving through the roof area from sunlight entering below its edge. That distinction helps you ask whether the proposed roof configuration addresses the recorded exposure or whether a separate, compatible side treatment would be needed.
Separate overhead shade from side shade
Draw sun arrows separately from eye-to-view lines. The overhead plane and a side opening address different geometry: overhead shade deals with light arriving from above, while a side element can intercept rays only when they pass through that side before reaching a seat. They are not interchangeable. At a low sun angle, overhead cover may leave a face or tabletop exposed; a full panel may instead block a favored view even if glare lasts only part of the day. Mark where the ray reaches a chair, person, or table, then trace where that ray meets the pergola boundary. That identifies which opening is worth testing, rather than suggesting shade around the whole perimeter.
Think of desired shade as a patch over the seating area, not automatically as a full enclosure. Does the bright spot fall on one end chair, the table, or the whole group? Existing trees or nearby buildings may already shade part of the zone at the relevant hour. When reviewing the Bloomcabin Lean-To Pergola, include the adjacent building in your sketch rather than considering the pergola footprint alone. Its wall and roofline may obstruct sunlight from some directions while leaving others exposed; their effect depends on the actual site. Mark the boundary of existing shade first, then compare the proposed overhead cover with the remaining sunny area. This separates shade already present from shade the new configuration would need to provide.

03
Place side shading where the sun enters
Put the side-shade candidate where the mapped sun enters, not across the garden-facing edge by default. Draw the opening through which rays arrive and mark the seats they hit. If a short segment intercepts those rays, test it before extending shade across an entire side. Where the sun moves around a corner during likely use hours, check each period separately: one fixed position may solve evening glare but leave earlier light untouched or cut off the view for longer than necessary. Include fences, trees, or buildings that already shade the area; an added panel may contribute little on that boundary. The other side may be the actual point of entry.
An operable or retractable screen changes the opening only if the exact model supports that arrangement; tracks, fixing points, and compatibility are model-specific. Do not assume a third-party fabric, curtain, blind, or freestanding screen is included with a pergola or approved to attach to it. For the Bloomcabin Pergola model, ask which side configurations are supported and whether each accessory is included or purchased separately. Draw both deployed and open states. A screen that clears the central view when open may still leave edge components visible, so include the complete accessory outline provided by the supplier. Also check whether its deployed position leaves the intended route between the seating and garden usable.
Choose panel height and width from the sightline
Set height by checking the sun ray against the seated sightline rather than choosing a generic panel size. On a side elevation, mark the eye point, view target, sun direction at the problem time, and proposed shade edges. Trace where the incoming ray and the garden sightline cross the proposed panel location. If they cross at different heights, a partial panel may block the sunlight while leaving the target visible. If they overlap, an opaque panel at that location cannot do both. Test another position, a seating change, or an acceptable compromise in visibility. The relevant question is where each edge appears from the chair, not how tall the panel looks when you stand beside it.
Check width and position too. A narrow element may leave a bright strip at one end; moving it nearer or farther changes which rays it intercepts and how much of the garden it covers. Mark proposed edges on a scaled plan or a photograph taken from seated eye level, then inspect each main chair. When comparing a configuration of the Bloomcabin Bioclimatic Aluminum Pergola, use dimensioned drawings to locate the side openings. Total floor area cannot tell you their widths or where posts divide them. Label the proposed shaded segment within the opening rather than treating the whole side as one uninterrupted span. Compare both outer edges and any gaps between separate elements, not just the middle of the screen.
04
Balance screen openness with sun control
Side treatments create a tradeoff between direct-sun reduction and transparency. An opaque surface interrupts the view wherever it crosses a sightline; an open-weave fabric or slatted surface may retain some visual connection, but actual visibility depends on openings, color, distance, angle, and what lies beyond. A material sample seen at arm’s length is not a reliable stand-in for the view from a chair, and product photography may use different light. If samples are available, hold one where the panel would sit and look toward the target at seated height. Also check whether bright light behind the material makes its openings more or less noticeable from your side.
Assess the material outdoors with sunlight coming from the direction you want to shade. Compare central and oblique viewing angles, and note whether the garden feature remains recognizable. A sample can reveal weave, color, and openness, but it cannot demonstrate whole-panel shading or how the full surface will look. For any side treatment proposed with the Lean-To Pergola, request information for that exact accessory, including available visibility and solar-control data. Treat these as separate properties: being able to see through a material does not establish how well it reduces direct sunlight. If both requirements cannot be met in the same area, consider a smaller screened zone that leaves the main view uncovered, rather than expecting one material to eliminate the tradeoff.
Arrange furniture to keep the view open
Furniture can help maintain the view without adding shade hardware. Turn the main seat toward the favored feature and check whether posts, cross-members, a table umbrella, planters, or chair backs fall across it. Keep chairs within the mapped shade area at the chosen hour if possible, but do not center the group automatically: a small shift may move the sightline away from a post or screen edge. Show the usual route around the table on the same plan. A seat in the perfect viewing spot is not useful if everyday movement forces people to push past it. Consider both dining and lounging positions if the area serves both purposes.
Test how people actually use the space: someone at an end chair may look diagonally, and conversation can turn attention toward another part of the garden. A dining table can sit farther from the view-facing edge while a lounge chair is aimed outward, or two chairs can angle around a post line. These are options to test, not universal layout rules. For the regular Bloomcabin Pergola, compare the confirmed post layout with a furniture plan showing chairs pulled out for use. Distinguish space occupied by furniture from space needed to reach it. A layout that preserves the view only with every chair pushed under the table will not reflect normal dining conditions.

05
Test shade and visibility on more than one date
Repeat the shade and sightline check at important use times on more than one date. Sun angle changes through the year, and trees or neighboring structures can cast moving shadows; leaf cover can also change both the view and the light reaching the patio. Note which periods bring unwanted glare and which provide welcome light. Do not assume a fixed arrangement works all season because it performs on one sunny afternoon. Decide whether the priority is a common daily use time, a seasonal gathering, or a view that should stay open year-round, then compare those conditions on the same plan. A simple record of date, time, seat, and shaded area makes comparisons easier.
Mock up visibility, not a potentially unsafe shade installation. Mark a proposed edge on a photo or scaled plan, or hold a rigid outline by hand while someone checks from the seats; do not attach loose fabric outdoors for a trial. For sunlight, photograph the patio at recurring times or use a scaled sun-path sketch. If you are discussing the Bloomcabin Lean-To Pergola configuration, share dated photos from a consistent viewpoint so the supplier can distinguish existing shadows from the proposed shaded area. Label observations separately from predictions for dates you have not tested. Leave chairs, planters, and any table umbrella in their usual positions so the record represents the space you actually use.
Confirm the exact pergola and side-accessory configuration
Take a concise brief into model selection: patio footprint and exact dimensions, seat positions and eye heights, view lines to preserve, dates and hours when glare occurs, and the side where shade would intercept it. Request a plan or elevation showing posts, roof perimeter, openings, and any supported side accessories. Ask whether a screen is available for the exact configuration, what is included, and how the installed position affects the view. If the documents do not show a side panel, don’t assume it comes with the pergola or will fit. For attachment and site-specific structural questions, ask the seller or a qualified installer rather than adapting an unrelated product.
Bloomcabin’s supplied listings identify the Lean-To Pergola, Bloomcabin Pergola, and Bioclimatic Aluminum Pergola, each with a listed area range of 97–258 sq ft. That range does not establish the dimensions or side arrangement of an individual configuration. Use the Bloomcabin Pergola product page as a starting point for an itemized proposal identifying the selected size and any approved side accessories. Keep the final drawing with that proposal so a later change in size or accessory can be checked against the same seating plan. Before accepting the arrangement, resolve any missing opening dimensions or unclear panel positions. The useful comparison is not simply which model covers enough patio, but which documented configuration shades the seats while preserving the chosen view.
Frequently asked questions
How do I check the garden view from a seated position?
Use the chair and cushion you expect to use, and measure eye height above the patio. Mark that point on a side-view sketch and draw a line to the garden feature. Repeat from the main seats, including a low target such as lawn or planting. A standing view can make a screen seem less obstructive than it is.
Should a shade screen go on the garden-facing side?
Only if the sun enters there and the screen does not cross a sightline you want to keep. Map the sun at the hours you use the seating; low-angle light may come from a different direction than midday light. A partial panel on another side may reduce glare with less impact on the view.
Will a pergola roof block afternoon sun?
It depends on the sun angle and the exact roof arrangement. Low-angle light can enter beneath overhead cover through an open side. Check the drawings and operating details for the specific model, then compare the ray path with both your seat and the garden feature you want to see.
Can I add a third-party screen to any pergola?
Do not assume a screen is included or compatible. Confirm approved accessory options and attachment details with the supplier for the exact model. If you are considering a third-party screen, get compatibility confirmed before making it part of your shade plan.
How can I test a panel before choosing one?
Mark its proposed edge on a photo or scaled plan, or hold a rigid outline by hand while someone checks the view from each main seat. Repeat for different target views and note the sun direction separately. A material sample can help assess visibility outdoors, but do not attach loose fabric as a temporary screen.
Once the sun path, seated sightlines, and furniture are on the same plan, the tradeoff becomes concrete: which rays need blocking, which garden view must stay open, and from which seats. Compare partial shade positions against those conditions, then confirm the dimensions and accessory compatibility of the exact model. If no single fixed position shades the relevant hours without crossing the preferred view, revise the seating or consider an adjustable option only where the model supports one. A side treatment is successful when it solves the observed glare and leaves the chosen garden axis clear.
