
Where Should a Pergola Heater Be Positioned?
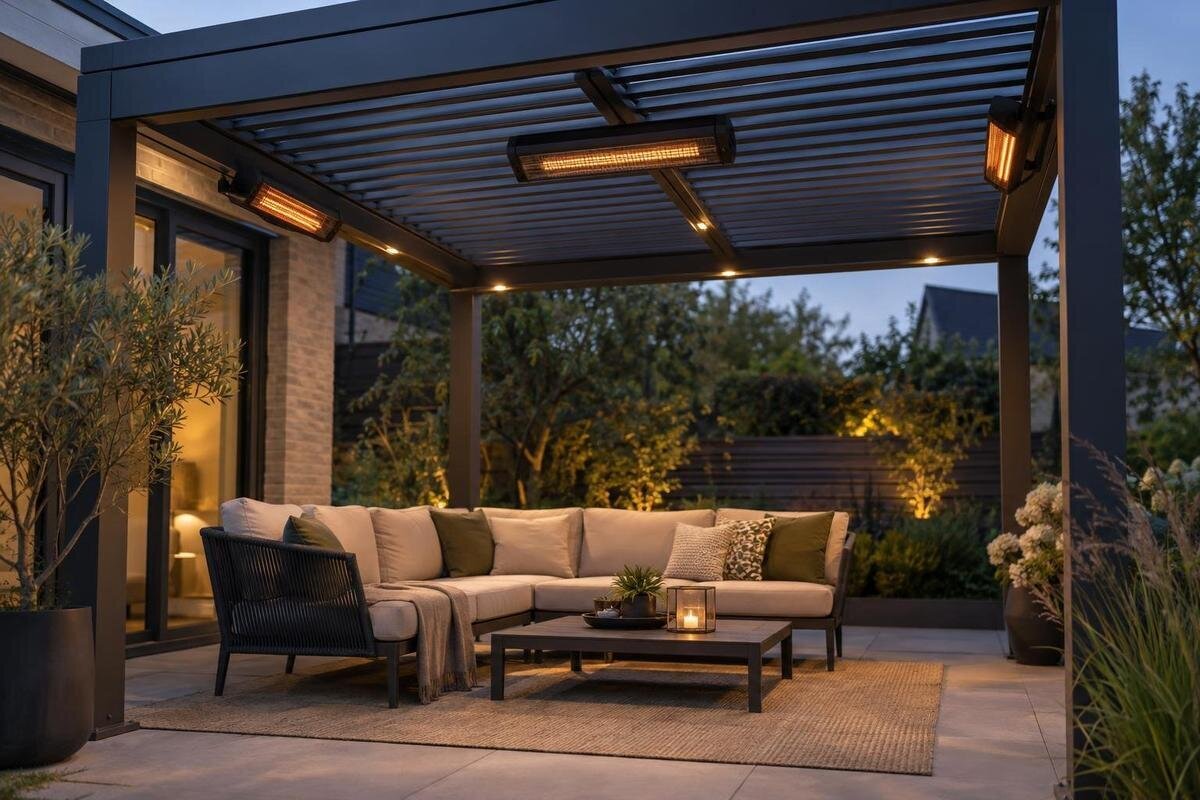
Pergola heating
A pergola heater belongs where it can serve the people using the space, not simply wherever a bracket fits. The final position also has to match the heater’s documented coverage and clearances, the pergola manufacturer’s approved mounting points, and the exposure at that location. Those requirements vary by product and layout, so there is no universal center point or clearance distance to copy. Map how people use the pergola first, then reconcile the plan with both manuals and qualified installation advice.

Map the seats people actually use
Draw a simple overhead plan and mark the chairs or benches where people spend the longest stretches: regular dining seats, a conversation group or a favorite lounge position. Prioritize an ordinary evening, not a rare party arrangement or a symmetrical layout that looks tidy on paper. If two groups use the pergola at different times, label the primary group and occasional zone separately. If both need warmth at once, mark both as targets; otherwise, identify the seating area that matters most. This keeps the discussion focused on people rather than empty frame space.
Use the installed pergola’s actual footprint and mark each seat’s position and direction, not just the outline of a table. Note whether people face one another, turn toward a view or recline; the area to warm may not be centered on the table. If seating moves, show its usual positions rather than every possible arrangement. When planning a new structure, keep the Bloomcabin Pergola model name with your sketch so the supplier knows which product you are considering. Add the dimensions of your proposed layout separately, including the distance between seating groups. These details help distinguish the space you want to use from the space shown in a catalog image.
Match the heater’s heating pattern to the seating
Identify how the exact heater distributes warmth before marking an attachment point. A radiant heater transfers heat to people and objects in its line of sight rather than first warming all the surrounding air. For that style, direction matters: a beam, deep post, fixed screen or large object between the unit and a seat can interrupt the intended direct path. Other heaters may distribute warmth differently, so a layout drawn for one design may not suit another. Use the exact manufacturer’s instructions and any supplied diagram; do not assume every overhead heater should point straight down or toward the center of a table.
An open pergola also differs from an enclosed room. Outdoor air can pass through its sides, so warmth may not be even across the footprint; a central mounting location cannot by itself make a breezy corner feel sheltered. Note which seats are most exposed to typical airflow during the hours you use the space, and share that observation with the installer. A heater’s expected effect depends on its design and stated use, so do not assume that a position alone will produce a uniform temperature. This is particularly useful when the main seating is near an open edge.
Compare heater coverage with the seating area
Find the installation manual for the exact heater model and see whether the manufacturer states a coverage area, mounting height or preferred direction. Treat any stated coverage as conditional on the setup described, not as a circle that automatically extends from the appliance. If the manufacturer supplies a diagram, compare its orientation and mounting conditions with your seating plan. Mark the documented heat area and check where the outer seats fall, not just the nearest chair. If your proposed mounting position differs from the example, or no coverage guidance is provided, ask the manufacturer or installer rather than estimating a radius.
The pergola’s floor area does not establish how much space a heater can warm. The listed 97–258 sq ft range for the Bloomcabin Bioclimatic Aluminum Pergola describes pergola size, not heater coverage. Two seating layouts with the same floor area can have different distances, orientations and obstructions. If an outer chair falls outside the documented coverage, or the guidance does not match your setup, ask the heater manufacturer or a qualified installer to assess the layout. You may need to focus on a particular seating zone rather than expect one position to serve every spot.
Measure clearances around people and surfaces
Clearance is a measured zone, separate from the area the heater can warm. The exact unit’s manual may specify space in several directions, a mounting height or permitted angles; mark those requirements on a plan and a side view. Include nearby surfaces and items, such as overhead roofing, posts, walls, shade fabric or umbrellas where present. Measure from the reference point specified in the manual, not from a convenient frame edge. With a wall-mounted layout such as the Bloomcabin Lean-To Pergola, draw nearby windows, doors and eaves rather than treating the wall as blank space. Do not substitute distances from a similar-looking appliance.
Then map how people move. Account for the heater and bracket as objects taking up space below or beside the frame; the position should not force people to duck, squeeze past the appliance or leave their usual route to reach a chair. Trace entry from the house, access to steps or gates, and movement around a table with chairs pulled out. Show door swings and normal standing spots, not only a neat setup with chairs pushed in. A qualified installer can compare these routes with the heater’s clearances and the pergola’s approved mounting options before choosing a final position.

Confirm the pergola’s approved mounting points
Do not assume a pergola member can carry a heater because it looks substantial or an accessory is fixed nearby. A decorative beam, trim piece, rail, louver or roof element is not an approved attachment point unless the pergola manufacturer identifies it as one. Acceptance of a nearby light or other accessory does not establish approval for a heater. If you are considering the Bloomcabin bioclimatic pergola, ask the supplier which mounting locations, attachment methods and orientations are permitted for your exact configuration and proposed heater. Identify the position on a drawing or labeled photograph so the answer refers to a specific frame member rather than a general description such as “the side beam.”
Give the pergola manufacturer or a qualified pergola installer the heater’s make and model, proposed bracket and intended position. Ask for documented confirmation of the support location and installation method, rather than relying on an impression that the frame feels sturdy. The professional needs to assess the exact equipment and mounting point; a photo alone cannot establish approval. If there is no documented permitted point at the proposed location, revise the plan to use a confirmed one or reconsider the equipment and seating zone. A spot that works on the drawing is not ready until its support is approved.
Account for walls, wind and weather exposure
Outdoor suitability is separate from structural support. Check the exact heater documentation for permitted outdoor or sheltered use, orientation and exposure limits, then compare those instructions with the pergola manufacturer’s information. A covered location is not automatically protected from wind-driven moisture, and an open-sided pergola is not an enclosed room. Do not infer that a roof panel or nearby wall changes the heater’s rating, or that an outdoor-use label makes every overhead position appropriate. The actual heater, structure and proposed location all need to fit their documented use conditions.
Record which sides are open, where walls, eaves and screens sit, and whether wind or rain reaches the proposed mounting area during normal use. A wall may change the exposure on one side, but it does not replace the heater’s location requirements. If you are considering the Bloomcabin Lean-To Pergola, show its proposed position relative to the house, including the wall and open sides. Note any observations about wind-driven rain at the site rather than assuming the house provides complete shelter. Have the installer assess the location as built, and keep the heater’s outdoor-use requirements distinct from the pergola’s mounting requirements.
Check moving roof and screen positions
If your pergola has an adjustable roof, louvers, retractable shade, sliding screens or another moving component, evaluate the heater location in every normal operating position. A fixed bracket can obstruct movement; a moving part may enter a clearance zone or interfere with service access. The reverse can matter too: equipment attached to a moving element changes position when that element moves. Include the mechanism’s travel and stopping points in the check. Do not assume a part is suitable as a heater support because it moves smoothly or appears rigid; the exact structure instructions must permit the proposed attachment.
Check the arrangement with the roof open and closed, a screen extended and shade retracted, if those positions apply to your setup. Ask the pergola supplier and heater manufacturer to confirm the combination and its clearances, then have the installer verify physical movement before fixing the location. If the documents do not address the pairing, obtain direct guidance instead of improvising a compromise. Preserve access to controls and any routine service points described by the heater maker. A position that works only when a moving component is left in one state may not suit the way you intend to use the pergola.
Allow for furniture changes and stored items
Test the plan with furniture in the positions people actually use, not only against an empty-frame drawing. Show dining chairs pulled out, loungers reclined, side tables, umbrellas, curtains or stored items that may sit under the structure. Those objects can interrupt a heater’s intended path or move inside its clearance area after installation. When planning furniture beneath the Bloomcabin wall-mounted pergola, include the space needed between the house, occupied chairs and nearby doors. Show where cushions or other loose items are stored when the seating is not in use, especially if they could end up beneath the proposed heater. Distinguish fixed furniture from pieces that residents regularly move.
Compare an everyday arrangement and the most common change, such as a larger dinner group or chairs shifted toward the edge, with the documented coverage and clearances. The layout should not depend on someone remembering to move a cushion, umbrella or screen each time the heater is used. If furniture shifts seasonally or on weekends, ask whether the position still meets the instructions and serves the intended seats. Recheck the arrangement if you add a shade or screen. It may be more practical to define one clear heating zone than to try to serve every temporary chair from one point.

Coordinate heater placement with electrical planning
If the selected heater is electric, settle its proposed position before an electrician plans the electrical work. The exact heater documents let the electrician assess its connection requirements; the pergola drawing shows where the appliance, controls and proposed route need to fit. Ask a qualified electrician to review the specific unit and the actual outdoor exposure, and to coordinate with the person confirming the mounting point. Do not assume an existing outlet or a general pergola electrical plan confirms that a particular heater can be connected there. The structural and electrical reviews are related, but they answer different questions.
Send the electrician the heater documents and a drawing that identifies the pergola. If you are considering the Bloomcabin Pergola model, include that name along with any configuration information supplied for your order. Mark existing power points, the proposed heater and controls, moving components, doorways and walking paths so routing can be considered before the mounting point is fixed. Also identify where you expect to operate the controls and whether furniture could block access to them. Leave connection details and routing decisions to the electrician; do not make a do-it-yourself wiring change to solve a location conflict. If the route and approved support point do not work together, revisit the plan with the professionals.
Give the installer an annotated placement plan
Bring the decisions together in one annotated plan. Include the occupied seats, direction of heat for a directional unit, coverage conditions stated by the heater maker, required clearances, obstructions, open sides and moving components. Mark the exact mounting point and note who confirmed it for the particular heater and pergola. For a project involving the Bioclimatic Aluminum Pergola, record the selected configuration alongside the model name and the applicable technical documents. Date the drawing so everyone can distinguish the agreed layout from an earlier proposal. Label which measurements come from which instructions, and identify any questions still awaiting confirmation before the installer treats the drawing as the final placement plan.
Before installation, ask the qualified installer to compare the drawing with the actual frame and furniture layout; for an electric heater, have the electrician resolve the electrical plan separately. Ask them to identify any conflict among coverage, clearance, mounting approval and service access. Resolve it by changing an approved position, the intended seating zone or the equipment, not by attaching a heater to an unapproved part of the frame. Keep the manuals and confirmations with the drawing so a later furniture change or replacement heater is not assumed to be equivalent.
Frequently asked questions
Is the center of the pergola the best place for a heater?
Not automatically. The center works only if the heater’s documented coverage reaches the seats you want to warm, its clearances remain open, and that mounting point is approved for the exact pergola and heater. An offset position may suit the seating better, but it still has to meet those requirements.
How high should a pergola heater be mounted?
Use the exact heater manual for its permitted mounting height, orientation and clearances; there is no universal height for all pergolas and heaters. Have a qualified installer compare those instructions with the approved support point and any coverage guidance. Do not change the height simply to extend the heated area.
Can a heater go directly above a dining table?
Only if the heater’s instructions and the pergola’s mounting approval allow that position. The table’s center is not a reliable guide by itself: seat positions, pulled-out chairs, people moving around the table and the heater’s heating pattern all matter. Include umbrellas and other objects in the clearance check.
Can I attach a heater to any pergola beam?
No. A frame member’s appearance, or an accessory attached nearby, does not prove that it is an approved support. Ask the pergola manufacturer or a qualified installer to confirm the exact heater, bracket and mounting point. If they cannot confirm it, revise the position or equipment.
Does a wall-mounted pergola change heater placement?
It can change the available mounting surfaces, nearby clearances, exposure and seating layout. A wall does not automatically make a location sheltered or change the heater’s permitted use. Show the wall, windows, doors, eaves and open sides on the plan, then have the proposed position assessed against the exact instructions.
A workable heater position brings the intended seats, documented coverage, required clearances and an approved support point together. The frame’s midpoint alone cannot settle those questions. A plan that records the actual seating and site conditions gives the installer—and, for an electric heater, the electrician—a specific layout to assess. If the requirements do not align at one point, revise the intended zone or equipment rather than stretching a clearance or mounting approval.
