







Limited Edition Accoya Lean-To Greenhouse
A premium Accoya lean-to greenhouse designed for installation beside your home
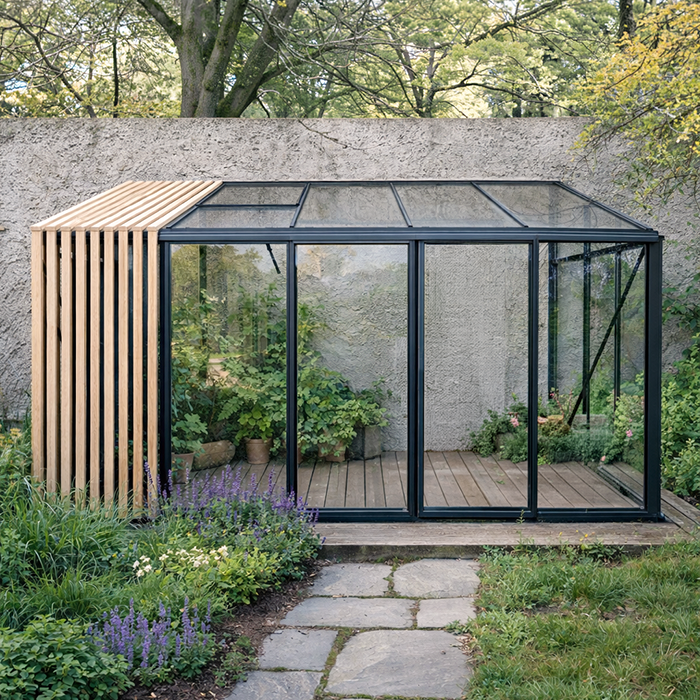
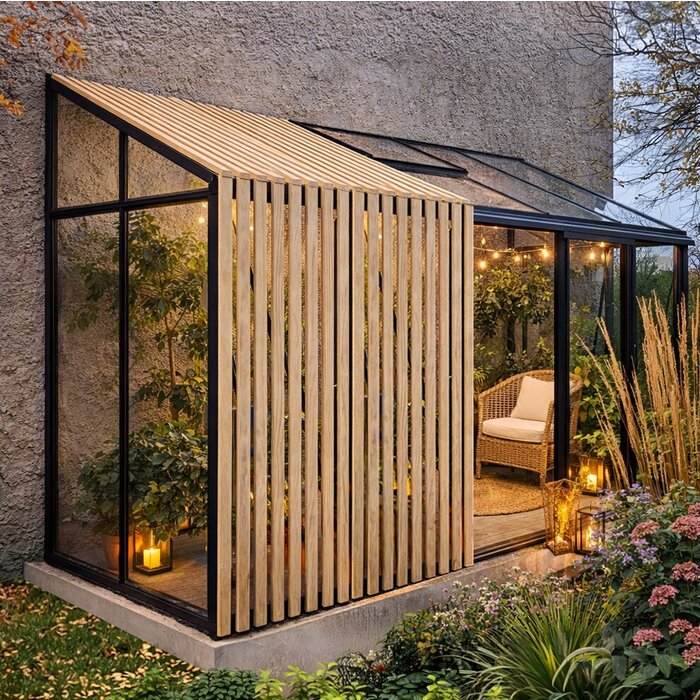
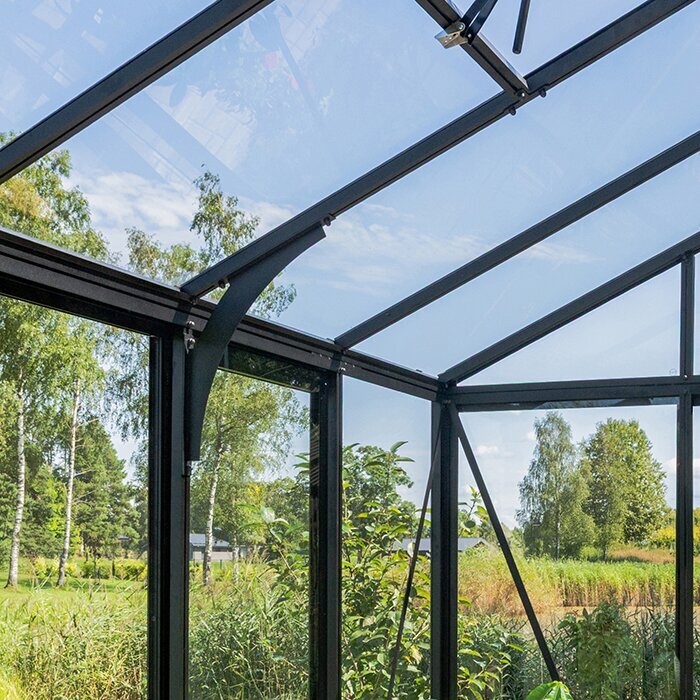
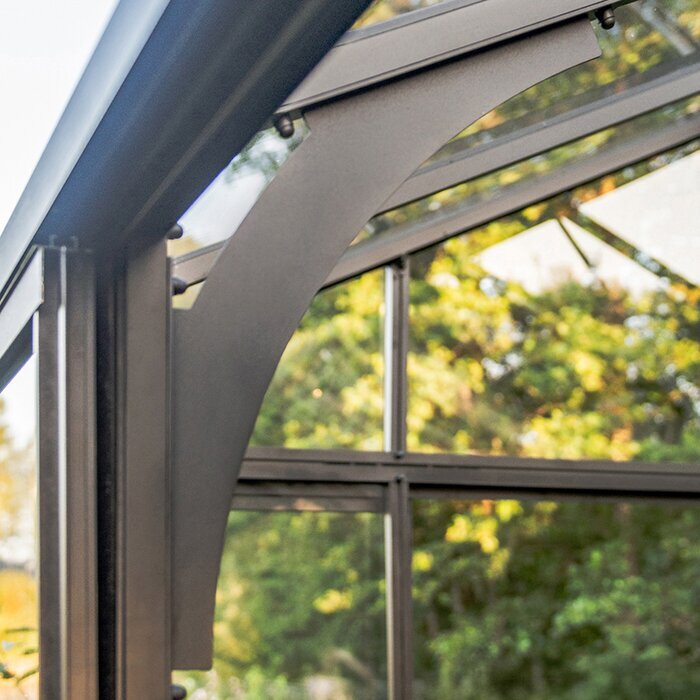
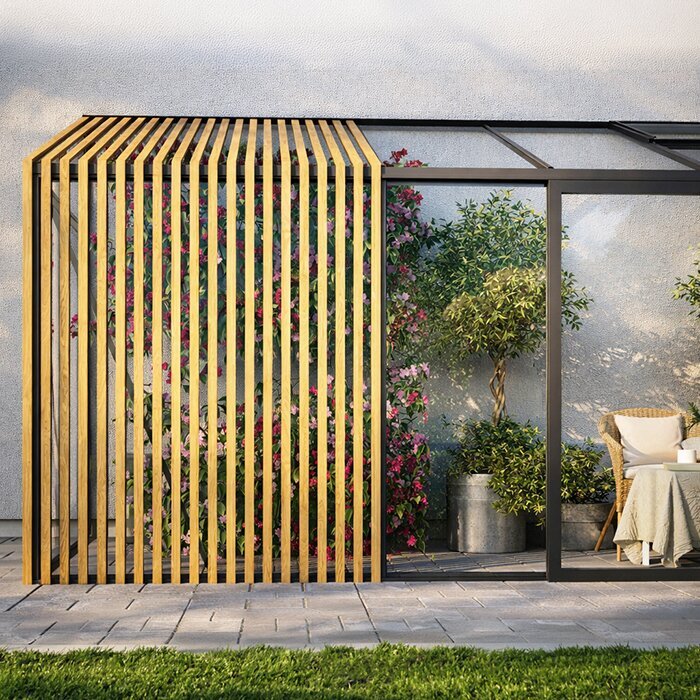
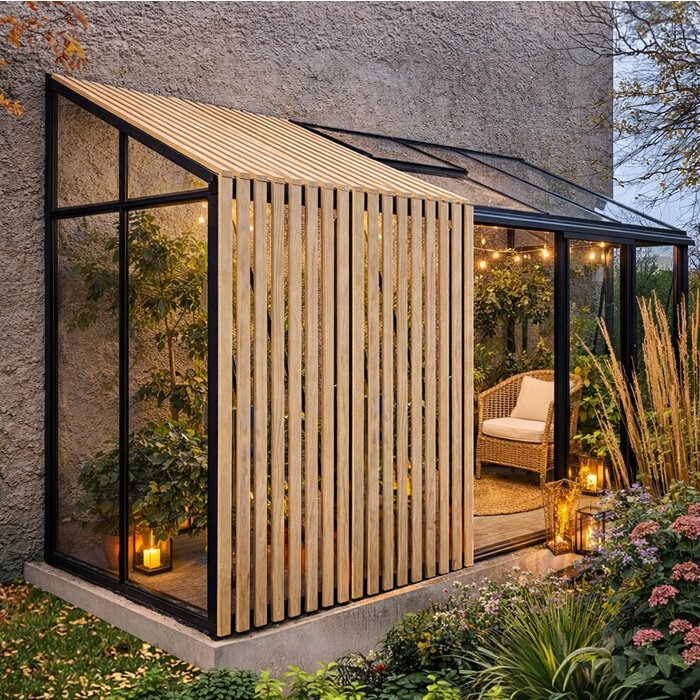
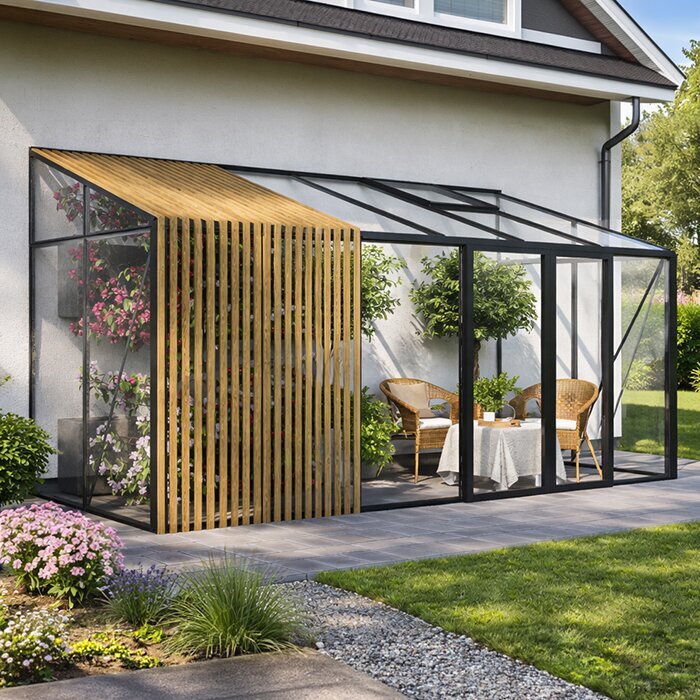
Our Bloomcabin Limited Edition lean-to greenhouse with Accoya design elements combines practical growing space with the warmth of natural wood detailing. Accoya provides an attractive contrast to the precise aluminum frame and helps the greenhouse sit naturally beside patios, exterior woodwork, windows, and landscaped areas. It remains a fully functional growing space while looking like a considered part of the home rather than a separate utility structure.
The greenhouse is available in 12 sizes with a choice of polycarbonate or 0.16 in (4 mm) tempered safety glass. The model includes roof vents, integrated gutters, a built-in aluminum base, and sliding-door configurations. Double sliding doors are available on compatible wall widths starting at approximately 122 in (310 cm). Compare the complete configuration rather than size alone: glazing affects visibility, light, and handling, while the doorway determines how easily plants, pots, tools, and supplies can be moved inside.
Before ordering, check the supporting wall, foundation area, drainage route, nearby utilities, available sunlight, and connection to existing patio or garden paths. Mark the footprint on the ground and the upper edge on the wall so you can identify conflicts with windows, exterior fixtures, roof overhangs, and walkways. For additional options and planning guidance, explore our greenhouse and conservatory range.
Premium lean-to design
A house-attached greenhouse designed to complement your home
This model is a strong choice when you need a productive greenhouse in a visible location beside the house. Its Accoya details are especially appealing when the structure can be seen from living areas, a patio, or the main path into the garden.
Because it attaches directly to a suitable building wall, the greenhouse can make efficient use of a narrow side yard or the edge of a patio. That arrangement also creates a direct relationship with the home, although it requires more careful coordination than a freestanding model because wall condition, attachment points, floor levels, and rainwater details all influence the installation.
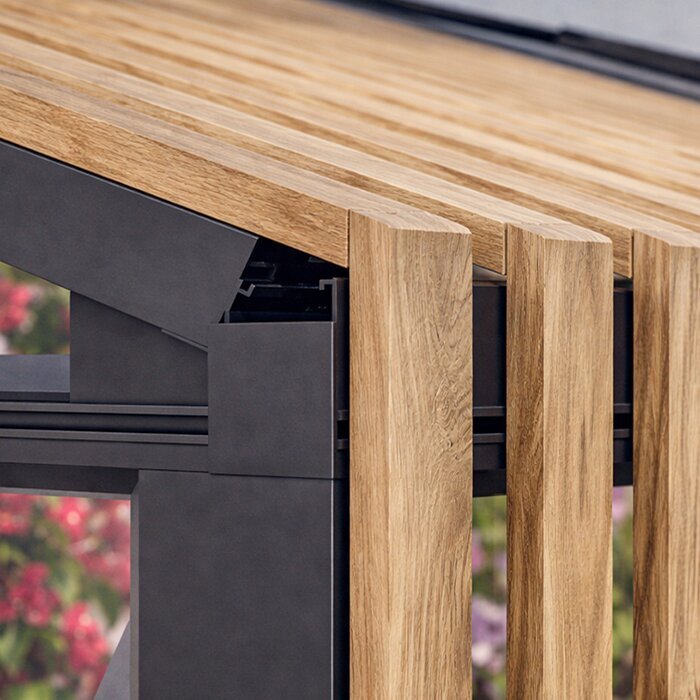
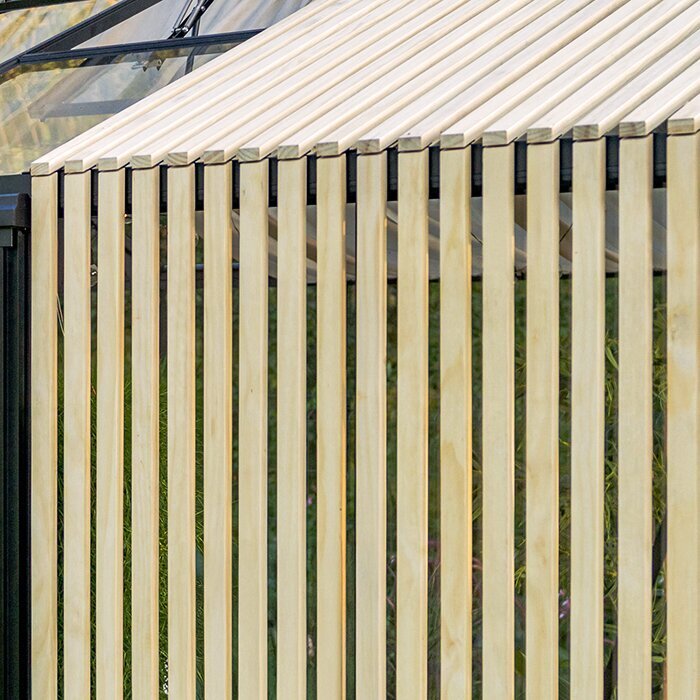
Accoya adds natural warmth without changing the greenhouse's core aluminum construction. Compared with a standard aluminum model, the Limited Edition has a softer, more distinctive appearance while retaining the precise fit, clean frame lines, and straightforward care of the aluminum structure.
Accoya and aluminum
Untreated Accoya creates a warm, natural contrast with the aluminum, and its appearance will evolve with exposure. If you want to maintain a specific color or finish, select a treatment intended for Accoya and follow its application and maintenance instructions.
Range of sizes
Configurations for compact sites and extended wall runs
Polycarbonate or glass
Choose polycarbonate or 4 mm tempered safety glass
Integrated essentials
Roof vents, gutters, and a built-in aluminum base
What makes Accoya different?
Natural Accoya details complement the aluminum frame
Accoya is used for selected design details, while the greenhouse's structural system remains aluminum. The result pairs precise frame lines and glazing with a restrained natural-wood accent.
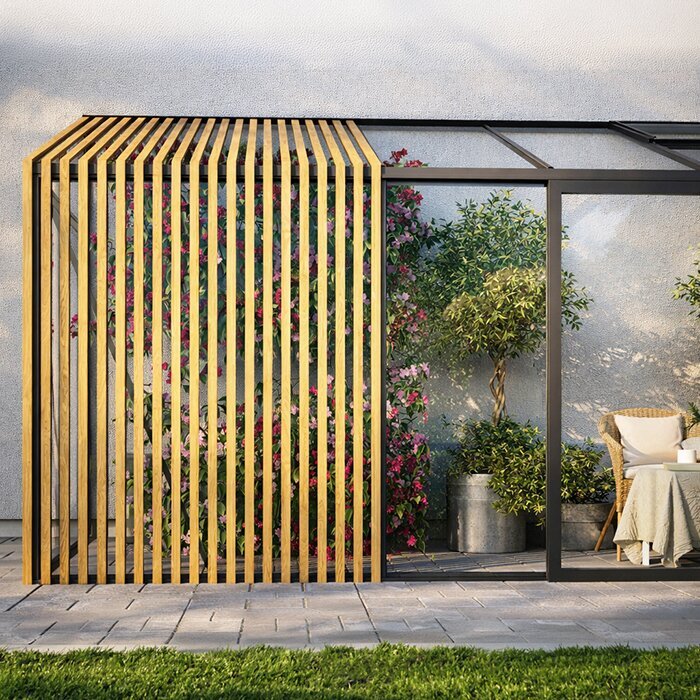
The untreated wood brings a softer look beside masonry, stucco, siding, paving, and planted borders. Consider it together with the selected RAL frame color and the home's permanent exterior finishes, particularly when the greenhouse will occupy a prominent patio or garden wall.
Care for each material separately. A cleaner or treatment suitable for the aluminum or glazing may not be appropriate for untreated Accoya, so check the relevant care directions before applying any product.
Plan the house-side installation
Four installation decisions to make before ordering
The wall, upper attachment, foundation, built-in base, and finished doorway level must work together. Check each element before choosing a size. A greenhouse may fit the available wall width yet still conflict with a window, downspout, utility connection, exterior light, roof overhang, or frequently used walkway.
01
Installation wall
Find the part of the wall where the greenhouse can be securely fastened rather than judging suitability from the visible exterior alone. Siding, stucco, brick veneer, and other finishes may conceal the supporting construction, so the attachment method must be chosen for the specific building.
02
Base and level
Prepare a stable, level foundation that supports the built-in aluminum base continuously and keeps the frame properly aligned. Confirm finished heights early so the paving, interior surface, and sliding-door threshold meet cleanly without holding water or creating an awkward step.
03
Entrance and circulation
Choose the sliding-door position based on how you will actually move through the space. Consider the route from the house, access to a hose or irrigation supply, turning room for larger pots, and whether the entrance would send garden traffic through dining furniture or a narrow planted border.
04
Rainwater
Decide where water from the integrated gutters will discharge or be collected before the foundation and surrounding surfaces are completed. Keep runoff away from the building connection and entrance, and avoid a layout that sends water across a primary walkway or into an area where it cannot drain effectively.
Configuration & technical points
Key specifications and structural ratings for the Limited Edition lean-to greenhouse
Model type
Lean-to wall greenhouse
Wall-mounted aluminum greenhouse with Accoya design details
Size range
12 sizes
Configurations to suit different lengths of usable wall
Glazing
Polycarbonate or 4 mm tempered safety glass
Tempered safety glass provides clear views and a traditional glazed appearance. Polycarbonate diffuses light and has different weight, handling, and heat-retention characteristics. Base the choice on your plants, site exposure, desired visibility, cleaning access, and handling during installation.
Accoya
Untreated decorative wood details
Supplied untreated, allowing the wood's appearance to change naturally with exposure
Doors
Single or double sliding doors
Double doors on compatible wall widths starting at about 122 in (310 cm)
Ventilation
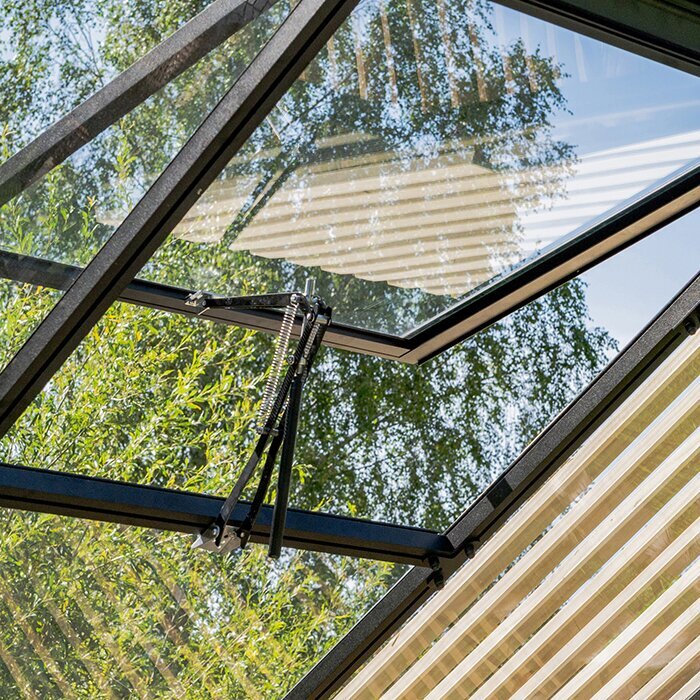
Roof vents
Roof vents allow rising warm air to escape and support everyday temperature and humidity control. They work best when they can open fully and air can also enter through the doorway, so avoid blocking the airflow with tall crops, shelves, or hanging plants.
Water & base
Integrated gutters and built-in aluminum base
Plan the gutter discharge and level support for the base before installation
The greenhouse is rated for winds up to 67 mph and a snow load of 43 lb/ft². Site exposure, foundation design, wall attachment, installation quality, and local requirements must still be considered for the individual project.
Why a wall-mounted greenhouse?
A lean-to uses space efficiently and connects the greenhouse to your home
A lean-to greenhouse uses a suitable house, garage, or masonry wall as part of the installation instead of having greenhouse walls on every side. The building connection is therefore central to the project: the location needs secure attachment conditions and enough uninterrupted wall area for the chosen configuration.
This form is especially useful where garden depth is limited, where a freestanding greenhouse would divide an established patio, or where the most convenient growing area lies along an existing building. It leaves more of the surrounding yard visually open, but it cannot be relocated around the site as freely as an independent structure.
Proximity to the home can simplify short, frequent visits for watering, vent adjustments, harvesting, and checking seedlings. It can also make the greenhouse easier to include in an everyday routine. Convenience still depends on a sensible entrance position and a route that remains usable when the patio is furnished or the garden is wet.
How can it be used?
Built for growing and designed to sit comfortably beside a patio
01
Herbs and seasonal crops
Keep frequently harvested herbs, young plants, and seasonal crops near the kitchen or main garden route. Organize them by watering and light needs so routine care is efficient, and reserve the easiest-to-reach bench area for plants that require regular pinching, inspection, or harvesting.
02
Patio backdrop
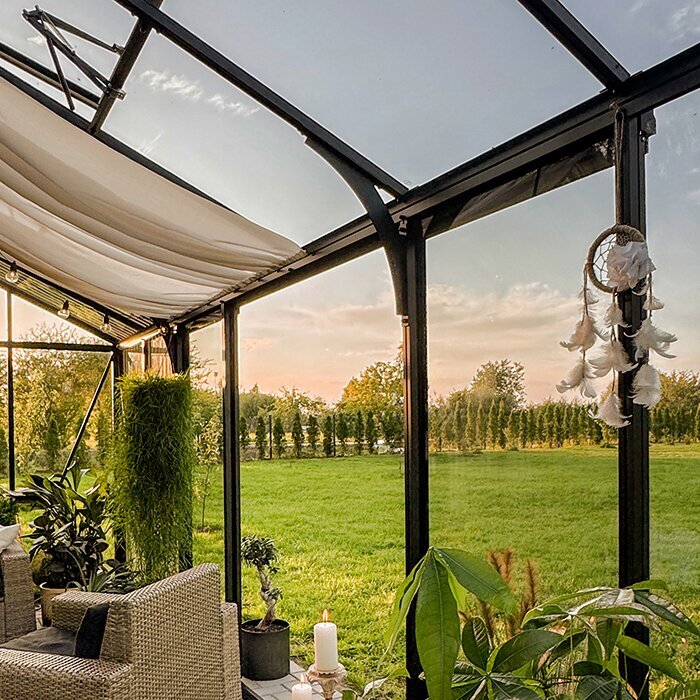
Use the greenhouse as an attractive backdrop for outdoor seating while keeping practical access clear. The Accoya details can coordinate with wood furniture, window trim, or other exterior features, but permanent planters and chairs should not block the doorway, gutter outlets, or maintenance areas.
03
Plant display
Use the greenhouse's vertical space for citrus, decorative containers, or collector plants while allowing for mature foliage. Make sure larger pots can still be moved and that panels remain accessible for cleaning rather than arranging the interior only for its appearance when first planted.
04
Growing and relaxation space
Combine active growing with a comfortable place to tend or enjoy the plants, while remembering that this is still a greenhouse rather than a conditioned room. Keep a clear working aisle and choose furnishings and surfaces that suit soil and moisture. Doors, vents, and maintenance points must remain accessible.
Wall, utilities, and drainage
Coordinate structural attachment, weatherproofing, utility routes, and drainage before any permanent site work begins.
Wall construction
Brick veneer, stucco, siding, solid masonry, and other wall systems require different fastening and weatherproofing details. The visible finish does not confirm that the wall is suitable. Identify secure attachment points, concealed utilities, and the required exterior detailing before finalizing the greenhouse position.
Create a measured elevation of the proposed wall, recording windows, doors, vents, utility meters, hose connections, downspouts, exterior lights, paving edges, and roof projections. Then mark the door travel and required approach space on the site plan. This two-view check reveals vertical and ground-level conflicts that a simple width measurement can miss.
Check any local permit, setback, building, or attachment requirements that apply to the project. Coordinate permanent work—including the foundation, wall penetrations, drainage, electrical routes, and water lines—before assembly. Movable benches and plant staging can be arranged later, once the fixed structure and circulation space are established.
Wall condition
Inspect the proposed wall for deterioration, movement, moisture problems, uneven areas, or previous repairs that could affect installation. Correcting a wall issue after the greenhouse has been mounted is significantly more disruptive than resolving it beforehand. The attachment area must be suitable across the full required connection, not merely at a few convenient visible points.
Review how the greenhouse will meet the existing exterior envelope. Window trim, siding transitions, stucco edges, flashing, and drainage paths may all influence the final position. Preserve access to building components that require inspection or service, and do not cover an existing drainage defect with the new structure.
Create one site record containing photographs, measurements, openings, repairs, fixtures, and changes in wall finish so the proposed attachment area can be reviewed as a whole.
Water supply and irrigation
A location beside the house may provide convenient access to water, but plan the connection and hose route before installation. Position the water connection and any irrigation controls where they can be reached without leaning over plants, and keep loose hoses away from the doorway and sliding-door track.
Drip irrigation can deliver water directly to containers or growing areas and reduce repeated hose movement across a patio. Divide plants into sensible watering groups and retain a straightforward way to inspect the system. Automated watering does not eliminate the need to check soil moisture, emitters, drainage, and seasonal changes in plant demand.
Route collected roof water to an appropriate discharge point or a planned rain barrel without overloading the surrounding surface. A collection container needs a stable location and a managed overflow route. Keep connections accessible for clearing debris, and prevent standing water beside the built-in base or the home's wall.
Climate & ventilation
Orientation affects when and how strongly the greenhouse receives sunlight, while the adjoining building may reflect heat, cast shade, or provide shelter. Observe the location at different times of day before deciding. Glazing, ventilation, plant placement, and seasonal shading should respond to the site's actual conditions rather than compass direction alone.
Sunny south- and west-facing walls
A south- or west-facing wall may receive strong afternoon sun as well as reflected heat from light-colored walls or paving. Note how long the exposure lasts during the growing season and whether nearby trees or rooflines provide temporary shade. Place heat-sensitive plants away from the brightest areas when necessary.
Keep the roof vents and sliding doors easy to reach so you can respond promptly to changing conditions. During warm weather, adjust them with outdoor temperature, sunlight, wind, and plant moisture needs in mind rather than leaving them in one fixed position.
On sites with prolonged sun exposure, plan seasonal shade so ventilation is not the only way to protect sensitive plants from intense conditions.
Home exterior and frame color
Treat the frame color as part of the home's permanent exterior palette, especially when the greenhouse is visible from living areas or a frequently used patio.
Compare the RAL frame color with the home's window frames, roofing, masonry, painted trim, and permanent hardscape. Untreated Accoya adds another natural tone whose appearance may change with exposure. Reviewing the full combination at the installation site is more reliable than choosing the aluminum color by itself.
Prioritize compatibility with permanent exterior materials rather than trying to match movable patio furniture or seasonal decor.
Floor and threshold
Set the finished interior surface and exterior approach in relation to the sliding-door threshold before foundation work begins. The entrance should permit comfortable foot traffic and movement of supplies while allowing the door to operate fully. Where accessibility is important, include the approach slope, surface stability, and turning space in the initial plan.
Pavers, gravel, or another suitable interior finish should support the intended benches and containers without preventing drainage. Avoid low spots that retain water beneath work areas. If loose material is used, keep it from entering the sliding-door track, where accumulated grit can interfere with smooth operation and increase cleaning needs.
Detail the threshold and adjoining surfaces so runoff, gravel, and other loose material stay clear of the sliding-door track.
Foundation, airflow, and maintenance
Plan the built-in base, roof vents, sliding door, and exterior service areas as one working system before adding benches or plants.
Cold-region foundations
Where freeze-thaw movement is a concern, the support must suit the local soil, drainage, and climate. Uneven movement can affect frame alignment, glazing fit, door operation, and the wall connection, so the foundation should be planned for the actual site rather than copied from an unrelated patio or garden project.
The built-in aluminum base does not replace the need for a stable, level supporting surface designed for the site.
Foundation design and installation must follow local soil conditions, building practices, and applicable codes.
Summer ventilation
Warm air rises inside the greenhouse, making the roof vents important during sunny periods. The sliding door can bring in air at a lower level when leaving it open is practical. Adjust the openings to suit the plants, weather, occupancy, and site security rather than relying on one fixed setting.
Position benches so the vent controls and full sliding-door opening remain easy to reach.
Place taller plants where they will not create a dense barrier between the door and roof vents. Leave open space around foliage as crops mature instead of filling every shelf. This makes airflow easier to manage and preserves access for inspection and pruning.
Maintenance access
Plan how each glazing panel, Accoya detail, gutter section, vent, and door track will be reached for routine care. A narrow inaccessible gap beside a fence or dense hedge can turn simple cleaning into a difficult task. Check overhead access as well, particularly where the greenhouse sits below an eave or near tree branches.
Keep permanent planters, built-in seating, and fixed outdoor kitchens outside the areas needed to service the greenhouse. Seasonal furniture can be moved, but heavy fixed features may prevent access to glazing, gutters, or upper frame sections. Include this clearance in the patio plan before the hardscape is finished.
Keep a usable access route to the roofline, outer glazing, and gutter outlets even after nearby planting matures.
Everyday layout and storage
Use the sliding-door route as the organizing line for benches, supplies, and movable staging so daily tasks do not narrow the working aisle.
Patio integration
Beside an outdoor dining or living area, the Accoya edition can create a natural visual link between the home and garden. Protect that appearance by planning storage for compost, empty pots, tools, and watering equipment. Everyday supplies should not block the entrance or dominate the patio view.
Walk through the full gardening routine: bringing in supplies, reaching the potting area, watering, harvesting, and removing waste. The shortest route is not always the most convenient if it crosses a dining area or causes congestion near a house door. Where possible, keep garden tasks separate from the main social walkway.
Test the patio layout with chairs occupied and pulled back from the table so the greenhouse route remains usable during normal outdoor use.
Interior benches
Arrange benches along the available sides while preserving a continuous central aisle. Test whether you can comfortably reach the back of each surface without leaning against the glazing. Leave access to door hardware and lower frame sections, with enough room to lift larger containers instead of dragging them through a narrow passage.
Select potting and display heights for the people who will use the greenhouse, the weight of expected containers, and the mature height of plants. A mixture of levels can accommodate propagation trays, compact crops, and taller specimens more effectively than one continuous shelf. Keep upper shelving clear of vent movement and routine cleaning areas.
Choose movable staging if you expect the layout to change as plants progress from propagation to mature crops.
Seasonal workflow
Seasonal priorities change: spring may require propagation space and frequent pot handling; summer shifts attention to airflow, watering, and harvest access; fall may call for reorganizing protected plants. Plan where unused trays, supports, and containers will go between tasks so each transition remains orderly and does not spill onto the patio.
Inventory seasonal supplies before sizing permanent storage, since empty containers, trays, and plant supports can occupy more room than expected.
Finalize the bench plan after selecting the greenhouse size and door configuration, since both affect usable floor and wall space.
Before you order
Gather the site details needed to compare configurations confidently
Confirm the usable wall area, secure attachment zone, foundation line, finished floor height, and clearance in front of the entrance. Compare these measurements with each configuration and door arrangement. Allow room for assembly and future maintenance instead of fitting the largest possible greenhouse tightly between permanent obstacles.
Choose glazing according to the priorities of the site. Tempered safety glass is suited to projects where clear outward views and a traditional glazed look matter most. Polycarbonate offers a different balance of weight, light diffusion, and thermal behavior. Also consider cleaning, panel handling, plant needs, and how visible the greenhouse will be from the home.
Review sunlight, vent access, gutter discharge, interior layout, and the route to the house or garden together. Moving the doorway may improve circulation but reduce bench space, while a rain barrel may simplify water collection yet restrict exterior access if placed too close to the frame.
Recommended project sequence
1
Check the wall and site
Prepare a dimensioned wall elevation, site photographs, the proposed foundation outline, and notes on drainage and utilities. Use this information to confirm that the selected configuration preserves access to building fixtures and greenhouse maintenance points.
2
Choose your configuration
Compare the available sizes, then select polycarbonate or tempered safety glass, the RAL frame color, and a compatible door arrangement. Check each choice against the measured wall and intended interior layout; a wider entrance may be more useful than maximizing bench length.
3
Prepare the foundation and drainage
Complete the stable, level support and establish the finished floor and threshold heights. Settle gutter discharge, surrounding drainage, utility routes, and the approach to the entrance before assembly begins. Leave enough working room around the site to handle the frame and glazing components.
4
Install, then organize the interior
Install the greenhouse according to the manufacturer's instructions and the site-specific attachment plan. Once the structure is complete and the vents, gutters, and doors operate correctly, add benches, irrigation, storage, and plants in stages. This keeps movable items out of the way during assembly and final adjustments.
Frequently asked questions
FAQ – Limited Edition Lean-To Greenhouse
How do I choose among the available sizes?
Eliminate any size that exceeds the uninterrupted wall width or available projection. From the remaining configurations, choose according to entrance access and usable interior space while retaining adequate assembly and maintenance clearance.
Which glazing option should I choose?
Choose 0.16 in (4 mm) tempered safety glass if clear views and a traditional glazed appearance are priorities. Choose polycarbonate if its different weight, light-diffusing qualities, and thermal behavior better suit the site and intended plants. Also consider cleaning and panel handling.
How should I choose the frame color?
The greenhouse can be supplied in the selected RAL color. Compare the color with the home's permanent exterior materials and the untreated Accoya details, preferably in the actual site lighting. A color shown on a screen may look different outdoors.
When are double sliding doors available?
Double sliding doors are available on compatible wall widths starting at approximately 122 in (310 cm); other configurations use a single sliding door. Consider normal foot traffic and whether larger planters, carts, or growing supplies must pass through the opening.
How should I use the roof vents?
Use the roof vents to release warm air from the upper part of the greenhouse. Keep them unobstructed and coordinate them with the sliding door when more airflow is needed. Adjust both according to the weather and the needs of your plants.
What should I plan for the gutters and built-in base?
Both are included. Plan where the integrated gutters will discharge or feed a collection container, and prepare a stable, level supporting surface for the built-in aluminum base before installation.
Why choose the Limited Edition over the standard Lean-To?
The Limited Edition adds untreated Accoya design details to the aluminum wall greenhouse, creating a warmer look for prominent locations beside patios and living areas. Choose it when the appearance of the greenhouse beside the home matters as much as its practical growing space.
What warranty applies? The greenhouse is covered by a 12-year warranty, subject to the applicable terms.
Bloomcabin Limited Edition
Choose a wall greenhouse that brings natural warmth to practical growing space
The Limited Edition combines productive growing space beside the home with a precise aluminum structure and the natural character of Accoya. It is a strong choice when everyday gardening and the greenhouse's appearance beside the building are equally important. Start with a suitable wall, a correctly prepared base, and a configuration that allows convenient access, water management, ventilation, and maintenance.
Final order review
✓ selected size matched to the confirmed wall footprint
✓ wall-attachment approach and foundation level reviewed
✓ glazing type and RAL frame color selected
✓ compatible single- or double-door configuration confirmed
✓ gutter outlet or collection point planned
✓ operating, cleaning, and maintenance clearance reserved