
How to Order Custom Windows and Doors
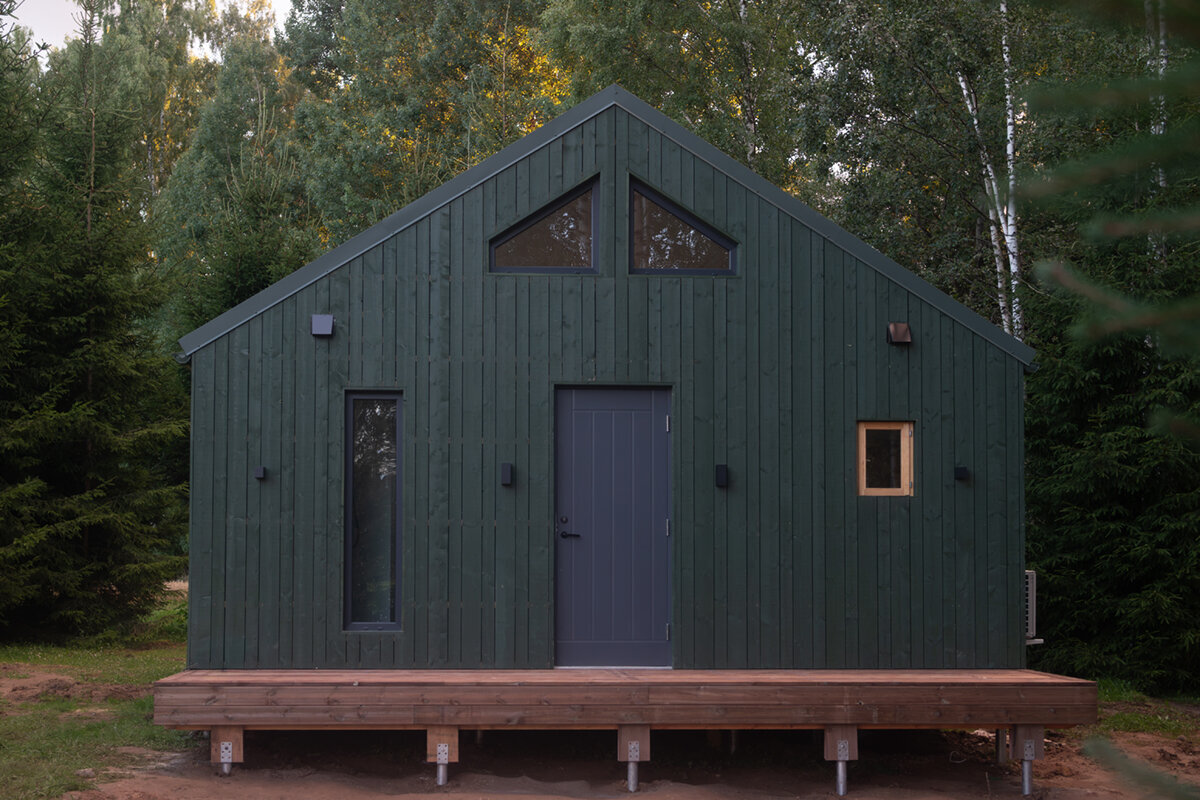
Planning and order approval
Checkout is the final step in a custom order, not where the decision begins. Site measurements, design work and installation planning must align beforehand. A window might fit the opening yet fail in practice because its sash strikes a balustrade, the divisions look wrong on the façade, or the junctions with insulation, sill and reveal are unresolved. Doors also involve circulation, thresholds, handles and the move between inside and outside. Define each element within the complete project before weighing individual options. This guide sets out what to document, how drawings should be interpreted and which checks reveal decisions still outstanding before approval becomes binding.
Start with an item schedule, not individual wishes
Build an item schedule for the complete project before selecting separate products. Assign every door and window a distinct reference, such as W-01 or T-03, and record its room, façade position and purpose. Include an approximate size, operating method, opening direction, inside and outside view, plus features such as glazing bars, a fanlight or a sidelight. This overview can show that, although a room has two openings, only one is meant to provide ventilation. It also prevents products with matching dimensions being assumed identical when their functional or visual roles are different.
Judge each option in its surroundings rather than as an isolated product. Where sufficient indoor clearance is available, an inward-opening single-sash window may suit the room, but the plan must still account for the sill, curtains, heater and furniture. Note what will be placed before the window and who needs to operate it. For renovations, identify existing conditions that will not change. The completed schedule can then guide checks of quotations, drawings, delivery and installation discussions instead of remaining a collection of preferences.
Record dimensions clearly and name reference planes
A width and height alone cannot define a custom element. Establish whether the dimensions describe the unfinished structural opening, the completed opening or the required outside size of the product. Take widths across the top, middle and bottom, and heights at the left, middle and right. Record variations, reveal conditions and anything projecting into the space, including masonry, services or irregular surfaces. State precisely which two surfaces form each measurement. Include the date and construction stage because plaster, linings or removal of old components may shift the reference edge. If distortion is visible, measure the diagonals rather than assuming straight, parallel sides and square corners. Labelled photographs with a visible scale help the site, design and ordering teams resolve later queries.
Do not simply use the smallest site measurement as the order dimension. The planned junction between the product and building needs adequate space, while its construction determines final positioning and size. Set these details with the professional responsible for the installation. Pay close attention to the vertical reference: was the opening measured from the present subfloor or the eventual finished surface? Even a small change in a door’s floor build-up can affect free movement of the leaf and the external transition. Dimensions taken from earlier documents must always be verified before they are reused for a new order.
Each opening in context
Read elevations before setting opening directions
Treat opening direction as part of the design rather than shorthand in a product name. First identify whether each drawing is viewed from inside or outside. Show the hinge position, handle and full path of every operable leaf. Review these details on both plan and façade: movement must not interrupt a route or strike furniture, bathroom fittings, heaters or another leaf. For outward operation, inspect the external zone for terraces, balustrades, pots and shading equipment. If terminology could be misunderstood, send an annotated sketch that labels both sides instead of relying on “left hinged”. Drawing the opening arc to scale also tests everyday reach to the handle and sash edge. Repeat this check upstairs, where obstacles beyond the window may be less obvious.
A conventional hinged sash may not be the best choice where an opening is elevated or difficult to reach. An outward-opening top-hung awning window offers a defined alternative, opening towards the exterior while still requiring suitable placement and accessible operation. Consider who will use each opening, how regularly and why. Ventilation, cleaning, outside access and any escape-route planning present different needs, so one standard assumption cannot cover them all. Ask a qualified professional to review the arrangement within the complete project wherever site-specific requirements must be addressed.
Match the window type to its purpose
A balanced façade grid is important, although function should determine which units open. Where a room has several windows, combining one operable unit with fixed glazing may provide the required daylight and outlook while reducing the number of operating points. A fixed glazed window works where opening is unnecessary, provided access to the exterior face and its place in the room’s ventilation and comfort plan have been considered. Think ahead to cleaning as well: glazing that cannot be reached externally may call for a different division from glass at ground level. Fixed glass should not automatically replace an operable window.
The arrangement of sashes in a broad opening affects appearance and routine use. Two leaves may open widely, yet they add a central meeting point and require two clear movement areas. One leaf produces another visual balance and uses space differently. For a symmetrical façade, inspect the axes, sill levels and exposed frame lines on a complete elevation instead of judging a product image alone. Compare repeated windows beside one another too, because inconsistent handles, transoms or fixed sections can disturb the intended rhythm even when each unit looks acceptable separately. Check the views from both sides: a division that improves the exterior may interrupt an internal outlook or furniture layout. Choose the type only after operation, cleaning, daylight and façade composition have been considered together.
Plan doors as links between two finished levels
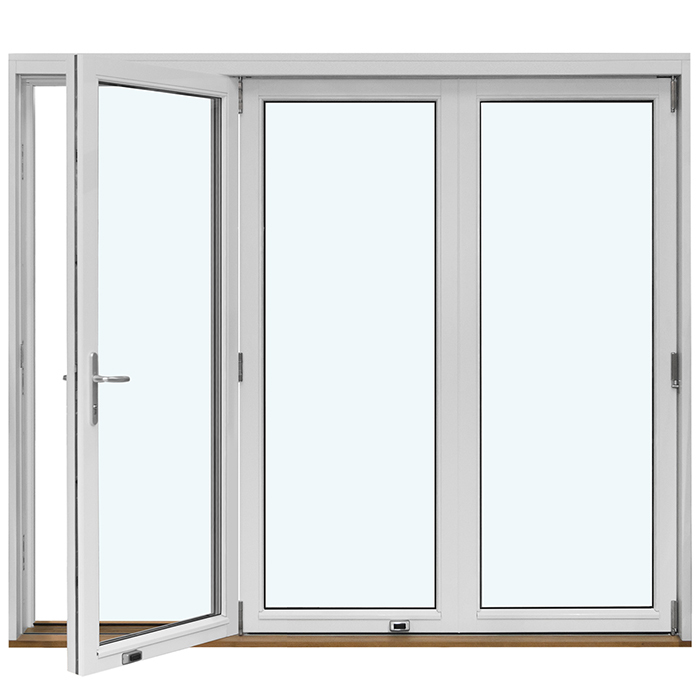
An external door connects rooms or links the interior with the garden, while also bringing several trades and finished surfaces together. Coordinate internal floor level, outside paving, waterproofing, drainage and any overhead cover before choosing it. Plot the operating area on both sides, including furniture, balustrades, steps, bicycle spaces and paths. Outward operation requires clear exterior space, whereas an inward-moving leaf occupies the room. With an outward-opening single patio door the selected opening direction must therefore work for both the patio and the room. A product name does not replace checking the real surroundings.
A door elevation must settle more than overall size. Identify the hinge and handle sides, the extent of glazing, and how the design aligns with nearby windows. For an entrance door, proportions can change markedly when a fanlight, sidelight or solid section is introduced. Test whether the open door is comfortable to pass and whether an arriving visitor can find the handle naturally, not merely whether the frame fits. Incorporate the threshold into the junction details before choosing the leaf. If accessibility, safety or another project requirement applies, ask the relevant designer or qualified adviser to specify an appropriate response for that site.
Compare sliding and folding doors around daily routines
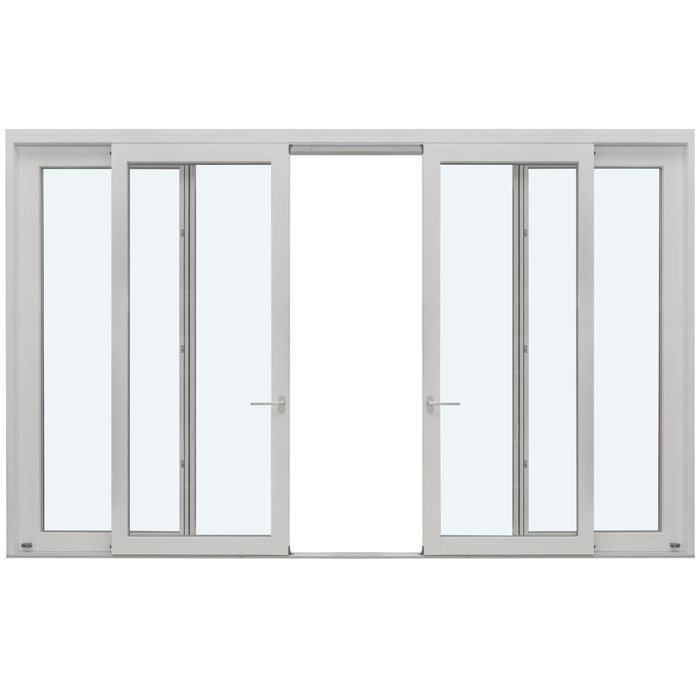
With a wide garden opening, clear passage width is only one part of the choice. Consider how people will operate the unit and arrange the adjoining space each day. A sliding system avoids a swinging leaf, although its moving and stationary sections still influence use and appearance. Select the moving side, confirm that its handle can be reached, and map the positions of furniture, curtains and external shading. A Patio Life lift-and-slide door provides one sliding solution; configure it for the preferred moving side and the intended relationship between inside and outside.
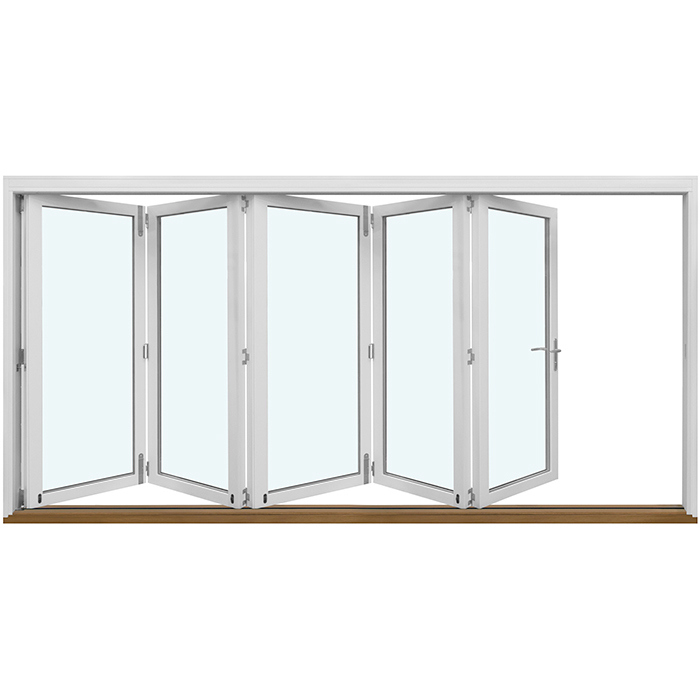
A folding system changes the way a broad opening works: multiple panels travel sideways and collect together. Space must be reserved for this folded stack, and the operating sequence is unlike that of a sliding unit. Outward-opening folding doors may be suitable when the exterior has adequate clearance and keeping indoor floor space unobstructed is a priority. Before signing off either system, establish the location of every division when shut and consider the position used most often: slightly open for air, partly open during routine use, or fully opened towards the outdoors. This everyday pattern is more useful when choosing panel or sliding arrangements than relying on one photograph of a façade.
The opening within the whole project
Consider glazing through light, privacy and comfort
Make glazing choices separately for each room and side of the building rather than applying one answer everywhere. Consider the relative importance of daylight, outlook, privacy and summer heat from the sun at every opening. Bathrooms, living spaces and work areas seldom share identical priorities. Include neighbouring buildings, trees, roofed areas and proposed curtains in the review. Describe the intended result in practical terms—for example, a clear seated outlook, screening at standing height, daylight reaching a hallway or visual contact with the garden. Designers and suppliers can then distinguish essential performance from personal preference.
With special shapes, the drawing matters even more. A fixed glazed triangular and raked window may visually resolve glazing within a roofline or gable, but it cannot be assessed like an ordinary rectangle. The drawing needs to show the visible edges, junctions with neighbouring construction and a practical way to reach the exterior surface. Before confirming size or divisions, relate the glass to the interior scheme and any proposed shading. Where project performance figures matter, request documents that clearly identify the chosen element and configuration. Comparisons are meaningful only when the values use the same reference basis and apply to equivalent versions.
Review colours, finishes and glazing bars together
Finish and colour deserve attention early because they alter the visual weight of frames, door panels and divisions. Assemble one coordinated view of every visible component, including windows, entrance doors, patio doors, sidelights and any relevant gates or façade cladding. Specify whether the same treatment is wanted indoors and outdoors. Examine samples and drawings in natural light beside the proposed wall, flooring and exterior materials. A small swatch that appears convincing by itself can have a very different effect across an extensive glazed frontage. On an existing building, identify which visible features will remain and assess how the lines of new frames will relate to them.
Choose terminology carefully. Glazing bars may form decorative or structural divisions, while through-glazing bars physically separate the panes. The distinction affects the finished elevation and belongs explicitly in both drawings and the order. A historic appearance therefore involves more than selecting a colour. An outward-opening historic-style “Kombi” casement window needs to relate to surrounding units through its sash pattern, operating method and exterior composition. Review it from the distance at which the building is normally seen, rather than relying on an enlarged close-up. If the design may be subject to project documentation or requirements from a relevant authority, obtain professional confirmation of what applies before approval.
Actively check drawings as contractual documents
An approval drawing converts design intentions into a specification that can be verified. Cross-check each reference against the item schedule rather than reviewing only the combined elevation. Confirm dimensions and whether the drawing presents an inside or outside view. Check the positions of hinges, handles and operable leaves, followed by fixed panes, mullions, transoms, glazing bars and glass areas. For doors, examine the threshold, direction of travel and adjoining construction as well. Annotate every uncertainty on the document and obtain a written revision. Memory of a conversation cannot provide the clarity of an amended drawing.
Some critical junctions sit beyond the information shown on a window drawing. Check sills, internal reveals, façade insulation, waterproofing, roller-shutter or shading housings, and power connections intended for motors. A single-piece glazed sidelight, for instance, must be positioned in relation to both the door leaf and the full entrance opening; its product name cannot define the surrounding design or junctions. Reconcile dimensions and reference levels across the plan, section and elevation. Revisions made after approval may add work and require further coordination, so withhold sign-off until all queries are resolved and the updated documents accurately represent the required result.
Finish approval with a site check
Before final approval, conduct a shared comparison of the site and ordering documents. Establish whether any opening has changed since measurement, whether finished floor build-ups are settled, and whether services, linings or outside components have been added. Review the code, position, dimensions, opening action, divisions, finish and special features of every item. On a substantial delivery, use a table to classify decisions as checked, outstanding or confirmed. It then becomes clear whether the owner, designer or installer must resolve each point. Everyone involved should refer to the same current revision throughout this check.
Confirm the post-approval process before placing the order. Bloomcabin specifies a five-year guarantee for windows and doors, with delivery stated as four to six weeks subject to order confirmation. Coordinate that period with construction progress, available storage, site access, installation sequencing and protection of completed surfaces. Nominate who will inspect the delivered quantity, item references and any visible damage. Handover becomes easier when the site receives one complete file containing the item schedule, approved drawings, colour selections and appropriate contact details. Raise unresolved questions before committing to the order rather than waiting until the goods arrive.
Frequently asked questions
Who should be responsible for measuring custom windows and doors?
Responsibility depends on how the project has been arranged. Record who takes the measurements, which surfaces or levels form their references, and who verifies the resulting dimensions before purchase. The structural opening, intended junction and final floor level should be reviewed with the professional overseeing design and installation. Retaining labelled photographs and written measurements reduces the risk of assigning information to the wrong item later.
What should I additionally check for an outward-opening door?
Inspect the full exterior travel of the leaf as well as operation from the room. Steps, terrace furniture, plants, balustrades and shading equipment must remain clear, while the handle should still be conveniently accessible indoors. Determine the hinge and handle positions from a drawing that identifies its viewing side; an unlabelled verbal description is too easily misunderstood.
Can operable and fixed glazed windows be combined on one façade?
Yes, when the layout supports how the room will be used. Identify the units that must open for ventilation or access, then establish how each exterior glass surface can be reached. Review the divisions, frame alignment and elevations as a single composition. Before selecting any fixed pane, account for its effect on operation and future cleaning.
Which documents should I keep before approval?
Retain the item schedule, site measurements, opening photographs, current plans and elevations, approval drawings, selected finishes and glazing, and written resolutions of outstanding points. Use one clearly dated current drawing revision as the project’s working copy rather than keeping superseded versions in circulation. This record provides a traceable basis when later questions arise.
When should I not approve an order?
Do not sign off while dimensions remain approximate, the final floor level is undecided, or opening actions have not been tested against both plan and elevation. Unresolved junctions, inconsistent drawings and special requests awaiting confirmation also require a pause. Approval is dependable only when the documentation is complete, readily understood and aligned with the current stage of construction.
Next step
A custom window or door order becomes reliable when every choice is tested in its future position. Prepare a comprehensive item schedule, keep site measurements distinct from manufacturing dimensions, and interpret elevations alongside floor and façade plans. Relate door operation to finished levels, outside paving and circulation; at broad openings, prioritise normal operating patterns over appearance alone. Scrutinise the approval drawing because it consolidates the dimensions, divisions and opening actions that will govern production. Any uncertainty about junctions, technical needs or local requirements should be referred to the appropriate qualified professionals and resolved before the order proceeds.
