
Flush or raised door thresholds: drainage and floor levels
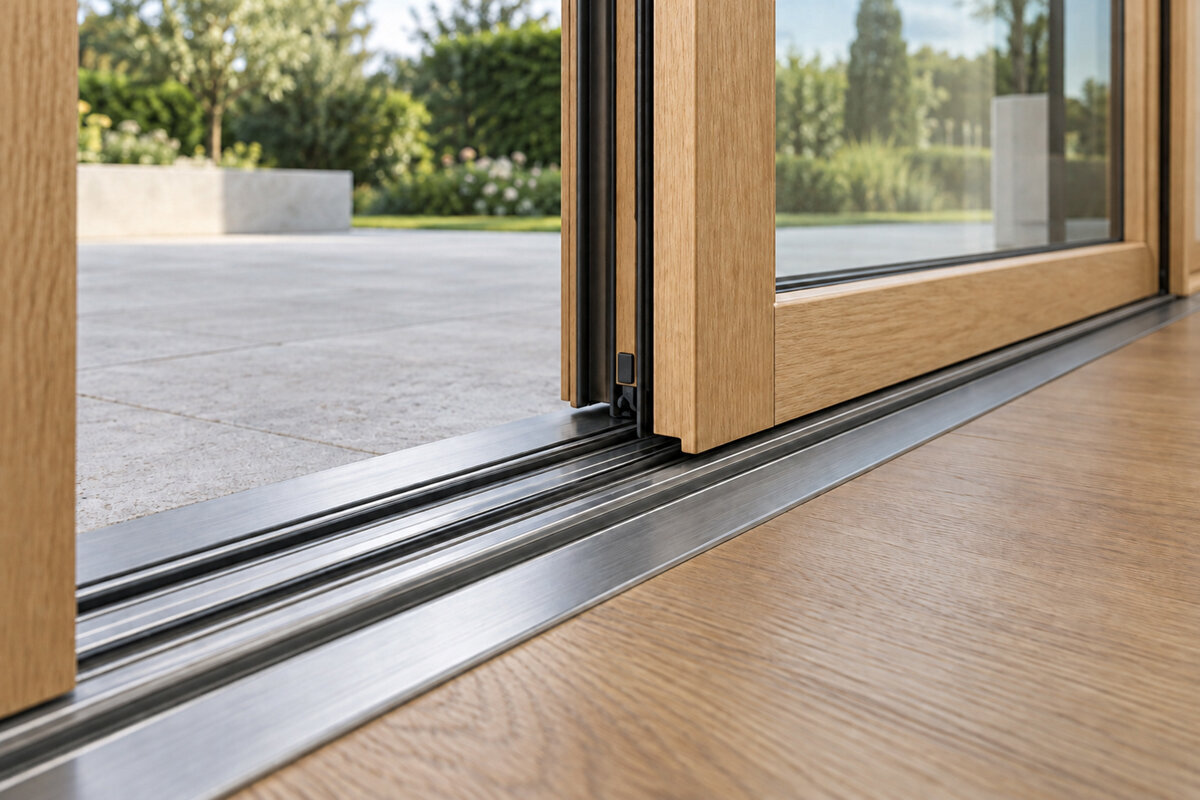
Comparing door thresholds
A door threshold often becomes visible only after the patio, internal floor and door have already been chosen. Several levels then meet in one place: the finished floor inside, the outdoor surface, building waterproofing and rainwater drainage. A near-flush option can create a calm, convenient transition, but demands particularly careful coordination of drainage and connection details. A raised threshold creates a distinct level change and more room to resolve the junction, although it affects walking comfort and the feel of the room. The deciding factor is not a preferred look but the complete installation situation. This guide helps put the door type, weather exposure, external build-up and planned floor levels in the right order before configuring or ordering a door.
The threshold joins several trades
An external door is more than a link between two finished surfaces. Around and beneath it, the structural opening, frame, waterproofing, insulation, screed, indoor finish, patio build-up and outdoor paving converge. Every layer has its own height, junction and installation stage, so the threshold cannot be decided in isolation. Looking only at its visible edge risks conflicts when the indoor floor or pavers are fitted. Instead, draw one shared section: mark the finished internal level, the intended external level and the route carrying water away from the doorway and façade. Use a single, clearly identified datum so structural, fit-out and landscaping dimensions remain aligned.
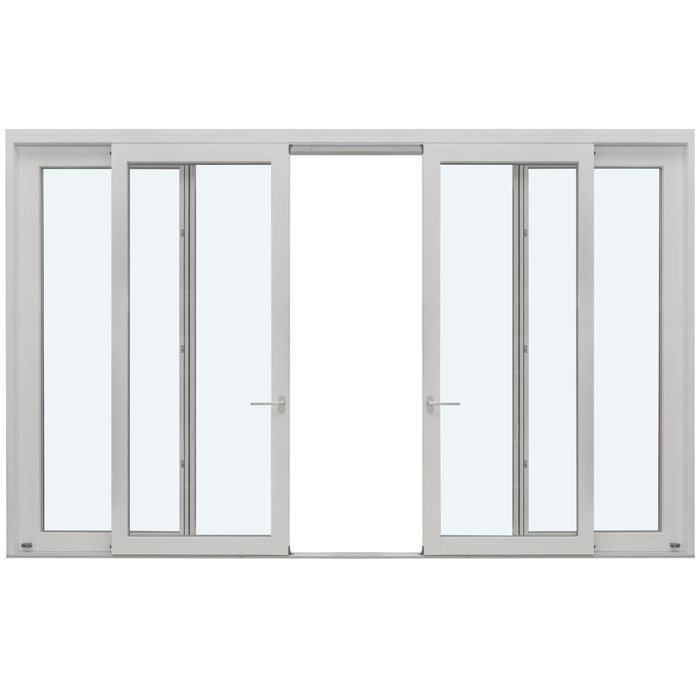
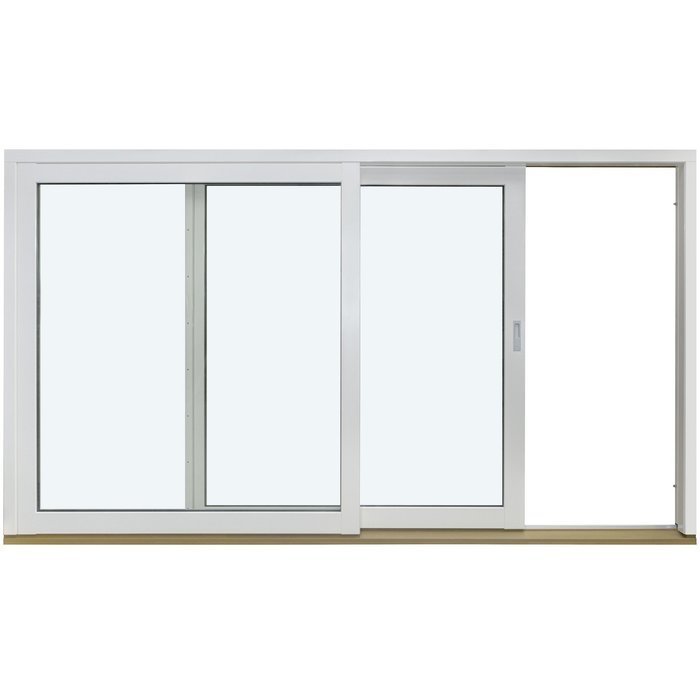
This coordination is especially apparent at large glazed openings. A Patio Life lift-and-slide door is first and foremost a lift-and-slide door; whether its transition appears understated or more clearly stepped also depends on the selected build-up and surrounding design. Give the window supplier more than width and height: provide dimensioned finished floor levels for both sides. The drawing should show the direction of external fall, drainage elements and proposed surface finish. Also identify whether dimensions are confirmed or still provisional. That turns a general request such as “as little step as possible” into a checkable brief for the professionals involved, rather than an expectation each contractor interprets differently.
Flush describes the transition, not the absence of planning
In everyday language, a flush or near-flush transition usually means no inconvenient step is felt between the living area and patio. It can open the view outdoors, simplify furnishing and make passing through more comfortable. It does not mean that the frame, drainage or connection zones disappear. Because little height allowance remains visible, water-management layers and floor-build-up details must work together reliably. A narrow channel, lowered area or coordinated surface build-up may form part of the solution. Distinguish between the visually perceived level, the actual clear walking height and the construction layers below. These three views can produce different outcomes and should be clearly labelled on the section.
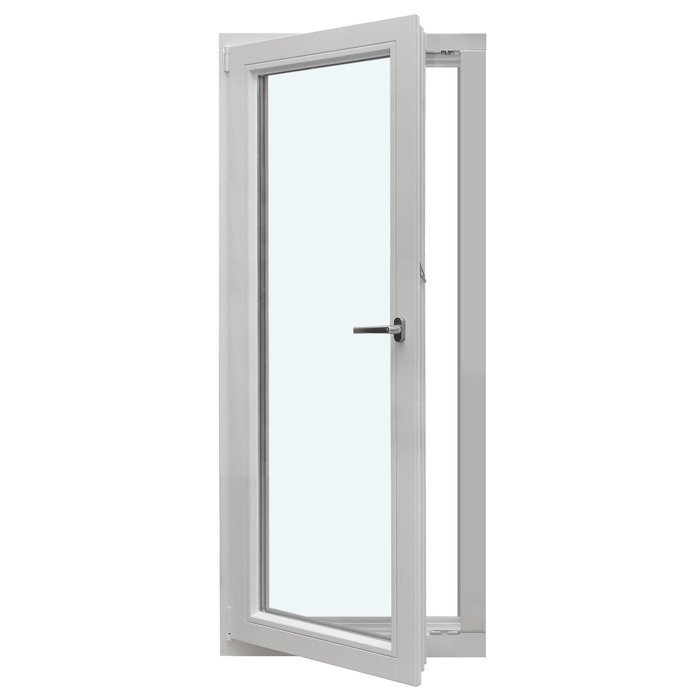
For a proposed level transition, check finished levels first, not only the structural edge. A thicker internal finish selected later can alter the available height; outside, the subframe, adhesive bed or drainage build-up also affects the result. With a single-leaf inward-opening patio door the swing area inside must also be considered: rugs, mats and furniture must not inadvertently interfere with operation or the lower junction. Ask the quotation exactly which height refers to the frame, clear opening and finished surface. Also clarify whether a line shown is a design level or an already measured existing level. This prevents two parties working from different datums and discovering the error only after ordering.
A raised threshold uses level differences deliberately
A raised threshold creates a clear offset between indoors and out. It is more than a traditional appearance; it can make different floor build-ups easier to organise. Where the patio sits lower, the outdoor surface may be renewed later, or drainage needs additional space at the junction, a visible level difference often provides more design tolerance. In an existing opening, it can also simplify adaptation to established internal levels. The drawback is obvious: the transition is more noticeable underfoot and needs consideration in daily use. Rather than asking abstractly whether a step is acceptable, consider who uses the exit with shopping, a mobility aid, pram or serving trolley, and how often.
Raised does not mean the outdoor surface can be brought arbitrarily close to the door. Surface finish, waterproofing and the water route still need to be designed as one detail. A single-leaf outward-opening patio door also changes the space immediately outside: its leaf needs a clear movement area. On a small balcony or narrow patio, that can influence furniture, planters and surface edges. Ask to see the section with the leaf open and finished surfaces marked. Consider both situations: the closed door in rain and the fully opened leaf during everyday access. You can then judge whether the raised threshold provides useful order and tolerance, or makes access unnecessarily difficult.
Assess rain, wind and splashback properly
Not every façade side receives the same exposure. A sheltered loggia, a deeply covered exit and an open patio door respond differently to rain and wind. Relevant factors include the opening’s position, eaves, adjacent walls, the size of the area in front and whether water can be driven against the façade. It would be too simplistic to prescribe one threshold type from this alone. Exposure does change priorities: the more water likely at the junction, the more important a clear discharge route, accessible drainage and carefully coordinated connections become. Where possible, observe an existing site: note the direction rain arrives from, where splash marks form and whether water runs towards the opening from neighbouring surfaces. Such observations complement measurements.
Do not plan water only for normal conditions. Consider leaves in a channel, runoff from an adjoining surface and wind-driven rain when the leaf is open. A sliding door describes a sideways opening method and can provide generous access; its lower track remains a detail requiring coordination with external drainage. Ask the design or installation team to explain the water route on a drawing: where does water appear, collect, go, and how can that zone be cleaned? Also ask what happens if the intended outlet is temporarily obstructed. A sound design considers both regular runoff and recognisable weak points during unusual exposure.
Plan falls and drainage away from the frame
The external surface in front of a door is not neutral decoration; it forms part of the water-management system. Its fall, joints, edges and connections determine whether surface water moves away from the opening or towards it. A drainage channel can collect water, but it cannot replace coordination of the whole external build-up. It needs an accessible position, a planned connection to drainage and a means of cleaning. Gravel strips, pedestal-supported pavers and sealed finishes behave differently. The contractor responsible for external works and building junctions should determine the suitable arrangement from the actual construction. The drawing must also continue beyond the channel: the onward drainage route needs resolving as part of the project, without merely shifting water to another troublesome location.
At a wide opening, the line ahead of the frame is particularly long, so small level deviations can show across its full width. For side-sliding Siegenia doors the ordering process should therefore start with coordinated measurements and a section detail, not a photograph of the desired patio. Clarify whether the door is installed before, during or after parts of the external build-up, and who protects each element until completion. Newly laid surfaces, open junctions and construction moisture require a coordinated sequence. Also agree who checks the level immediately before installation against the approved drawing. This avoids a later patio contractor having to improvise around an already fixed threshold arrangement.
Record internal and external finishes as a height sequence
The most useful working document is a simple height sequence. Start with the structural floor inside, then list insulation, screed or levelling layer, adhesive and finished floor covering. Outside, include the supporting base, waterproofing or separation layers, drainage or subframe, and final surface. Add the frame position and the intended surface immediately in front of the door. This shows whether a desire for a low transition can work with the selected layers, or whether one component needs adjustment. For materials not yet selected, do not record an estimated final height as fixed; mark it as an open design item. This protects the door order from false precision.
A typical conflict arises when a slim finish is planned indoors but a subframe or large-format pavers are wanted outside. Rather than simply raising the external finish later, reassess the whole sequence. With a double-leaf outward-opening patio door two leaves and a wide opening are added to the height comparison; the area in front must therefore allow not only for the surface, but also for opening clearance. Give the measuring team samples or unambiguous finish-thickness information. Record which layer provides the ordering datum and who communicates changes. A loose statement such as “about the same height as the kitchen” is not sufficient for ordering.
Opening type changes how the junction is used
Choose threshold and opening method together. With a hinged door, the leaf determines how close furniture, curtains and plants may stand. Inward-opening options use indoor floor area; outward-opening versions need clear patio space. Sliding and lift-and-slide doors avoid a swing arc, but have their own requirements for tracks, operation and precise integration with the floor build-up. Wanting a low threshold does not replace the question of how the door will actually be used each day: only for ventilation, as the main route to the garden, or as a broad opening for visitors? Consider whether both hands are free while passing through and from which side the door is regularly operated. Frequency and movement patterns can matter more than appearance alone.
Try a simple movement exercise on the floor plan. Draw the open leaf, the route with a tray or pram, and the location of an indoor rug. For an outward-opening external door it is particularly important that steps, loose mats or permanently placed objects do not turn the area in front of the leaf into a trip hazard. Check which side is opened in rain and whether a roof or awning forms part of the decision. In tight spaces, mark the handle, balustrade and adjacent walls as well. Operating logic often shows more clearly than a catalogue image whether a low transition or a clearly defined junction suits daily life.
Renovation: uncover and assess existing junctions first
In new construction, levels can be coordinated early; in an existing building, first understand what is already there. Old finishes can conceal differing layers, previous repairs or unexpected junction positions. Internal floor level is often governed by adjoining rooms too. If an old door is replaced while the patio is altered, treat both as one project. Measuring only the visible opening does not reveal how the connection can be formed after old elements are removed. Survey the existing condition before fixing the door, surface and drainage. Where concealed areas are important, the responsible professional should decide whether limited opening-up or further investigation is necessary. Assumptions about unknown layers should be clearly marked.
A renovation can still achieve a completely level transition, although the external build-up or internal floor may need alteration. Retaining an existing step can instead be sensible when sound junctions remain and the work stays manageable. This sequence applies just as much when the product is an outward-opening entrance door with a panel as it does at a patio opening. The product name defines the door configuration; the site conditions determine the threshold and adjoining construction. Before work starts, photograph and measure the opening, surface edges and visible damage. Label each image as inside or outside and include a scale. Contractors can then develop proposals from a common record rather than conflicting assumptions.
Maintenance starts with accessible details
Drainage does not continue to work solely because of where it was installed. Channels, inlets, joints and the area immediately in front of the frame can collect leaves, soil, grit or ice. With a particularly discreet threshold solution, a blocked zone may only become apparent when water ponds. Plan access for cleaning and visual inspection. Ask whether covers can be removed, where deposits may accumulate and who will carry out regular care. A planter close to the door or a thick outdoor mat can also disrupt the intended water route. A sensible inspection interval depends on the setting: below trees, in exposed areas or after building work, earlier checks may be needed than at a sheltered, clean entrance.
Maintenance also includes the interior. Moisture tracked in on shoes and cleaning water should not remain around sensitive transition zones. Do not use loose aids that could obstruct door movement or drainage. Check seasonally whether the external surface has moved, edges have settled or joints have changed. After unusually heavy rain, also check whether the intended water path has remained visibly clear. These observations do not replace professional assessment, but can prompt timely investigation of small causes. A well-planned threshold is not one that disappears from view, but one whose drainage, access and care remain understandable in daily use.
Make a confident decision with a complete enquiry pack
Request quotations once the essential project information is assembled. Include opening dimensions, opening direction, internal and external photographs, a floor plan, proposed finished floor levels, surface build-up details, drainage position and intended use. State clearly whether the outdoor area already exists or is yet to be built. Do not ask merely for a “low threshold”; ask for a suitable connection concept for your levels and weather exposure. Attach a list of open decisions, such as final paver thickness or timing of patio works. Professionals can then identify trade-offs and state which details must be confirmed by measuring or at the latest before approval.
Do not compare responses only by the door’s appearance. Useful questions include: which height datum was assumed? Which work belongs to the door supply, and which to the floor layer, waterproofer or landscaping contractor? Which details must be decided before ordering? Who checks final measurements? Ask for differences between quotations to be explained instead of comparing only visible threshold heights. If required, a qualified design or installation professional should assess project suitability and the building junction. Bloomcabin states a five-year guarantee for windows and doors; delivery is generally four to six weeks after order confirmation. These details do not replace timely technical coordination of the threshold and adjacent work.
Frequently asked questions
Is a flush door threshold always the better option?
No. A flush threshold can ease access, yet levels, drainage and junctions need exact coordination. For severe exposure or complex construction, a raised option may provide useful design tolerance. Let site conditions, daily use and the complete junction determine the choice.
Can the patio be planned after the door is installed?
It can be built later, but should be considered before the door order becomes binding. The proposed finish, its build-up height, fall and drainage directly affect the junction. Without that information, the final level of the external surface and its connection to the door area cannot be assessed reliably.
What measurements should I bring to the site measure?
Provide opening and structural dimensions, the finished internal floor level, proposed external build-up and photos of both sides. Note the opening direction, drainage, roof or awning. A section through the transition using one clear height datum is more useful than isolated measurements.
Does every low threshold need a drainage channel?
Not automatically. Whether and how water is collected and discharged at the junction depends on the external surface, fall, weather exposure, connection build-up and overall drainage. A channel is only one possible component. Have the responsible professionals plan and explain the complete water route for the specific opening.
What else should be checked for outward-opening doors?
Keep the area in front of the open leaf clear. Account for furniture, planters, steps, mats and water crossing the surface. Opening direction also affects use in wind and rain. Show the swing, handle location and access path on the patio plan.
Next step
Whether flush or raised, the right door threshold comes from coordinated level and drainage planning, not one product feature. Begin with a section through the internal floor, frame and external build-up. Then assess weather exposure, water route, opening method and everyday use. A raised threshold can clearly organise level differences; a low transition can be compelling when its details are prepared consistently. Before measuring, establish finished floor levels, the shared height datum and responsibility for connection works. The door choice can then support the intended transition rather than causing later compromises to the finish or building junction.
