
Garden shed assembly mistakes that are difficult to fix later
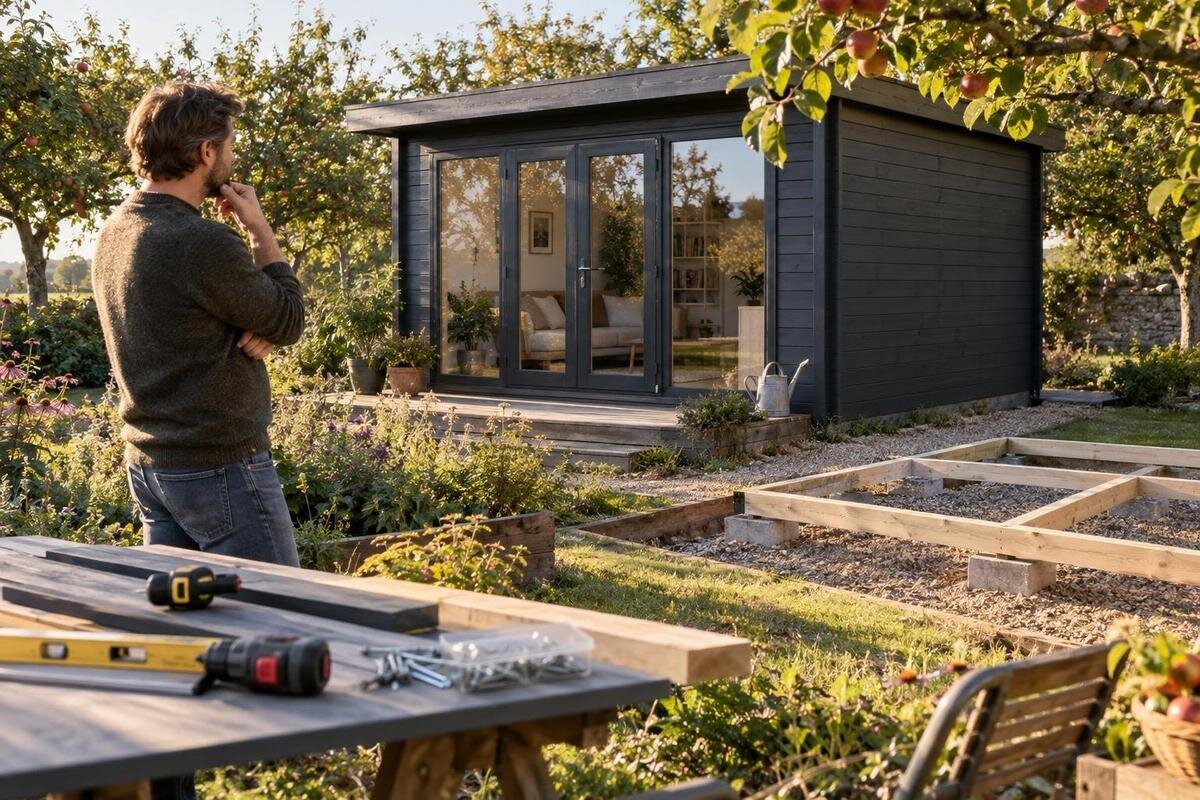
Garden shed assembly
Garden shed assembly mistakes are most costly in time when they surface after another part has enclosed, trimmed or fixed the work. A base that is out of level, a reversed layout or a frame pulled into place with fasteners can leave openings awkward to fit and make later stages difficult to undo. These errors are easier to avoid with a few deliberate pause points: verify the exact kit, prepare and mark the site, inspect components, then confirm alignment before locking in each stage. This guide focuses on those early decisions and checks, not a tool list or a step-by-step build. Follow the manual for the exact garden shed, and pause for supplier or qualified-installer advice when its requirements or the site conditions are unclear.

Confirm the exact kit and instructions
Use the instructions supplied for the exact model and variant, not a manual that merely looks similar. Model names, online photos and sales descriptions do not establish an assembly sequence: component labels, opening arrangements and fastening order may differ between kits. If you are comparing options, the Verdana 1 garden-house listing identifies a product; it does not replace the manual for the version you would receive. Ask whether the correct assembly instructions and complete parts list are available, and keep the answer with your order details. Check that the manual names the relevant model and any selected option. If instructions come in separate sheets or files, gather all of them before unpacking.
When delivery arrives, compare the package labels and paperwork against the order and parts list before building. Confirm that any selected options match the kit, then inspect the contents as the instructions direct. Note missing, damaged or unlabelled items while they are easy to identify; photograph labels and the affected area, and retain the packing information until the discrepancy is resolved. If instructions are missing, unclear or inconsistent, stop and ask the supplier for the correct document. Don’t borrow the sequence from a related model or infer it from a product image: one mistaken early component can affect every later fit.
Check the base before preparing the site
A base error is hard to compensate for once walls and openings are in place. Before preparing the site, check the exact manual for the required base footprint, position, level requirements and any specified support arrangement. A surface can look even from a distance but still miss the stated requirement; use the method in the instructions rather than a visual guess. Consider the ground where the shed will sit and whether water tends to collect there. If the surface or soil conditions make the base requirements unclear, get advice from a qualified installer before building on it. Don’t try to correct an uncertain base by adding a thicker edge or packing one side unless the model’s instructions allow that approach.
Establish the required dimensions for each model you consider, including the Verdana 2 garden-house listing, before committing to a pad or other support. Check whether a measurement describes the base footprint or the overall external size; those are not automatically identical. Don’t size a base from a perspective image, assume a floor will make an uneven surface acceptable, or position the shed first and decide later that it needs moving. Mark the prepared area and recheck its dimensions and level before fixing the first component. A small correction is simpler here than after the frame is assembled; any substantial change to the support needs resolving before work continues.
Set out the footprint and opening orientation
Mark the footprint before lifting or fixing panels. Use the measurements in the instructions, label the front and back on a simple site sketch, and note where each wall and opening belongs. This catches a planning error that is easy to overlook: choosing a position that fits the outline but leaves the door facing an awkward route or puts an opening on the wrong side for the intended use. Keep the plan available as components go up, and compare the first wall positions with it before fastening them. Avoid relying only on a drawing in a sales photo, where the orientation may not match the version supplied.
Check the exact model instructions to see whether the illustrated orientation can be changed; don’t assume a wall, door or window can be swapped because the footprint appears symmetrical. A listing such as the Durano garden-house listing identifies a product, but does not establish that its openings are reversible. Before settling the base position, check access around the opening and clearance from nearby fences, walls and other obstacles. If the intended layout depends on moving an opening or changing the panel order, get supplier confirmation for that model before ordering or assembling. That avoids finding, once the walls are fixed, that the doorway cannot face the route you planned.
Plan delivery access and room to work
A footprint can fit on a site and still be difficult to assemble there. Trace the route from the delivery point to the prepared area, including gates, turns, steps and any narrow passage. Check package or component dimensions only when they are supplied in official information; if a handling size is not stated, ask rather than relying on an online photo or model name. Plan a clear staging area close to the base, with space to set out components in assembly order and move them without leaning a partly assembled wall against a fence. It is easier to arrange this before a delivery is on the ground.
Think about access after assembly as well as during it: can you reach the shed exterior for routine inspection, and can doors or other moving parts operate in the space where the building will stand? The Veltor 1 garden-house listing is a product identifier, not evidence of its actual dimensions or clearances. Confirm those details from the documentation for the exact model, then compare them with the gate, path, fence and nearby buildings. Include the clearance shown for the opening rather than measuring only the closed footprint. A cramped position can make repairs or ordinary access inconvenient, so adjust the plan before fixing the base if there is doubt.

Sort and inspect components before assembly
Sort parts by the labels and diagrams in the manual instead of combining similar-looking pieces in one pile. Keep fasteners in their labelled groups; retain the orientation shown for each panel, post or trim piece, and lay out left- and right-hand components so they cannot be accidentally swapped. Follow the instructions on when to unwrap, move or protect parts. Check the count and visible condition while damage or a missing item can still be connected to its label. Keep a simple inventory with the parts list, and keep the paperwork where it will remain legible during the build.
The Orello garden-house listing names a product, not the contents of the kit in front of you, so use the parts list for the exact delivered version. Don’t assume components are interchangeable because their holes or edges look alike, and don’t replace an absent fastener with one that seems close. Avoid drilling a new hole, trimming an edge, bending a component or filling an unexplained gap simply to make pieces meet. Set aside damaged or uncertain parts, record the label and location, and ask the supplier what to do before modifying them. Once an altered part has been built into a wall or corner, returning to the original problem can be much more disruptive.
Keep the frame aligned as you build
Follow the stated assembly order and use the alignment checks at the points shown in the manual. A joint secured too early can pull the next part out of position, and the error may spread from one corner to the rest of the frame. Where the instructions call for staged tightening, temporary alignment or a later tightening pass, preserve that order rather than completing every fixing as soon as it is accessible. Check the frame by the method in the manual; a wall that looks straight from one viewpoint does not confirm that the base, adjoining walls and openings are aligned together.
If a hole, edge or notch will not meet naturally, pause and inspect the part labels, orientation, sequence, base and most recently completed joint. Don’t use a fixing to draw misaligned pieces together or force a component into place unless the exact manual specifically calls for that action. If you are comparing products, ask for the instructions for the Modano 1 garden-house listing rather than assuming a familiar-looking frame follows the same order as another shed. During assembly, note the step number and photograph any mismatch before contacting the supplier. Continuing can make it harder to identify where the alignment first went wrong.
Test doors and windows before adding trim
Check door and window components as they are fitted, not only at the end. Match the opening pieces to the diagrams and confirm their orientation before tightening or adding trim that makes them harder to reach. Follow the manual on when to test hinges, tracks, latches or other moving parts, and check that any supplied door or window can move as intended without rubbing or obstruction. Test at the earliest stage the instructions allow, then repeat after the surrounding frame is complete. This gives you a chance to find an alignment issue before later parts hide the cause.
If something binds or will not close as intended, don’t force it, plane an edge or enlarge the opening by guesswork. Recheck the base, frame alignment, component orientation and fitting sequence; make only adjustments described for the exact model. The M timber garden-shed listing identifies a product, so confirm which opening parts and adjustment instructions apply to the version you would receive rather than inferring them from the name. If the cause is still unclear, stop before adding trim and send the supplier photos of the opening, labels and relevant manual step. Fixing the cause early is generally easier than removing completed work.
Plan alterations and services before closing the walls
Decide before the walls are closed whether you expect to add shelves, hooks, a work surface, pipework or electrical services. Check the instructions for areas that must remain accessible and any restrictions on drilling, fixing or changing panels. A convenient position is not proof that a component can be cut or that a wall can carry a particular fitting; don’t notch, drill or attach a heavy item on assumption. The Timber tool shed S listing is a product name, not evidence of what modifications or fixings its structure permits. Confirm the exact model and its guidance before creating openings or purchasing items that depend on them.
Electrical work, lighting and other installed services need planning before they are routed through a finished structure; have the design and work handled by a suitably qualified professional. Don’t hide cables or pipes inside a wall unless both the product guidance and the qualified trade’s advice allow the arrangement. If a future use depends on an unlisted opening, cable route or fixing point, get approval for the specific model before assembly. Changing a plan after cladding or internal finishes are in place can mean taking completed work apart, so flag it at the design stage instead.

Check joints before they are hidden
Build in a pause before fitting any trim, cover or later component that will hide a joint. Compare the completed stage with the manual, check that the prescribed parts and fixings are present, and resolve gaps or movement you cannot explain before covering them. A neat cover does not correct an incorrectly seated connection, and an uneven gap can be a sign that an earlier piece needs checking. Don’t use filler, sealant or an extra fixing as a cosmetic shortcut unless the instructions specifically call for it; an unapproved addition can hide the original issue rather than solve it.
Where a connection will become difficult to see, take a photo before the next stage and note the manual step and part labels. Include enough surrounding detail to locate the joint later; an unlabelled close-up may not help when you need advice. If you cannot confirm a concealed connection is correct, stop before adding further components and ask the supplier what to inspect. If an earlier part has already been covered, don’t dismantle a large section on guesswork; get guidance on an appropriate way to check and correct it. That prevents an early uncertainty from being compounded.
Complete the final inspection and keep a record
Finish with the model-specific inspection in the manual, not just a glance at the outside. Check the listed connections and fixings, operate each supplied door or other moving part, look for visible damage or unexplained gaps, and confirm that the shed remains aligned with the prepared base. Compare leftover components with the parts list: a spare may be expected, but an unaccounted-for fixing or panel could indicate a missed step. Resolve uncertainty before storing items in the shed or treating the build as complete. Don’t improvise a final fix simply to make the inspection appear finished.
Keep the model identification, instructions, parts list, delivery notes and progress photos together. Record any advice or approved adjustment, including the step it relates to; those details let you describe a later problem accurately rather than reconstructing the build from memory. If a door later binds or a joint looks different, compare it with the manual and your record before changing anything. Avoid trimming, adding fixings or covering a gap after the fact unless the supplier or manufacturer confirms a method for that model. Good records make diagnosis easier, though they do not replace a correct final assembly check.
Frequently asked questions
What should I check before assembling a garden shed?
Match the delivered model and any selected options to the manual and parts list, then confirm the base requirements, footprint, orientation and opening position. Check the delivery route and space to work around the build as well. Resolve missing instructions or parts before fixing the first component; it is easier to identify a discrepancy while labels are still visible.
Can I correct an uneven base as I assemble the shed?
Don’t rely on the walls or floor to compensate for a base that misses the model’s stated requirements. Pause, check the instructions and prepared surface, and arrange a correction using a method suitable for the product and site. If you are unsure what support the ground needs, ask a qualified installer. Don’t add packing or alter the base by guesswork.
What should I do if the holes don’t line up?
Stop rather than widening a hole or drawing the parts together with a fastener. Check the labels, orientation, assembly order, base and last completed joint against the manual. Photograph the mismatch with the part label and step number, then ask the supplier if it remains unexplained. Continuing may carry the error into later walls or openings.
Should I fully tighten every fixing as I go?
Follow the manual’s sequence. Some instructions call for checks or staged tightening, so don’t assume each fixing should be fully secured as soon as it is accessible. Keep connections adjustable only where the instructions require it, and don’t improvise a different order. Before completing each stage, confirm that the surrounding components are correctly seated.
When should I test doors and windows?
Test them at the earliest point the instructions allow, before trim or other parts make the opening hard to reach. Check their movement again during the final inspection if the manual calls for it. If anything binds, don’t force or trim it. Recheck the base, frame and fitting order, and ask the supplier for model-specific adjustment guidance.
The most useful pause points come before the first fixing, before a joint is hidden and before an opening becomes difficult to adjust. Confirm the exact instructions, base and orientation, then stop when parts do not align or operate as expected. Resolving a mismatch at that stage preserves options; trying to make it disappear with a cut, extra fixing or cover can turn a small uncertainty into substantial rework. When the manual, site or delivered parts disagree, get the discrepancy resolved before continuing.
