
Garden Shed Assembly Tools: A Practical Checklist
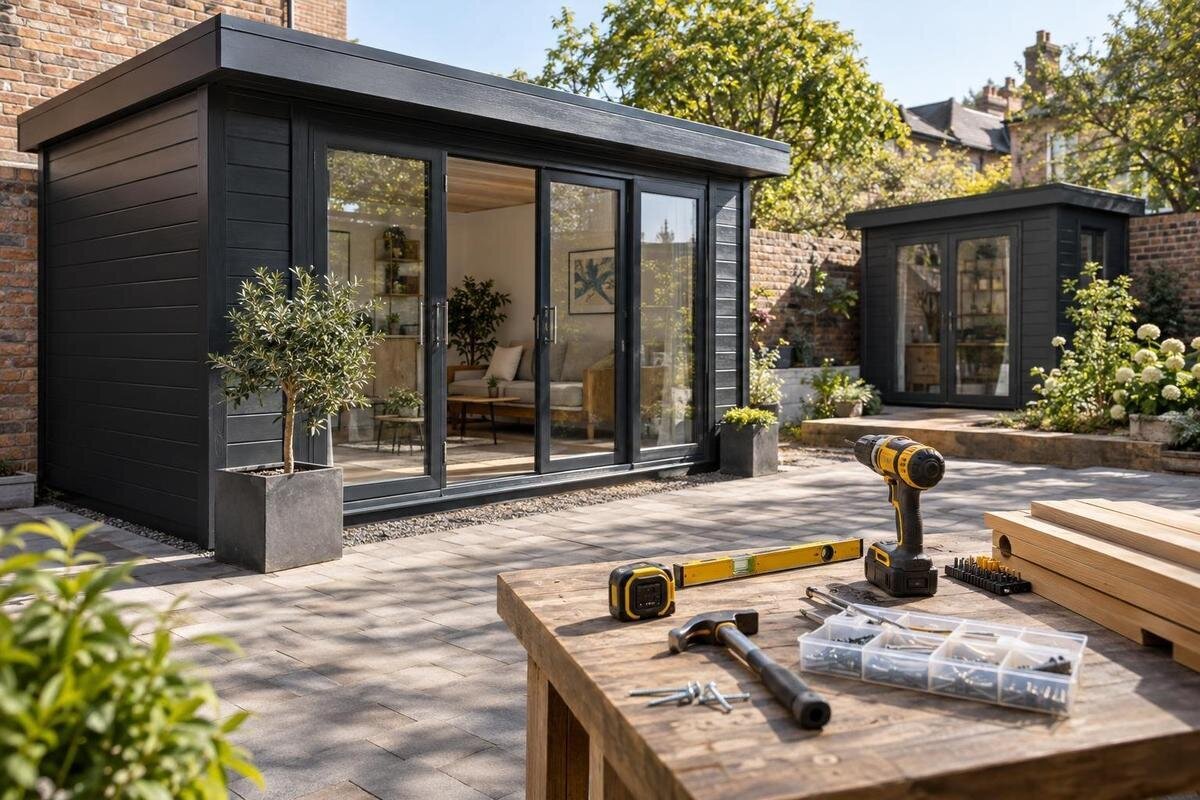
Garden shed assembly tools
A dependable garden shed assembly tools checklist starts with the kit’s own instructions, not a universal shopping list. Garden shed kits can call for different fasteners, driver bits and access equipment, so gather basic measuring tools and suitable safety gear, then confirm every item against the exact assembly guide. This lets you buy, borrow or hire only what the job needs and gives you a reason to pause before a step that calls for equipment or a skill you do not have.

Before you buy or assemble 1
Assembly instructions and tool requirements
Get the exact assembly guide for the garden shed model before shopping for tools. A product image or general description cannot tell you which fastener heads are used, whether holes are prepared, or whether any cutting is part of the job. Read the tool list, symbols and assembly sequence, noting which items are essential, optional or supplied separately. Check for named attachments too, such as a particular driver bit, and flag any operation for which you lack suitable equipment. If the guide is unavailable before purchase, ask where to access it and whether any tools are included. When considering the Verdana 1 garden house, base your checklist on that model’s instructions, not on a generic shed list.
Copy the named items into one place and mark what you own, what needs a matching attachment, and what you may need to borrow or hire. Check the model name and instruction version against the kit you plan to assemble; similar-looking products can still call for different fixings. Keep a paper copy or an accessible offline copy at the work area, then flag steps that mention specialist equipment or an unfamiliar operation. Read general tool notes at the front as well as notes beside individual steps, because a symbol may apply to more than one stage. If the guide and supplied parts appear inconsistent, stop and ask the supplier or a suitably qualified installer rather than substituting hardware.
Measuring and marking tools
Set aside a tape measure, a pencil or removable marker, a straightedge and a carpenter’s square. Use the tape to check positions against the plan; a pencil lets you revise temporary marks without leaving a permanent line on a finished surface. A square is useful for checking and marking corners where the instructions call for one, while a straightedge helps keep longer marks clear. Check that the tape’s hook moves freely and its scale is legible. Record each measurement with its units and what it refers to, rather than relying on a note such as width that could mean the base, walls or clearance.
Before assembly day, compare the intended position and base outline with the dimensions and clearances stated in the kit documents; do not estimate from a product picture or assume the name tells you the footprint. Removable tape or a string line can make a temporary reference where the surface allows it. Keep site measurements separate from dimensions taken from an assembly drawing, and write down what each one refers to. When shortlisting the Verdana 2 garden house, check the plan for that exact model to identify the measurements you need to take. A general tape and square are a starting set, not a substitute for model-specific requirements.
Before you buy or assemble 2
Sorting parts and checking the inventory
An inventory sheet, a marker reserved for container labels, and several small trays make parts easier to distinguish once assembly begins. Lay out only what the instructions tell you to identify, then compare item names or symbols with the supplied parts list. Keep fasteners separated by type and retain their labels; mixing similar screws can turn a quick lookup into guesswork. If the kit has multiple packages, open them in the order the instructions recommend rather than emptying everything together. A phone photo can record a label or an unclear part reference, but it does not replace the written inventory. Label the containers, not the kit components, unless the instructions say otherwise.
Check for a missing, visibly damaged or mismatched component before depending on it in the build. Note the part reference and photograph the issue, then contact the supplier for a resolution rather than reaching for a different screw or making a replacement. If you are comparing the Durano garden house, ask for the assembly guide and inventory for that exact model before deciding whether extra tools or fasteners are needed. Keep a clean, flat sorting area beside the work zone, with small items away from foot traffic and children. A simple tick on the inventory sheet is more reliable than trying to remember which parts you have checked.
Choosing drivers and bits for the fixings
Match the driver to the fixing named in the instructions, not to the tool you happen to own. Check the head shape and size, then select a screwdriver or driver bit that fits cleanly; a loose or incorrect bit can slip and damage the fixing. A manual screwdriver can be useful where the guide calls for careful control, while a drill-driver may save effort if the instructions permit it. Keep the correct bit beside the fasteners and inspect it for wear before work. There is no single universal bit size for every garden shed kit, so check the model-specific list before buying a large assortment.
Use a powered driver only for operations the guide allows. Keep it aligned with the fixing, begin carefully, and stop if the tool slips, the fixing resists unexpectedly or parts move out of position; do not force the connection. An impact driver is not an automatic substitute for a drill-driver, and a hand tool may suit a step that needs careful control. For the Veltor 1 garden house, confirm the specified fastening tools before buying an accessory set. Check the battery or other power supply required by your own tool, and keep any spare matching bits together so they are not confused with the wrong size.

Before you buy or assemble 3
Checking the base and alignment
A spirit level and square can help you check reference points named in the assembly instructions. Use a level only on surfaces the guide identifies; an arbitrary edge may not be a useful reference. A square can help check a corner, but it cannot establish whether a foundation or base meets the kit’s requirements. If the guide specifies a particular length or checking method, follow that direction. Keep the contact faces clean, as grit or damage can make a tool unreliable. If a measuring tool has been dropped or is visibly bent, do not rely on it to judge alignment.
Check the prepared site or base against the garden shed’s documented requirements before assembling walls or other parts. Do not use loose scraps, a hammer or extra fasteners to compensate for a base that appears out of level; improvised packing may not be allowed. If it does not match the instructions, pause and get guidance from the supplier or a qualified installer before continuing. For the Orello 1 garden house, as with any shortlisted kit, identify these requirements from the exact model documents rather than inferring them from a listing or photograph.
When cutting or drilling tools are needed
Treat saws, hole cutters and extra drill bits as conditional tools, not standard entries on every shed checklist. The required equipment depends on the kit and its instructions; check whether any cutting or drilling is specified, which tool and accessory are named, and whether the maker gives a method for the task. If an operation is absent from the guide, do not invent one to make parts fit or add an opening. For the Modano 1 garden house, for example, the model name alone cannot tell you whether an alteration is required. Consult the instructions for that exact model before adding cutting tools to your list.
If the guide calls for cutting or drilling, make sure you have the correct tool, suitable support for the component and a safe way to do the task in line with the tool maker’s directions. Do not hold a small part in your hand while operating a power tool, or work on a component that is unstable. If the operation is unclear or beyond your experience, leave it to a suitably qualified person rather than experimenting. Keep blades and bits matched to the tool and task; a generic accessory pack does not guarantee compatibility. Never treat an unlisted alteration as a shortcut for parts that do not fit.
Before you buy or assemble 4
Safety gear for shed assembly
Set out safety gear before moving panels or switching on a power tool. Eye protection should suit the task and follow the tool maker’s guidance; wear enclosed footwear appropriate to the work. Choose gloves for handling parts only where they do not create a snag hazard near moving machinery, and follow the tool’s instructions on glove use. If the equipment guidance calls for hearing protection, have the appropriate type ready. Tie back long hair, remove loose jewellery and avoid clothing that could catch. Check that each item fits, is in good condition and can be worn properly while carrying out the task.
Keep the work area clear of bystanders, children and pets, and do not let a rushed helper use a tool without understanding how it operates. Store protective equipment where it remains clean and easy to reach rather than burying it under packaging. For any shortlisted shed, including the M timber garden shed, choose protective gear for the actual tasks and tools, not from the product name or appearance. Follow the kit instructions and each tool’s safety information; if they leave an important risk unclear, pause and ask a competent person.
Work surfaces, access and small equipment
Some support and access items are useful only if the instructions call for them. A stable work surface or suitable trestles can keep tools and labelled parts within reach, but they must be appropriate for the task and used as their makers direct; do not balance components on loose boxes. If reaching higher points requires a step platform or ladder, use suitable equipment on a stable surface and follow its instructions. Never rely on a wall panel, door or improvised stack as a step. If the assembly method requires access you cannot arrange safely, seek help before beginning.
Put a shallow tray or divided organiser beside the work area for fasteners in current use, and keep the rest identified in labelled containers. A soft, clean covering may protect parts while they are set down, provided it does not make the work surface unstable or hide small pieces. Have a cloth or brush for ordinary clean-up, but keep it away from moving machinery and anything the tool maker says must be kept clear. Before ordering the Timber Tool Shed S, check the guide for that exact model for any access or support equipment it calls for; do not infer a requirement from the product name.

Before you buy or assemble 5
What to buy, borrow or hire
Decide what to buy only after sorting the list into essential items, optional tools and equipment you can borrow or hire. A tape measure, pencil and containers may already be in your household; there is little value in duplicating tools that are in good condition and suitable for the job. By contrast, a correct driver bit is a small, model-specific item worth checking early. If an instruction names a specialised tool, ask the supplier or a tool-hire provider whether an equivalent is acceptable before spending money. Confirm that any hire includes the attachment or accessory needed, rather than assuming the bare tool will be enough.
When borrowing, check that the tool works properly, its accessories match the manual and you know how to use it safely. For a powered tool, confirm you have the battery, charger or compatible supply it requires; the shed kit does not determine the accessories for your personal equipment. If the assembly date is fixed, check that borrowed or hired items will be available for the whole task, including any instruction-led checks. A generic garden shed setup tools bundle may still lack the right bit or accessory. Compatibility, condition and actual use matter more than having every possible tool in a case.
A pre-start check and clear stop points
Run through the checklist before work starts: the correct instructions are open, required tools are present, measuring and marking items are together, fastener bits match the guide, and safety gear suits the tasks. Check that parts can be sorted without mixing fixings, batteries or other tool supplies are ready, and access to the work area is clear. Make sure optional equipment is genuinely required rather than adding it by habit. A quick check of tool condition can prevent a pause over a blunt, damaged or unsuitable item later. Keep the guide within reach so you can confirm a step instead of relying on memory.
Set aside the job if the instructions are missing, a listed tool is unavailable, the fasteners do not match the specified driver, parts fail to align without force, or a step appears to require an unlisted alteration. These are reasons to clarify the issue, not improvise a substitute. Contact the supplier about product-specific questions; if the site, access equipment or task presents a technical concern beyond your skills, speak with a suitably qualified professional. The best checklist is not the longest one: it is the exact list that lets you work as instructed and recognise when to stop.
Frequently asked questions
What tools are needed for assembling a garden shed?
The exact list depends on the kit. A tape measure, pencil, square, suitable level, matching screwdrivers or driver bits, containers for fixings and task-appropriate safety gear are useful starting points. Check the assembly guide before adding other tools.
Can I use one drill-driver for every fixing?
Only if the instructions permit a drill-driver and you have the correct bit for each fixing. Stop if the bit slips or a fixing resists unexpectedly; do not force the connection.
Do I need to buy every item on a generic shed tool list?
No. Use the tool list for your exact model, then check which suitable tools you already own. Borrow or hire specialist equipment if appropriate, and confirm that any required accessories are included.
Should I use a spirit level to correct an uneven base?
A level may be specified for particular checks, but it does not make an unsuitable base acceptable. Compare the prepared base with the kit requirements and pause if it does not match, rather than forcing parts into position.
What safety gear should I have ready?
Choose protective gear for the tasks and tools involved, following their instructions. Eye protection and enclosed footwear may be appropriate; gloves should not create a snag hazard near moving machinery.
An effective garden shed assembly tools checklist is built around the exact kit instructions: measure and mark clearly, keep parts and fasteners organised, match drivers to fixings, and prepare task-appropriate protective gear. Add powered, cutting or access equipment only when the documented method calls for it and you can use it safely. If the instructions, parts or site do not match, pause and resolve the question before continuing. That preparation makes the tools useful rather than simply numerous.
