
Garden Shed Floor Insulation: Plan Before Assembly
Garden shed planning
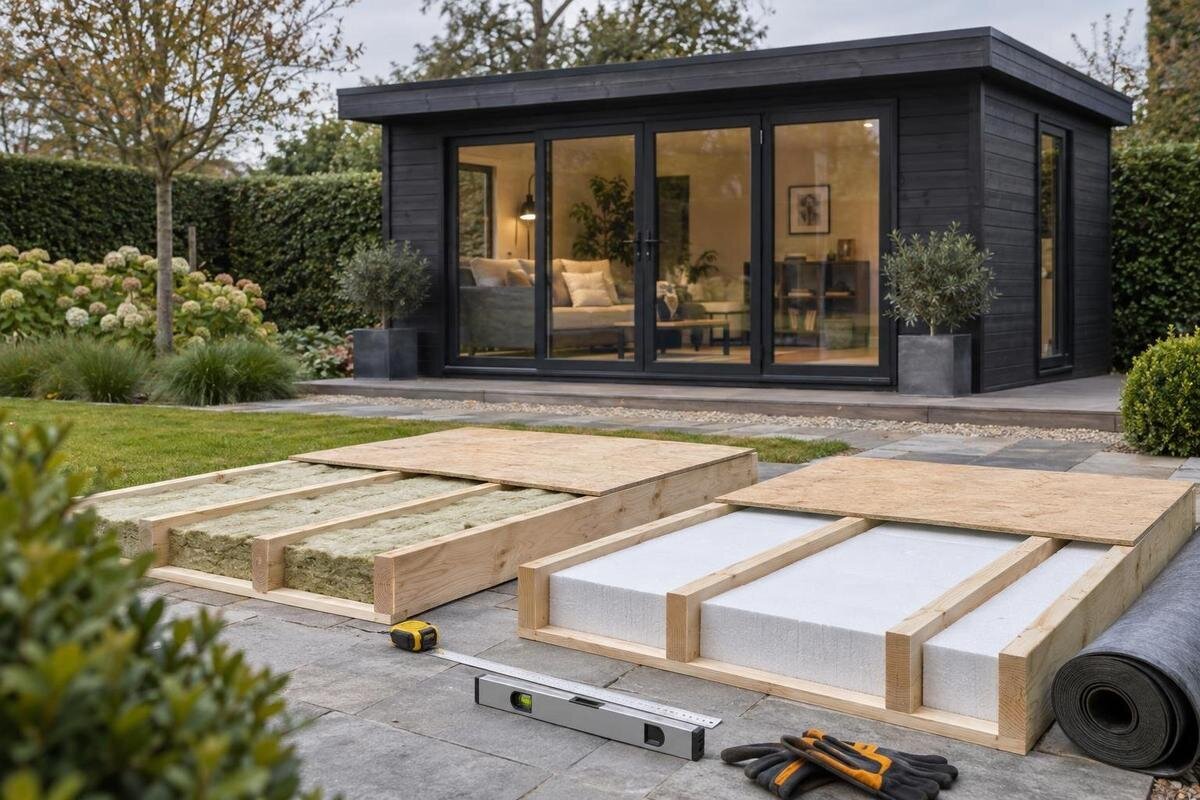
Floor insulation is easiest to plan before a garden shed is assembled, when the base, floor parts and instructions can still be considered together. The key questions are not only which insulation to buy, but whether the floor has a suitable space for it, what will support and protect it, and when it can be fitted without changing the intended construction. An afterthought may be difficult to reach; a layer chosen too early may not match the actual floor system. Use the ordering stage to confirm the shed's floor package, the base arrangement and the finished floor height. This guide focuses on those decisions, so the insulation fits the plan rather than driving an unverified alteration.

Before you buy 1
Why floor insulation needs planning before assembly
Planning floor insulation before assembly is mainly an access and compatibility decision. Depending on the design, floor panels, bearers, perimeter edges and fixings can become difficult to reach once the shed is standing. A layer added later may call for awkward access or partial disassembly; a layer fitted too early can interfere with the intended floor arrangement. Confirming the approach while the base and floor components are still separate lets you compare the proposed layer with the actual drawings and assembly sequence, rather than trying to make a generic product fit after construction. It also gives the supplier or installer time to flag a detail that needs approval.
Keep three decisions connected: what the base supports, how the floor is assembled and where the insulation sits. Each affects the space available for the next layer. Set a clear purpose, settle the floor construction and identify the installation stage before buying materials. Record the exact model and floor option you are considering, because details can vary between configurations. If a plan, drawing or package description leaves a gap, ask about that point before ordering or changing the kit. This is more useful than choosing insulation thickness first and discovering later that a support, fixing or edge detail occupies the space you expected to use.
Match the floor plan to the shed's intended use
Begin with what the shed will hold and how you expect to use it. Occasional storage of garden tools raises different questions from a space where you plan to stand for long periods, work at a bench or protect sensitive contents. That distinction does not determine a product by itself, but it helps you decide how much effort to put into the floor, what surface you want underfoot and whether insulation is a priority at all. Consider how you will move items in and out, too: a change to the floor finish or entrance height may matter more to everyday use than an insulation layer. Write down the main purpose before comparing options.
Floor insulation limits heat transfer through one part of the enclosure; it cannot compensate for gaps, an unsuitable base or a floor that remains damp. Think about the complete intended arrangement without treating a garden shed as a fully temperature-managed room. Where you are comparing individual models, use the Verdana 1 garden house listing to identify the exact version and look for any accompanying floor information. Neither the model name nor a photograph tells you whether insulation is included or how the floor performs. Base your decision on the documents for the precise floor option, not a general description of the shed.
Before you buy 2
Check exactly what the floor package includes
Separate the shed package from the floor package and from the base, because they are not automatically the same purchase. A listing photo can show a finished interior without telling you which floor panels, supports, edging, fixings or surface treatment are supplied. Look for a parts list or written package description and mark each item as included, optional, supplied by you or still unconfirmed. Check that the information refers to the exact model and version you intend to order. If insulation appears in an image or is mentioned in a description, ask whether it is part of the order or simply an example of a possible addition.
Before checkout, ask what the manufacturer expects beneath the floor and whether the floor needs a particular support arrangement or finish. Establish whether the base is a separate preparation, whether any underfloor layer is supplied and which parts must be sourced separately. If an item is optional, confirm its dimensions and compatibility instead of assuming the word floor covers every layer. Use the Verdana 2 garden house listing to identify the model you are considering, then compare its package details with the quotation or order confirmation. Keep unanswered items on your list rather than treating them as included; that makes it easier to spot a missing component before assembly.
Read the floor structure before choosing insulation
Identify how the floor is meant to be supported before choosing what fills or sits beneath it. Some designs use floor panels on supports; others may have a different arrangement, or leave the finished floor to the buyer. Do not assume that an open-looking space in a drawing is an insulation cavity. Ask for the relevant floor plan or assembly diagram, then check the support positions, available depth, perimeter construction and access to the underside. These details help establish whether a proposed layer has room to fit and how it can be held in place without altering structural members or obstructing the floor.
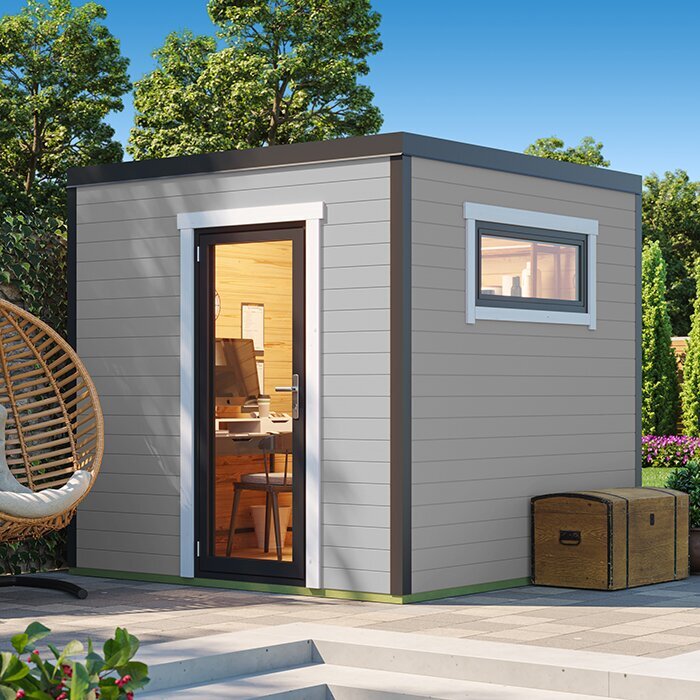
Insulation products have different dimensions and support requirements, so a space that appears large enough is not automatically suitable. A material may need a backing, restraint or protective layer, and its thickness can matter where floor panels meet bearers or edge pieces. Those are product-and-design questions, not details to settle by forcing material into place. With a model page such as the Durano garden house listing, look for drawings or floor details tied to the exact product; do not infer a support layout from an image. If no usable drawing is available, ask for information about the floor option before selecting insulation.
Before you buy 3
Allow for finished height, thresholds and clearances
Compare the full floor build-up with the space around it. Insulation placed above a structural floor, together with any cover layer, raises the finished walking surface; a layer below it can reduce clearance to the ground or alter how the underside is exposed. Either change may affect the entrance threshold, the gap below a door, the meeting between floor and wall, or access for cleaning along the edges. Record the proposed layers in order and use their stated thicknesses to ask focused questions. Do not use those measurements to devise a different support system; confirm the resulting height against the shed's own assembly information.
Include fixed items and everyday access in the same check. A step, shelf, workbench or stored equipment may sit differently if the finished floor changes height, and a raised surface can change how easy it is to carry things through the entrance. Draw a simple cross-section of the doorway and one floor edge, marking the base, supports, floor, insulation and protective surface. The advertised footprint does not describe internal floor clearance. For a specific model, the Veltor 1 garden house page is a prompt to check its published floor plan and entrance details, not proof of a particular clearance.
Coordinate the base with moisture protection
Floor insulation and the base need to be considered together because the base sets the floor's relationship to the ground and water. Confirm that the proposed base is appropriate for the shed and site, that its surface and dimensions match the floor arrangement, and that water will not be directed or trapped against vulnerable edges. The right approach depends on the design and local conditions; do not assume an insulating layer can correct a base problem. If the base is uneven, drainage is uncertain or there is little clearance beneath the floor, ask the shed supplier or a qualified installer to resolve that point before the structure is assembled.
Ask how the underside is intended to dry and whether the floor design needs space for airflow. Added insulation, a membrane or a sealed edge can change how moisture moves or evaporates, so copying a detail from another shed can create a mismatch. Do not add a vapour-control or ground sheet automatically; confirm what belongs in the particular floor build-up and where it sits. Use the Orello 1 garden house listing to identify the model and seek its own floor and base information; an image or product name cannot establish moisture detailing. Resolve this question before covering an area that may be difficult to reach later.
Before you buy 4
Choose insulation to suit the floor system
Once the available space and installation position are confirmed, compare insulation products against those constraints. Check the manufacturer's stated thickness and dimensions, intended application, support or retention needs, moisture guidance and any required covering. A product described broadly as underfloor insulation is not necessarily suitable for an exposed or enclosed garden-shed floor. Do not choose by thickness alone, and do not compress a product simply to make it fit unless its instructions explicitly allow that use. Keep the product data sheet with the shed documents so the installer can see which material and configuration were considered.
If you have a specific thermal target, ask a building professional how to assess the floor as part of the complete shed rather than treating one material rating as a promise of room comfort. For a model-specific comparison, the Modano 1 garden house listing can help identify the product under consideration; check the relevant floor documents against the insulation maker's requirements. Confirm what will protect the insulation from wear, moisture or accidental contact in the chosen arrangement, and whether that protection changes the finished height. These checks are more useful than buying a product before knowing where it can go.
Agree the installation order while access is open
The approved assembly sequence determines when insulation can go in. If the design places it within a floor cavity, it may need to be fitted while that cavity is accessible; if it sits elsewhere, the instructions may call for another stage. Ask for the sequence that applies to the exact floor option, including when supports, floor panels, edge pieces and protective coverings are fitted. Avoid relying on a generic video or instructions for a different kit. Your plan should name each layer and the point at which it is installed, so the person assembling the shed does not have to improvise around a floor that has already been closed up.
Plan storage and coordination as well as the order of work. Keep insulation dry and protected in line with its packaging instructions, and arrange for it to be available when the relevant part of the build is ready, rather than in the way of other components. If an installer is involved, agree who is responsible for checking compatibility and who supplies each item. The assembly instructions remain the authority for the kit; do not drill, cut or move floor supports to make an unapproved layer fit. Ask for any alternative detail to be confirmed before work proceeds. the M timber garden shed listing can help identify the model to which your question relates.

Before you buy 5
Compare the complete order before you buy
Compare the complete purchase rather than the headline cost of the insulation. List the shed, any floor option, base preparation, insulation, retention or backing, protective finish and separate labour as distinct items. Some may be included, some optional and some outside the product order; get each status stated rather than assuming. Check that the measurements and model version on the documents match the item you intend to order. A clear list makes like-for-like comparisons possible and reduces the chance of ordering a layer that cannot be used with the chosen floor. It also shows which unanswered question could delay the assembly plan.
Ask the supplier to confirm what is included, what you must provide and which instructions apply, preferably in writing. Check the ordering information for the exact item and any separate components, and coordinate delivery with the planned assembly without assuming a particular lead time. When the goods arrive, compare the package against the order and keep the instructions together; raise a missing or mismatched part before it is hidden by construction. Apply the same package check to the Timber Tool Shed S listing: identify what is listed as standard, optional, customer-supplied or unconfirmed before comparing the full order. Do not infer package contents from a photograph.
Confirm these details before assembly begins
Before starting, make a one-page record with the exact model and floor option, the base arrangement, the floor drawing used, the insulation product and its intended position, the finished-floor layers, and the approved assembly sequence. Add the answers on package contents and moisture handling, plus the name of the person who confirmed them. This record helps a supplier or installer see whether everyone is working from the same version and whether insulation is being fitted at the right stage. Keep it beside the assembly instructions and update it if you change the shed, floor choice or insulation product.
Pause if a measurement, product sheet and assembly drawing appear to conflict, or if the floor design depends on a detail nobody can confirm. Ask the product supplier about model-specific parts and instructions; seek a qualified installer or building professional when base suitability, structural support or performance is outside your experience. Do not alter supports, omit floor parts or select a different thickness just to solve a mismatch. Resolve the issue before ordering insulation or closing the floor. If the required detail cannot be established, reassess the purchase rather than relying on a guess.
Frequently asked questions
Can I add garden shed floor insulation after assembly?
Possibly, but access to the underside or any enclosed floor space may be restricted once the shed is built. A retrofit can also affect edges and clearances. Check the instructions for your exact floor design before buying insulation; do not assume that a layer can be added without changing the assembly.
Should insulation go above or below the shed floor?
There is no universal position. The answer depends on the floor structure, available clearance, protection from moisture and the finished height you need. Check the floor plan and insulation instructions together, then confirm the approved position for the exact shed and floor option.
Can I use leftover insulation from another project?
Only if its dimensions, intended application, support requirements and moisture guidance suit the shed's floor. A product that fitted another space may not fit this floor or its clearances. Compare its data sheet with the shed documents before deciding, rather than cutting or compressing it to make it fit.
Will floor insulation make a garden shed comfortable all year?
Not by itself. It can address heat transfer through the floor, but it cannot guarantee a comfortable or temperature-stable space. The rest of the shed, its base, gaps, moisture conditions and how you use it all matter. If you have a specific performance target, seek advice on the complete space.
What should I confirm before ordering insulation?
Have the exact shed model and floor option, floor drawing, base arrangement, available space, intended insulation position and assembly sequence. Also establish what is included in the order, what protection or retention is required and how moisture is managed. Keep written answers with the assembly instructions.
Garden shed floor insulation is a floor-and-base decision, not simply a product purchase. Before assembly, confirm the exact floor parts, intended use, available space, moisture details and approved sequence for the shed you are considering. Then choose a compatible layer only where the product information supports it, and keep the related components and instructions together until the relevant stage of the build. A little planning can prevent a rushed alteration later, but it cannot replace the shed's assembly instructions or professional advice where the base or performance target is uncertain. The useful outcome is a floor arrangement that can be assembled as planned.
