
Greenhouse Hydroponics: Beginner’s Guide
Bloomcabin Journal · Australian greenhouse know-how
Hydroponic growing
inside a greenhouse
A starter guide
Foliage may occupy the space above the water, but success is shaped below it by water, oxygen, plant food and close attention. Here is a manageable way to begin.
Chapter 01 · Understand the basics
Removing soil does not remove the need for attentive plant care.
What hydroponics changes
Hydroponic roots take up water and dissolved mineral nutrition from a controlled liquid mix. Oxygen, suitable warmth, physical support, light, moving air, clean surfaces and frequent observation remain essential.
This makes a greenhouse a useful workspace. Shelter, access and sufficient room help keep irrigation and crop tasks organised, yet equipment faults, excess humidity and heat still require management. Avoid crowding the initial layout and reserve walking and maintenance space immediately. Explore the Classic aluminium greenhouse as one element in a plan that also covers airflow, crop space and maintenance access.
Reservoir The covered, opaque vessel that holds water and the nutrient mix.
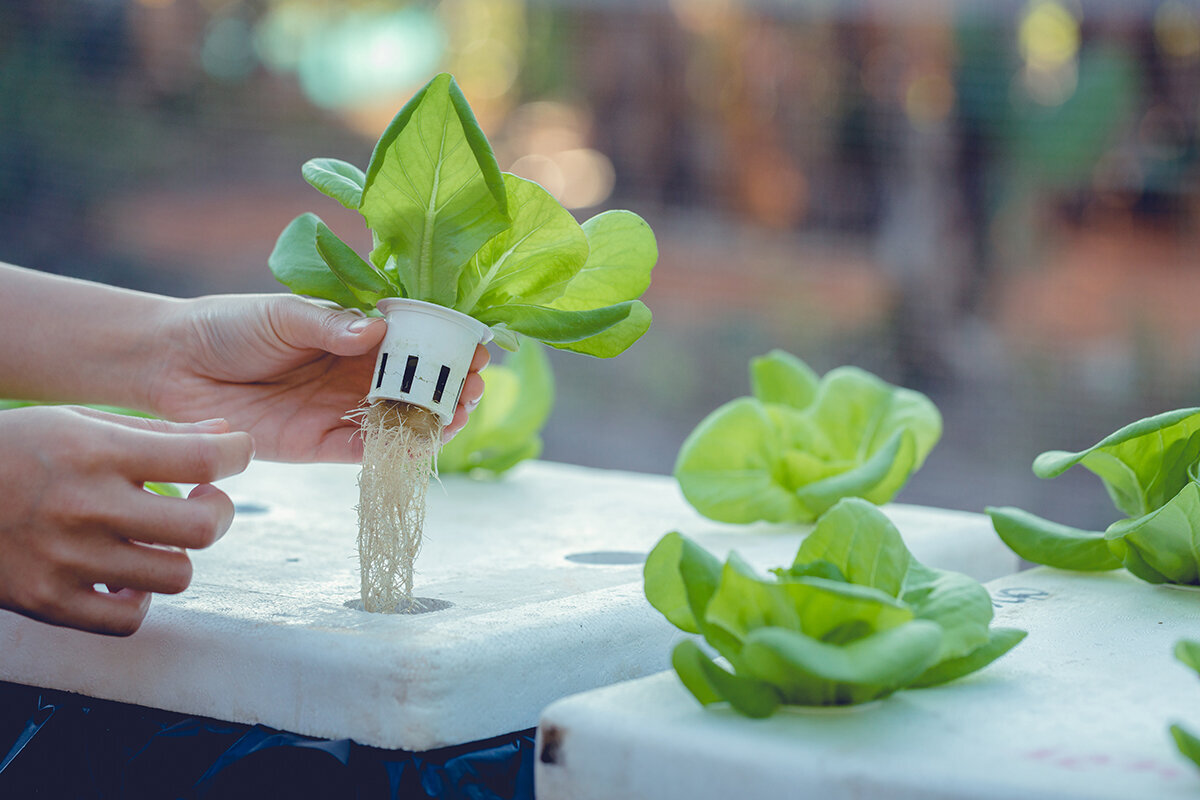
Mesh pot An open-sided holder that steadies a plant while its roots reach both air and liquid.
EC Electrical conductivity, used as an indicator of all salts dissolved in the nutrient mix.
Root zone Everything surrounding the roots, including liquid, air, warmth, growing medium, surfaces and cleanliness.
Chapter 02 · Plan for an achievable win
Let the first crop teach you how the equipment behaves.
A strong first choice: Loose-leaf lettuce is fast, compact and quick to display environmental changes. Basil is another forgiving option in bright, warm conditions. Either crop lets you learn harvesting and testing without pollination, lengthy growing periods or elaborate supports.
Limit the initial tank to one crop and, where possible, one variety. Herbs and leafy vegetables reveal useful clues before foliage becomes crowded: watch for pale young leaves, sluggish roots, a dropping waterline or a different pump note. Pak choi and Asian greens are useful in cooler conditions, whether that falls in autumn, winter or early spring in your Australian region.
Excellent hydroponic results are also possible with tomatoes, cucumbers and capsicums, but save them for later experience. Their longer growing period calls for more room and light, bigger tanks, solid support, pruning and dependable environmental control. Begin with a crop that develops observation skills rather than exhausting your patience.
Start with compact, healthy seedlings, or sow in clean propagation cubes made for hydroponics. Do not fill mesh pots with garden soil: organic matter, small particles and possible pathogens can contaminate the recirculating water. A few evenly sized plants in an orderly tank will teach you more than an overcrowded display.
Chapter 03 · Trace the water route
Four system types, each with its own path to oxygen
There is no best design for every grower. A suitable beginner system is one whose flow route, maintenance demands and likely faults are easy for you to recognise. Compare where each design stores its nutrient mix, how that liquid travels and which component deserves attention first during a problem.
Stationary · oxygenated
Deep-water culture
Tank + air stoneThin flowing film
NFT
Pump + inclined channelControlled application
Drip irrigation
Emitter + substrateFlood · empty
Flood-and-drain
Bench + scheduled returnDWC, or deep-water culture: The crop is supported above a tank, with roots extending into the liquid below. A pump supplies air through an air stone, both oxygenating and moving the mix. DWC is particularly easy to follow with herbs and lettuce because roots and water remain visible, connections are limited and no extensive channel network needs servicing.
NFT, or nutrient film technique: Here, a pump moves a thin layer of nutrient mix along channels set at a slight incline. Roots contact the flowing liquid while retaining ample exposure to air. Leaf crops can grow efficiently this way, provided the slope is even and channels and returns stay clear. A blockage or stopped pump can cause rapid stress.
Drip-fed designs: Individual emitters meter nutrient mix into a soil-free substrate such as coir, rockwool or expanded clay. Run-off may be discarded or collected back in the tank. Moisture held in the substrate gives larger plants some protection between irrigation events, although each hose, drain and emitter still needs routine inspection.
Flood-and-drain designs: At set times, liquid covers a growing tray and then returns to the tank. The draining action draws new air into pores around the roots. Pots and propagation blocks both work in this flexible arrangement, but sound drainage, correct timing, level support and cleanliness are vital. Even so, many beginners will find a compact aerated DWC tank simpler to interpret.
Whatever the design, build one habit first: inspect what is happening before intervening. Favour equipment that leaves sufficient room and time for cleaning, checking and changes you can document.
Starting with DWC
Four essentials in view
01Light-proof tank
02Mesh pots plus propagation blocks
03Air pump with air stone
04Plant food and test instruments
An opaque, covered reservoir limits algae; light exclusion matters as much as capacity. Mesh pots and clean propagation cubes support crowns without burying them. Pump, hose and air stone oxygenate roots. Use pH and EC meters with calibration solutions for repeatable readings.
Chapter 04 · Purchase only what helps
Cover the basics before adding automation.
Required A suitable opaque tank and lid, mesh pots, an air pump and stone, hydroponic plant food, pH and EC meters, calibration and cleaning liquids, and one accurate measuring jug reserved for this setup.
Helpful additions Keep spare hose and an extra air stone, a thermometer for the liquid, a labelled top-up jug, plant markers, a notebook and a low tray for catching drips beneath vulnerable joints.
Leave these until later Remote monitoring, dosing controllers, sprawling multi-channel loops, automatic refill equipment, complicated vertical towers and CO₂ systems are unnecessary initially. Wait until your basic routine reveals a genuine safety concern or recurring waste of time before adding another layer of equipment.
A greenhouse leaves scope to increase capacity later. The Classic aluminium greenhouse offers a durable, restrained setting where a small tank can sit beside a workbench without blocking maintenance access. That extra room is not a reason to make the first lettuce crop resemble a technical laboratory.
Chapter 05 · Prepare before planting
Build it empty, add water gradually and test first.
Commissioning may be uneventful, but it is valuable protection for the opening crop. Use a stable, level surface that can carry the load and be cleaned readily. Arrange plugs, sockets, power boards and power supplies above potential leaks, keeping them dry and reachable, and form drip loops in cables. Approach each tank from a dedicated service side rather than climbing across plants.
01Choose the position
Avoid uninterrupted direct sun on the tank and decide how it can be drained in a controlled, safe way.
Avoid uninterrupted direct sun on the tank and decide how it can be drained in a controlled, safe way.
02Add water
Operate the completed setup using plain water, checking every lid, drain, hose and joint.
Operate the completed setup using plain water, checking every lid, drain, hose and joint.
03Use your ears
Confirm a steady pump sound and an even supply of bubbles throughout the tank.
Confirm a steady pump sound and an even supply of bubbles throughout the tank.
04Set a reference
Indicate the usual water height. This reference simplifies top-ups and helps expose a possible leak sooner.
Indicate the usual water height. This reference simplifies top-ups and helps expose a possible leak sooner.
When mapping crop benches, walking space and separation between wet work and equipment, consider the Classic aluminium greenhouse. A sound layout places all testing, inspection and cleaning tasks close at hand.
Chapter 06 · Manage what happens underwater
Nutrients travel in water; records keep the formula useful.
Making a nutrient mix involves more than stirring fertiliser into a tank. The outcome varies with the incoming water, plant species, growth phase, liquid volume, temperature, uptake and selected products. Read the latest analysis from your Australian water supplier, then test the water yourself. Potable water may contain enough alkalinity, hardness or other dissolved minerals to affect hydroponic management.
EC reports overall conductivity, reflecting the combined dissolved-salt content rather than identifying any single element. It can show whether repeated top-ups are making the mix more concentrated or plants are drawing down water. Because pH alters nutrient availability, use directions for the particular crop and product instead of imposing one target on every plant.
pH 5.4–6.2Typical mildly acidic operating range
about 20–24 °CA practical guide, not a fixed target
EC ≠ recipeInterpret it for the crop and stage
Treat these figures as operating references rather than universal instructions. The crop, source water and product directions take precedence. Record a starting point, then note the date, plant, liquid level, EC, pH, temperature and each intervention. Trends give an isolated reading its proper context.
Chapter 07 · Healthy roots stay light-coloured, active and oxygenated
Coordinate conditions around the roots with those above them.
Water alone is not enough for roots; they also require oxygen. In DWC, aeration continually disturbs the liquid beside root surfaces. NFT leaves most of the channel open to air while a narrow stream touches the roots. Substrate designs rely on effective drainage, which restores air-filled spaces after irrigation.
Clean, oxygen-rich root area
- Opaque reservoir
- A moderately cool mix
- Reliable flow or aeration
- Light-coloured, branching and firm roots
Overheated, inactive root area
- Stray light
- Sun-driven warming
- Poor movement
- Dark, soft or stale-smelling roots
Conditions inside the greenhouse
A greenhouse does not make local weather irrelevant to hydroponics. Sunlight can warm a bright structure rapidly and, without suitable siting or shade, heat the tank as well. Australian regions differ widely, so use local conditions rather than season names alone; even a cool night may precede a sunny day. Vent excess heat and moisture from the foliage without subjecting young plants to persistent cold draughts.
- Light Place the opening crop where light is bright and even, while shading and fully enclosing the tank so sunlight cannot enter the nutrient mix.
- Heat Open doors and roof vents, provide shade and encourage air movement before temperatures become excessive. Prevent sunlight from heating the liquid rather than waiting for wilting foliage or inactive roots.
- Humidity Allow enough room between plants for damp leaves to dry quickly and for easy inspection beneath foliage, around crowns and at root openings.
- Circulating air A compact circulation fan helps disperse still pockets of air, but during hot conditions it cannot substitute for adequate venting and well-timed shade.
Chapter 08 · Use routine to simplify the work
Notice one useful detail in the greenhouse each day.
Mon Observe
Tue Hear
Wed Take readings
Thu Inspect
Fri Replenish
Sat Pick
Sun Assess
- Monday: Examine foliage, roots, bubbles and the marked waterline.
- Tuesday: Check lines and the pump, ensuring nearby surfaces remain uncluttered, still and dry.
- Wednesday: Log the liquid temperature together with EC and pH.
- Thursday: Inspect foliage for stress, pests and signs of algae.
- Friday: Add water when required, wait for mixing and take another reading.
- Saturday: Pick outside leaves, clear away debris and dry any splashes.
- Sunday: Read the week’s notes; intervene only when several observations point towards the same considered change.
Plant size, local weather and tank capacity will alter this schedule. Water demand may climb sharply through a hot Australian week, while cooler or dimmer conditions reduce both uptake and growth. The aim is not constant adjustment. It is to recognise modest changes each day.
Chapter 09 · Read the whole environment, not one leaf
Common early problems usually provide clues.
Plants stall although the equipment appears clean
Slow development or pale young leaves can reflect incorrect nutrient strength, drifting pH, inadequate light, low temperature or a tank now too small for the crop. Test the liquid, compare conditions with the plant’s needs and focus on recent growth. Make one well-founded change only after those checks.
Rapid wilting calls for immediate equipment checks. In NFT and drip systems, inspect pump, lines, even flow, return and water level. For DWC, confirm aeration and avoid hot, oxygen-poor solution around roots. Flow failure can harm crops faster than nutrient deficiency.
Damaged leaf margins do not prove that more fertiliser is required. Begin by checking EC, water availability, liquid temperature and air movement. Excessive dissolved salts may injure roots further while worsening stress already caused by heat or water conditions.
The root environment turns warm or dirty
Algae develop where moisture, illumination and time coincide. Cover the tank, seal openings beside hoses and mesh pots, remove visible growth and wash exposed surfaces between crops. Find and block the source of illumination before reaching for a chemical response.
Slimy, brown or stale-smelling roots signal trouble below the surface. Possible causes include hot liquid, low oxygen, poor circulation, inadequate cleanliness or disease pressure. Isolate severely affected plants, then address aeration, movement, temperature and tank level. Clean everything thoroughly before beginning again.
Leaks that return often reveal a layout fault. Keep hose runs visible, supported and free of tension, placing low catch trays beneath joints at risk. Position the tank so that a minor spill cannot reach plugs, bare timber, a doorway threshold or any walking route.
A frequent beginner error: altering light, tank level, nutrient strength and pH together. Choose the one variable supported by your observations, correct it and wait long enough for the plant response to become clear.
Chapter 10 · Pick, clean and only then enlarge
Increase your knowledge before extending the plumbing.
For a continuing lettuce harvest, remove outside leaves while preserving the centre; alternatively, take the complete head once it reaches the size you want. Do not refill immediately after the crop finishes. Drain and wash the equipment, inspect deposits and roots, and study your notes. A dependable reference for the next crop is the most useful product of the first one.
Stay with one tank
Introduce one change
Preserve maintenance access
Repeat the crop with a tidier, more settled process before installing a second design.
Try either another variety, another season or a larger tank; avoid changing all three together.
Only expand while every crop, hose, electrical connection, drain and surface can still be reached for cleaning and inspection.
For lasting materials, considered vent choices and an understated architectural feature in the garden, explore the Classic aluminium greenhouse. A well-planned hydroponic growing space should be pleasant to enter and orderly enough that regular upkeep feels natural.
Australian growers · Common questions
Greenhouse hydroponics FAQ
Is Australian tap water suitable for hydroponics?
It often is, but suitability should be checked rather than assumed. Obtain the latest report from your local supplier and test the incoming water for EC and pH. Even safe drinking water is not free of minerals: its alkalinity and hardness can influence how readily the nutrient mix is controlled. Water passing through a domestic softener may contain salts, so it is not necessarily the better option.
What is a straightforward first greenhouse system?
A compact DWC tank that excludes light and receives steady aeration is often easiest to learn with herbs or leafy vegetables. You can view the main components and inspect roots directly, and there are fewer long channels or small emitters to obstruct. Keep sunlight off the tank, watch the level and air supply, and locate electrical connections beyond every plausible spill route.
Are lights and heating essential for continuous growing?
They are not generally essential for a seasonal trial with lettuce or herbs. Continuous production is different: regional climate, glazing, crop choice, insulation, available daylight and temperature control all influence what is needed. Low winter light may constrain demanding production in southern Australia, whereas overheating may dominate in summer; tropical and subtropical locations have different seasonal patterns. Begin with local seasonal conditions, adding heat, lamps or shade only in response to a documented need.
When does the entire nutrient mix need replacing?
No single interval works for every setup. The answer depends on uptake, tank volume, incoming-water quality, temperature, crop maturity and whether your readings remain stable. Fully renew the liquid and clean the equipment at the end of each crop. Replace it earlier if contamination appears, measurements no longer settle predictably or problems continue after environmental causes have been examined. Written records make this judgement more precise over time.
Does hydroponic food automatically qualify as organic and pesticide-free?
No. Hydroponics refers to the way a crop receives nutrition and water; it does not establish organic status or determine pest-control practices. A clean, closely monitored circuit may avoid some problems associated with soil, but hygiene, pest inspection and suitable crop care remain necessary. Before applying an agricultural chemical, consult APVMA registration and permit information as well as the use requirements in your state or territory.
References and additional reading
Background material for the next crop
Continue with Bloomcabin: a carefully laid-out aluminium greenhouse · Bloomcabin greenhouse curtains · aluminium-greenhouse sliding-door choices
- Germany’s BIL: Growing fruit and vegetables without soil
- German Environment Agency: Drinking-water quality in Germany
- HSWT: Indoor farming, vertical farming and hydroponics
- University of Minnesota: An introduction to small-scale hydroponics
- Purdue Extension: Taking pH and EC readings
- Penn State Extension: Plant nutrition principles for hydroponics
Begin your first greenhouse hydroponics season
Begin with one tank, rather than filling the greenhouse.
Select one crop, one system you can readily follow and one safe route for maintenance. Together they create a growing space that is understandable, enjoyable to tend and ready for sensible expansion later.
A single crop
Become familiar with its foliage, roots and pace.
Become familiar with its foliage, roots and pace.
A single setup
Make its water route easy to see, follow and wash.
Make its water route easy to see, follow and wash.
A maintenance route
Keep access open for tests, cleaning, airflow management and picking.
Keep access open for tests, cleaning, airflow management and picking.
