
Grey mould seldom starts across a whole greenhouse.
Greenhouse plant care / Australia
Grey mould seldom starts across a whole greenhouse.
Botrytis first exploits easy-to-miss sites: a faded flower caught at a leaf joint, an injured stem, touching wet foliage or a decaying fruit stub. Cool, humid nights can turn these minor vulnerabilities into infection points.
Botrytis cinerea is widespread. When spores meet susceptible tissue and prolonged surface moisture, its familiar grey spore growth can develop quickly. Rather than spraying in haste, take a calm sequence: assess the symptom, contain it, remove material, dry the crop, then improve prevention.
Tonight’s principle: As temperatures fall, leave no dead, injured or damp material lodged among the crop.
Immediate response / act before debating the diagnosis
Move gently. Remove precisely.
Fuzz alone does not establish Botrytis. Still, treat grey sporulation, softened collapse or an enlarging lesion cautiously. Avoid vigorous shaking, spraying with water and open containers, all of which may scatter spores or infected debris.
- 01
Pause ordinary tending.
Deal with the suspicious patch before resuming pruning, picking or movement through neighbouring foliage. - 02
Enclose it at the plant.
Before making a cut, position a bag or lidded container at the plant; keep removed material enclosed during transport. - 03
Cut out all visibly affected tissue.
Carefully excise the bloom, fruit or leaf and all collapsed tissue with a clean, sharp tool. - 04
Survey the setting as well as the lesion.
Check for condensation, wet foliage, stagnant air, touching leaves and debris on benches or flooring.
Accessible vents and uncluttered work routes are sound structural features of the Classic aluminium greenhouse. Even so, daily management determines success: inspect closely, keep surfaces easy to clean and adapt to changing weather without shifting the entire crop.
Recognition / a coating is not always Botrytis
Assess the pattern before taking action.
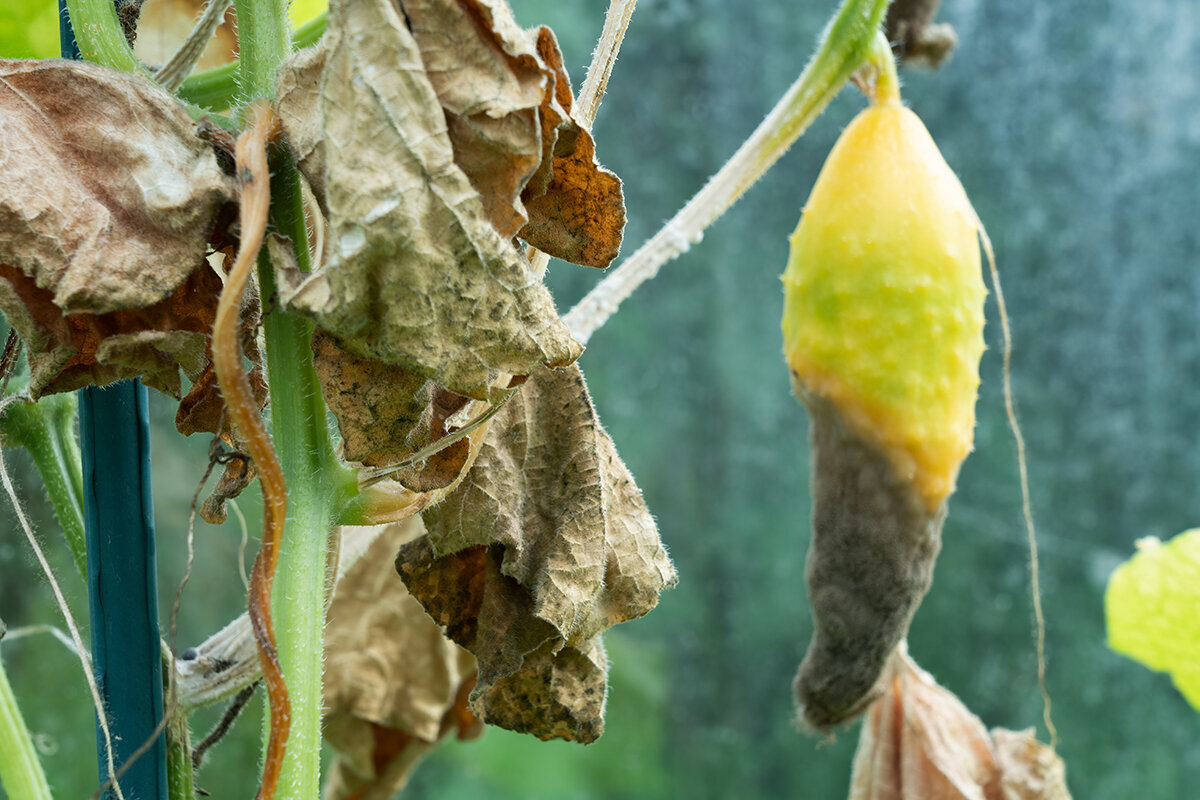
Typical grey mould produces a dusty or downy coating, ranging from grey to grey-brown, over affected blooms, foliage, stems or fruit. From several steps away, natural ageing, unrelated fungi, chilling injury and wilt caused by root trouble may appear equally concerning. Judge the tissue, its location and recent growing conditions together.
Features more consistent with grey mould
Clues include fine, dusty grey spores on dead or soft tissue; browning flowers; and damage spreading from an old bloom, wound or injured fruit. Also inspect stem points kept damp by leaves, petals or support clips.
Visible grey spores provide persuasive evidence, particularly after lingering moisture and where deterioration began in ageing tissue. Even then, interpret them alongside every other sign.
Collapse without visible fluff
Botrytis may be present before any fuzz appears, leaving tissue watery, tan or brown. Other possible causes include different rots, physical injury, chilling, root disorders and bacterial disease. Examine the crown and roots, leaf margins and individual wounds to determine the pattern.
For high-value specimens, seedlings or edible crops, move the questionable plant away from others. Seek horticultural advice or diagnostic testing if the cause remains uncertain or the symptoms return.
Normal senescence
Neither a papery faded flower nor a lower leaf yellowing evenly should be assumed diseased. The risk develops when this material stays caught against fruit or foliage within humid shade.
Routine care covers normally ageing material. Soft, marked or furry tissue should instead be contained, bagged and discarded hygienically.
Vulnerability map — each marker indicates a risk site, not confirmed disease.
1 / Spent flowers Old petals trap moisture beside tender fruit, leaves or stems.
2 / Leaf contact Touching leaves stay shaded and dry slowly after irrigation or dew.
3 / Pruning wounds New cuts benefit from hygienic technique and prompt drying, not prolonged dampness.
4 / Fruit damage Splits, feeding marks and bruises weaken fruit tissue, particularly during humid conditions.
5 / Plant debris Fallen fruit, blooms and leaves on flooring or benches may continue releasing spores beside plants.
6 / Stem lesions Inspect tan or brown stem marks promptly, especially beside wounds, supports and declining leaves.
Likely entry sites
Good greenhouse practice already focuses on the places Botrytis prefers.
Senescent, injured and dying tissues give Botrytis an easy foothold, yet the resulting infection remains serious. Once established on a spent flower, damaged stem or softened fruit, air currents, splashing, people and equipment can carry spores onward.
Warning sites can often be seen before symptoms in a backyard greenhouse. Tomato blossom remains lodge at leaf joints and broad cucumber foliage rests against itself. Pelargoniums, fuchsias and begonias may hold wilted flowers, while strawberry petals can share a moist recess with maturing fruit. Each situation creates an opening for Botrytis, but infection is not certain.
- Inspect after cool stretches with heavy cloud. Conditions may seem unremarkable by noon even though blooms and foliage stayed damp from dusk until late morning.
- Tend dry, healthy crops before anything suspect. Leave questionable sections until last, then wash hands and clean equipment before returning to unaffected plants.
- Keep bench tops and floors exposed. Petals, leaves and spoilt fruit stand out quickly against tidy, unobstructed surfaces.
Key window / dusk until foliage dries
Relative humidity is useful; leaf wetness is more revealing.
A humidity reading is a warning signal rather than a diagnosis. As temperatures drop, flowers, stems and leaves may reach dew point and remain damp. Moisture beading on the glazing therefore signals more than an appearance or maintenance issue: similar conditions may exist on chilled plant tissue and should be investigated and corrected.
Towards evening
At sundown
Overnight
Around dawn
Following sunrise
Irrigate while drying time remains
Apply water early enough for splashes and moist surfaces to dry ahead of the evening temperature drop. Direct it to roots rather than flowers or leaves.
Cooling begins
Glass, metal and foliage shed heat quickly; crowded growth and sheltered corners are often first to lose warmth and air exchange.
Condensation becomes more likely
Warm, moisture-laden air encounters colder surfaces. Foliage may dampen without visible drops or unusually high daytime meter readings.
Shorten the wet interval
Match the response to conditions and available equipment: modest heat, deliberate venting and low-speed circulation can work together to dry foliage.
Reassess the crop
Look between plants, not just at glazing. Continued dampness calls for a change to irrigation timing, spacing, circulation or overall climate settings.
No fixed duration of leaf wetness forecasts disease reliably for every plant, cultivar and temperature. Treat the overnight interval as something to observe, aiming to shorten cool, damp conditions around vulnerable tissues. Cornell guidance likewise identifies keeping condensation off plant surfaces as a key Botrytis measure.
Simple-to-operate roof vents make day-to-day humidity control easier. The Classic aluminium greenhouse includes roof windows, while automatic openers may improve routine responsiveness. Neither feature removes the need to watch the weather and inspect plants.
Spacing
Plan functional air passages, not merely visual gaps.
Position containers and grow bags so leaves do not stay interlocked. Support cucumbers and tomatoes before they sprawl, take off diseased or ground-level leaves, and thin the layout before flowering plants close into a wall. A small fan can disperse humid pockets if its gentle flow passes through foliage rather than blasting one plant continuously.
Watering
Keep irrigation low and preserve the dry evening window.
Foliage stays drier with drip lines, low-level watering or a can aimed gently at the container edge. Morning irrigation lets stray droplets evaporate; late applications may prolong wetness overnight. Adjust volume to plant demand and conditions—a cloudy, damp week requires a different schedule from bright summer heat.
Pruning
Prune hygienically while foliage is dry.
Whenever practical, prune, remove side shoots and harvest only after foliage dries, using sharp, clean tools. Keep wounds as small as possible. Clear yellow leaves and spent flowers before major cutting. Where several crop groups are present, begin with the healthiest and visit suspicious plants last.
Season
Anticipate risk whenever light and natural drying weaken.
Australian risk periods depend on region: cool, cloudy spells can matter in temperate areas, while humid or wet-season conditions may dominate farther north. A greenhouse may look settled even after crops have cooled at sunset and remained damp for hours. In bright summer weather, prioritise ventilation and, where required, shade. During cooler periods, balance venting, circulation and equipment-appropriate gentle heating without chilling plants.
For a climate routine planned around easy access, consider the Classic aluminium greenhouse, whose practical roof windows let door opening and gentle circulation become part of regular management.
Sanitation / control the route out
Keep contamination from travelling through the crop.
Removal is most effective when questionable debris is enclosed where you find it. Carry it directly from the affected plant to a closed waste receptacle rather than touring the greenhouse with an uncovered picking basket.
Do not leave dying blooms, diseased foliage or decayed fruit beneath benches, at the doorway or in an uncovered compost container near crops. Such material may keep shedding spores.
Where it is found→
Cut→
Contain→
Remove→
Reset
At the plant
Bring a sealable tub or bag to the affected specimen before you begin cutting.
Less handling means fewer chances for debris to brush healthy foliage.
The cut
Using a sanitised sharp blade, excise any diseased, softened or actively sporulating part.
Neat cuts are easier to observe later and minimise ragged, oversized wounds.
Containment
Transfer each piece into the container immediately and close it before moving away.
Do not shake it, place it on a bench or carry it through crops uncovered.
Disposal
Promptly remove waste through a household or council green-waste stream that local rules accept.
Keep decaying waste away from doors, windows and other vents.
Restart
Brush or wipe plant fragments from secateurs and the work area first. Next, apply an appropriate cleaner as its maker directs, and wash hands or gloves before handling unaffected plants.
Start with physical removal; residue can shield the surface from cleaners and disinfectants.
Repeat this pathway weekly rather than reserving it for outbreaks. Clear worktops, usable aisles and robust components make the growing space simpler to maintain. Explore the Classic aluminium greenhouse and plan its interior around how you cultivate, inspect, ventilate and clean.
Treatment / prevention once conditions are corrected
Products have a supporting role, never a substitute for cleanliness and drying.
Where Botrytis is active, begin by removing diseased tissue and changing the environment that favours infection. Registered fungicides or biological controls may support an integrated program aimed at protecting unaffected growth, but no application can restore tissue already rotten or destroyed.
Task A
Make cultural controls the opening response.
- Promptly clear declining flowers, diseased fruit, dead foliage and other crop debris.
- Limit surface moisture through earlier watering, managed vents, suitable gentle heat and mild circulation.
- Open compressed, humid foliage and leave more room between plants.
- Inspect adjacent specimens, the bench and the floor beneath the infection.
Task B
Match any crop-protection product to its registration and intended crop.
- Search current APVMA registrations and permits, checking the crop, target disease, protected-cropping situation, location and user restrictions.
- Obey the entire label, including rate, method, protective gear, ventilation, withholding interval and treatment limits.
- For repeat treatments, manage resistance by avoiding continual reliance on one mode of action.
- Registration for another vegetable, ornamental species or outdoor situation does not authorise use here.
Biological controls: specific, preventive and subject to registration
In selected crops and production systems, biological pesticides or antagonistic organisms may contribute to control. Results vary with formulation, product, crop, timing, temperature, infection pressure and application accuracy. They usually offer most value before disease becomes established, alongside moisture reduction and sanitation. The label “biological” does not establish suitability for every edible, ornamental or protected crop, nor permission for domestic gardeners.
Conventional fungicides: assess the need; do not default to spraying.
A registered fungicide may be warranted after professional assessment of crop value and continuing disease pressure, with resistance risk included in product choice. Botrytis commonly develops resistance problems. Avoid homemade mixtures, altered rates and automatic calendar applications without a defined risk. Serious stem lesions, repeated episodes or several infection sites call for crop-specific advice.
Australian registration requirements: Use products only under a current APVMA registration or permit and follow the full label. Verify the crop, pathogen, protected-cropping use, location and user category, then comply with rates, precautions, withholding intervals and treatment limits. State or territory controls may also apply; historic recommendations are insufficient.
When planning a new growing area, consider vent access, glazing, circulation space and working aisles together. The Classic aluminium greenhouse pairs roof ventilation with an orderly frame, helping create a workspace that is accessible, hygienic and straightforward to manage.
Recovery / verify progress
Signs of recovery are clean new growth, dependable drying after irrigation, and benches and floors no longer collecting fallen flowers, fruit or leaves.
During the coming 72 hours
Inspect the first infection site and surrounding specimens once a day, removing fresh suspicious growth immediately. Examine leaf undersides and crowded canopy interiors as well as foliage visible from the aisle.
Over the next week
Record when condensation forms and clears. If moisture often persists after daybreak, alter one factor deliberately: irrigation timing, spacing, circulation, or coordinated ventilation and warmth.
Before the next crop cycle
Select plants and cultivars that fit the available room. Set a weekly maintenance round, and finish each pruning or harvest session by clearing benches, floors and worktops.
For an orderly interior that remains easy to reach, review the Classic aluminium greenhouse. In practice, a basic routine followed consistently usually outperforms an elaborate system that is often skipped.
FAQ
Answers to frequent questions about greenhouse grey mould.
Is recovery possible for a Botrytis-affected plant?
Often, provided infection is limited, sharply defined and addressed promptly. Cut away damage with a margin, sanitise the nearby area, help foliage dry and check the plant frequently. Isolation or disposal may be safer for extensive spores, several centres or severe stem involvement. Diseased tissue itself cannot heal.
Is lowering humidity enough for prevention?
No. Drier air may help, but risk also comes from dew, lingering surface moisture, stagnant pockets, old flowers, injuries, crowded leaves and crop waste. The practical aim is to shorten cool, wet conditions on vulnerable tissue.
Should water be used to rinse grey mould away?
No. Rinsing disperses spores and keeps foliage damp longer. Enclose and remove diseased pieces carefully, then correct irrigation and climate settings. A pesticide may be used only when its registration or permit covers the crop, disease, protected setting, location and user.
Can diseased material go into a backyard compost system?
Sealed disposal through a locally accepted household or green-waste stream is safer for material with visible fungal growth or spores. Domestic compost does not always heat uniformly enough to kill plant pathogens. Keep infected waste enclosed while moving it, and never stockpile it inside or beside the greenhouse.
How can grey mould follow a cold, irrigation-free night?
When temperatures fall, glass and foliage can cool to dew point. Water vapour then settles on stems, flowers and leaves even though nobody irrigated. Inspect crowded growth next morning and rebalance irrigation timing, venting, circulation and, if the equipment allows, modest heating.
References and additional reading
Trusted material for identification and crop-level choices.
Control choices vary with the plant, production method, weather and current registration status. Australian government sources provide the regulatory checks and practical direction, while the cited university material adds detail on symptoms, moisture, sanitation and integrated management.
More from Bloomcabin: Custom greenhouses · Smart greenhouse solutions · Premium conservatories and aluminium greenhouses
- APVMA – registered chemical products and permits
- Australian Government – regulation of agricultural and veterinary chemicals
- APVMA – permit and product registration searches
- Cornell Greenhouse Horticulture – guidance on Botrytis blight
- UMass Amherst – greenhouse-crop Botrytis guidance
- UConn IPM – greenhouse Botrytis advice
- Penn State Extension – diseases affecting bedding and young plants
Before the greenhouse cools
Clear susceptible tissue ahead of dusk.
A strong evening routine is uncomplicated: finish with foliage as dry as conditions permit, air moving freely and senescent debris removed, denying grey mould an easy starting site overnight.
Classic aluminium greenhouse- 01
Gather faded flowers.
Lift out wilted blooms and loose petals before they lodge against fruit or inside leaf joints. - 02
Check humid pockets within the crop.
Check dense canopies, leaf undersides and cold glazing—not just the central path. - 03
Reopen circulation paths.
Move touching containers apart, secure loose shoots and preserve access for inspection and airflow. - 04
Remove waste in a sealed container.
Seal questionable debris where discovered, and never leave uncovered heaps within the structure or beside it.
