
Growing Broccoli in a Greenhouse
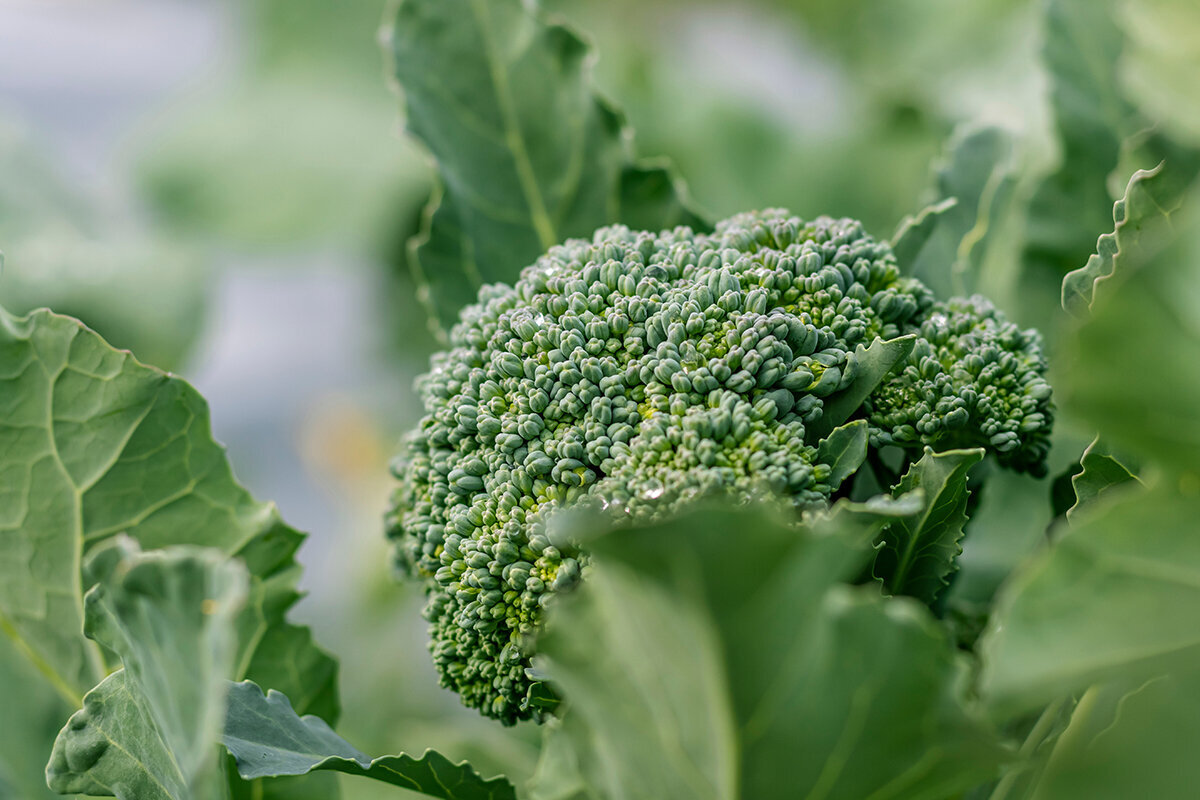
The Crown Records the Climate
Greenhouse Broccoli: From Seed to Harvest
A firm, dark-green broccoli head is never accidental. Its fine texture reveals dry spells, heat spikes, restricted roots and a harvest that came too late.
Broccoli earns its place under cover during the cooler months, as long as the greenhouse is treated as adjustable shelter rather than a heat store. Start with sturdy, compact seedlings, reserve room for their full canopy and provide a dependable escape route for humid air.
Ideal seasonCool spells in spring and autumn
Spacing50–60 cm for each plant
Preferred temperatureRoughly 18–21 °C while raising seedlings
Greatest riskWarm, humid heading
01 · Managed coolness
A greenhouse does not help broccoli by making it hotter.
The growing principle
Glazing, roof vents, doors, shade and watering are tools for moderating abrupt weather changes. Before a head develops, build a vigorous plant at an even pace rather than heat-forced, tender foliage.
As a cool-season brassica, broccoli performs best with consistent growth, ample moisture, seedlings planted at the right stage and mild conditions during heading. The greenhouse gives you several ways to manage those needs, yet it cannot turn broccoli into a heat-loving crop.
02 · Match plant form to the bed
Choose the broccoli habit that fits your covered plot.
Maturity time dominates many seed packets, but growing under cover makes other traits equally important: crown form, the footprint of the fully grown plant and whether it produces useful lateral shoots.
Compact head
Early harvest
Brief season · compact footprint
Sprouting
Repeated pickings
Small florets · extended cropping
Calabrese
Substantial central head
Broad foliage · ample room
Fast-heading forms
Choose these when the spring opportunity under cover is brief and tomatoes or cucumbers will need the bed next. Most of the crop arrives as a central head. Harvest decisively while its buds are close and firm; the amount produced later on lateral shoots depends on the variety.
Broccoli for repeated picking
Rather than concentrating growth in one large crown, sprouting broccoli supplies many modest florets across an extended period. It works well for regular, meal-sized pickings. Branching growth can become crowded, so maintain a clear passage for air and inspect it repeatedly.
Vigorous Calabrese forms
Traditional blue-green Calabrese generally develops a strong central head before producing smaller lateral shoots. Its broad foliage needs room. A summer planting can therefore be useful where heads will mature in cooler autumn conditions. Select a cultivar whose timing matches your planned harvest.
For an uncomplicated first crop under cover, select a dependable heading variety labelled for the intended season. If extended picking appeals, place several sprouting plants at one end instead of expecting every type to follow the same timetable. Retain the labels through harvest; cultivar and season details help explain unexpected maturity or crown shape.
03 · Quality starts with the seedling
Aim for youthful, robust plants, not specimens held too long.
A broccoli seedling can remain outwardly compact after its roots have occupied the entire cell. Resist holding it in a cramped pot merely to suit a later planting day. Plants that are old, stressed or tightly root-bound have a greater tendency to make undersized heads too soon, a disorder called buttoning.
Place one seed in loose propagation mix, covering it a few millimetres deep with more mix. Maintain steady moisture without saturation. Give emerging seedlings abundant light straight away, then keep them noticeably cooler. Once the first true leaf appears, restrained feeding is preferable to a rapid flush caused by excessive fertiliser.
Begin gradual hardening once each plant carries several true leaves and its roots form a stable, cohesive ball. Shelter under glass eases the transition but can disguise strain: clear days warm rapidly inside, while cloudless nights may still turn distinctly cold.
From seedling to head
01
SowClean mix; shallow cover.
02
EmergenceStrong light; gentle airflow.
03
Pot onGive roots room.
04
Harden offIncrease exposure gradually.
05
Plant outSet at final spacing and water thoroughly.
Before shoots appear, maintain consistent moisture in the mix without allowing it to become saturated. Move emerged seedlings promptly into bright light. Mild air movement builds shorter, sturdier stems and reduces the time foliage remains damp.
Pot on before roots begin circling tightly. Hold seedlings by the leaves wherever possible. Over several days, increase light, airflow and temperature variation while ensuring the small root balls do not dry out.
Readiness matters more than a fixed number of weeks. Set out firm, actively developing seedlings that have several true leaves, youthful form and roots holding the mix together. Australian timing should follow the local cool period, which differs across temperate, coastal, inland, highland and tropical districts. Choose a likely harvest window, then count backwards while considering frost exposure and conditions inside your greenhouse.
04 · Let spacing manage the microclimate
Reserve enough room for the plant’s eventual spread.
Overcrowding often begins in a bed that appears orderly on planting day. Tiny transplants sit comfortably together, but their wide blue-green foliage eventually meets. Moisture then remains near the crowns, inspection becomes awkward, and competition for sunlight, nutrients and water intensifies at the very stage when heads are forming.
For compact plants, treat 50 cm as a practical minimum in a well-aired row. Increase the gap to as much as 60 cm for vigorous cultivars, long cool-season plantings or structures where humidity clears slowly. Around 60 cm between rows is a dependable starting point. Include paths and vent areas in the layout: a seemingly generous space around young seedlings becomes valuable breathing room when the leaves reach full size.
Preserve access from either end. The layout should let you view leaf undersides, test the soil beneath its surface and remove the central head without reaching through an adjacent crown.
Plan for circulation and reach
Air entry
Unobstructed airflow
Unobstructed airflow
Crop row
Separated foliage
Separated foliage
Picking route
Firm, dry footing
Firm, dry footing
Arrange the tallest specimens away from the line connecting the door and high-level vents. Where the structure is narrow, a single roomy row accessible on both sides generally works better than two cramped beds pressed against the glazing and walkway.
Container growing is possible, but each plant needs a deep, sufficiently large container with fertile, structurally stable mix. Keep about 50 cm between plants. Containers heat up faster and dry more quickly in sun than a soil bed, so moisture needs checking more often.
05 · Run a cool, airy house
A steady pattern matters more than one thermometer reading.
Broccoli copes well with cool weather, yet its developing crown reacts to accumulated warmth and fluctuating soil moisture. Favour bright, mild days and circulating air. For propagation, 18–21 °C is a workable range. As crowns begin developing, operate the structure as coolly as the season permits. Start airing it early on bright days rather than waiting for wilted foliage.
Extended periods above roughly 20–22 °C, especially with irregular irrigation, may result in coarse, open or prematurely mature heads. A compact glasshouse can enter this range while the outdoor air still feels mild. A min-max thermometer positioned among the leaves will reveal peaks. As guidance for small greenhouses in Germany, the Bavarian Garden Academy recommends openable ventilation equal to at least one quarter of the floor area.
Pressure ↑Crop stage →
High
Suppressed
Loosening
Opening
Moderate
Irrigate
Air out
Cut
Low
Steady
Head set
Compact
A practical daily airing cycle
- Morning
- Open the door and high vents before direct sunlight turns the interior into a heat store. Check that air is moving through the crop; a narrow crack seldom exchanges enough air around dense foliage.
- Midday heat
- Apply modest shade only when sunshine and heat are exceptional. The crop needs ample light, but not overheated crowns or stalled roots. Appropriate seasonal timing and vigorous ventilation remain more effective than keeping the house dark.
- Towards evening
- Ahead of a forecast cold night, close the structure in time without trapping moisture on the foliage. Let the crop dry before darkness where possible, and avoid directing a sudden stream of cold air onto it.
- After watering
- Provide enough exchange for surplus moisture to disperse. Persistent condensation, soaked foliage and a wet path are poor substitutes for proper temperature control.
06A · Managing moisture
Maintain consistent moisture around the roots.
Cycles of drying and soaking are hard on broccoli. Throughout the period from transplanting to picking, roots require moisture, oxygen and dependable access to water. Apply enough at each irrigation to wet the soil beyond its top layer. Decide when to irrigate again by examining the soil, current weather and crop growth rather than following an inflexible weekly schedule.
Because rainfall cannot reach the crop, demand is shaped by sunshine, airing, soil texture and pot volume. Check the rooted layer with a finger or trowel instead of judging only the surface. A drip line or slow application onto the soil leaves crowns and foliage drier than routine overhead spraying. Watering in the morning also allows humidity to clear before night.
06B · Supplying nutrients
Provide nutrition evenly rather than in bursts.
Although broccoli has a high nutrient demand, extra nitrogen cannot compensate for poor roots, insufficient light, erratic moisture or unsuitable temperatures. Where practical, assess the soil before planting and prepare a mature bed with stable structure. Well-rotted compost supports moisture retention and tilth; avoid placing fresh manure against the crop. Base the feeding plan on what the soil already contains, not on a universal maximum.Let soil results guide feeding Base later applications on test findings and observed growth.
A measured application after establishment may be useful. Following removal of the central crown, restrained feeding can assist lateral shoots when the remaining plant is vigorous. Avoid abrupt, rich applications: excess nitrogen combined with unusually fast growth and generous spacing may favour hollow stems. Do not add trace elements speculatively; investigate first.
The moisture and feeding plans converge as the crown forms. Plants that have not repeatedly stopped through drought or nutrient shortage are more likely to develop an even, close-textured head.
07 · What the crown reveals
The making of a close-textured broccoli crown.
A broccoli crown is a cluster of flower buds that have not yet developed. Its eventual standard is determined well before it appears ready. First, the crop must build ample foliage and roots able to absorb nutrients and moisture without interruption. When cultivar, conditions and growth stage align, the central growing tip transforms and its buds assemble into a compact crown.
The crown may reveal a fault only near picking time, although the underlying setback happened earlier. Tiny heads on undersized plants often follow restricted pots, transplant disturbance, drought, cold or heat. Widely separated coarse buds and yellow blossom usually point to a later disruption, such as warmth, inconsistent moisture or waiting too long to harvest.
Ahead of initiationBuild foliage promptly without pushing it excessively. Give young plants root aeration, space, stable moisture and measured nutrition.
As the crown beginsKeep greenhouse conditions notably stable. Prevent sudden heat, drying of the soil and sharp shifts in fertiliser strength.
Approaching maturityPreserve circulation beside the crown. Inspect frequently and cut while every bud remains closed, rather than sacrificing quality for a little more diameter.
08 · Work backwards from the symptom
Crown faults reveal where growing conditions fell out of balance.
One standard treatment will not suit every faulty head. Assess the visible sign alongside root health, plant maturity, watering, temperature history and air movement. In many cases, the triggering setback occurred weeks before symptoms appeared.
Premature crown
Buttoning
Undersized plant.
Enlarged buds
Open-textured crown
Hot or dry conditions.
Yellowing buds
Bloom opening
Cut immediately.
Cavity in stem
Growth disruption
Review feeding.
Undersized premature crown
Buttoning
What probably happened: Something interrupted the seedling’s development, such as prolonged confinement in a pot, thermal stress, lack of water, disrupted nutrition or strain after transplanting. The plant initiated its crown before producing sufficient foliage.
Lowest-impact response: Take the small head if it is usable. Improve the next planting by reviewing propagation timing, root condition and transplant date; a large dose of fertiliser will not return the existing specimen to vegetative growth.
Separated or enlarged buds
Open bead structure
What probably happened: Likely factors include hot conditions during crown development, humid air, irregular irrigation, a rapid flush of growth or late picking. The individual buds become prominent as the crown loses its fine, close texture.
Lowest-impact response: Begin airing the house sooner on bright days, stabilise moisture around the roots and avoid abrupt nutrient applications. Where the crown has reached maturity, remove it without delay, ahead of flowering.
Yellow tint or visible flowers
Crown beginning to open
What probably happened: The crop matured more quickly than it was inspected and picked. Warm conditions can turn short, firm green buds into elongated, opening ones in little time. This usually reflects harvest timing and does not by itself indicate disease.
Lowest-impact response: Remove the crown at once. Its stem, flowers and buds are still edible, although appearance and texture are preferable before blooming. Continue with daily checks while conditions remain warm.
Stem cavities or brown areas
Internal stress
What probably happened: Several influences may combine: fluctuating moisture, unusually rapid growth, excessive nutrients, broad spacing, cultivar sensitivity or an imbalance of trace nutrients. A hollow section inside a firm stem is generally a quality defect rather than automatic evidence of danger. Generously discard any soft, rotten or discoloured tissue.
Lowest-impact response: Test the bed soil or potting medium before guessing at individual trace elements. Bring watering and feeding back to a consistent pattern. During harvest, discard rotten or damaged portions and clean the cutting equipment.
09 · A quiet inspection routine
Early signs of aphids, caterpillars and excess moisture can be subtle.
Cover excludes some harsh weather, but pests can still enter. Moth and cabbage white larvae arrive through openings and shelter in folded leaves beside the crown. Colonies of aphids favour tender tips, while flea beetles pepper young foliage with feeding holes. Inspect no less than twice each week, increasing the frequency in warm conditions and while crowns develop.
Start with the most targeted, gentle response. Hand-pick isolated caterpillars, wipe off small aphid groups or dislodge them from sturdy foliage with a directed jet of water. Remove heavily infested parts and spent brassica material. Insect netting may help if it still permits adequate ventilation. If a pesticide is needed, confirm through APVMA’s PubCRIS or permits search that the exact product and use are authorised, then follow the label, withholding period and relevant state or territory rules.
Sound humidity control also lowers disease pressure. Preserve the planned gaps, direct irrigation onto the soil and clear away dead foliage. Cool outdoor conditions are not a reason to seal the structure immediately after watering.
A five-minute crop check
- Inspect beneath foliage for aphids, caterpillars and eggs.+
- Ease the foliage apart, confirming that it is dry and that moving air reaches the plant’s centre.+
- Test the soil a few centimetres down before irrigating; dryness at the surface does not establish that the root zone is dry.+
- Look over forming crowns for yellow areas, caterpillar frass and separating buds.+
- Remove damaged foliage from the structure rather than dropping it beneath propagation benches or along the walkway.+
Leave a break of several years before growing broccoli or another brassica in the same part of the bed. Extending the rotation markedly lowers pressure from overwintering pests and soil-borne disease. Apply this approach to permanent beds under cover as well as outdoor vegetable plots.
Where to make the harvest cut
Central crown
Closed green buds
Closed green buds
Knife position
Clear of lower axils
Clear of lower axils
Lower leaf joints
Keep undamaged
Keep undamaged
Lateral shoots
Preserve buds in axils
Preserve buds in axils
How to cut: Once the central crown is well sized but every bud remains firmly shut, it is ready. In the morning, use a clean, keen-edged knife and include a useful length of stalk. Cut clear of the strong lower leaf joints, keeping the rooted plant healthy and in position.
Once the centre is removed: Smaller lateral shoots often emerge from the retained leaf axils on Calabrese and sprouting cultivars. Maintain regular irrigation. Where consistent with the soil and earlier feeding programme, a restrained nutrient application may assist this follow-up crop.
10 · The clean cut
Take the central crown and retain the plant for lateral shoots.
Do not wait for supermarket size if the surface is already becoming looser. Closed buds, a firm structure and tenderness matter more than the widest possible diameter. Once individual buds begin to stretch or show yellow, the best window has passed. In warm weather, check daily because compact green heads can move to open flowers very quickly.
Tender lateral shoots make excellent covered-crop pickings and are naturally sized for the kitchen. Following removal of the centre, keep moisture consistent, preserve circulation and take off only unhealthy foliage. Harvest each floret while the buds remain close together.
Lower the crop’s temperature promptly after cutting rather than leaving it in a warm room. Refrigerate it in surroundings that are humid without being soaking wet. Eat it soon, because warmth quickly diminishes both tenderness and freshness of flavour.
If you want productive cool-season beds, uncluttered access and effective ventilation overhead, consider the Classic Aluminium Greenhouse from Bloomcabin. The adaptable, neatly planned interior supports successive plantings of broccoli, early seedlings and leafy vegetables.
11 · Seasonal windows in Australia
Time head formation for your reliably cool growing period.
Cool coastal and highland areas
Here, spring often remains broccoli-friendly for longer, although seedling growth may slow during darker weeks. An early crop benefits from protected establishment, but frost protection should still be available for very early planting. Autumn crops also commonly perform well as temperatures decline gradually.
Temperate southern regions
Use the two shoulder seasons. An early planting may release the bed before tomatoes or capsicums are needed. Autumn growing is often particularly reliable: sow in late summer, plant during autumn and schedule head formation for cool weather. Even in spring, open the greenhouse early because sunshine can build heat quickly under glass.
Warm inland, subtropical and urban gardens
Concentrate greenhouse production in the coolest months and keep crown development away from peak summer. In warmer districts and built-up locations, the temperature under cover can become excessive even on a sunny winter or spring day. Sow at a time that places the critical development stage in cooler nights and shorter daylight periods.
Work back from the preferred picking period. Add propagation time to the cultivar’s stated maturity period after planting. A Classic Aluminium Greenhouse is easier to schedule when you know its sun exposure and can readily reach its door and roof vents. Automatic openers may be useful where nobody is available to begin morning ventilation by hand.
12 · Questions gardeners often ask
A measured adjustment is usually the soundest response.
Timely, modest changes suit broccoli better than drastic intervention. Before reaching for fertiliser, shade cloth or pest treatment, determine whether the real problem is accumulated heat, inconsistent irrigation, cramped roots, crowding or delayed picking.
Will broccoli grow under unheated cover?+
Yes. During Australia’s cooler planting periods, an unheated structure offers useful shelter. Its role is to moderate wind, driving rain and variable conditions, not to create tropical warmth. It may still freeze during extended cold spells, so tender plants can need another protective layer. Ventilation remains important on bright days even if outdoor temperatures feel mild.
What quantity fits inside a compact greenhouse?+
Base the calculation on full-grown plants, not tiny transplants. With gaps of 50–60 cm, a row accommodates only a small number of vigorous specimens. It can remain highly productive if lateral shoots are picked after the central crown. Temporarily use edges for propagation trays, lettuce or short herbs only where they leave the circulation route unobstructed.
What causes undersized broccoli crowns?+
A naturally compact cultivar is one possibility. Others include seedlings held too long or placed under stress, inadequate water, unsuitable heat or cold, and disrupted nutrient uptake. An abnormally early miniature crown on an undersized plant often indicates buttoning. It remains edible; use more youthful transplants and steadier seasonal timing for the following crop.
Does greenhouse broccoli require shade?+
Temporary shading may take the edge off severe solar heat, but sound timing and ventilation still do the main work. Broccoli requires strong light to produce foliage and a crown. Begin by airing through the door and roof openings and maintaining reliable soil moisture. Add shade only if heat around the crop continues to rise too quickly.
Is container-grown broccoli practical?+
Yes, when every specimen receives a roomy, deep pot containing fertile growing medium that drains freely. Keep roughly 50 cm between plants. Pots have less stored moisture than beds and heat rapidly in sunshine, so inspect them frequently. Irrigate thoroughly while preventing persistent saturation.
Sources & further reading
References supporting this crop plan.
Continue with Bloomcabin: Made-to-measure aluminium greenhouse · Bloomcabin smart greenhouse range · Explore planning a greenhouse for long-term use
- Bavarian Garden Academy – Designing and operating compact greenhouses
- Bavarian Garden Academy – Propagating seedlings or purchasing young plants
- German Federal Plant Variety Office – Vegetable testing and value-assessment guidance
- University of Minnesota Extension – Home-garden broccoli production
- University of Minnesota Extension – Irrigation approaches for vegetable crops
- University of Maryland Extension – Raising broccoli in a home garden
- University of Massachusetts Extension – Physiological disorders and crown quality in broccoli
Plan around the crown
Make the quieter gardening months productive.
A well-designed greenhouse has work beyond sheltering tomatoes that prefer warmth. It can give cool-weather crops bright, carefully moderated protection. Allocate a deliberate broccoli row, allow its mature foliage to spread, preserve a clear route for picking and begin ventilation before moisture and warmth accumulate inside the crown.
Plan a Classic Aluminium Greenhouse around a personal cool-season sequence of broccoli, lettuce, brassica transplants and early spring herbs. Coordinate dimensions, high vents and walkways so climate control supports routine care. View the Classic Aluminium Greenhouse then compare the configurations available for a Classic Aluminium Greenhouse to create orderly beds that remain practical over many seasons.
Classic Aluminium GreenhouseDecision 01 Choose the cool picking period before anything else.
Decision 02 Lay out beds at full-grown plant spacing.
Decision 03 Preserve an airy, dry route for checking plants and picking.
