
Growing Onions in a Greenhouse
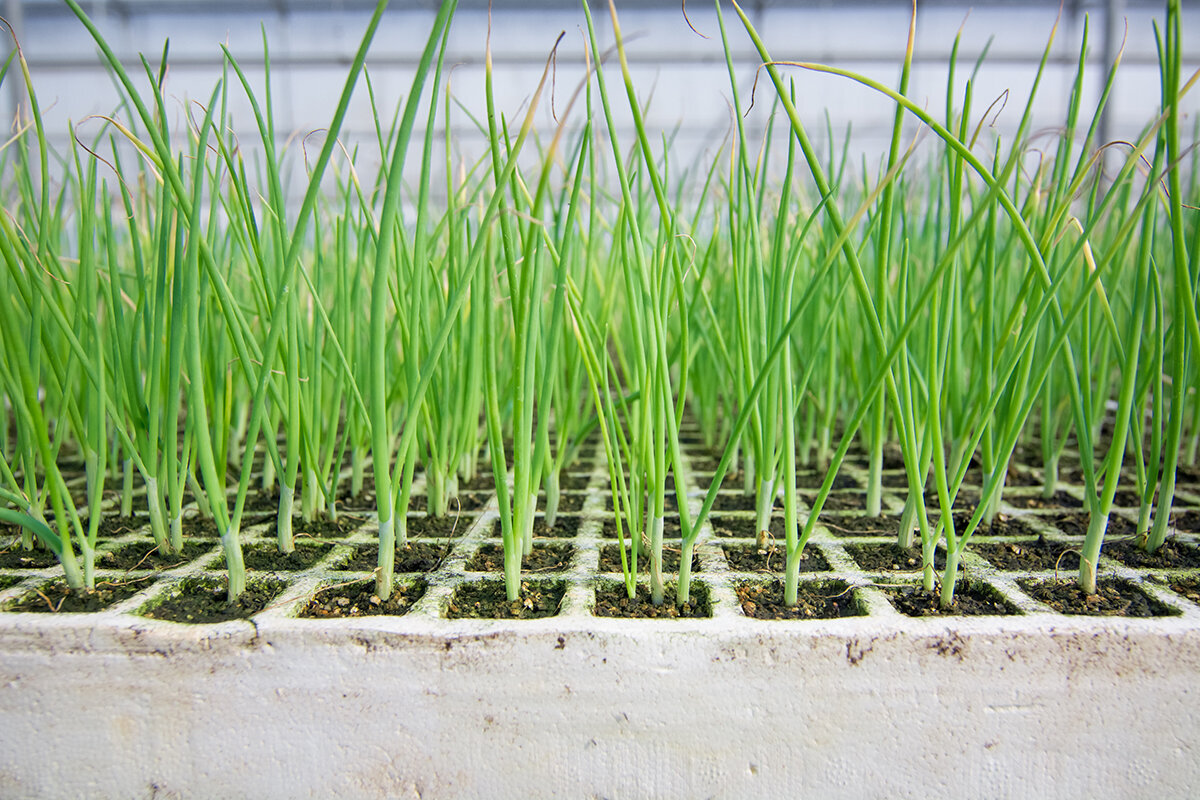
Why grow onions under cover?
Shelter without simulating summer
The bulb develops from successive leaf bases well before any swelling can be seen. The plant must first produce ample healthy foliage before reaching the daylight duration that activates its cultivar-specific response.
Changes created by glazing
Protected space buffers prolonged cold rain, saturated soil, crusted seedbeds and sudden weather shifts. Seedlings are easier to establish, prepared ground can be worked sooner, and lifted bulbs gain shelter while curing. Daily control of irrigation, airflow and cleanliness particularly benefits shallow-rooted onions, which dislike both drought and trapped warmth with moisture.
What glass cannot change
Photoperiod largely directs bulb formation. A long-day onion will still need long days beneath glass, while a short-day type can bulb early in unsuitable summer light and stay small. Normal home crops do not need added lighting. A safer choice is a cultivar recommended for the relevant Australian latitude or district.
Putting the space to work
In many home gardens, the cooler part of the year is the most useful period for greenhouse onions. Sow a cultivar suited to the district or set out sturdy seedlings and sound sets once the soil is workable. They may remain in an airy side bed until harvest. If tomatoes or cucumbers later occupy a hot, crowded house, preserve light and airflow for the onions and separate their irrigation requirements.
With a thoughtfully arranged Classic aluminium greenhouse this routine is easy to manage. Keep trays in a bright, sheltered position at first; later, low accessible beds support upright leaves, irrigation aimed at the soil and an uncluttered route for tending the crop.
Choosing planting stock
Seed, sets or seedlings?
All three approaches can produce onions. Each has a different timetable, offers a different breadth of varieties and makes particular demands on greenhouse space.
For choice and control
Starting with seed offers the broadest control over colour, shape, maturity, storage performance and response to daylight. This route is especially useful when local suitability is a priority. Sow into a hygienic, finely textured mix with good drainage. Cell trays or compact pressed blocks encourage consistency and keep weeds from competing early.
Seed needs planning, but under cover it can establish a healthy, even crop before the main garden season.
For speed and an easy start
Sets are immature bulbs produced in advance. Planted at the suitable local time, they simplify establishment and usually mature sooner than a seed-raised crop. Select dry, solid specimens without blemishes. Anything soft, marked or mouldy could carry disease, so discard it rather than planting or storing it.
Sets suit growers who value a fast, uncomplicated start over extensive cultivar choice.
For an even early crop
Transplants raised at home or bought ready to plant reduce the time required in the permanent bed. They offer purposeful cultivar selection with rapid establishment, making efficient use of limited greenhouse space. Choose upright, fresh specimens with compact, healthy root systems, and reject any that look soft, decayed or badly stressed.
For onions destined for household storage, transplants make measured spacing easier and establish a useful early lead.
Bloomcabin recommendation. If colour, keeping ability or cultivar choice leads your decision, sow seed. Transplants offer predictable establishment and uniform rows. Sound sets usually make the first season under cover simpler, although correct photoperiod selection remains essential.
Light sets the schedule
Choose onions by their day-length response
Bulbing is timed quietly by daylight. Protection comes from the greenhouse, but inherited cultivar traits decide when the thickening leaf bases develop into a recognisable onion.
Propagation and planting
Build leaves first, then give bulbs room
Place seed close to the surface of a clean, finely graded propagation medium that drains freely. Maintain steady moisture through germination without saturating it. After emergence, favour strong light and cool air. Use a greenhouse bench only if seedlings are protected overnight and vents are managed on sunny days; otherwise start them at a bright indoor spot.
Once up, seedlings need adequate root space, alone or in small groups. Warmth combined with low light makes weak, elongated foliage and loses the benefit of an early compact start. Keep root balls moist rather than dripping before planting. Harden plants off progressively, taking care not to injure roots or leaf bases.
Plant the permanent bed early enough for ample growth before that cultivar begins forming bulbs. Timing varies with district, greenhouse design and prevailing weather. Wait until soil is workable and excess water escapes readily. An early start adds development time, but also calls for prompt venting in sunshine and contingency planning for sudden severe frosts.
On compact blocks, a Classic aluminium greenhouse can keep a small onion project organised on a compact block. Set adequately deep trays on secure benches, then move sturdy seedlings to prepared ground. Storage onions should not spend their full cycle constrained in pots that are too small.
Anatomy beneath the skin
An onion bulb is not a root
Thickened leaf bases form the bulb around a compressed basal plate. The fine root system begins below that plate. Because of this arrangement, burying plants deeply, mounding soil high, compaction or persistently wet ground can prevent bulbs from developing cleanly.
Transplants should sit at much the same depth as in their trays; cover only a little of the pale junction beneath the leaves. Insert sets close to the surface, with their tips showing or just under soil. As each bulb expands, keep its shoulder near ground level so water drains and evaporates quickly. Every healthy leaf contributes to eventual storage capacity.
Make the bed loose, level and reliably drained. Well-matured compost incorporated previously is preferable to a fresh nitrogen-rich feed. Deal with compacted patches and large clods, but avoid needless deep cultivation. Where vegetables return to the same covered soil, analysis of a sample provides a sounder basis for nutrition than routine top-ups.
Treat the bed as a workspace
Plan spacing, moisture, feeding and ventilation
About 25 cm between rows provides a practical baseline for bulb onions. Within each row, 7 to 10 cm suits medium keepers; choose 10 to 12 cm for bigger bulbs or where humidity tends to linger. Packing in more plants does not guarantee sounder stored onions, because crowded foliage dries slowly and inspection becomes difficult. Reserve a walkway to prevent foot traffic compacting the shallow rooting layer.
Because onion roots work mostly near the surface, they suffer from repeated drying and saturation. Apply thorough soil-level water through establishment, foliage growth and bulb expansion. Test moisture 2 to 3 cm down, not just at the dry surface. Drip lines keep foliage dry under cover. Ease watering back gradually when bulbs mature and necks soften naturally.
Diagnosing a reluctant onion crop
Identify the underlying cause before intervening
Good foliage with undersized bulbs
Either swelling started while the plant was undersized, or establishment came too late. Investigate planting time and the cultivar’s daylight response before anything else. Fertiliser added near maturity cannot repair a photoperiod mismatch.
Broad necks and poor keeping quality
Necks can remain wet and slow to seal after heavy late nitrogen, continued irrigation during ripening, overcrowding or lifting too soon. Withdraw feed and reduce moisture at the proper stage, then finish curing where air circulates freely.
Young plants yellowing or wilting
Larvae of onion fly can tunnel through tissue around the leaf base, and injured plants may pull free with little resistance. Take out suspect specimens and examine nearby onions. Because adults can enter through ventilation openings and doors, the structure does not provide complete exclusion.
Leaf spotting, collapse or grey rot
Still, humid conditions, splashed or wet leaves and crowding favour fungal problems. If plants touch, thin or widen the stand; maintain ventilation and direct irrigation onto the earth. Dispose of heavily diseased specimens. Rotate the bed so onions and related Allium crops are not returned there every season.
Cover alone does not prevent disease. Its real advantage is visibility: you can spot condensation, congestion and fading foliage promptly. Generous door openings, roof ventilation and an efficient floor plan therefore deserve attention when choosing a Classic aluminium greenhouse.
Natural neck fall, lifting and curing
Wait for dry, papery maturity
Good storage begins while onions are still growing. Let many necks soften, topple and start drying naturally before harvest. Never twist or fold healthy green leaves to force the process. Artificial collapse differs from true maturity and may wound bulbs, making successful curing harder.
Choose dry weather for lifting if you can. Work a garden fork beneath the bulbs, shake away loose earth gently and keep skins and necks intact. Bulbs selected for keeping should remain unwashed.
Arrange the crop one layer deep on slats or mesh whenever space permits. Avoid closed plastic containers and do not pile bulbs in a humid greenhouse corner. An unoccupied greenhouse is suitable for curing only when airflow is excellent around the clock and direct, intense sunlight cannot reach the onions.
Use mild-flavoured onions earlier. Cultivars bred for keeping generally remain sound for longer, but only when bulbs are uninjured and both outer skins and necks have dried completely.
After drying
Only checked onions enter storage
After curing, inspect and grade every bulb. If trimming is necessary, leave several centimetres of dry foliage and preserve the protective skins. Store sound onions somewhere dark, cool, dry and ventilated, using nets, shallow ventilated boxes or slatted racks. Recheck them throughout autumn and winter; remove any damaged, soft or sprouting bulb promptly and use it first.
Choose a stable, dry location away from potatoes rather than a damp area with large temperature swings. Although a greenhouse can cure onions effectively, it may fail as winter storage. Look for cool air, low humidity and protection from freezing; a suitable cellar, protected garage or ventilated utility space may perform more reliably.
Choose for storage Unbruised, firm bulbs whose necks are closed and coverings are dry.
Prioritise for use Use bulbs that are soft, split, nicked, thick-necked or not fully dry.
Never do this Never put away damp whole bulbs or seal them in plastic bags where air cannot circulate.
Season close Clear away roots and all plant debris, then clean the bed. If disease occurred, move future onion and other Allium plantings to a different growing area.
Common questions
Practical answers for onions under cover
Is a greenhouse suitable for the whole onion crop?
Yes, if the structure contains a deep enough bed of loose, freely draining soil and supplies strong direct light plus reliable airflow. Roof cover is not the limiting issue; cultivar response to local daylight is. In hot periods, manage excess temperature and stagnant humidity, and keep irrigation separate from crops that demand more water.
Can extra lighting make all onion cultivars form bulbs reliably?
For a typical backyard crop, this is not a practical approach. Although the length of daylight initiates swelling, extending illumination mechanically cannot make a poorly matched cultivar suitable. Lights may assist compact seedling production. Beyond propagation, sound results depend much more on clean glazing, an open sunny position and correct regional cultivar selection.
Why is there abundant foliage but little bulb growth under cover?
Common causes include the wrong day-length type, a late start or insufficient plant size when the critical day length arrives. Tight spacing, weak light, early leaf loss and water stress during active growth also limit size. Check these points before applying heavy late fertiliser.
How often should onions under cover be watered?
Let conditions, not the calendar, decide: assess soil texture and moisture, weather and the crop’s stage. From establishment through bulb expansion, keep the rooting layer consistently moist without saturation. Feel the soil 2 to 3 cm below the top. A deep morning soak directed at the ground is preferable to frequent light sprinkling over leaves.
Does folding the leaves make onions mature sooner?
No. Wait for necks to lose firmness and tops to lie down naturally. Creasing green foliage neither guarantees earlier storage readiness nor avoids injury. Lift when most of the stand has matured by itself, then complete curing in a sheltered, shaded place with generous airflow.
References and suggested resources
Background horticultural material
Continue with Bloomcabin: Classic aluminium greenhouse · Custom-sized aluminium greenhouse · Premium aluminium greenhouses for Australian backyards
- LWG Bavaria – an organic kitchen-garden guide
- Planting and sowing calendar – Bavarian Garden Academy
- North Rhine-Westphalia Chamber of Agriculture – onion fly affecting bulb onions
- Commercial onion cultivation – Hortipendium
- Organic onion production – FiBL, Bioland, KÖN and Bio Austria
- FiBL guide to organic onion cultivation
- LWG Bavaria – advice on crop health and natural ripening
- Onion timing and row spacing – Bavarian Garden Academy
