
How Level Does a Garden Shed Base Need to Be?
Garden shed planning
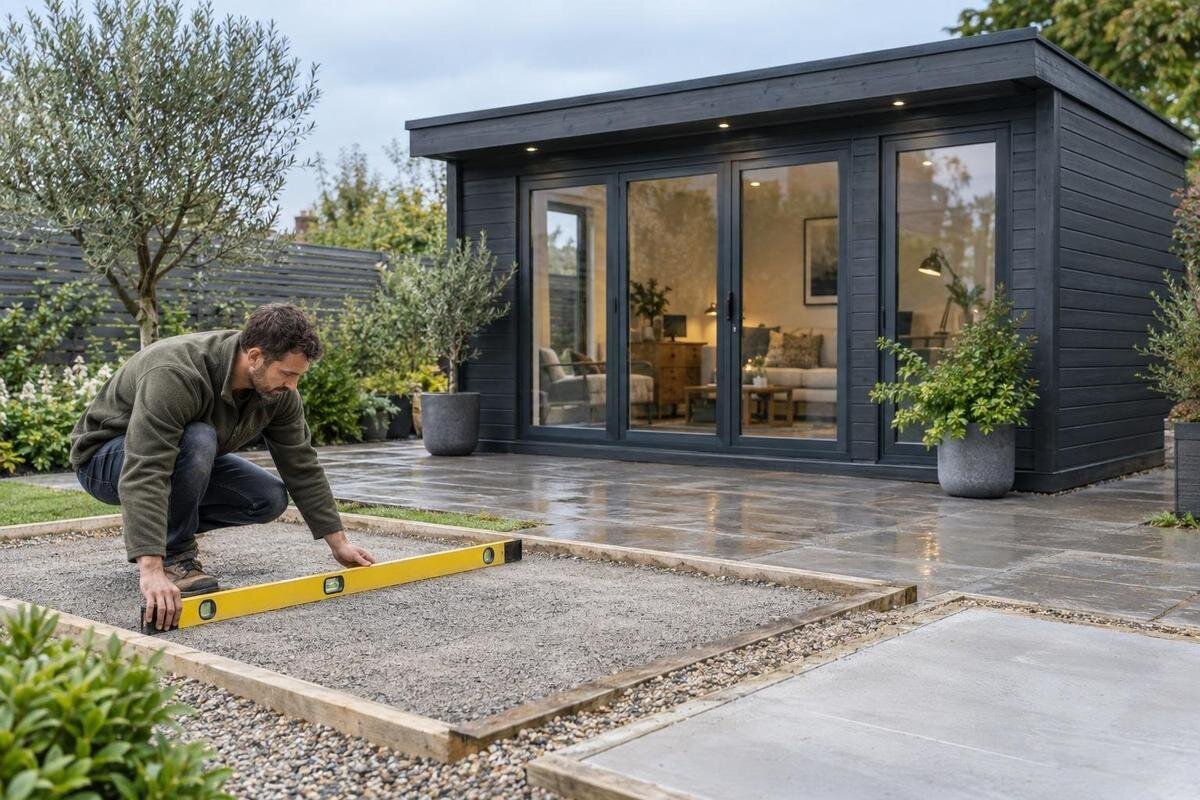
Before ordering a garden shed or booking groundwork, it helps to answer one question early: how level does the base need to be? The reliable answer is the tolerance in the installation instructions for the exact model. There is no single millimetre allowance that applies safely to every shed and base type. In general, the finished support should be level and even across the full footprint, and remain stable. This guide explains the difference between those checks, how to assess the site and base, and what to confirm before ordering or assembly.

How level, flat and square differ
Level describes whether the base is horizontal from side to side and end to end. Flat describes whether its supporting surface is even, without a hump, hollow or abrupt change. The terms are often used together, but they are not interchangeable: a uniformly sloping surface may be flat without being level, while a base can read level at its ends and still dip in the middle. A shed may also need a square base layout, with corners set out as intended. Check each requirement in the installation instructions rather than treating one reading as proof that everything is right.
The relevant reference is the finished base across the shed's full footprint, or at every support line or point specified by the maker. A nearby path, fence or patch of lawn is not a reliable guide to that plane. Corner readings alone can miss a ridge or hollow between them, and a surface that looks even from the gate may still rise or fall over its length. Instructions may use words such as level, flat, even and square without defining them in detail. If a diagram or term is unclear, ask what needs to be measured before the groundworks begin. It is also worth confirming whether the stated footprint means the outer edge of the base, the area beneath the floor, or a pattern of designated supports. Marking the correct reference area prevents a well-made but wrongly sized base.
Why levelness matters during assembly
A shed is assembled to a particular layout, so an uneven base can make parts harder to align as intended. The frame may sit at different heights, and joints, panels or a door opening may not meet neatly. A door can then be difficult to open or close, even if the components themselves are correctly assembled. The exact effect depends on the shed's design, which is why its instructions matter. A level base is not a cosmetic preference: it gives the installer the reference surface the assembly is designed to use.
Levelness is only one part of a sound foundation. A surface can be horizontal on the day it is checked but still be unsuitable if it moves, settles or does not support the shed as specified. Conversely, a stable base can still fail the levelness requirement. Do not try to compensate for a poor fit by forcing parts together or relying on fasteners to pull a frame into alignment. If anything appears out of line during assembly, stop and compare the base and the installation steps before continuing. Check whether the issue occurs in the same place as a high or low reading on the base. This can help distinguish a site-preparation question from an assembly step that needs clarification, without assuming that either is the cause.
Use the model's stated tolerance
The permitted variation, if one is given, belongs to the instructions for the particular shed. It can depend on the design and the way the base is meant to support it, so a rule of thumb from another product may not apply. Look for details under headings such as base preparation, foundation or before assembly. If the instructions say only that the base must be level, do not turn that wording into a guessed millimetre allowance. A visible gap or a reading that seems small is not enough to decide whether the base is acceptable.
When considering the Verdana 1 garden house, use installation information for that exact model rather than its name or an image as a guide to tolerances. Before starting the base, ask the supplier or installer what variation is allowed, where it should be measured and which points need support. If there is no clear answer in the documents, request clarification before the groundworks are finished. Knowing the requirement early is more useful than discovering a mismatch when the shed is ready to be assembled. Ask for the answer in writing, together with the relevant plan or diagram, so it can be shared with the person preparing the site. This reduces the risk that a verbal description of “level” is interpreted differently by different people.
Measure across the full shed footprint
Use the model's own plan to establish the footprint and the locations where the base is meant to support it. Do not estimate dimensions from a product photo, or assume that a similar-looking shed uses the same layout. Mark out the proposed area and check the ground across its length and width, not just along one edge. Include the middle and any specified support lines or points. This gives you a clearer picture of both an overall fall and local high or low spots that a single measurement could miss.
A long straightedge with a spirit level, or a laser level, can help reveal changes across the marked area; the tools show what is there, not whether it meets the model's tolerance. For a listing such as the Verdana 2 garden house, refer to its own supplied plan and requirements rather than using another model's measurements. If you are unsure how to take a reading or interpret the results, ask the installer to check the site before the base is built. Take readings in both directions and record their location on a simple sketch of the footprint. Repeating a reading after moving the tool can help identify whether an apparent difference is a local feature or a result of tool placement.

Keep surface drainage separate from base level
The shed's support surface and the way water moves around the site are related concerns, but they are not the same instruction. Do not add a slope across the base as a shortcut for drainage unless the model's directions specifically call for it. A base that is deliberately tilted may not meet the assembly requirements. At the same time, a level base does not by itself resolve water collecting beside it or flowing towards the proposed position. Consider both questions before the groundworks are complete.
Check where rainwater naturally runs and whether the finished site could leave water standing near the shed. The relevant drainage approach depends on the location and base design, so avoid assuming that raising, cutting or grading the ground is always the answer. If water flow needs more than a simple site adjustment, discuss it with a qualified installer or drainage professional. For a model such as the Durano spacious garden house, use its own base guidance and do not infer drainage or foundation requirements from its name or pictures. Consider what may change after heavy rain, including runoff from nearby roofs, paved areas or higher ground. Observing the proposed location in wet weather, where practical, can reveal conditions that are not obvious when the soil is dry.
Match the base to the shed's requirements
Base selection is part of choosing a shed, not a detail to leave until the product arrives. Before committing to a model, check its stated footprint, how its floor or frame is supported, and whether the instructions identify particular support points or an anchoring arrangement. Different designs may ask for different preparation, even when their external appearance seems similar. Confirm that the base you have in mind is accepted for the chosen shed and can be made level to its stated tolerance.
When comparing a product such as Veltor 1, look for the installation details for that exact listing and check how it defines the base dimensions. Ask whether the measurements refer to the supporting area, the floor or another part of the shed, and whether the finished base needs to extend beyond a stated outline. Do not use a model name or category image to fill in missing dimensions. If the requirements are not available before purchase, ask the seller how to obtain them so you can plan the groundwork accurately. Include access for measuring, constructing and assembling the shed when considering the position. Access does not alter the levelness requirement, but it can affect whether the planned base can be prepared and checked properly before installation day.
Prepare the ground beneath the base
A base can be level when first completed and still change if the ground beneath it is poorly prepared or moves. The right preparation depends on the site and the base system, so a level reading alone cannot confirm that the ground is ready. Make sure the person doing the groundwork knows the exact shed model and has its instructions. They can assess the proposed position, the condition of the ground and the support the base needs, rather than relying on a generic method for every garden shed.
Clear the planned area of loose debris and keep the marked footprint available for checks as the work progresses; the more substantial ground preparation should follow the chosen base design. If you are considering the Orello 1 garden house listing, provide the installer with the matching model information rather than assuming its requirements from another shed. Agree who will confirm the finished surface and what will happen if it does not meet the stated levelness requirement. That conversation is useful before materials and labour are committed. It can also be helpful to agree when the final measurement will be taken: after the base is complete and clear, but before components or stored materials obscure the surface. A clear handover point makes it easier to identify and rectify a problem.
Inspect the finished base before assembly
Once the base is complete, check it again before the shed is assembled. Work from the same plan used to mark out the footprint, taking readings at several points around the edges and through the centre, as well as at the specified support locations. Look for debris, obvious hollows, raised areas or water pooling that could affect contact or indicate a separate site issue. Compare the results with the shed's written requirements; appearance alone cannot show whether a small variation is within tolerance.
Keep a note of the readings and any questions so the installer can respond to something specific, rather than being asked to judge from a general impression. For the Modano 1 garden house listing, for example, use the documentation for that model; a product image cannot provide measurements or prove that a base is suitable. If the base is not clearly within the stated limit, have it reviewed before assembly begins. This check is a practical pause point, not a substitute for the manufacturer's instructions. If someone else checked the base, ask which locations were measured and which tool was used. That information makes the result more useful if a second check is needed or the installer identifies a difference on arrival.
What to do if a check fails
If your readings fall outside the stated tolerance, or you cannot tell whether they do, pause before assembly. Record where the difference occurs and share the result with the supplier or installer. Ask what correction is acceptable for that shed and base arrangement. Do not assume that adding local packing, trimming a component or changing a support will be approved; a seemingly small adjustment can affect how the design is meant to sit. The appropriate remedy depends on the instructions and on the cause of the variation.
For a product such as the M Timber Garden Shed, seek advice for the exact model rather than applying a fix from a different shed. If the issue appears to come from the ground or the base construction, have the relevant professional assess it before work continues. Keep the original installation directions available when discussing a correction, and make sure the final check is repeated after any work. That avoids relying on an earlier reading that no longer describes the finished surface. A correction should address the reason for the variation as well as the measured result. For example, a local high point and a broader change across the base may need different assessment; do not assume that treating the visible spot alone resolves the underlying base issue.
Confirm responsibilities before ordering and installation
A smooth order and installation depend on having the base requirements available before work is scheduled. Ask the seller for the model-specific installation guide and base plan, and confirm who will check the site and finished surface. If a separate groundworker and shed installer are involved, give both the same documents so they are working to the same footprint and tolerance. Clarify when the base should be ready for inspection and who to contact if the readings do not meet the instructions.
For the Timber Tool Shed S listing, as with any model, treat the product name as identification rather than a technical specification. Keep the matching plan with your order and pass it to the person preparing the base; confirm that the finished measurements are for the model you actually selected. Sorting out the allowed variation before assembly makes it easier to resolve questions while the base is still being planned, rather than after the shed is waiting to go up. If the model, planned location or base approach changes, revisit the guide and measurements rather than assuming the earlier check still applies. Keeping the decision-makers aligned is especially useful where ordering, groundwork and assembly happen on different dates.
Frequently asked questions
Can a garden shed base be slightly out of level?
Only if the installation instructions for that exact shed allow the measured variation. There is no universal allowance that applies to every model. Measure across the full base or its specified support points, then ask the supplier or installer if the limit is unclear.
Is a flat base the same as a level base?
No. Flat describes an even surface without local humps or dips; level describes a horizontal surface. A base can be flat but slope, or be level at its ends while dipping in the middle. Check both where the shed instructions call for them.
How can I check a shed base?
Use the method in the installation instructions. A long straightedge with a spirit level, or a laser level, can help you check several points across the footprint, including the edges and centre. Compare the readings with the model's stated tolerance rather than guessing.
Should the shed base slope to drain water?
Do not assume that the shed's supporting surface should slope. Keep the base requirement separate from managing runoff around the site, and follow the model's instructions. If water flow or site grading is a concern, discuss it with a qualified installer.
Can I install a garden shed on a sloping block?
A sloping block does not mean the shed's finished base should also slope. The base needs to meet the model's requirements, and the best way to achieve that depends on the site and base design. Ask a qualified installer to assess the proposed position and approach.
A garden shed base needs to meet the levelness requirement for the exact model, across the full footprint or all specified support points. No general figure can replace the maker's tolerance. Check levelness and flatness separately, consider water flow around the site, and have any uncertain readings reviewed before assembly. With the model-specific instructions in hand, the groundworker and installer can work to the same base plan and resolve variations before the shed is put together.
