
Install windows yourself or hire a professional?
Planning window work in Australia
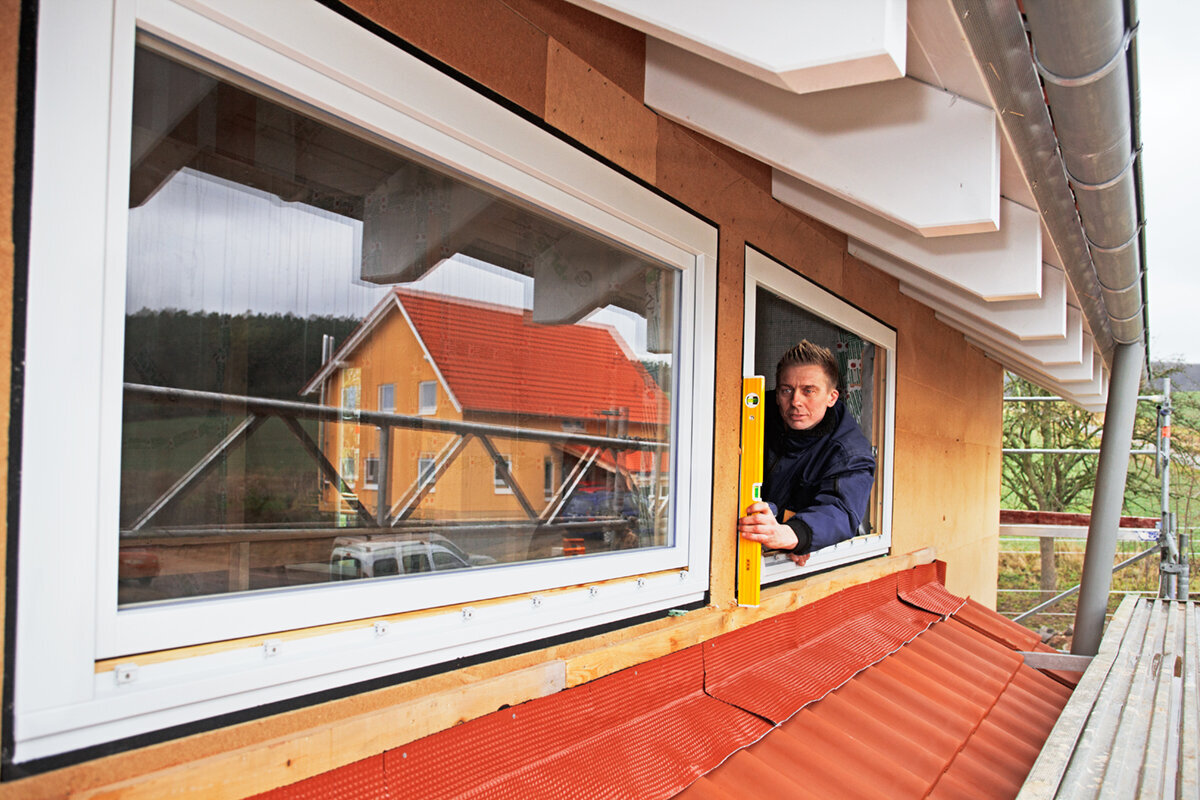
A window replacement should be planned well before anyone lifts a frame into place. Treat measurement, fixing, sealing, wall junctions, sash adjustment and repairs to the façade and internal reveal as connected parts of one job. Experienced renovators who understand comparable components, can assess the openings safely and have time for reinstatement may handle selected tasks. A trade installer is usually preferable for multiple windows, heavy units, uncertain reveals or work in an occupied home. Beyond comparing labour charges, this guide examines the interfaces and risks behind a durable result. Use it to define sensible DIY boundaries, examine quotations and resolve key questions before ordering.
Decide on the whole project
Unlike furniture, a window becomes part of the building envelope. Its installation connects the outer wall, room, weather barrier, insulation, sill and surrounding render or cladding. Start by allocating the linked tasks and responsibility for each, rather than simply choosing between DIY and a contractor. A sound, square opening presents a very different job from crumbling reveals, altered sill levels or new external insulation. Access also changes the method: open ground-floor workspace is unlike a position above stairs, scaffolding or an extension. Sketch every stage from removal to final repairs. That sequence will show whether doing part of the job yourself saves effort or transfers difficulty to later work.
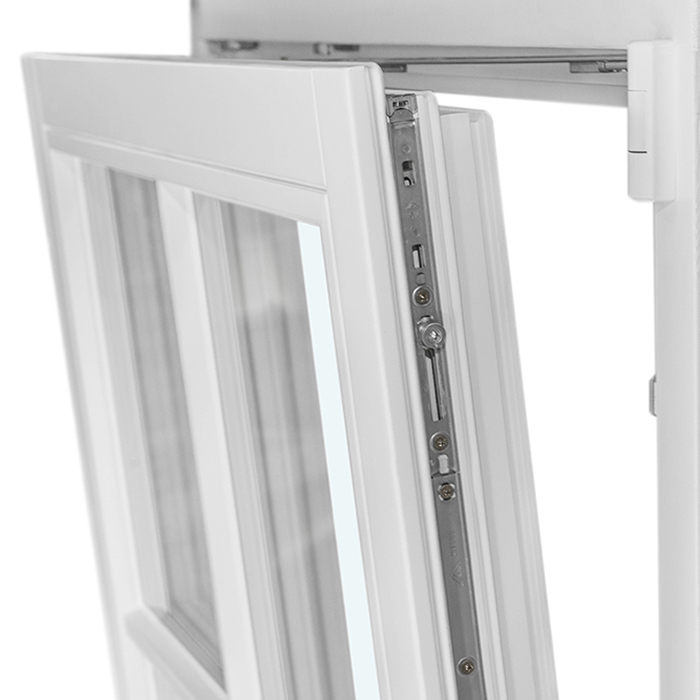
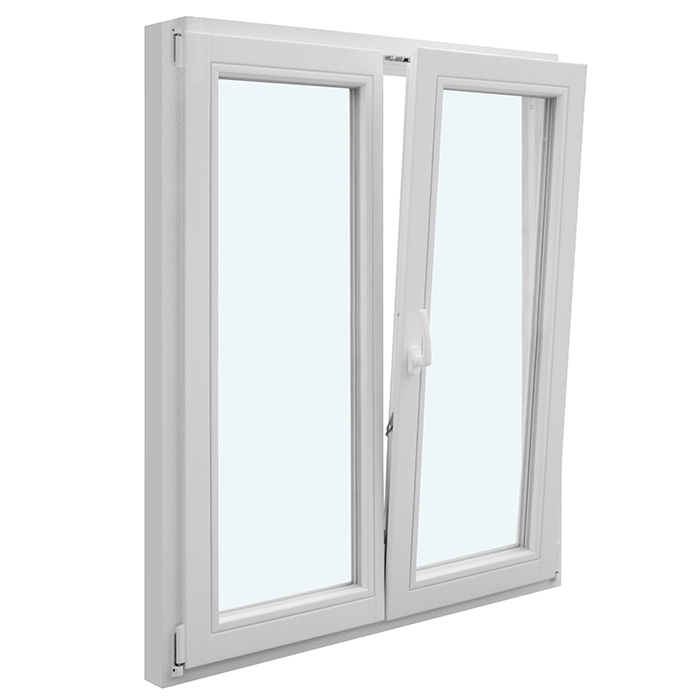
Product configuration can make the job more demanding. A small, straightforward unit is handled differently from a broad, multi-sash or cumbersome window. Consider a double inward-opening window : opening clearance, transport, frame placement and final sash adjustment all need to work together. The description identifies the product type; it does not confirm compatibility with your wall. Before arranging installation or starting yourself, review the opening, swing direction, furniture position and ongoing access. Also plan for the time the wall remains open, including weather, dust and security protection and continued use of the room. If coordinating these matters is beyond your experience, a contractor contributes project control as well as fitting labour.
Settle the measurements before ordering
Installation difficulties frequently originate before the product arrives. One clear opening measurement is not enough: reveals can taper, be irregular or hide old layers. Measure width and height at multiple points, check diagonals, and note exactly where readings were taken. Also consider wall construction, existing-frame position, stops, sills, shutter tracks and any services. In an older building, removal can be the point at which the real substrate becomes visible. Ordering while these matters remain unknown transfers the risk that the unit cannot be located or connected as planned. A professional may take measurement into their scope; confirm precisely which dimensions they own and what opening conditions they require.
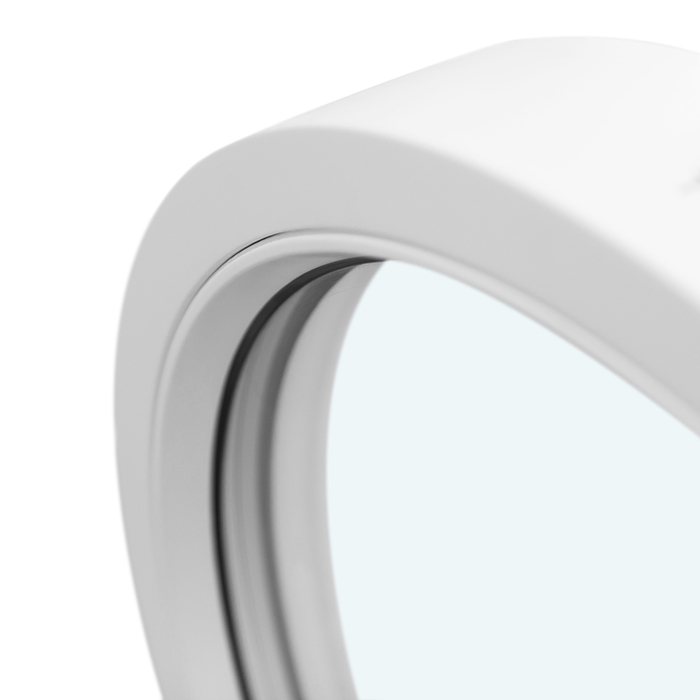
Width and height are not the only decisions; establish the frame’s installation plane as well. It affects the relationship between insulation, sill and the internal and external junctions. Existing conditions may leave little flexibility where no façade work is planned. If façade renovation will follow, avoid creating a detail that soon needs reopening. File photographs, sketches and readings with the order. Unusual forms, including a triangular and sloping fixed-glazed window, require particular care. Confirm the opening’s true geometry, support points and adjoining construction before purchase. Where the existing fabric remains uncertain, ask a suitably qualified person to assess it rather than treating dimensions inferred from a photograph as reliable.
What proper installation actually includes
Placing the frame is only part of the work. First protect retained surfaces, release old fixings and prepare a stable opening that allows the replacement to sit level without being forced out of shape. The installer then positions and secures the frame, treats the perimeter gap according to the selected junction detail, and reinstates the reveal, sill and façade interfaces. Moving components must finally be tested and adjusted where necessary. A neat surface bead cannot demonstrate that concealed work is sound. DIY installers should organise the sequence, tools and materials before removal begins, rather than making decisions while the building is open to the weather.
Ask a prospective installer to itemise these stages. Confirm whether the price covers removal and disposal, substrate preparation, repairs to neighbouring finishes, and completion of both inside and outside junctions. Check whether sills, sealing and render repairs are included or allocated to another trade. That detail makes differently priced quotations easier to compare. A fixed-glazed window , for example, needs less hardware adjustment than an opening sash, yet still demands correct positioning, secure anchoring and properly finished wall junctions. Fixed glazing is therefore not necessarily a simple DIY task. Arrange a recorded completion inspection covering operation, visible surfaces and every agreed interface.
Assess experience, tools and helpers honestly
Broad home-improvement experience helps, but precision measurement and window-to-wall detailing require specific competence. The work involves controlling heavy, fragile units, maintaining the frame’s correct position and ensuring joint treatment does not impede operation. Project needs may include accurate measuring devices, transport and lifting equipment, fixing tools, stable work platforms, protection materials and the specified junction products. Confirm that everything will be available when required; unfamiliar borrowed equipment may hinder rather than help. Include unpacking, sorting, cleaning, protection and repairs to surrounding surfaces in your time estimate, not just the minutes spent securing the frame.
People are not simply an item on the logistics list. With a bulky frame, an extra person without a defined task or suitable experience does not create safety. Allocate who receives the unit, measures, aligns it and protects nearby finishes. A Patio Life lift-and-slide doorillustrates why a large movable door unit needs its delivery route, temporary resting place and handling method settled beforehand. Product information does not remove the need to verify actual weight and delivery arrangements. If you cannot explain how the unit will travel safely from the vehicle to the opening and remain supported there, engage experienced handlers. You can still contribute by clearing the route, protecting finishes and completing agreed later work; uncontrolled lifting should not become a DIY experiment.
The wall connection determines future costs
The perimeter gap must accommodate building tolerances, keep the frame correctly located and unite different materials where weather exposure occurs. Conditions at the room side, through the joint and outdoors may call for different treatments. The correct detail depends on wall construction, frame position and neighbouring layers, so one universal sealant is not a plan. Junctions concealed by cladding, sills or internal linings deserve special attention: an apparently tidy finish may later require disruptive opening-up if a hidden problem needs investigation.
Ask the installer to describe how the proposed wall junction suits this project. You need not judge every proprietary material, but you should understand each handover between window, plasterboard and façade trades. Establish the required condition of the opening, expected preparatory work and responsibility for tying into an existing outer sill or new insulation. For a single outward-opening patio door , the threshold links the floor inside with the external surface. Levels, finishes and water management must be designed with the frame rather than decided separately. Numerous interfaces favour coordinated planning under a clearly nominated installation lead.
Moving units need adjustment and function testing
Visual straightness alone does not prove a frame is free of stress. Each door or window sash should move cleanly, shut properly and remain where intended. Test it after hanging and again once fixings and junction work are finished, because pressure or inadequate clearance can change its action. Operate every opening position and inspect the handle, alignment and proximity to surrounding surfaces. Record problems before linings, reveals or paint restrict access for corrections. Anyone installing their own unit should follow the relevant adjustment procedure; random alterations can hide the original fault rather than resolve it.
This also applies to unusually opening windows. A top-hung outward-opening awning window has a different operating path and different requirements for reaching its exterior face than an inward-moving sash. During design, account for handles, hardware and anything to be added later. Curtains, insect screens, furniture and outside fittings may obstruct an otherwise correctly installed window. Give a contractor the opening direction and intended use in writing. For DIY work, do not expect hardware adjustment to remedy an error in positioning or clearance. Fine adjustment belongs at the end, once the location, space and wall junctions have been confirmed.
Plan existing conditions, removal and occupied-home protection
Taking out the old unit can be less predictable than installing its replacement. Linings, render edges, wallpaper, sills and concealed fixings may suffer damage during removal. Decide which finishes must survive and what level of repair is acceptable. Protect access paths, clear a generous work area and prepare a low-dust resting place for removed sashes. In an occupied home, stage the work so every opening is not exposed together. Where several windows are involved, complete one as a trial. Its timing and junction details can be reviewed before a fault is repeated around the house.
Historic or visually sensitive buildings require extra care. A outward-opening Kombi casement in a heritage style defines an appearance and operating method, not the treatment required for the existing façade, reveal or room lining. Photograph elevations and details and record dimensions before starting. Decide what will remain, what can be repaired and what must be replaced. A divided scope may work well here: specialists undertake removal, fitting and sensitive junctions, while you manage clearing, protection or approved cosmetic finishing. If concealed conditions are uncertain, the quotation should identify its assumptions and potential additional work. This reduces the chance that an apparently economical DIY choice develops into repeated, unplanned repairs.
Allocate DIY tasks instead of taking on the entire job
The project need not be entirely DIY or entirely contracted. Written boundaries can combine budget control with professional responsibility. Your contribution might cover emptying rooms, protecting furnishings, agreed removal or disposal, and painting once installation is complete. Accountable measurement, frame fixing, perimeter detailing and operational sign-off can remain with the installer. Sequence is crucial: preliminary work must not alter the prepared opening or prevent access. Before starting, ask what preparation the contractor permits, how the site should be presented on arrival and which activities could compromise the installation if completed early.
You might first commission professional fitting for one uncomplicated unit and observe the process. Do not assume every later opening will match it; wall construction, dimensions and exterior details can vary substantially. A pivot roof window , however, adds roof access, elevated working conditions and weatherproof integration with the roof covering. Lessons from a vertical wall window cannot simply be transferred. Assign measurement, installation, junction work and finishing separately for each unit. Recording those four responsibilities in a table reveals gaps more effectively than saying that you will handle whatever remains, and gives the contractor a firmer basis for pricing.
Compare quotes by scope depth
A single line labelled “installation” tells you too little for a useful comparison. Each quotation should identify units and quantities, included work, site assumptions and exclusions. Review provisions for measurement, protection, removal, movement around the site, anchoring, junction treatment, adjustment, waste disposal and surface repairs. Resolve ambiguous terms before purchase: determine whether an interface is merely prepared or fully finished, whether sills are supplied, how exposed damage will be handled and who schedules successive render, window and façade work. A cheaper total may simply omit stages included elsewhere.
Seek a project-specific method rather than a broad promise of professional workmanship. Supply photographs, measurements, known wall details and your removal preferences. For an outward-opening panelled entrance door, examine how the frame, threshold, approach, exterior level and any sidelight or canopy interact. Its catalogue name cannot define those site details. Assign responsibility for defects at each trade boundary as well. Credible planning records assumptions, required checks and possible extra work instead of pretending uncertainty has disappeared. Only with that information can contracted and owner-completed work be compared on equal terms.
Confirm the order, schedule and final inspection
Place the order only after confirming dimensions, quantities, appearance, opening direction and task allocation. Match every line of the confirmation to a room schedule, checking its location, operation, inside face and outside face. Number the openings on a floor plan rather than relying on recall. Before delivery, arrange vehicle access plus dry, secure space for temporary storage. Delivery takes 4–6 weeks, subject to order confirmation. Use the interval for measured site preparation; do not remove existing units irreversibly too soon. Agree the programme with all participating trades so the new windows arrive when their openings are genuinely ready.
Final inspection should cover far more than the view through the glazing. Reconcile the quantity, visible configuration and opening directions with the order, then operate every movable sash. Under good light, inspect accessible junctions, frames, glass and handles. Photograph anything unusual, identify its position and effect, and notify the relevant contracting party promptly. Retain the confirmation, delivery paperwork, installation records and photographs together. Bloomcabin provides a 5-year commercial guarantee for windows and doors, operating alongside consumer rights that may apply under Australian Consumer Law and cannot be excluded. Neither the guarantee nor those rights remove the need to identify responsibility for installation work. Good records help distinguish product, adjustment and building-junction issues later.
Frequently asked questions
When is DIY window installation realistic?
Consider DIY only where the opening is accessible and understood, and you can competently manage measurement, handling, alignment and every junction. Allow enough time for removal and repairs, with capable assistance available. Choose professional fitting when transport, wall condition or connection details remain uncertain.
Can I buy the window and engage an installer separately?
You can, provided the arrangement is settled before purchase. Agree who accepts responsibility for measurements, what technical information the installer requires and how the opening must be prepared. Record the delivery check, transport arrangements, fitting scope and ownership of each wall junction in writing.
Which tasks suit DIY work?
Useful owner-completed work often includes clearing rooms, shielding furniture, protecting access paths and undertaking agreed painting afterwards. Removal, waste handling or reveal repairs may also be suitable if conditions and responsibilities are settled first. Leave frame anchoring and perimeter junctions to someone with the necessary technical competence.
What should I tell a contractor before seeking a quote?
Share internal and external photographs, readings from several points, and whatever is known about the wall and sill. Add the required opening direction, finish, access restrictions, storey, planned façade work and the services expected from removal through reinstatement. Thorough site information allows the contractor to price and allocate work more precisely.
What should prompt questions after installation?
Investigate sashes that rub, close unevenly or have stiff handles, as well as unfinished or unexplained visible junctions. Photograph damage, omitted agreed work and any mismatch in specification or opening direction. Notify the relevant contracting party before painting, lining or other follow-on work hides the affected detail.
Next steps
The sound choice depends on which responsibilities you can control, not on maximising DIY participation. Begin with measurement, wall junctions, access, transport and coordination of removal, façade and room repairs. Even capable renovators may benefit from assigning critical fitting and sealing work to specialists. Compare contractors by clearly defined tasks and handovers rather than a general installation label. If you will contribute, document each duty and wait until the sequence has been accepted before starting. The decision then becomes one organised stage in the broader window project, rather than a source of uncertainty for everything that follows.
