
Planning a Front Door with Sidelight and Transom
Planning your home entrance
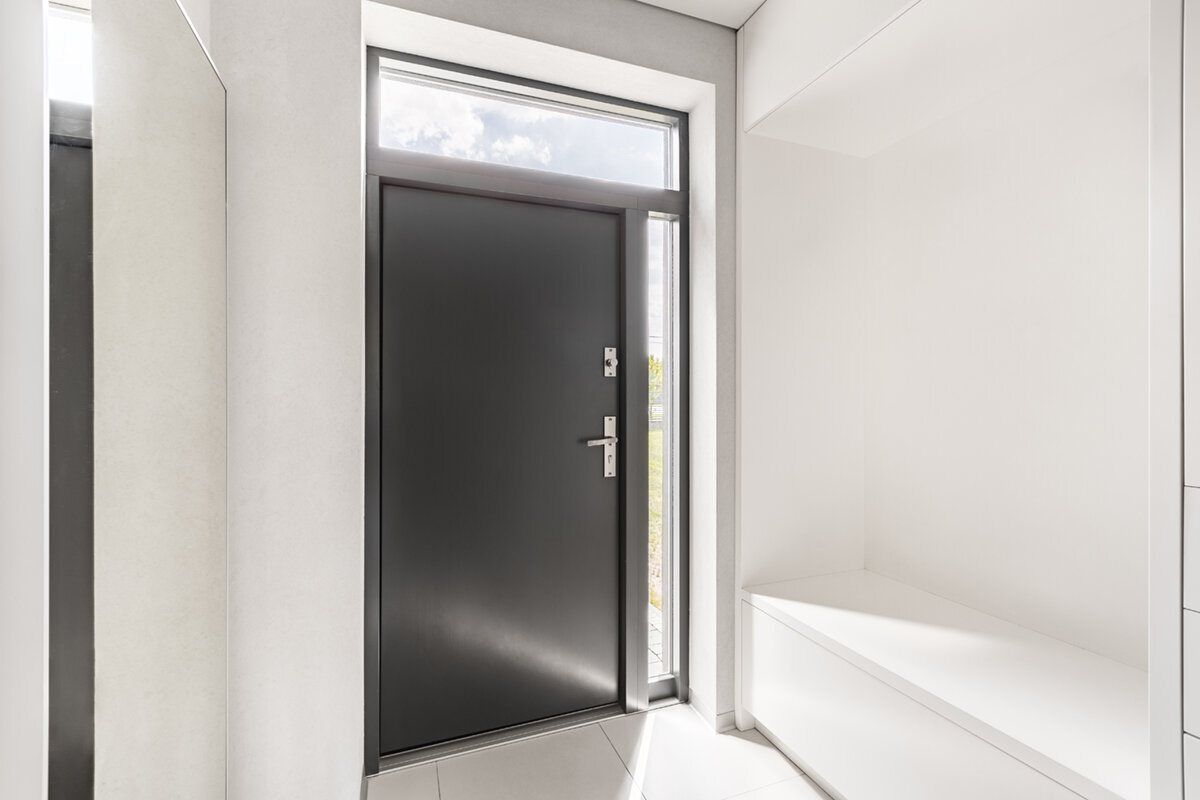
Replacing a front door or designing a new entry involves more than choosing the door leaf. A sidelight and transom affect daylight in the hall, how easily visitors recognise the entry, and how private the street-facing area feels. In a narrow, dark hall, glazed additions may be more useful than a wider door; at an exposed entry, limited, carefully placed glazing can be preferable. A successful design considers the door, glazing, wall opening, shading and interior together. This guide sets out the key decisions, from measuring through to ordering, and the questions to resolve before configuring your entry.
Treat the entry as one complete opening
Start with a survey of the existing opening, because the door and glazed elements form one assembly rather than separate pieces added later. Record finished floor levels inside and out, the opening’s true width and height, wall build-up and façade plane. Mark where any downpipe, exterior light, doorbell, letterbox or awning sits nearby. On a new build, these details allow early coordination with the structure; during renovation, they prevent an attractive elevation being selected for an opening it cannot fit. Photograph both faces and measure at several points. This evidence gives the supplier and installer a much clearer basis for discussion.
Begin by assigning a purpose to each part rather than maximising glass. The leaf provides the usable passage; glazing beside it can brighten the hall and visually broaden the entrance, while a transom occupies the space overhead without narrowing the doorway. A tall opening need not be glazed throughout. A solid area may steady a busy façade, whereas a simple door with a narrow light panel can guide the eye along a deep hall. Prepare a scaled drawing of the complete opening, adding the house number, outdoor light and visible internal walls. Review these proportions before choosing colours and smaller details.
Creating a balanced arrangement of width, height and divisions
Set the clear passage needed through the door before allocating width to a sidelight. Allow for movement inside the hall and practical tasks such as carrying bags, manoeuvring a pram or bringing in furniture. A slim glazed strip may admit enough daylight without squeezing the doorway; a broad one has greater visual impact and can place the door deliberately off-centre. Judge the composition on an elevation of the actual house. Consider whether its lines respond to the windows, eaves, recess or plinth. Symmetry within the entrance will not necessarily suit a façade whose other elements have an asymmetrical layout.
Height is read through the vertical arrangement. A transom can divide a tall opening, give the assembly less of a squat appearance and direct light farther into the entrance. Choose its depth in relation to the leaf, sidelight and surrounding windows. A horizontal joint that ignores nearby façade lines may prove more distracting than a modest glazed area. Where vertical space is limited, glazing beside the door can be clearer; where width is restricted, glazing above may provide the light. State any required joint level explicitly in the enquiry. Assess the inside elevation as well, since an eye-level line, wardrobe or mirror may produce an effect not apparent from outdoors.
Plan the whole opening
Bring daylight deliberately into the hall
Daylight performance cannot be judged simply by totalling the glass. Follow the likely path of light through the day and identify the surfaces it can reach. Glazing beside the door may wash a side wall with light, whereas a transom introduces illumination from higher in the room. The result will differ between a hall facing enclosed coat storage and an open corridor aligned with living spaces. Inspect the entrance under cloud and with low-angle sunlight. Map the dim areas, switches and the place used for keys or post. This exercise avoids creating an elevation that appears bright while leaving the space beyond the door poorly lit.
Not every glazed panel needs to open. For an illuminated section within the entry assembly, a fixed-glazed window is suitable when the panel only needs to transmit light. With no handle or operating arc to accommodate, the surrounding layout may be simpler. If a separate window above or alongside the entrance belongs to a wider façade scheme, align its visible frame widths and divisions with the other elements. Consider nighttime conditions too: illumination from the hall may reveal the interior through clear glass. Daylight decisions should therefore account for outward-looking and inward-looking views as well as brightness during the day.
Choose privacy from sightlines, not instinct
Base screening on the actual viewing paths. Someone passing a door beside the footpath sees it differently from a visitor approaching across a front garden and steps. Inspect the entrance from the street, the neighbouring property and your usual route to the door. Repeat the check indoors and note whether the sidelight reveals only the hall or exposes storage and rooms beyond. Plotting distances and approximate eye levels on a basic sketch can clarify the options. You can then decide whether clear glass is appropriate throughout, whether light should enter mainly at the top, or whether revised panel divisions would provide better seclusion.
Daylight and privacy can be balanced rather than traded outright. For example, a quieter lower section may screen direct views while glazing above continues to brighten the hall. A mostly solid leaf with one controlled glazed area may work better than an expansive panel that later has to stay covered. Where the proposal uses a single fixed glazed element alongside the door, a single glazed door sidelight can serve as the initial configuration. Its title identifies a one-panel format; glass, dimensions, frame appearance and the door junction still require separate specification. Review screening together with room lighting, curtains or blinds and furniture placement.
Check door swing and everyday routes before ordering
Door swing affects the entire approach, not only the hinges. Rehearse arrival while carrying shopping, handling a parcel or pushing a pram. Note the bell position, where a visitor would stand and the area swept by the leaf. Indoors, check coat storage, seating, radiators and neighbouring doors for clashes. Outdoors, include steps, landing dimensions, awning supports, pots and pedestrian movement. Tape the swing onto the floor or use a cardboard outline to test it. This quick full-size exercise reveals conflicts hidden in a front elevation, and changing the glazing afterwards will not correct a poorly planned opening path.
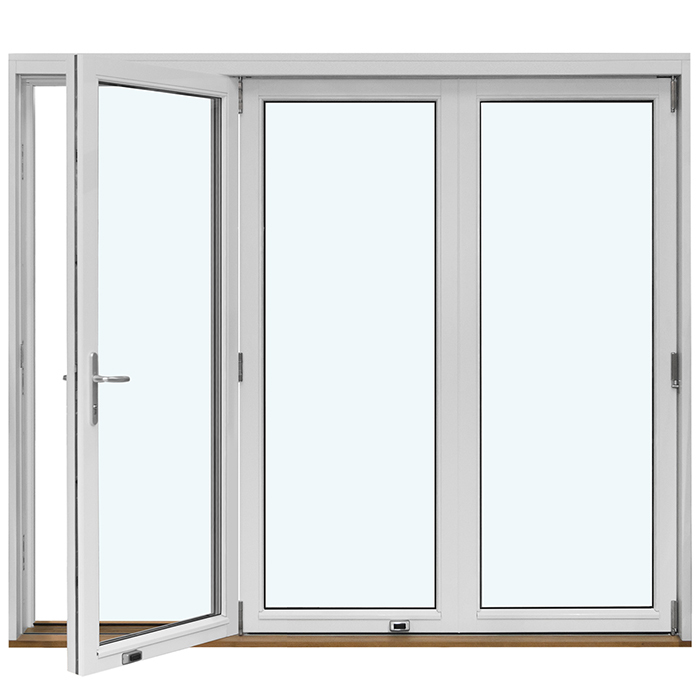
An outward-opening front door with panel is one configuration when the entrance must swing outwards. If the panel design is undecided, compare an outward-opening exterior door instead. Examine the open leaf on the floor plan as well as the closed front elevation, including where a visitor can wait. Site conditions will determine whether an outward swing is suitable and feasible. Because the sidelight and transom are fixed, neither frees any space within the leaf’s arc. On a tight landing, draw the full-width swing and trace the routes taken by residents and guests. The order should identify the outside view, hinge position and opening direction without ambiguity. Left and right can reverse with the viewer’s position, so establish that viewpoint and support the description with a clearly labelled drawing.
Make frames, joints and glazing bars part of the design
With every added panel, frames and joints become more prominent in the composition. Lines introduced by a sidelight and transom may organise the elevation, but too many can break it into unrelated pieces. Study their alignment with the leaf and adjacent windows, not just the amount of glass. A restrained pattern may suit a clean, quiet design; glazing bars aligned with established window axes may help a more articulated house feel coherent. Specify whether each bar is decorative or actually separates panes. The two constructions create different visual results, so drawings and quotations need terminology that makes the intended treatment unmistakable.
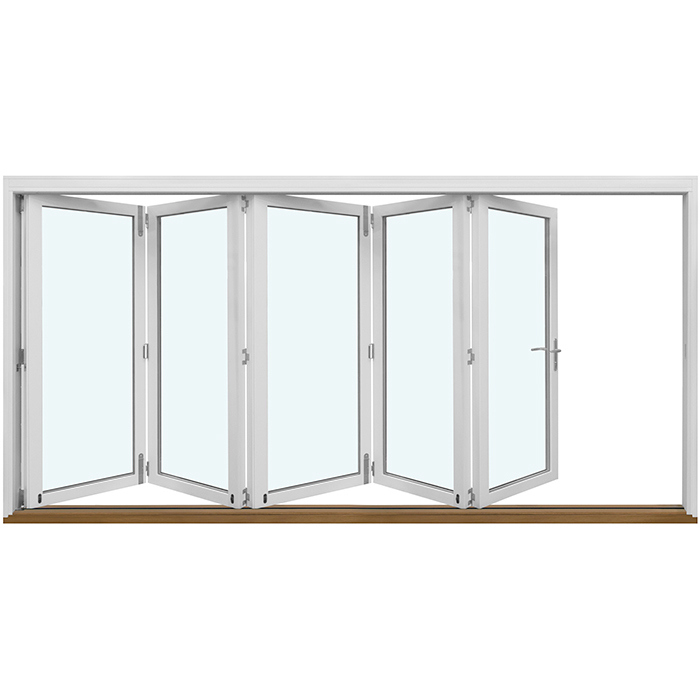
For example, specify an unbarred transom, one vertical line in the sidelight aligned with the adjacent window, and a simply panelled leaf. This measurable brief is clearer than broad labels such as “classic” or “modern”. For historical character, views of a historic-style outward-opening “Kombi” casement window can illustrate useful proportions and glazing-bar patterns, but not the entrance assembly’s technical construction. Treat the window solely as a visual reference. Ask for a dimensioned drawing of the proposed door system showing every glass division, visible frame face, handle and lock location.
Plan the whole opening
Coordinate façade, awning and interior
Although people operate the door at close range, it contributes to the house elevation from a distance. Compare it with the façade colour, plinth, eaves, awning and exterior lighting. Dark leaves can anchor broad glazed areas; paler finishes may reduce the apparent weight of a wide assembly. Rather than following a universal colour formula, examine contrast against walls, window frames and naturally shaded sections. Assemble photographs or material samples and inspect them outdoors in daylight. Recheck the scheme as conditions change, because planting, rain-darkened paths and low-angle sunlight can alter the entrance’s overall character.
The interior elevation should complement the hall, although it need not duplicate the outside treatment. Plot coat storage, shoe racks, mirrors, switches and lighting before setting the glazing. Light above the leaf may increase the sense of ceiling height, while a sidelight gives more emphasis to the area alongside the entrance. If tall cupboards occupy that wall, illumination from overhead may be more useful; a slim side panel may instead soften a confined corridor. Finally, follow the visitor’s approach from the street. Knowing which element comes into view first helps locate the number, bell and handle so that the entrance reads clearly without searching.
Derive special shapes from the architecture
An unconventional opening does not always call for a rectangular grid. In a gable, beneath a sloping roof or within an existing arch, shaped glazing may echo the building’s geometry. Let that geometry drive the choice instead of introducing an attention-seeking feature. For a raking opening, take dimensions at several heights and record the relevant angles. A suitable professional can then determine what can connect realistically to the existing construction. Errors in an angle or reference level are especially obvious in glass. Have the opening measured properly by an appropriate installer before committing to manufacture of any special form.
For a sloping or triangular section, consider fixed-glazed triangular and sloping windows as fixed façade glazing. They are not standard components of every entrance assembly. For a curved opening above a straight door section, a fixed-glazed semicircular window can act as a form reference. In either case, request a complete elevation showing the shaped element with the door and sidelight. The result is strongest when it continues an existing architectural line; without that connection, it may resemble applied decoration. Ask which existing dimensions are required, how junctions will be drawn and how the design will feed into installation planning.
Support the order with complete measurements
Width and height alone do not make a reliable enquiry. List the complete assembly size and separate dimensions for the leaf, sidelight and transom. Record the intended interior and exterior views, swing direction, hinge and handle sides, division levels, proposed finished floors and wall or façade plane. Supply photographs from both directions plus a sketch of adjoining construction. Label every figure as a structural, opening or finished dimension. Where information is provisional, mark it accordingly rather than allowing it to become an order size. Detailed measuring during renovation may uncover uneven reveals, retained finishes or hidden junctions that were not previously visible.
The specification must also cover finishes, glass appearance, glazing bars, hardware and accessories, identifying what is settled and what remains open. One precise question is: “In the external elevation, how is the junction between the door and sidelight shown, and what measurements are needed?” Confirm the sequence for site measuring, drawing approval and installation as well. Bloomcabin provides a five-year commercial warranty for windows and doors. The stated delivery period is four to six weeks, subject to order confirmation. Do not schedule flooring, rendering, façade work or installation until the order is confirmed; coordinate every trade interface before work proceeds.
Turn the concept into a decision
Assess every scheme against one consistent checklist instead of judging a closed front view alone. Compare clear passage and swing, the path of daylight through the hall, inward views from outside, panel lines, façade relationships, storage effects and construction junctions. This makes it easier to see whether extra sidelight width improves daily use or merely changes the composition. If useful, shortlist two approaches: a restrained entrance with one defined light panel, and a more extensively glazed design incorporating a transom. Place each over photographs and compare its plan with the hall layout. Set colour and minor detailing only after the fundamental arrangement has proved satisfactory.
Coordinate any other openings proposed for the same elevation with the entrance. A fixed-glazed round window might form a separate feature elsewhere, but should not compete accidentally with the rectangular entrance. An architect or suitably qualified specialist can draw the whole elevation and assess its junctions for the particular building. Before ordering, make one final check: can visitors read the entrance in daylight, does the hall retain enough privacy, and does the door path support ordinary use? Confirm that every dimension and elevation is recorded unambiguously. Once those points are resolved, the selected configuration has a sound basis for ordering.
Frequently asked questions
Which is better for a dark hall: a sidelight or transom?
Match the glazing position to the room and opening. A sidelight sends illumination across the entrance laterally; a transom brings it from overhead without consuming width. Locate the hall’s darkest areas, then consider acceptable views from outdoors. Comparing scaled interior drawings will show which arrangement serves the space more effectively.
Can a sidelight be placed on both sides of the front door?
Using a glazed panel on each side affects the overall width, symmetry and visual emphasis of the leaf. A site measure must establish whether both will fit. Draw the leaf and two sidelights with all division sizes, then review the façade composition outside and the spread of daylight through the interior.
How should opening direction be documented?
Define the viewing side used to name the hinges and swing, then draw the leaf’s movement with an arrow. Show nearby steps, storage and doors on the same sketch. Avoid relying on “left” or “right” alone: either term changes meaning when the observer’s position is not stated.
Are glazing bars worthwhile in sidelights and transoms?
Bars may continue lines established by other windows or organise a large expanse of glass, but they also increase visual detail. Identify decorative and pane-dividing versions separately and request drawings of each. Select the pattern for its relationship with the wider elevation rather than adding it afterwards.
When should final dimensions for the front-door assembly be set?
Confirm them only after resolving the opening, finished floors, façade plane and junctions. Renovation work may reveal significant variations in existing construction. Arrange the measuring stage with a qualified installation contractor, then verify every elevation, division and swing instruction in writing before authorising the order.
Next steps
The strongest entrance design improves clarity and everyday movement as well as bringing light indoors. Begin with the complete opening and trace how people move on both sides of the leaf. Next, assign each glazed or solid area a role in lighting, screening or expressing height. Scaled sketches, façade photographs and an organised measurement schedule will give quotations and site measuring a dependable foundation. Bring the relevant professionals into discussions about unusual shapes, junctions and installation at an early stage. The completed arrangement can then respond coherently to both the architecture and daily use.
