
Planning round, arched and gable windows

Window planning
Circular stairwell windows, segmental arches above patio doors and glazing tucked into a roof gable appear effortless only when purpose, opening and geometry work together. Appearance is just one consideration for non-rectangular glass. The element might admit daylight, provide ventilation, frame an outlook or reinforce the façade composition. Even minor decisions alter surveying, pane divisions, hardware, junction details and the construction sequence. Begin by studying every window across the elevation, then select the special shape. Otherwise, a convincing sketch may become awkward to operate or visually restless once built. This guide brings shaped windows into one plan with neighbouring rectangular units, insulation, weatherproofing and installation.
Start with the window arrangement, not one shape
Give each unusual shape a clear role within the elevation. A circle might illuminate a stair, a semicircle may crown a rectangular opening, and a triangle can echo a pitched roof. Prepare a drawing of the entire façade, marking storey levels, door heads, eaves and window centrelines. Then test the alignments. Is the circle centred on an architectural axis? Does the curve begin level with nearby lintels? Do the sides of a gable window follow the roof, or is the separation intentional? These choices affect more than personal preference: coherent reference lines make the window belong to the building rather than resemble an ornament added afterwards.
The room introduces different reference points. Gable glazing beneath a pitched ceiling can emphasise height, while a circle beside a stair landing creates concentrated daylight. Review the outlook, furniture, access and cleaning from inside, not only the street elevation. If daylight is the main requirement, a fixed-glazed window offers a useful benchmark because the outline and proportions need not accommodate a moving sash. Where fresh air is also required, another part of the window arrangement can open instead. A fixed shaped pane paired with a restrained, reachable opener often produces a more composed appearance and simpler operation.
Describe geometry clearly and measure early
Labels such as “round” and “arched” do not define a manufacturable shape. For a circle, record at least the diameter and its position relative to the finished wall. A semicircle requires its width, full height and the level where the curve begins. A segmental arch must also have its rise or curvature defined; pointed, triangular and gable profiles require width, height, angles or a traced outline. Identify whether every dimension describes the structural opening, the rendered opening or the finished window unit. Mixing those references can conceal discrepancies until weatherproofing or fit-out is under way. Irregular profiles may need a full-scale template. Nominate who prepares it, the construction plane used to trace it and the marks that distinguish orientation. Manufacture should proceed from one agreed source—a drawing, digital survey or approved template—not several conflicting records.
Older reveals call for a thorough site survey. Take widths, heights and diagonals at several locations and record uneven areas rather than relying on one reading. Scaled photographs, an elevation sketch and clearly labelled interior and exterior faces make the information easier to interpret. An opening that looks symmetrical should still be checked for its true centre. A fixed-glazed round window can establish the intended form of a circular daylight opening, but cannot substitute for a dimensioned outline. When reviewing quotations, establish which measurements control manufacture and who will verify discrepancies in the structure before production approval.
Consider the opening as a whole
Separate fixed glazing, opening sashes and ventilation
As an outline becomes more elaborate, first decide whether the shaped pane itself genuinely needs to move. Fixed glass can suit a high gable, a stair wall or an elevation intended to remain free of visible sash lines. It may also leave the reachable area below available for another use. An opening sash needs frame width, hardware space and an unobstructed travel path. Within an arch, these components can alter the visual character because the form must accommodate operation. Establish the priorities—daylight, ventilation, view and convenient use—then select the shape that contains them effectively.
A window that requires a stool or another aid for every use seldom provides convenient everyday ventilation. In rooms needing regular airflow, plan a reachable operating level, sensible handle access and enough clearance for the sash. Rather than making the arch move, consider a separate high-level outward-opening top-hung awning window where its height and direction suit both room and elevation. This allows the feature glazing to remain undivided while placing ventilation where it can be operated. Use, furniture and construction conditions will determine the right arrangement, so allocate each function before completing the façade design.
Match each arch profile to the architecture and detailing
A true semicircle creates a balanced, quiet form, provided its straight sides and the point where the curve starts are precisely set out. A segmental profile has a shallower rise and often complements a wide, low opening. By contrast, a pointed arch strongly directs attention upwards. Judge each option against the building’s proportions, axes and established lines rather than as an isolated motif. If several openings repeat the design, schedule a common radius, starting level and pane arrangement. Small variations in where adjacent curves begin can make the whole sequence look inconsistent.
A fixed-glazed semicircular window may form a fanlight over a rectangular unit when its diameter and straight lower edge are deliberately aligned with what sits below. That does not make it suitable above every door or window. Draw whether the two shapes meet at a visible frame, a continuous transom or another division, and resolve the same transition through the internal reveal. An enquiry should therefore include an elevation with the controlling edges, not merely an overall size. The relationship between the lower unit and curved section can then be reviewed before production receives approval.
Shape gable glazing around the roof and interior light
Gable glazing involves more than placing a triangle in masonry. The sloping sides interact with roof pitch, verge, interior lining and often the structure. Decide whether the upper outline should closely track the roof or whether a rectangular or trapezoidal arrangement makes better use of the room. A tall triangle can send daylight deep inside yet offer limited outlook near its base. Pairing a lower rectangle with a fixed shaped pane lets viewing height and roof geometry be resolved separately. Test the alternatives in interior and exterior drawings. Prepare at least two scaled schemes: one close to the roof slope and one inset with a broader wall margin. The first fills more of the gable visually; the second may provide more legible junction space. In each drawing, show the actual visible frame rather than depicting the full structural opening as glass.
For daylight in a roof gable, a fixed-glazed triangular and sloping window is a straightforward response where the roof gable needs light but no operable sash. Before selection, the designer and relevant trades should jointly inspect the built outline, available junction surfaces and route of the internal lining. Along every slope, a continuous, buildable connection matters more than filling the last portion of wall shown on a sketch. Draw the eventual positions of frame, visible glass and reveal as well. This makes clear why the glazing may appear smaller than the rough opening, or why an internal slope may not mirror the outside profile.
Design glazing bars as part of the grid, not an afterthought
Glazing bars can organise a broad pane, reference an older window pattern or add rhythm to the elevation. Their effect is particularly strong on circles and arches. Spokes emphasise the centre, horizontal bars temper the curve, and verticals can continue the rhythm of nearby rectangular units. Determine whether the bars are visual overlays or genuinely separate pieces of glass, and describe them accordingly as glazing bars or glass-dividing bars. The approved sketch should locate every bar and record quantity, symmetry and frame relationships; a general note saying “with glazing bars” is not enough.
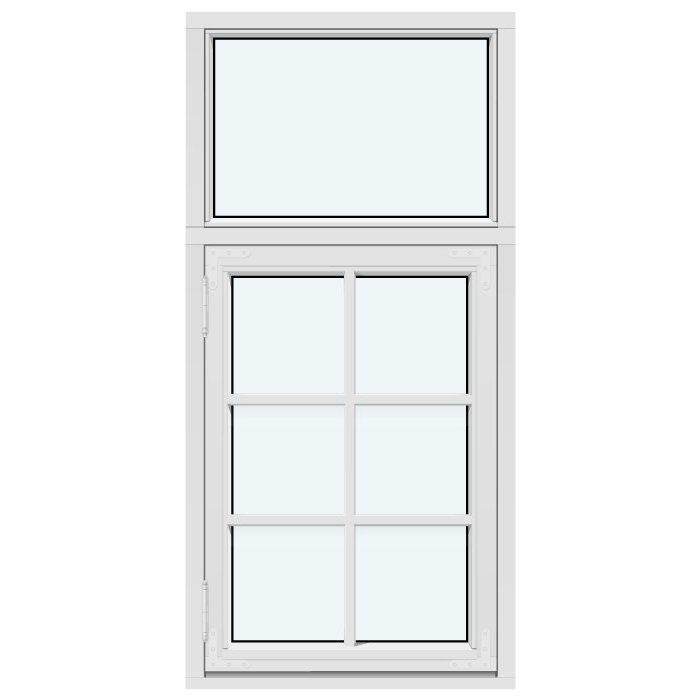
A small shaped pane may read best with minimal subdivision, whereas a broad gable can benefit from a carefully coordinated pattern. Inspect the proposal in daylight from a normal exterior distance and from the real viewing position indoors. A grid that seems balanced on paper may place a distracting line through the outlook. If opening units adjoin the shaped glazing, a traditional-style outward-opening “Kombi” casement can serve as a reference for the rhythm of a traditional divided composition. Even so, the project’s complete bar pattern needs its own drawing and approval. The name of a product does not specify a bespoke division.
Consider the opening as a whole
Check internal and external views together
Frames, reveals and glass do not present the same composition on both sides of a wall. A slender exterior arch may produce a deep, visually substantial reveal indoors. Around a circle, set out the lining so it does not leave an unintended uneven border. At a gable, coordinate the window edge with the roof slope and ceiling finish. Prepare an exterior elevation, an interior elevation and at least one section for every unusual opening. Sections reveal wall layers, setbacks, window position and junction routes that a front view conceals. Add eye level, finished floor and significant furniture edges to the elevations. This may expose a transom crossing the preferred view or a deep sill masking the lower glass. Beside stairs, inspect the result from several treads and landings because both sightline and perceived centre change as a person moves.
Include operation in that assessment. Inward-opening sashes may meet curtains, heaters or furniture and consume usable room space; outward-opening versions require an unobstructed exterior zone. Where the interior is constrained, a single outward-opening casement is one useful reference for planning operation. It is not a substitute for an arch; rather, it demonstrates that form and movement can be resolved independently. Plot the full sash travel on the plan and compare it with the proposed furnishings before installation begins.
Plan junctions to wall, roof and weatherproofing
The detail continues beyond the frame that remains visible after installation. The unit must connect coherently with the particular wall or roof layers. Curves and sloping edges demand especially careful detailing because membranes, linings and finishes cannot be continued as simply as they can along a straight edge. Assign responsibility for designing the junction, preparing the opening and coordinating the trades. The project section should locate the window within the wall and show internal and external connection zones, linings, render, cladding and any meeting with the roof. Catalogue photographs cannot answer these project-specific questions.
Concentrate on transitions between shapes: where an arch rises from a rectangle, at a triangular apex and in the lower corners of gable glazing. Resolve them before the structural profile, insulation and final finish leave no room for a coherent detail. A roof pivot window belongs in the roof slope, whereas a vertical gable window belongs in the wall. These are distinct product and construction situations, so their connection details are not interchangeable. Identify the exact location and building element in the specification. The appropriate project professionals should then confirm that the proposed junction suits the particular building.
Coordinate existing fabric, style and replacement openings responsibly
An existing shaped window provides useful evidence for replacement design, but its appearance alone cannot direct manufacture. Survey the contour, pane divisions, visible frame widths, reveal depth and alignment with adjacent windows. Next, identify the qualities worth retaining: perhaps the exact outline or symmetry, an established glazing-bar scheme, or mainly the way daylight enters the room. A respectful replacement need not reproduce every detail. Equally, a nominally similar shape may feel wrong when it disregards the original axes and subdivisions. Compare physical samples, photographs taken from several distances, and drawings that superimpose the proposed elevation over the existing one.
Treat any change in the purpose of an opening as a coordinated redesign. Adding a sash does not necessarily turn a decorative fanlight into convenient ventilation. Conversely, an existing pair of opening leaves might become a calmer fixed area when daylight matters more than access. For a wide rectangular opening, a double-casement inward-opening window can illustrate one operating arrangement. It does not determine period character, glazing-bar design or the correct profile for a shaped replacement. Reach the final decision from the measured opening, room use and complete façade drawing rather than relying on a historic photograph.
Organise enquiries, approval and installation precisely
Bring all production information into the initial enquiry: dimensioned elevations, sections at unusual junctions, views from each side, opening direction, fixed panes, the glazing-bar drawing, project-specified colour or finish, and photographs of the existing work. Assign every unit a unique position number. Ask which details still need approval before manufacture, then assess quotations against identical drawings. An apparently cheaper proposal is not comparable if its geometry, subdivisions or functions differ. Before signing off, reconcile every outline with both the measured opening and the intended finished wall.
Coordinate the program with structural work, weatherproofing, render or cladding, and interior fit-out. Bloomcabin gives a delivery period of 4–6 weeks for windows and doors, subject to order confirmation; finalise the construction sequence only after receiving that confirmation. Do not expect unverified site dimensions to be corrected automatically during ordering. Before installation, inspect the delivered position number, profile, opening side and visible condition. Retain the approved drawings and acceptance records. The commercial guarantee for windows and doors is 5 years, with conditions and procedures set out in the relevant documents. Any applicable Australian Consumer Law guarantees remain separate and cannot be excluded.
Frequently asked questions
Can a round window be opened?
Whether it should open is a separate design decision. On circular and arched units, the sash, hardware and supporting frame can substantially change appearance and ease of operation. Fixed glass is usually simpler when only daylight is required. If the room also needs fresh air, a reachable opening unit elsewhere may be a more effective solution.
Which measurements define an arched window for manufacture?
Supply an unambiguous outline and identify the reference behind each measurement. A semicircle needs its width, full height and curve starting level; every other arch requires enough information to reproduce its exact geometry. Mark the room side and exterior side, and distinguish structural-opening, finished-opening and unit dimensions. A measured elevation accompanied by a section reduces the risk of conflicting interpretations.
Are glazing bars useful in gable windows?
Their value depends on the pane size, outlook, adjoining windows and intended composition. Bars may continue an existing façade rhythm or make a broad area feel ordered. They may equally weaken a crisp triangular outline or obstruct an important view. Confirm both the pattern and the type of bar on a formally approved elevation.
When should measuring take place?
Undertake the controlling survey only when the opening and the construction layers that establish window position can be judged with confidence. That stage varies between a new build and a renovation. Before releasing dimensions for manufacture, agree the timing with those responsible for the structure, wall assembly, junction details and installation.
Could a gable window require project approval?
Location, building type and the proposed work must be known before that question can be answered. The applicable pathway depends on the project and responsible authority. Discuss alterations—especially work to an existing structure or its external envelope—early with suitably qualified planning and construction professionals. Requirements are set through the relevant Australian state or territory and local council, so they must be checked for the actual site.
Next step
Successful circular, arched and gable glazing comes from coordinating several decisions rather than choosing an attractive outline in isolation. Derive the profile from the elevation, interior and intended function. Decide separately how daylight and ventilation will be provided, then record dimensions, controlling lines and the glazing-bar pattern without ambiguity. Add junction design, operating clearance and construction sequencing to the same set of information. Before ordering, obtain agreement on a measured exterior elevation, an interior elevation and an appropriate section. That coordinated record supports both the final survey and the work on site, allowing the shaped window to become an integrated architectural element instead of a late construction problem.
