
Planning Windows and Doors for a Kitchen Extension
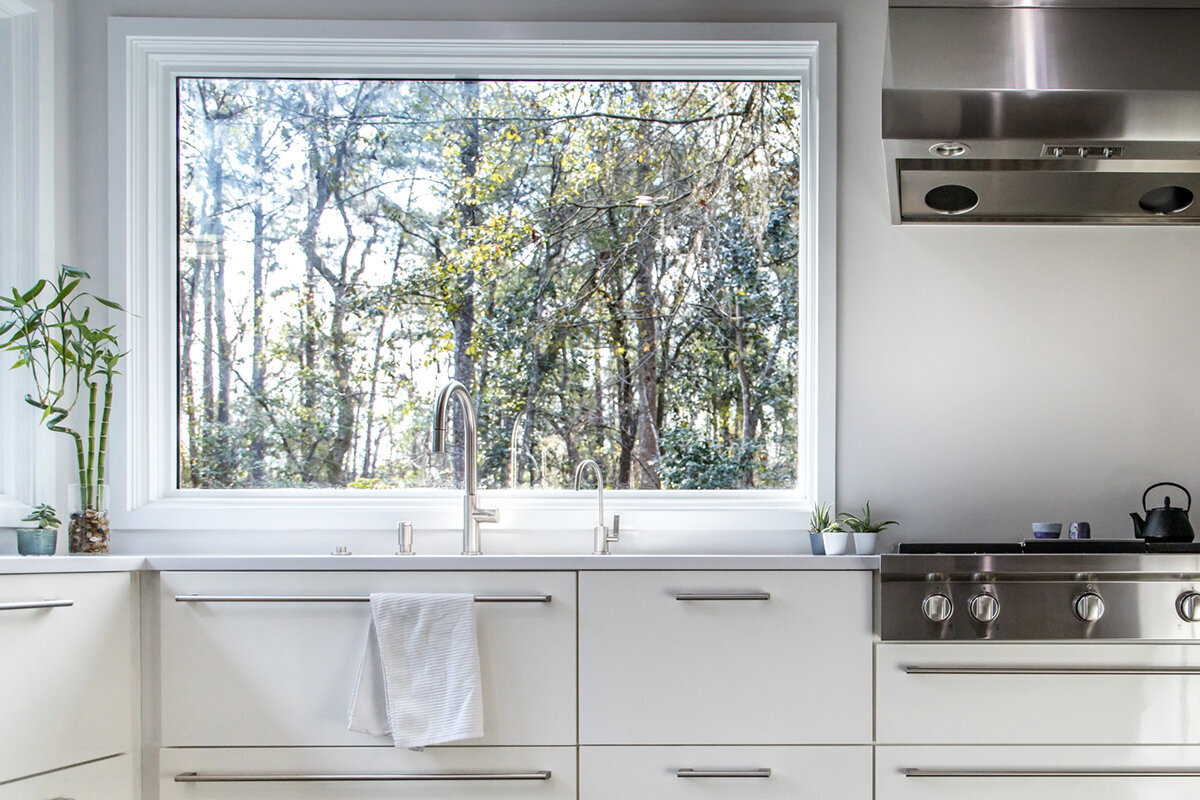
Planning a kitchen extension
The wish for more space is often the starting point for a kitchen extension. However, its windows and doors are just as influential as the additional floor area: they affect cabinetry placement, daylight at the dining table, the ease of reaching the patio and summer comfort. If openings are selected only once the kitchen has been planned, light, storage and access may compete with each other. Plan the layout, furniture, views and facade as one exercise instead. This guide explains which choices deserve attention first, how fixed glazing, opening windows and patio-door options differ, and what should be coordinated with the project and fit-out team before an order is placed.
Pre-purchase check 1
Start with kitchen use, not the facade
First map the room around genuine activity zones; do not begin by choosing the biggest expanse of glass. Show the full depth of the kitchen run, tall cabinets, sink, cooktop, island, table and chairs. Trace movement into the extension, between the kitchen and dining table, towards the refrigerator and out to the garden. This exposes doors that crowd an island, open sashes that narrow a walkway and sills that meet the benchtop. Include bins, food storage and countertop appliances in the sketch. Even an attractive elevation will frustrate daily use if it breaks up the only practical stretch of wall for cabinets.
Set an order of priorities before positioning openings. Decide whether the addition is primarily a light-filled cooking space, a garden-facing dining room or the link between the house and patio. A smaller extension may benefit more from an uninterrupted wall for appliances and storage than from another floor-to-ceiling pane. By contrast, generous glass may transform an addition intended to enlarge the dining space. Identify the main garden exit as well as routes to places such as the bins or herb bed. With those needs mapped, you can judge where access is essential and where glazing alone will serve the room better.
Plan daylight across the room
Good daylight depends on its reach through the room, not simply the total area of glass. End-wall glazing may establish a strong outlook yet leave workspaces deeper inside subdued. Light from a side opening or elevated pane can reach those areas while preserving useful wall space. Test the proposal through the day. Sun at the breakfast table may be pleasant in the morning, while low-angle glare across a bench or dining setting may not be. Also assess the view from the cooking position and how nearby homes, boundaries or future privacy screens could influence each opening.
A fixed pane positioned for light and outlook is useful where neither routine airflow nor a passage is required. Possible locations include above built-in seating, alongside tall cabinetry or around a chosen garden view. With no sash arc to accommodate, the pane can be positioned closely against furniture lines. The broader design must nevertheless provide ventilation and practical cleaning access. Confirm how both surfaces can be reached, and allow for any curtains, plants or lighting planned nearby. The composition is usually more settled when each of a few openings has a defined purpose, rather than distributing similar windows evenly across every elevation.
Pre-purchase check 2
Coordinate benchtop, sill and tapware
A window over a bench can be a strong feature, provided all adjoining levels are resolved together. Check the opening dimensions against the benchtop, splashback, sill and handle heights. Set too low, the unit may break the working surface; set too high, it can remove the intended view from the sink. Where the sink sits beneath it, establish the locations of the tap, bowl, power points and wall finish early. Tapware, drying racks and sill-mounted appliances must also clear an opening sash. Use a scaled elevation of the kitchen run, because the floor plan alone will not reveal these vertical conflicts.
An top-hung outward-opening awning window may provide extra airflow above a work area when a side-hinged sash would get in the way. Judge the format against the intended operation, exterior design and cleaning access at the actual installation point. The everyday user matters too: the handle should not require an awkward reach across the bench, and coffee machines or utensils should not obstruct it once the kitchen is occupied. Plan indoor shading at the same time. Any glare-control system needs suitable mounting room without interfering with the window hardware, tap or overhead cabinets.
Place ventilation openings where they stay usable
A kitchen generates heat and moisture, but placing a window immediately behind the cooktop does not necessarily create effective ventilation. Wind through an open sash can change airflow, and cookware or the operating rangehood may make that position difficult to reach. Consider how the room will be aired briefly in the morning, during cooking, after entertaining and in wet weather. Separate openings on more than one side may provide flexibility that one large unit cannot. The kitchen design, whole-room ventilation approach and advice from the relevant project professionals should inform the final arrangement.
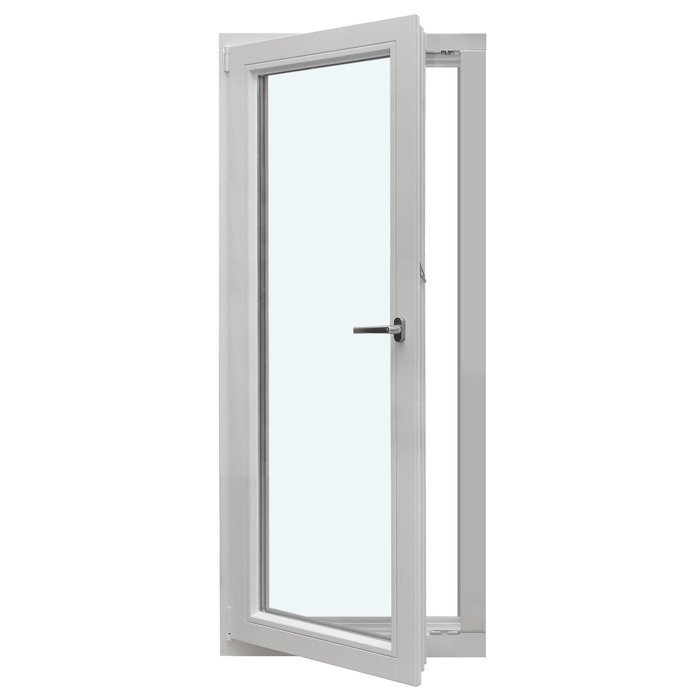
A single-sash window that opens inwards offers a separately operated source of ventilation when its arc remains clear of furniture and curtains. Because the sash enters the extension, it needs dedicated indoor space. An outward-opening alternative preserves that space but must be clear of exterior obstacles. Plot the operating zone on each side of the wall rather than judging the closed elevation alone. This is particularly important beside a narrow garden passage, where an external sash could impede movement. Label every window according to whether it will be opened often or mainly supply daylight. That avoids specifying opening hardware in positions that will rarely be accessible.
Pre-purchase check 3
Choose the patio connection from real routes
Base the patio-door position on the route people will actually follow. The best location may sit off-centre, close to the dining setting or beside the part of the kitchen used when taking meals outdoors. Test circulation while chairs are pulled back, one person is cooking and somebody else is entering. Although a door behind the table can look welcoming, regular garden traffic may disrupt the dining area. Moving it to the side can protect that space, provided the exterior path is designed accordingly. Map patio seating, the barbecue, planters and weather protection as well, so movement inside and outside follows one coherent arrangement.
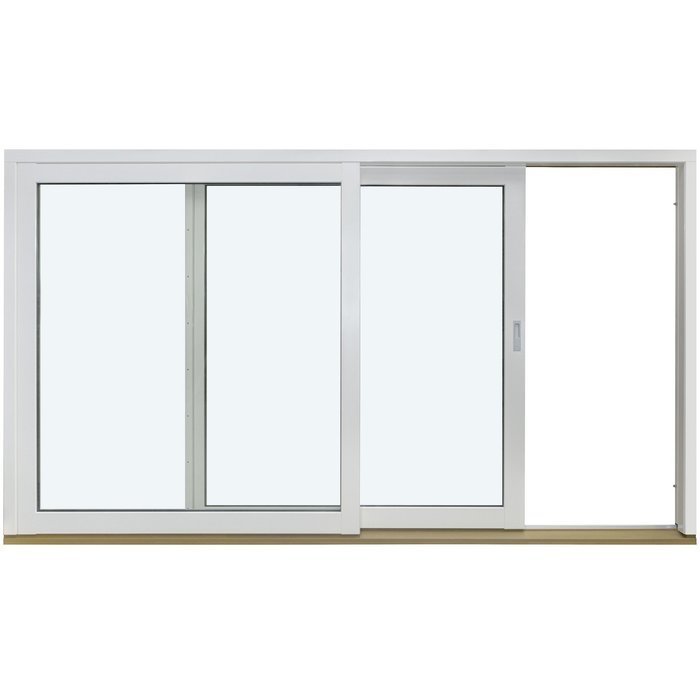
Where a wide, straightforward route outdoors is wanted, the Patio Life lift-and-slide garden door offers another approach to a standard hinged door. Do not assess it from clear-opening width alone; nearby furniture, the facade layout and routine handling are equally relevant. On the floor plan, identify which panel moves and which remains fixed. One frames the outlook, while the other establishes the usable exit point. Ask the project team to resolve the threshold and adjoining floor construction before dimensions are confirmed. Early coordination allows the interior finish, patio build-up, drainage and visual continuity across the doorway to be designed as a single junction.
Compare hinged, sliding and folding doors deliberately
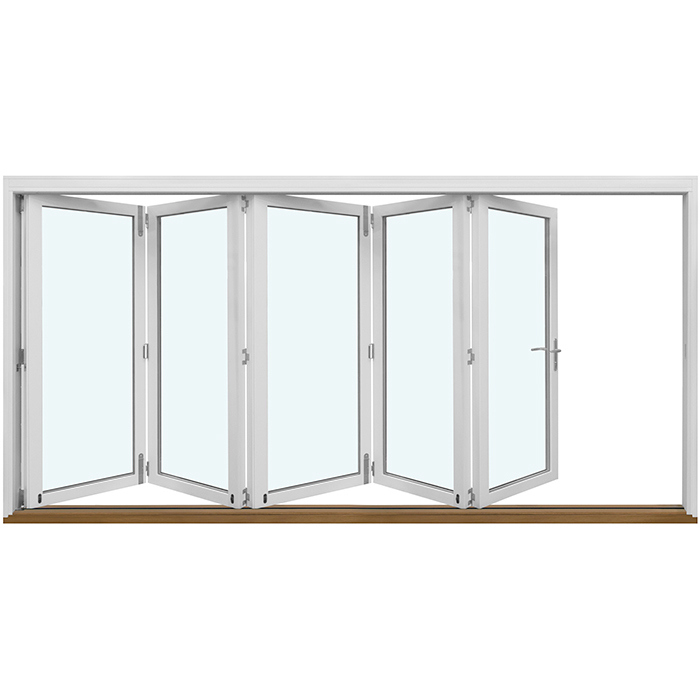
Choose the mechanism by testing the access it creates. A single hinged patio door gives a readily understood everyday exit and leaves neighbouring wall area available for glazing or furniture. Paired doors can introduce symmetry and provide a larger opening, but their leaves require operating space. A sliding system avoids an indoor swing, although part of the glazing generally remains fixed according to its configuration. A folding system divides a broad opening into several leaves and needs somewhere for them to stack. Draw every option in its open position and test it against an ordinary evening meal, not only the occasional summer gathering.
A glazed outward-opening folding door makes sense when the broad opening will be used repeatedly and the leaves have sufficient room outside. Its dramatic appearance does not by itself guarantee convenient daily access. Identify the first panel to operate and check whether that route falls naturally beside the table or island. Review the furniture arrangement with the system closed as well as folded away. A sideboard must not prevent operation, and curtains or shading should work without relying on the moving panels. Studying elevations together with the furnished plan helps produce an opening that functions through the year instead of serving only as a visual gesture.
Pre-purchase check 4
Connect the new elevation with the original house
A contemporary addition need not imitate the existing home, but the two should still read as related. Alongside frame colour and width, compare sill and head levels, vertical alignments and the ratio of masonry to glazing. Matching a significant upper line can help a new window sit comfortably even when its proportions differ. Architectural order must not override kitchen function, however: an inherited axis is unsuitable if it cuts through tall cabinetry or meets the plumbing position. Prepare both a full external elevation and internal views of the kitchen walls, then verify that every opening appears consistently across the drawings.
On a narrow part of the facade, an outward-opening single casement window can give a narrow wall section a disciplined proportion while keeping the sash out of the interior. Its name establishes the direction of operation only, so confirm all other characteristics in the product specifications and project documents. Where the original house features glazing bars, consider whether the extension should use integral divisions, applied bars or uninterrupted glass. Directly copying the old pattern is not automatically preferable. Any chosen grid should support the sizes of neighbouring openings without needlessly cutting across daylight or the intended view.
Treat privacy, sun and furniture as one decision
Broad areas of glass strengthen the visual connection outdoors, while making indoor activity easier to see. Check sightlines from the garden, adjoining properties and regular seating positions. Privacy can be achieved without screening the whole elevation: carefully placed solid wall, elevated glazing or a side window may retain both seclusion and daylight. For sunny orientations, reserve a suitable location for shading during the design stage and test it against door operation, exterior circulation and the facade composition. Indoor treatments alter the character of the room; exterior systems also affect the outside appearance and clear space beside the wall.
A fixed triangular or sloping window can draw daylight beneath an angled roof or into the upper part of a gable. Treat it as an accent rather than a substitute for properly located main windows. Before selecting an unusual shape, define the outlook it frames, the period when it receives light and its relationship with the internal wall. High glazing above dining furniture may need to accommodate pendant lights, curtains or acoustic treatments. Over the working kitchen, safe cleaning access may carry more weight. These formats are most effective when they have one clear task and the surrounding elevation remains restrained. Finalise them after coordinating roof geometry, furnishings and the principal drawings.
Pre-purchase check 5
Resolve floor and junction details early
Much of the garden elevation's quality is determined at its junctions: the end of the indoor flooring, the meeting point with the patio, and the detailing around walls, frames and neighbouring construction. Resolve them before ordering because they influence unit dimensions, installation sequence and perceived frame height. Matching finishes can visually extend the interior, whereas contrasting materials can make the threshold intentional. In either case, design the indoor and outdoor build-ups together. Ask the appropriate designers and trades to review the project-specific connections, protection of adjacent components and installation conditions. A detail borrowed from another building may not suit this one.
Door handing is another small detail with a substantial effect. A single outward-opening patio door leaves interior floor space available, which can help in a narrow dining zone. Its exterior arc must still clear the patio layout, steps, planting and normal route. Imagine it standing open for a summer meal: establish where the leaf rests, how people pass and whether it remains manageable in wind or while someone carries a tray. Select the handle side to suit movement rather than symmetry alone. Mark the operation of every unit on both plan and elevation so the kitchen designer, builder and installer are all referring to an identical arrangement.
Prepare the order with a complete opening schedule
Create a schedule before choosing individual units. Against each opening, record the room, planned structural-opening dimensions, floor-plan position, sill and head heights, mechanism, handing, function and preferred appearance. State whether its main role is daylight, outlook, airflow or access. Reviewing the list will reveal conflicts, such as a ventilation window hidden by a tall cabinet or a wide door occupying the proposed exterior-light location. Ask the design and construction teams for any project-specific installation information still absent. A preferred product dimension should not take the place of verified opening and junction details.
Cross-check the proposed units against the kitchen, electrical, shading, landscape and structural plans. Frames, handles and operating zones may overlap power points, switches, heaters, lights, curtain tracks or cabinetry. Resolve alterations before the order becomes binding. Bloomcabin windows and doors carry a five-year commercial guarantee, in addition to rights that may apply under Australian Consumer Law. Delivery is 4 to 6 weeks, subject to order confirmation. During that period, perform a final review of the elevations, dimensions and opening directions. The order should describe how every unit will work in the completed extension, not merely how it will look.
Frequently asked questions
Should the patio door be centred in a kitchen extension?
No. Centring the door may create a balanced elevation, but only when that position also supports the kitchen, dining setting and outdoor circulation. If daily garden traffic follows one edge of the room, placing the door there may work better. Evaluate it on a furnished plan with the dining chairs pulled back.
Is large fixed glazing suitable for a kitchen?
Yes, when the pane's principal jobs are admitting daylight and framing an outlook, and dependable ventilation is provided elsewhere. With no opening arc, fixed glass can fit above a built-in seat or beside cabinetry. Confirm cleaning access, privacy treatment and shading before settling its size and position.
Which opening direction is better for a patio door?
The better choice depends on the site. An inward swing consumes room within the extension; an outward swing needs clear patio space. Assess circulation, dining furniture, exterior furnishings and handle placement together. Draw each alternative open in both plan and elevation before deciding.
When should the kitchen be planned: before or after the windows?
Design them together. Begin by defining the main activities, circulation and approximate furniture volumes, then coordinate sill levels, door locations and operating directions. Complete a kitchen elevation before confirming the window order so cabinets, taps and power points do not clash with the openings.
Do I need several opening windows in a kitchen extension?
The answer depends on room geometry and the complete ventilation strategy. Separate opening units can support different airing patterns, but each needs reachable operating space and affects furniture placement. Identify the windows that must remain accessible, then have the kitchen designer and appropriate project professionals coordinate the final solution.
Next step
The strongest kitchen extensions make every opening useful. Daylight falls where it is needed, uninterrupted bench and storage areas remain available, and movement to the patio feels effortless. Establish activities and furniture first, arrange the openings second, and select individual models only after that. Coordinate a floor plan, internal elevations and a full opening schedule. This turns windows and doors into working parts of the room rather than obstacles or facade features with no connection to daily life.
