
How to Prepare Garden Shed Timber Before Painting
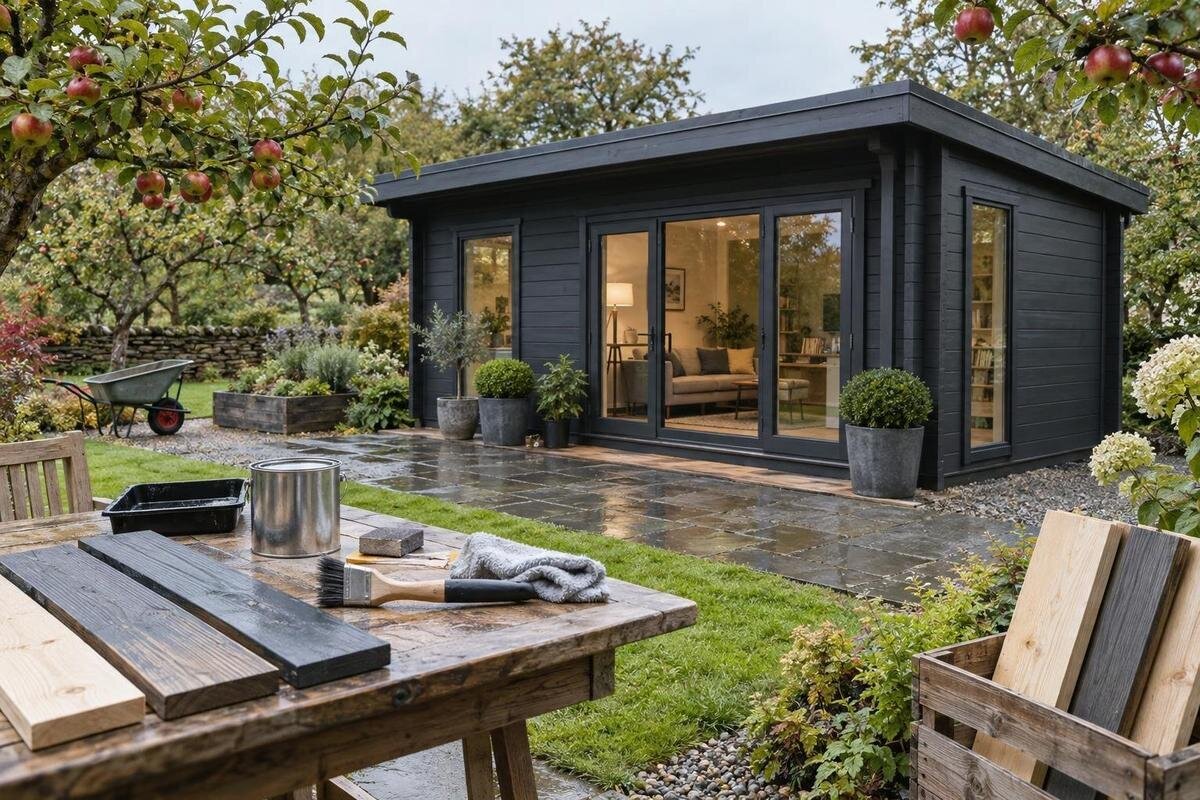
Garden shed preparation
Paint adheres best to a garden shed when the timber is sound, clean and dry, but those conditions take more than a quick sand. A new-looking board may already have a supplier-applied treatment or finish; an older shed may have several layers, repairs or weathered patches. The preparation method depends on that history. Work through identification, inspection, cleaning, drying, repairs, sanding and dust removal before deciding whether primer is needed. This guide covers the surface up to the point where the selected paint system can be applied; it does not assume every shed arrives untreated or that one primer suits every timber surface.

Before you buy 1
Find out what finish is already on the timber
Before using sandpaper, establish whether the timber is bare, previously painted, stained, sealed or otherwise treated. A new-looking board is not proof that it is untreated: a clear factory-applied coating can be hard to spot, and different faces may have had different exposure. Check purchase paperwork and care instructions, then inspect several areas rather than judging one easy-to-reach panel. Look at edges, cut ends, sheltered corners and places where the finish changes. Note flaking, glossy patches, powdery residue, discolouration and exposed fibres. These clues show where the surface is inconsistent, but appearance alone may not identify the product already on it. Make a note of which faces show each condition.
Record any known paint, treatment, filler or previous sanding, and photograph patches that need attention. If the finish is unknown, pause before abrading it or applying a test coat; the new system must be compatible with what remains. Ask the supplier or a qualified painter to identify the surface if you cannot confirm it. If you are choosing a new shed, the Verdana 1 garden house listing can help identify the model you are considering, but use the product information or a seller’s written answer to confirm whether its supplied timber is bare, pre-treated, primed or coated. Do not infer this from a product name or image.
Inspect the whole shed before starting
Walk around the structure and inspect every face you can reach, not just the side most visible from the house. Check lower boards, corners, joints, end grain, door and window edges, and areas behind stored items. Dirt, splinters and old coating can collect where water runs or where a surface stays shaded. Note which faces need attention so the same area is not missed later. If a face is too close to a fence or above a safe working height, do not stretch from an unstable position; arrange safe access or ask a suitably qualified tradesperson. Keep tools and sanding equipment out of walkways.
If you have not bought the shed yet, consider whether you will have room to prepare all sides once it is in place, and ask whether any preparation should happen before assembly. Check the supplied instructions before removing trim or hardware; a paint plan is not a reason to alter parts or coat moving edges without guidance. The Verdana 2 garden house page identifies a model to investigate, but does not establish its supplied finish or assembly sequence. Base those decisions on the exact product information and instructions for your order. For an assembled shed, move stored items and clear a route so you can inspect lower panels without leaning across equipment.
Before you buy 2
Assess damage before coating
Paint can make a surface look more uniform, but it will not repair loose fibres, a deep split or timber that has softened. Inspect board faces and edges for cracks, raised grain, nail holes, dents and old filler that has pulled away. Look for recurring damp marks or changes around joints as well as obvious damage. A visual check can help you map minor defects, but it is not a structural assessment; do not puncture or dig into the timber to test it. Mark each spot with removable tape or a simple sketch so repairs are not overlooked after cleaning. Check the surrounding area too, in case a defect extends beyond the visible mark.
For small, stable cosmetic defects, use a repair material labelled for exterior timber and compatible with the intended paint system; follow its directions for preparation and curing. Do not use filler to bridge a moving joint or disguise decay. Extensive damage, movement, persistent damp or loose components need assessment by a carpenter or another suitable professional before coating. The Durano garden house listing identifies a model, not the condition of every piece supplied. If you are buying a new shed, inspect the actual timber when available and resolve damage or uncertainty before sanding or painting.
Clean the surface without soaking it
Remove loose dust, cobwebs, soil and surface grime before sanding so grit is not dragged across the boards. Start with a soft brush or cloth and work from cleaner areas towards dirtier patches; clear corners and ledges as well as broad faces. If water or a cleaner is needed, use only a method allowed by the surface-care guidance and paint-system instructions. Avoid soaking the timber: water can enter joins and end grain, and wet boards cannot be prepared until they dry. A pressure washer, abrasive pad or strong solvent is not automatically suitable just because it removes dirt quickly. Do not scrub hard enough to roughen the timber unnecessarily.
If a cleaning product is permitted, read its label for dilution, application, rinsing and disposal directions; do not mix products. Remove residue as directed, and keep cleaner away from fittings or adjacent surfaces if compatibility is uncertain. A clean-looking board can still carry oil, wax or cleaner residue that interferes with the next layer. For a model you are considering, the Veltor 1 garden house listing can identify the product, but ask which care instructions apply to its supplied finish. A method suitable for bare timber may not suit a surface with a previous coating.

Before you buy 3
Let the timber dry before continuing
After washing or damp wiping, let the timber dry before filling, sanding or applying primer. Sheltered joins, areas under trim and end grain may dry more slowly than an exposed face, so a board that feels dry in one place may not be ready everywhere. Keep rain and splashes away while it dries, and allow air to move around the shed without directing intense heat at the boards. Do not coat damp timber; trapped moisture can contribute to adhesion problems or later finish failure. If a cleaner specifies a rinse or a further waiting period, follow that direction and allow the surface to dry again afterwards.
There is no universal number of hours to wait: recent rain, shade, airflow, board condition and the amount of water used all affect drying. Follow the paint and primer labels for acceptable conditions and any timber-moisture guidance they provide; do not invent a threshold when none is stated. Check the least exposed areas, not just the sunny face, and postpone the job if there is fresh dampness or conditions that will wet the surface again during preparation. Do not speed-dry boards with an unapproved heat source. If you are unsure whether the timber is ready, seek advice from the coating supplier or a qualified painter.
Repair defects with compatible materials
Once the timber is clean and dry, deal with repairs before sanding the whole surface. Fill only small, stable holes or shallow defects with a product labelled for exterior timber and suitable for the intended coating. Follow directions for preparation, application depth, drying or curing and sanding; different fillers are not interchangeable. Some products shrink or require another application, so inspect the repair after the stated cure rather than smoothing it while soft. Do not assume ordinary interior filler, flexible sealant or paint will provide a sound repair. If a repair remains soft, cracked or proud of the surface, correct it before moving on.
Match the repair to the problem: a small nail hole is different from a split board, open joint, loose fitting or recurring movement. Damage that affects strength, keeps returning or may indicate ongoing moisture needs professional assessment, not a layer of filler and primer. If you are comparing a new shed, the Orello garden-house page can identify the candidate; use the seller’s written information to clarify how to report damage and what repair guidance applies. Keep unresolved areas uncoated until they are dealt with. Do not fill joints or gaps that are meant to move unless the product instructions specifically call for that treatment.
Before you buy 4
Sand only as much as the surface needs
Sand only when the timber and any repairs are dry. The aim is to remove loose coating, smooth raised fibres, feather the edges of sound old paint and provide the surface the chosen paint system calls for—not to strip every board automatically. Follow the coating maker’s instructions for the surface and abrasive grade. If no grade is named, test a modest abrasive in a small, inconspicuous area rather than starting aggressively. On exposed timber, sand with the grain where practical and use even pressure. This reduces the risk of cross-grain scratches, hollows or rounded board edges that can show through paint. Work in small sections so you can check the result as you go.
Use a sanding block or suitable tool that keeps the abrasive flat on broad faces; work lightly on corners, edges and thin details. Stop when the required finish is reached rather than cutting through stable coating. If you are considering a new shed, the Modano garden-house listing identifies a model, not a sanding instruction; confirm its supplied surface and any preparation restrictions for the exact item before ordering abrasives. Capture dust where practical and use eye and respiratory protection in line with the tool and coating instructions. Do not sand an unknown old coating until its identity and safe handling requirements are established.
Remove sanding dust and inspect again
Remove sanding dust thoroughly before primer. Brush or vacuum dust from flat faces, corners, joints and mouldings, then use a clean, lint-free cloth if the paint instructions allow it. A damp cloth can raise fibres or leave moisture, while some tack cloths and household wipes may leave residue; follow the coating maker’s directions rather than adding a new contaminant. Pay attention to horizontal ledges, door edges and areas around fasteners, where fine dust settles. Clear filler dust too, and check that repairs have cured as directed. Keep dust off adjacent surfaces so it is not blown back onto the shed during later work.
Inspect the timber again in good, even light. A clean cloth should not pick up loose powder, and the surface should feel smooth enough for the intended finish without snagging on splinters or sharp raised edges. If you spot a rough patch, sand that area lightly, remove the fresh dust and let any damp cleaning dry before continuing. Recheck feathered paint edges and repairs; if the surface still feels uneven or dusty, repeat the relevant preparation step rather than expecting primer to hide it. Keep the cleaned surface free of hands, tools and stored items while you work.

Before you buy 5
Choose primer for the actual surface
Primer is chosen for the surface and the topcoat, not simply because the shed is made from timber. Bare, previously coated, weathered and repaired areas may have different requirements; knots, resin or other specific features need guidance from the paint maker rather than a one-primer-fits-all assumption. Choose an exterior timber primer only when its label says it suits the substrate and is compatible with the intended finish. Check whether directions call for spot-priming repairs, priming all bare areas or a full coat. The coverage and number of coats should come from the product system, not a general rule. If the timber has mixed surfaces, check the instructions for each one.
Read the primer and topcoat information together, including surface-preparation, drying and recoat directions; the labels take priority over a general online rule. Do not combine systems simply because both mention timber, and do not apply primer over loose paint, wet wood, dust or uncured filler. If you are checking a possible purchase, the M timber garden shed page identifies the listing, but confirm its exact material and finish details before choosing primer. For an older or poorly bonded coating, ask a qualified painter whether the remaining surface can support the proposed system. Test compatibility in an inconspicuous area if the paint instructions recommend it.
Make a final paint-ready check
Before priming, make a final pass across the whole shed: the timber should be clean, dry and sound; loose coating removed; stable repairs cured; edges feathered; and sanding dust cleared. Check corners, cut ends, joints, undersides of accessible edges and the face that gets the least attention. Remove cleaning residue or masking only as product directions require, and protect nearby materials from dust and splashes. This inspection helps catch a missed patch before it is covered. Keep a note of cleaners, fillers and primer selected, along with the preparation steps, so you have a clear record of what was used on each surface.
Hold off if the timber is damp, the existing finish is unidentified, a repair is moving or product instructions conflict with conditions at the shed. Resolve the issue before coating; extra primer is not a substitute for sound preparation. If you are checking a possible purchase such as the Timber Tool Shed S listing, use the exact product documents and the seller’s answer to confirm what material and finish you will receive, then plan preparation around those details. Once the surface passes these checks, follow the selected paint system’s instructions for priming and application; preparation is complete, but the coating’s own directions still govern.
Frequently asked questions
Should I sand a new timber garden shed before painting?
Not automatically. First confirm whether the timber is bare or has a factory-applied treatment or coating, then follow the preparation instructions for that surface and paint system. Sanding may be needed to smooth fibres or prepare a coating, but sanding through a sound finish can leave an uneven base.
Does timber always need primer before painting?
No single primer suits every surface. Check whether the timber is bare, previously coated, weathered or repaired, and choose a primer only if its label covers that surface and it is compatible with the intended topcoat. Follow the product directions for where and how to apply it.
Can I paint over a factory-applied treatment?
Only if the treatment and paint system are compatible and the instructions allow it. Find out what was applied rather than guessing from the timber’s appearance. If you cannot identify the finish, ask the supplier or a qualified painter before sanding or coating.
How long should timber dry before painting?
There is no universal waiting time. Rain, shade, airflow, the amount of water used and the condition of the timber all affect drying. Follow the cleaner and paint-system instructions, and check sheltered areas as well as exposed boards before continuing.
What should I do if an old coating is peeling or unknown?
Do not paint over loose coating, and do not assume an unidentified layer is safe to sand. Establish what is on the timber and what preparation is appropriate. For an unknown coating or extensive peeling, seek advice from a qualified painter before continuing.
Preparing timber for paint is a sequence of checks, not a single sanding pass. Identify the existing finish and any damage first, then clean, dry, repair, sand and remove dust in an order suited to the surface. Choose primer only after you know what is on the timber and have checked compatibility with the topcoat. If the coating is unknown or damage goes beyond a minor repair, get suitable advice before painting.
