
Propagating Cuttings Successfully in a Greenhouse
Bloomcabin journal for greenhouse growers · Cuttings edition
Successful propagation from greenhouse cuttings
Do not think of a cutting as a tiny finished plant. It is living material that must conserve water, initiate roots and adjust to independent growth within carefully balanced surroundings.
A greenhouse turns propagation from a matter of finding a lucky windowsill into a repeatable growing practice. Match the cutting method, clean preparation, open medium, filtered light and managed humidity to each plant rather than applying one formula to every species.
For a permanent propagation bench, the Classic Aluminium Greenhouse provides a clear workspace, practical roof ventilation and sheltered conditions for an organised daily propagation routine.
Starting materialBegin with healthy, accurately named stock; reject any shoot showing stress, disease or pests.
PositionProvide softly bright light, moderate warmth around the medium, steady moisture and ventilation—not a sealed, continually wet compartment.
Growing onWait until a network of roots can supply the cutting away from shelter before moving it into a larger pot.
Warmth is only one benefit of greenhouse propagation. Vulnerable cuttings are separated from outdoor fluctuations while you manage illumination, moisture, ventilation and temperature independently.
A newly taken cutting still loses water through its foliage, but developed roots are absent and cannot replace it. Oxygen must reach the base, the medium needs consistent dampness without suffocation, and mild illumination must support active tissue without causing heat stress. Outside, drying winds, downpours, cold nights or a hot afternoon can quickly upset that balance. Under glass, watering, shade and ventilation can be managed far more closely.
Avoid making the entire greenhouse constantly hot and humid. Excess warmth accelerates moisture loss, while saturated mix and persistent condensation favour rot and disease. Create a modest protected zone within the structure instead: hygienic, lightly shaded and aired whenever necessary. Aim for regulated shelter, not an airtight chamber.
Check 01 · Starting material
Choose the stock plant before the tool
Whatever affects the stock plant can carry into its cuttings. Select vigorous, true-to-type growth from a plant that is adequately watered but not soft from recent overfeeding. Exclude specimens with distorted shoots, leaf spotting, webbing, aphids, spider mites, feeding damage, or dark and yielding stem tissue. Forming roots will not automatically remove an internal infection or another inherited problem.
For many soft and partly ripened shoots, harvesting in the cool morning helps because their tissues are usually well hydrated. Shade the material immediately, handle manageable batches and insert each piece promptly. Normally, flowers, buds, fruit and seed heads are removed so their demand does not divert reserves from root formation.
Look for pest-free, energetic shoots showing their usual leaf colour and characteristic habit.
Collect pieces only from clearly identified plants for which propagation is permitted.
Prefer non-flowering shoots at the right maturity over impressive but exhausted tips.
If required, irrigate the stock on the previous day; never harvest from growth already stressed by drought.
Check 02 · Choose a method
One cutting technique cannot suit every plant
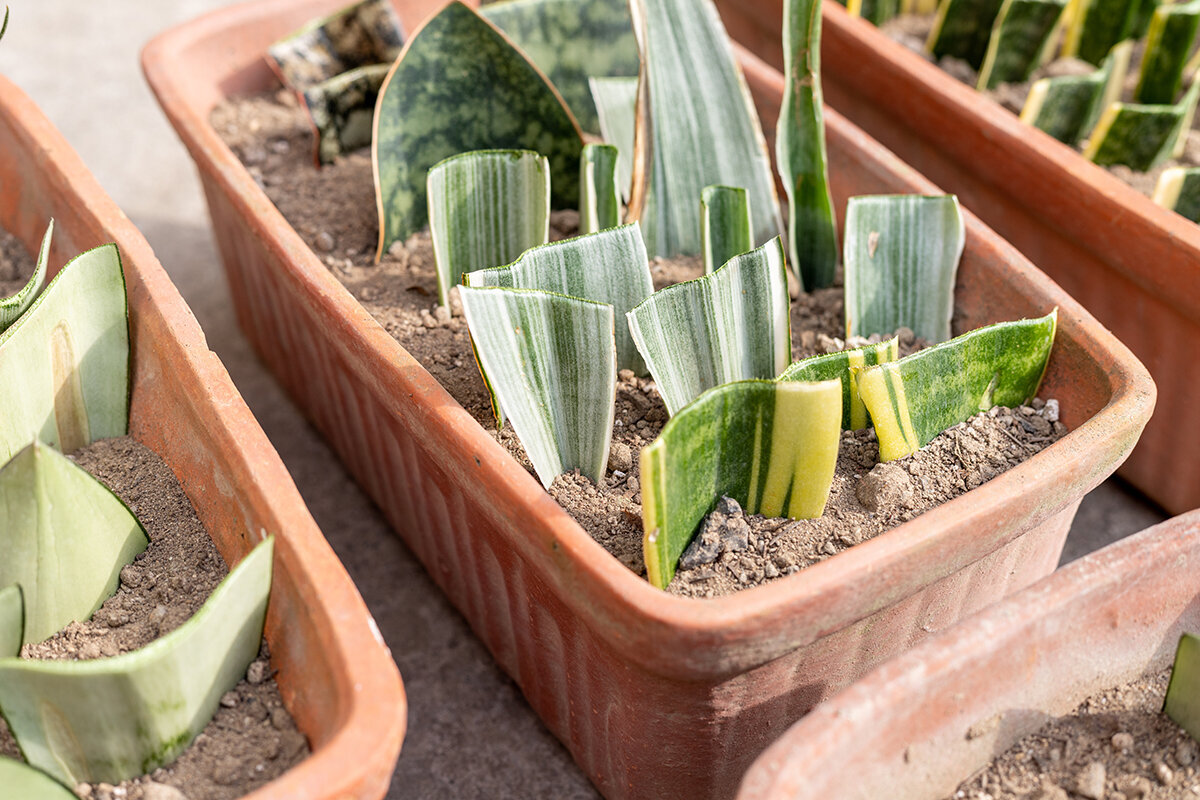
Choose the technique according to growth habit and how mature the tissue has become. For many shoot cuttings, a node is significant because it carries leaf junctions and tissue capable of initiating roots. Methods using leaves, stems, canes or roots succeed only when the species can regenerate both the required shoots and roots from that material.
Softwood
Young, flexible growth
Young shoot cuttings are often taken from late spring through summer, including from fuchsias, pelargoniums, coleus and basil. They often root quickly but can dry out just as fast.
Partly woody
Shoots midway through ripening
Rosemary, lavender, sage, numerous ornamentals and evergreen shrubs often suit this approach during mid or late summer. Less foliage and carefully managed moisture may improve results.
Mature hardwood
Leafless, dormant woody pieces
Currants, willows and certain other woody plants respond to this approach. Because the sections are leafless, evaporation is reduced; however, they must be collected at the correct dormant stage and their polarity kept obvious. Mark or recognise which end is basal.
Leaves and canes
Plant parts chosen by species
Leaves can generate plantlets in African violets and numerous begonias, whereas cane sections can be appropriate for dieffenbachia and dracaena. Root production by a leaf does not guarantee that the same material is capable of developing an entire new shoot.
Root pieces
Regrowth held beneath the soil
Only certain perennials, including phlox and Oriental poppy, can generate shoots from pieces of root. Treat root propagation as its own technique rather than using it in place of a stem-cutting method.
Exception for succulents
Manage wounds for the particular species
With some succulents, allow the wound to dry before placing the piece in medium. Humid surroundings can work against species vulnerable to decay, so consult dependable instructions for the plant concerned.
Check 03 · Accurate cutting
Work swiftly, intentionally and without contamination
Use sharp secateurs or a knife appropriate to the shoot; crushed tissue is not an acceptable cutting surface. Clean containers and the working area first, then sanitise equipment between batches or stock plants, especially when handling valuable collections or material intended for sharing. Make a hole in the dampened mix with a pencil or dibber before insertion. This prevents fragile basal tissue—or any applied rooting preparation—from being scraped off.
01
Hygiene
Use fresh propagation mix and begin with washed trays, clean labels, sanitised tools and clean hands. Keep garden earth and dirty pots away from the bench.
02
Collect a cutting
A conventional tip or shoot cutting begins with a vigorous stem section or healthy growing point. Let the species determine its length and node count rather than forcing every plant to fit one measurement.
03
Reduce transpiration
Strip foliage that would otherwise be buried, and remove flowers and fruit. Where broad leaves crowd the bench or burden the unrooted piece, trim them neatly in half rather than taking away every functioning leaf.
04
Preserve polarity
Cane and stem pieces need to enter the medium basal end down. Distinctive cuts at each end can help identify polarity in hardwood material, although the correct preparation still depends on the species involved.
05
Insert and label
Insert the necessary node, settle the mix around it and irrigate with restraint. Immediately record species, cultivar, date and technique, plus the stock plant or batch identifier where useful.
Base cut · lowest node · foliage · medium level
Cutting anatomy
Understand the structure, then adjust it for the plant
Use the standard leafy shoot as an introductory model rather than a universal prescription. Consult guidance for the species before scoring woody material, placing nodes below the surface, trimming foliage or applying a root-promoting preparation.
- Basal end: place this part into dampened mix after making a clean, uncrushed cut.
- Lower node: for many common shoot cuttings, this is covered by the mix while retained foliage remains clear above.
- Remaining leaf area: supports the cutting’s metabolism, although too much foliage increases moisture loss.
- Upper bud or tip: keep it clear of the mix so it can later produce visible growth.
- Insertion depth: insert far enough to establish firm contact, but keep leaves and tender tissue above the surface where they cannot decay.
Check 04 · Controlled climate
Build conditions for rooting rather than a dripping enclosure
Until roots function properly, fresh leafy pieces commonly benefit from extra atmospheric moisture. Avoid interpreting this as a need for motionless, saturated air. Successful conditions leave foliage turgid, the growing area smelling clean and the medium consistently damp while oxygen remains available around the base.
Filtered lightOffer strong but indirect brightness or modest shade. Behind greenhouse glazing, intense summer sunshine can quickly heat foliage under a transparent lid.
Humidity coverA transparent lid or plastic tent slows evaporation. Increase ventilation whenever droplets persist instead of clearing between checks.
Tempered mediumGentle heat beneath the tray may assist plants that prefer warmth or initiate roots slowly. Measure within the mix rather than continuously warming the complete structure.
Air exchangeRegulate roof vents, doors and circulating air with care. Supply fresh air without exposing tender foliage to a dehydrating draught.
DrainageRaise trays, use containers with drainage holes and never allow the medium to stay waterlogged.
Greenhouse conditions vary sharply across Australia. Even in districts with cool nights, a closed structure can overheat during a clear day, while summer conditions elsewhere may demand substantial ventilation and shade. Check the bench at the hottest part of the day, not solely in the morning. During warm spells, a cover needs airflow as well as shading. In colder districts, glazing moderates exposure but does not replace suitable frost protection for vulnerable plants.
Check 05 · Rooting medium
Supply moisture without depriving the base of oxygen
Choose a hygienic, free-draining material that keeps its structure, is fine enough for the cutting and remains supportive. Typical garden earth performs poorly in small pots: it may compact, wet irregularly and introduce weed seeds, insects or disease organisms. Before inserting cuttings, dampen the full volume evenly and permit all surplus water to escape.
| Medium | Air space | Water retention | Use and note |
|---|---|---|---|
| Perlite-rich mix | High | Medium | This lightweight option suits numerous houseplants and tender shoot pieces. Because drainage is rapid, inspect small cells before the contents become completely dry. |
| Coconut coir with perlite | Medium to high | Medium to high | Useful where moisture should remain more even without losing pore structure. Use clean components and do not compact the medium heavily when filling. |
| Coarse sand with peat or coir | Medium | Medium | A traditional mix where clean components of suitable grade are available. It holds cuttings steadily, but can be heavier and denser when potting on. |
| Water rooting | Low at the base | Very high | Useful for a small number of houseplants that initiate roots readily. When transferred into a solid mix, water-grown roots often require a careful transition. Inspect and refresh the water routinely. |
Check 06 · Root development
Distinguish new foliage and callus from functioning roots
Some plants make callus before roots; others initiate them directly from a node or another responsive tissue. Stored energy may even produce a leaf while the underground system remains inadequate. Do not test progress by repeatedly tugging the stem. Instead, watch for steady new growth, slight resistance under a very gentle check, pale roots appearing at drainage openings or against clear containers, and a cohesive root ball that has not become tightly congested.
Delay potting until several roots have branched sufficiently to maintain moisture uptake without the cover. Select a container only moderately larger and use a somewhat richer mix appropriate for the species. After transplanting, water evenly and retain bright conditions away from direct midday sunlight. Over several days, leave the cover open for progressively longer periods. This acclimatisation is essential because rooted material may still be unable to tolerate drier air and increased transpiration.
Stage 1Freshly inserted: tissue is hydrated, but functioning new roots are not yet present.
Stage 2Root initiation: the first roots or callus become visible, so continue monitoring moisture in both the air and growing mix.
Stage 3Branched root system: ready for measured acclimatisation and gentle potting that avoids needless disturbance.
Check 07 · Problems
Interpret the sign before adjusting the underlying condition
Discard pieces that are plainly decaying or heavily moulded before the problem spreads. Examine other losses without rushing to one conclusion, because several faults can produce the same outward sign. Alter only one or two variables initially and note how the batch responds.
Problem A
Wilting despite wet medium
Water may be leaving the foliage faster than the base can replace it, or basal damage may already have occurred. Possible triggers include excessive warmth, harsh sun, too much leaf area, incorrect insertion depth and early decay.
Correction: Reduce light intensity, examine the lower stem for decay, briefly increase atmospheric moisture and keep the mix damp without saturation.
Problem B
Dark, soft stem base
Common triggers for decay include excessive irrigation, restricted drainage, contaminated supplies and a sealed lid that stays condensed. No rooting preparation can remedy a zone starved of oxygen.
Correction: Discard damaged material, sanitise equipment and pots, replace the mix with a clean porous batch and restore measured ventilation.
Problem C
Bleached or dry leaves
Sunlight passing through both glazing and a clear lid can raise exposure considerably. Useful brightness is necessary, but foliage may scorch before young roots can replace lost water.
Correction: Relocate the tray to bright indirect conditions, add temporary shading and reassess the bench during the hottest afternoon period.
Problem D
Mould, algae or no progress
Development may stall because of persistently damp surfaces, spent mix, insufficient illumination, unsuitable warmth or source material taken at the wrong maturity. Some species nevertheless progress slowly even under sound care.
Correction: Increase cleanliness and spacing, clear dead foliage, assess temperature, and verify that both the season and technique suit the species using a dependable reference.
Check 08 · Batch record
Every batch improves the next
Results become steadier when propagation is treated as an ongoing process rather than an isolated trial. Keep notes beside the bench or adopt weatherproof labels. Conditions in your own structure matter more than a broad calendar: in Australia, a sheltered southern bench behaves differently from an exposed position facing east. Regional heat, chilly nights and dry summer spells can alter the working environment from one season to another.
Document losses with the same care as successful plants. Rather than chasing a flawless rate, identify which stock, tissue maturity, growing mixes, bench positions and seasonal windows produce sturdy young plants under your own conditions.
Example bench record
BatchH-26 · rosemary, partly woody · eight pieces
SourceNon-flowering, pest-free side shoots; cut in the morning
MediumDamp coir-and-perlite blend in a sanitised propagation tray
EnvironmentBright filtered light; ventilated cover; tempered bench without direct sun
ObservationDay 8: no wilting; day 18: firm hold; day 25: branched roots
LearningFor the next batch, harvest fewer pieces of more consistent size and trim slightly more foliage.
Questions from the greenhouse
FAQ
Use these answers as a starting point, and seek species-specific expert information for valuable, woody, protected or difficult-to-root plants.
Do all cuttings need rooting hormone?
No. Coleus, pelargoniums, pothos and many other readily rooted house or herbaceous plants often manage without one. A suitable preparation may assist more reluctant species. In Australia, verify the product and use through APVMA PubCRIS or the permits search, then follow the current label and destination state or territory rules. Decant only a small amount of powder or gel into a separate clean dish; never return leftovers to the original pack.
Should the humidity cover stay closed all day?
Not by default. Although a lid slows dehydration from newly prepared leafy material, inspect and air it daily. If foliage stays covered in droplets, the mix becomes saturated or fungal growth starts, lengthen the open period and reconsider irrigation, brightness and airflow. Succulents and other decay-prone plants often require little covering or none.
Is greenhouse bed soil suitable for inserting cuttings?
Usually, a fresh porous mix held in clean pots or trays is the better choice. Bed soil can compact, carry unwanted organisms and prove difficult to moisten consistently. Cell trays, small pots and shallow containers also simplify recording, inspection, separation and movement of individual batches.
How long does propagation take in a greenhouse?
The answer depends on species, propagation technique, season, stock health and the bench microclimate. Tender new material may establish comparatively soon, whereas woody pieces commonly take considerably longer. Use multiple branched roots capable of supporting the plant—not a calendar deadline—as the test for readiness.
What equipment is most useful on a propagation bench?
Choose a level bench that cleans easily, dependable drainage, shading, temperature checks, ventilation and enough space to separate batches. The Classic Aluminium Greenhouse creates a stable, accessible framework for seasonal growing. The Classic Aluminium Greenhouse also supports planning a well-defined propagation area with controllable airflow.
Sources and further reading
Reliable foundations for your propagation bench
More from Bloomcabin: Custom-built aluminium greenhouse · Classic aluminium greenhouse · Aluminium greenhouse with accessible roof vents
- APVMA – registered chemical products and permits search
- IP Australia – plant breeder’s rights and listed exceptions
- Australian Government – regulation of agricultural and veterinary chemicals
- University of Illinois Extension – Propagation
- University of Illinois Extension – stem, leaf, root and cane cutting methods
- Royal Horticultural Society – practical propagation methods
