
Protecting a Wooden Garden Shed Base From Ground Moisture
Timber garden shed care
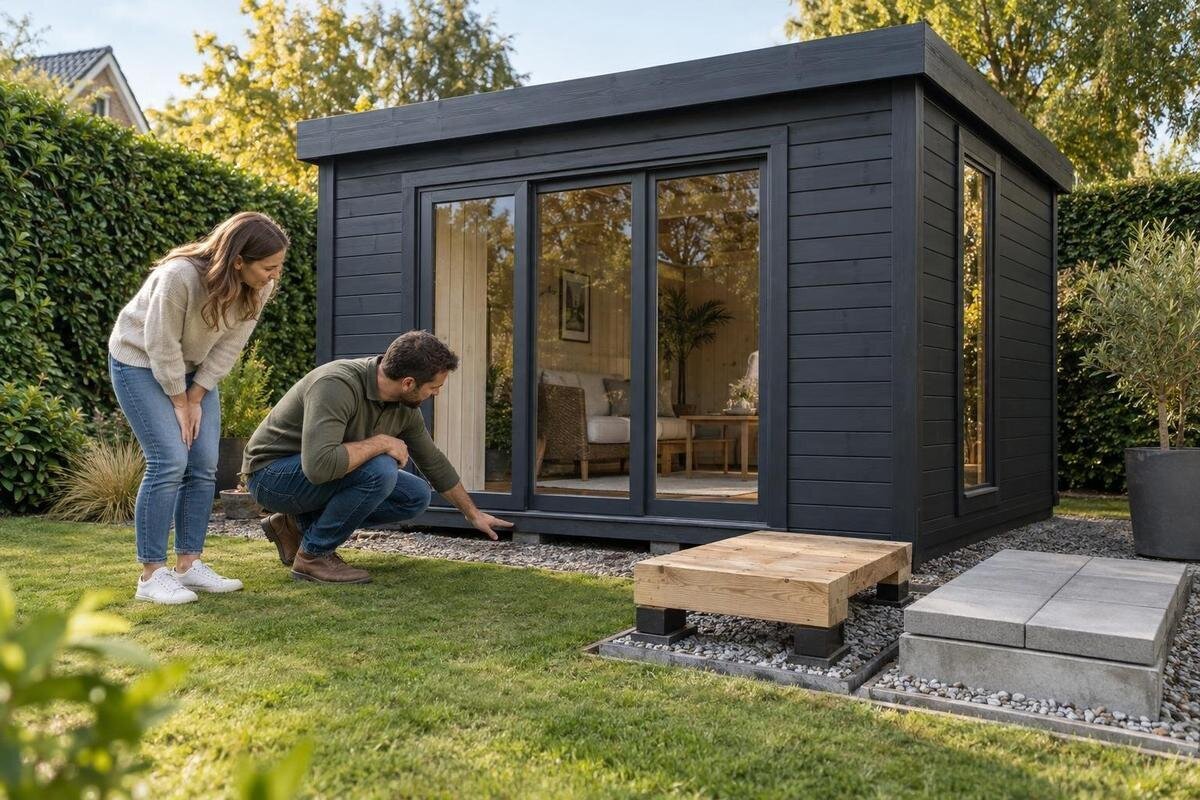
A timber garden shed can stay wet at its base even when the rest of the structure appears sound. Ground moisture may pass from soil or a damp support into the lowest timber, while a barrier in the wrong place can trap water or fail to address the source. When choosing a shed, the practical question is how its base is meant to meet the prepared support, what moisture separation is specified, and who supplies each part. This guide covers the details to confirm before ordering and the signs to watch for once the shed is in use.

01
How ground moisture reaches a timber shed base
Ground moisture can affect a shed even when no puddle is visible. If its lowest timber member sits against persistently damp soil, moisture can move into the wood through direct contact. A concrete or masonry support may also remain damp and transfer moisture to timber resting on it; movement through touching materials is often called capillary transfer. The lower edge may dry more slowly if soil, stored items or vegetation crowd it, although the exact exposure depends on the shed, support and surroundings. Repeated wetting with little time to dry is more concerning than a single damp spell, as ongoing moisture can gradually affect the timber and its finish.
Identify the route before selecting a remedy. Moisture following the contact line between support and timber suggests a different issue from water entering higher on a wall, a leak, condensation or rain splashing onto the shed. Those sources can all leave damp marks near the base, but a layer beneath the support will not fix them. Note where the dampness first appears and whether the ground or support stays wet after ordinary wet conditions. Check whether a mark changes after several dry days, without disturbing the area, as this can help distinguish persistent contact moisture from a short-lived wetting event. The goal is to reduce transfer at the base and preserve the drying the design allows, not to treat every wet patch as a foundation problem.
Signs of damp at the lower timber
Inspect the lowest timber members, corners and the junction between shed and support for dark or persistently damp-looking patches, swollen edges, a finish that is blistering or flaking, distortion, or timber that seems soft. A loose joint or change in shape can also signal that the lower section needs attention. None of these clues alone proves ground moisture or decay: timber colour varies, and dirt or an old coating can obscure the surface. Note whether marks run along the contact line or appear at one isolated point, and whether they recur after the area has had time to dry. That pattern helps you decide what to investigate next.
Where access allows, compare the outside of the lower edge with the inside face of the same area. Look for a pattern around corners or supports, and note whether the damp mark starts at the base or higher up. Avoid painting over a suspect patch, piling soil against it or concealing it with stored items before you understand what is happening. Take dated photos from the same position if you need to monitor a recurring mark; they can show whether the area is spreading or changing after wet weather. A mark after one wet period may not mean lasting damage, but soft, split or visibly deteriorating timber deserves prompt attention. If the shed has shifted or a joint is loose, ask a qualified builder or carpenter to assess its condition before altering the base.
02
What a moisture barrier can and cannot do
A moisture barrier is intended to reduce transfer between a damp support and the timber above it. For that purpose, the position matters: a layer specified for the interface may help, while a coating on an exposed wall does not necessarily protect the timber underneath a bearer. The barrier must also suit the materials it touches and the base arrangement. It cannot compensate for a support that does not meet the shed’s requirements, and it will not repair timber that is already damaged. There is no single sheet or coating that is right for every shed and foundation.
If the Verdana 1 garden house is on your shortlist, check its available product information or ask the supplier how the lower structure is meant to meet the prepared support. Find out whether the instructions specify a separate moisture-control layer, where it belongs and whether it is part of the planned supply. Ask whether the stated arrangement assumes any particular base finish or support preparation, rather than selecting a barrier before the support detail is known. Don’t infer the base arrangement from a model name or image. The useful comparison is between the shed’s actual installation requirements and the base you intend to provide, not between generic barrier products in isolation.
Check the shed and base as one assembly
Before ordering, establish what the shed is designed to sit on and how its lowest timber will be supported. Depending on the design, the relevant contact may be at a perimeter member, a floor support or another part of the assembly. Check the manufacturer’s instructions for the required support and how it should meet the shed; don’t assume that a floor, base or protective layer is included. A barrier is not a substitute for a suitable, properly prepared support, and adding extra layers without checking can change the interface you are trying to protect.
For the Verdana 2 garden house, for example, look for instructions that clarify what the base needs to provide and how the lower edge connects to it. Confirm whether a floor is supplied or whether the base is prepared separately, and check that any proposed moisture separation fits the described arrangement. Record the dimensions and level requirements supplied for the base so the person preparing the site is working from the same information as the installer. Product photographs and names cannot answer these questions. If the details are unclear, get an answer from the supplier or installer before the base is built; resolving the interface at that point is simpler than trying to adapt it once the shed is assembled.

03
Choose treatments and barriers for their intended use
The right protection may involve a specified separation layer, an appropriate damp-proof detail, timber treatment, or a combination described by the shed manufacturer. These options do different jobs and should not be treated as interchangeable. Check that a proposed product is intended for the materials it will touch and the position where it will be used. A barrier meant for a concealed interface may not suit an exposed edge, while a surface treatment cannot automatically replace separation from damp ground. When a supplier recommends a particular approach, ask which part of the moisture path it addresses.
Before choosing a treatment for the Durano spacious garden house, look for the available assembly and care information or ask the supplier what is specified. Check whether timber treatment is already part of the supplied product, what further treatment is expected, and how it should be maintained. Clarify whether any treatment is intended for exposed surfaces only or for particular edges, because the preparation and application method may differ between locations. Follow the treatment product’s instructions, including any limits on where it may be applied. Don’t coat a concealed contact face simply because it is near the ground: the coating may not be suitable for that use or compatible with the assembly. Keep the care guidance for the exact shed you buy.
Avoid trapping moisture against the timber
A layer intended to limit moisture transfer can still cause problems if water is allowed to collect above it or if the shed is wrapped in a way that prevents it drying. Ground moisture is only one possible source, so sealing every lower edge is not a reliable shortcut. Preserve any drying or ventilation details specified for the shed, and don’t block openings or enclose the lower timber without guidance. The aim is to reduce damp contact while allowing the assembly to behave as designed, not to create a sealed pocket where moisture can linger.
Position, seams, edges and fixings all affect how a barrier works, but the correct details depend on the particular base and material. Don’t guess at overlaps, turn-ups or fastening methods from another shed’s installation. Before adding anything to Veltor 1, check the available instructions for the base-to-wall connection and ask who is responsible for fitting the moisture-control layer. Also establish the sequence of work, so the layer is not punctured, displaced or left exposed while the shed is being assembled. The barrier should be protected from damage during assembly and should not obstruct the intended support. If the proposed detail is not clear, pause and get it confirmed rather than concealing the junction.
04
Match protection to the site and support
Think about the conditions where the shed will stand, not just the product name. Before ordering, note whether the chosen patch of ground tends to stay damp, whether irrigation regularly reaches it, and whether nearby soil or stored items will sit close to the lower edge. Shade and surrounding surfaces can affect how quickly the area dries, so consider what happens after ordinary wet conditions as well as on a dry day. This is a check on likely exposure, not a substitute for planning the site’s broader water management.
Then match the proposed protection to the actual support material and position. Read product labels and shed instructions for the intended use, and check that any layer is suitable for contact with both sides of the interface. Consider whether the detail will remain accessible for inspection and whether the shed’s care instructions call for ongoing treatment. Note any change in level created by the proposed layer, as it must not conflict with the support arrangement specified for the shed. If Orello 1 is among the options you are comparing, use the information for that exact model rather than assuming another shed’s base detail will apply. Where compatibility is uncertain, ask the supplier or a qualified installer to confirm it.
Confirm base details before ordering
A product listing does not necessarily tell you what needs to be prepared at the site or which parts are supplied separately. Confirm whether the order includes a floor or base components, what supporting surface is required, and whether a moisture barrier is included or specified as a separate item. Ask about treatment and maintenance as well, particularly if the lowest timber will be close to a damp support. When reviewing Modano 1, for instance, use the product information as a prompt to confirm these details, not as proof that a particular base or barrier is included.
Get the key points clear before committing: what base the shed requires, how the lowest timber is separated from a damp support, who supplies and installs each part, and what care is expected afterwards. Request confirmation in writing where the base and shed are supplied by different parties, especially if one party is relying on information from the other. If the shed and base are being supplied by different parties, make sure they are working to compatible instructions. Keep the written information with the order paperwork so it is available during assembly and future maintenance. A clear answer about the interface is more useful than buying an extra barrier first and hoping it suits the eventual construction.

05
Inspect and maintain the lower edge
Once the shed is in use, include the accessible lower timber in routine checks. Look for recurring damp marks, peeling finishes, debris resting against the edge or a change in the condition of a joint. Check after a prolonged wet period as well as during ordinary maintenance, but follow the shed’s own care instructions for timing and access. Keep leaves, soil and stored items from covering areas that need to dry or be inspected. This simple visibility makes it easier to notice a change before it disappears behind a coating or accumulated material.
Use only maintenance products and methods suitable for the shed, and follow the stated preparation and re-treatment instructions. Applying a fresh coat over damp or deteriorated timber can hide a problem without addressing its cause. Clean away loose debris only where this can be done without damaging the finish or forcing material into joints, then allow the area to be seen clearly. If the M timber garden shed is one of your candidates, obtain the care guidance for that exact product and retain it; do not assume another model has identical requirements. When you find soft timber, an opening joint or repeated dampness, establish the source and arrange an assessment before sealing or covering the area.
Retrofitting an existing shed or planning a new one
For an existing shed, first work out whether the dampness comes from the ground-to-timber interface or from a different source. Adding a barrier after assembly may require access beneath the structure or changes to the base, so it is not always a simple surface repair. Don’t assume the shed can be lifted or altered safely without help. If the timber is soft, the base has moved or the support detail is unclear, have a qualified builder or installer assess it before attempting a retrofit. A new purchase gives you the chance to confirm the interface before assembly instead.
When comparing new options, put the base instructions, moisture separation, drying details, supplied components and ongoing care alongside the shed’s other specifications. A plan for Timber tool shed S should be based on information for that exact product, just as it would for any other candidate. Make a simple list of the components and tasks that remain outside the shed order, including preparation of the support and any specified separation detail, so responsibilities are not overlooked. Check what you need to prepare, what the supplier provides and which details still need confirmation from an installer. That gives you a practical basis for comparing the full setup and reduces the risk of treating a ground-moisture problem with an unsuitable afterthought.
Frequently asked questions
Do I need a moisture barrier under every timber garden shed?
Not necessarily. The right detail depends on the shed’s instructions and the support it will sit on. Check what is specified for those materials and that position; don’t assume a loose sheet or a particular membrane will suit every base.
Will a barrier under the base keep the whole shed dry?
No. It can reduce moisture transfer where the barrier separates the support from the timber, but it won’t fix a leak, water entering higher up, condensation or rainwater reaching the shed from elsewhere. Identify the source of damp before choosing a remedy.
Can I add a plastic sheet under an existing shed?
Only if the shed’s instructions or a qualified professional confirm that the material and placement are suitable. A retrofit may require access beneath the structure, and an unsuitable sheet could trap water or interfere with the support. Check the base and timber first.
Is exterior paint enough to protect the shed base?
A suitable coating may help protect exposed timber when used as directed, but it is not automatically a substitute for separating timber from a damp support. Follow the care instructions, and don’t coat concealed surfaces unless the product or shed instructions allow it.
How often should I inspect the lower timber?
Follow the shed’s maintenance instructions rather than relying on a universal timetable. Include the accessible lower edges in routine checks, and look again after a prolonged wet spell. If timber is soft, distorted or visibly deteriorating, have it assessed before covering it.
A dry shed base depends on a suitable interface between the lower timber and its support, not simply on adding a barrier. Match that detail to the instructions for the exact shed, keep intended drying paths clear, and confirm supply and maintenance responsibilities before ordering. If an existing base is damp, find the source and assess the timber before covering or altering it. These checks make ground-moisture protection part of choosing and caring for the shed, rather than a guess made after assembly.
