
Window Installation Joints: Tapes, Sealing and Insulation Explained
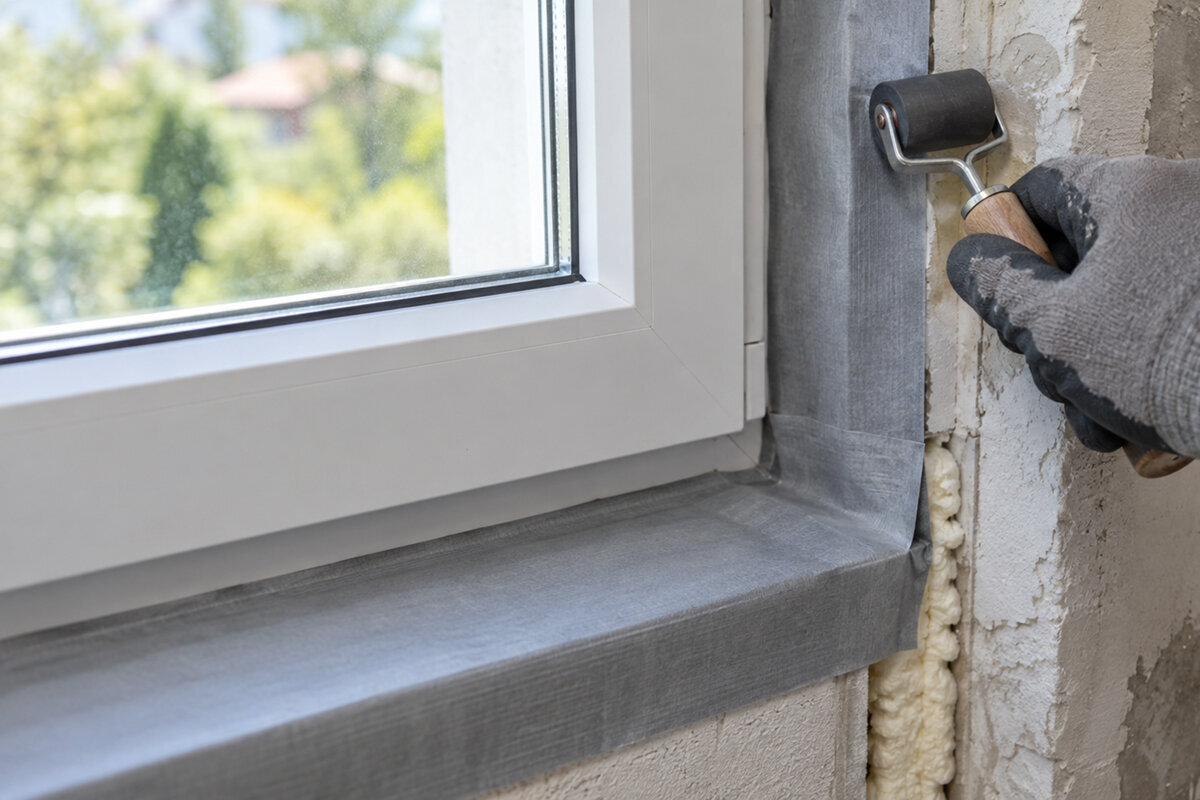
Planning a window installation joint
Frames, glazing and sash arrangements often dominate conversations about replacement windows. The perimeter joint is just as important because it determines how the unit connects with the wall. Running between the frame and building fabric, it must accommodate movement, uneven surfaces, moisture and temperature differences. Poorly designed junctions can undermine an otherwise capable window. Rather than choosing foam and sealant only when work begins, coordinate the frame position, wall construction, fixings, internal seal, insulating layer and exterior weather barrier. This guide sets out the purpose of each part and the questions to settle before ordering, site measurement and installation.
Understanding the joint as an interface
More than a border or neat finishing line, the joint forms an interface between materials that can behave differently. On one side is the frame; on the other is a reveal made from masonry, concrete, timber or a layered wall system. Space is required for dimensional tolerances, fixings and the working layers, making joint geometry part of both measurement and installation design. Using only the clear opening dimension and overlooking plaster, insulation, stops, shutter tracks or the sill defers crucial decisions until installation. Renovations may also expose deteriorated seals, irregular reveals or hidden damage that calls for a revised detail.
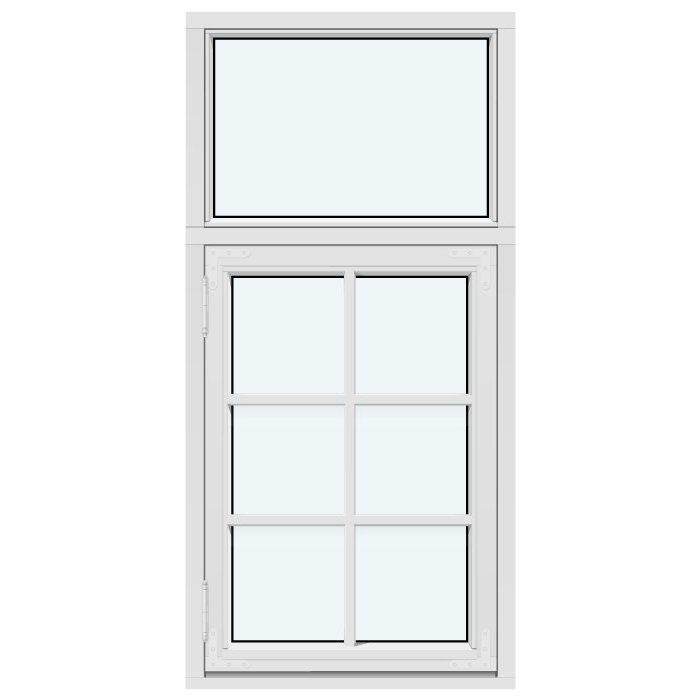
Plan the frame and its perimeter detail as one assembly. For example, with a single-sash inward-opening window the handing, hardware, internal sill and room-side junction must be compatible. During renovation, establish whether the replacement remains in the former wall plane or is repositioned. That choice governs access to the junction surfaces, their length, fixing locations and connections with plaster or façade insulation. Sections through the head, jamb and sill reveal considerably more than the phrase “installation included”. Review each of those locations separately because their construction and duties differ.
Putting the three-layer principle in context
A practical way to design the junction is to separate its work into three functional zones. Facing the room, the detail restricts warm, moisture-laden indoor air from entering uncontrolled. The central fill supplies most of the thermal and acoustic insulation. On the weather side, the assembly resists exposure—especially wind-driven rain—yet supports outward drying. Continuity of function around the frame matters more than displaying one material everywhere. Real-world performance is commonly decided at corners, fixing points and the interfaces with lintels or sills.
Treat the three zones as performance requirements rather than a list of products. Pre-compressed tape may provide the exterior seal and, if designed as part of a suitable system, perform other duties. Complex junctions may instead use membranes or liquid-applied products. Foam can insulate the core, but foam alone does not necessarily create the room-side air seal or weather-resistant outer layer. A tidy exposed bead of sealant is likewise not proof of a complete junction. For every face, identify the product, its function and substrate, then show how corners and joins are finished and who inspects them before concealment. The idea behind “tighter inside than outside” then becomes a documented construction detail.
Consider the whole window connection
Inside: make an airtight connection, not just a covered gap
Whether indoor air reaches the gap depends partly on the room-side junction. Moist air that moves into a cooler section may condense, while leakage can also cause draughts and lost heat. The internal layer needs a lasting bond to both the frame and the building fabric. Depending on the surface and geometry, the answer may involve a membrane, compatible sealant, pre-compressed product or liquid-applied system. Provide a stable, clean bonding area and enough flexibility for relative movement between wall and frame. A narrow rigid bead placed over dust or cracks may look closed initially but does not resolve the underlying detail.
Pay particular attention wherever materials and planes meet. Sealing the reveal achieves little if the airtight path stops under the internal sill or fails to join the existing layer at the head. For plastered interiors, determine the intended plaster connection, whether the membrane accepts an over-plaster finish and how repairs can be made later. For a double inward-opening window the sill projection, reveal lining and handles must preserve clear sash movement. Do not ask only for a tape name: require the installer to map the uninterrupted internal seal around all sides of the frame.
Middle: insulation needs suitable geometry and protection
The core should occupy the space between frame and wall without leaving cavities. It is not a substitute for structural fixing, nor should it be used to disguise substantial irregularities in the opening. Choose the insulating filler according to joint dimensions, movement allowance, substrate, installation method and surrounding layers. Depending on the detail, mineral insulation, foam or a proprietary insulating tape may be suitable. Aim for a consistent fill without uncontrolled compaction. Voids and excessive filling can obstruct completion of the two sealing faces and weaken insulating performance.
Fixing must be planned independently of joint filling. Load-bearing packers, fixings and load transfer hold the unit in place; insulation does not replace them. This is especially important with wide or heavy elements. A Patio Life lift-and-slide door requires its threshold and load path to be resolved before attention turns to side seals. Ask how the unit is supported, what keeps the frame aligned and how insulation reaches those locations. Where the construction changes around a structural point, the drawings should explain how the air seal, insulation and weather barrier remain continuous. Good sequencing, rather than simply adding more material, produces an effective central layer.
Outside: shed rain and allow for drying
At the exterior, the perimeter detail encounters weather, ultraviolet exposure, splash water and the junctions of the façade. Its job is to resist incoming moisture and drain water deliberately, without trapping moisture already present in the assembly. Exposure, façade finish, window position, stops and neighbouring components all influence the design. A frame recessed deeply into a sheltered reveal does not face the same conditions as one near the façade surface. The instruction “use silicone outside” ignores the relationships among seal, render, flashings and sill. Survey the directly exposed faces, protective projections and edges where runoff gathers. Cracked adjacent finishes, unsealed render edges and inadequate bonding surfaces must be addressed before products are selected. Allocate substrate preparation and establish how long the applied system may safely remain uncovered. Its installation requirements should inform the work program from the outset.
Draw the sill zone separately because jamb junctions, falls, end caps, the sill, wall waterproofing and possibly a threshold converge there. Any water passing an exterior cover needs an intentional route back outside; appearance alone cannot demonstrate drainage. For a single outward-opening patio door the relationship between the indoor floor and exterior surface must be fixed early. Subsequent floor or paving build-ups could hide junctions, obstruct drainage or limit the door swing. Ask for a section through every layer at low level instead of relying on an elevation of the completed façade.
Choosing between tapes, membranes and sealants
Correctly sized tapes can be applied efficiently and accommodate modest surface variation, but the gap must be prepared and provide the specified expansion space and time. Membranes adapt to involved geometries and can connect with the building air barrier; successful bonding depends on adhesive choice, substrate preparation and properly made overlaps. Liquid-applied products may help around irregular or inaccessible areas, provided the substrate is compatible and application thickness is controlled. Sealants work in defined joints only after adhesion, movement capacity and material compatibility are established. Build a small matrix covering straight runs, corners, head, sill and known difficult points. Record the proposed product, how it meets the neighbouring component and the necessary preparation at each location. This exposes systems that succeed on a demonstration length but cannot be installed continuously through interruptions. Consult the technical and application data for the product actually offered, not merely for another item in the same broad category.
Compare complete installation requirements, not just product categories. Determine how the frame and wall surfaces are prepared, whether primer is required, which finishes may cover the product and how long to wait before the next operation. Ask for the method used at frame joins and corners so folds do not create leakage paths. For example, a fixed-glazed window has no moving sash at that opening, yet its frame-to-wall junction requires equally careful work. Prefer a system whose installation can be verified under the actual site conditions. Without drawings, substrate requirements and assigned responsibilities, a schedule of materials is not an adequate construction plan.
Consider the whole window connection
Window shape and opening type change the detail
Standard rectangular units often share repeatable details, although glazing bars, fixed lights, sash divisions and less common opening actions can alter measuring and work sequencing. Glazing bars belong within the window itself; the perimeter joint follows the outer frame rather than the visual divisions across the glass. An unbarred window therefore has the same extent of junction as an otherwise comparable divided design. The important relationship is where the frame, reveal and sealing layers meet. A heritage appearance may affect exterior design choices, but it does not by itself determine whether the perimeter detail is simple or complex.
Curves, slopes and other special shapes increase cutting, corners and transitions. A triangular and sloping fixed-glazed window needs close examination along every sloping edge and at the upper meeting point in particular. Fixings, insulation and exterior drainage should be designed together there rather than improvised in stages. A roof window introduces additional interfaces with the roof build-up and covering, so it needs a separate approach suited to that roofing system. Supply both a scaled elevation and a section for unusual shapes. The designer and installer should identify where tapes are cut or joined and show how each junction preserves continuity.
Prepare new builds and renovations differently
A new build allows frame location, wall composition and junction products to be resolved together at an early stage. This can clarify handovers among the structural, window, plastering, façade and interior trades. Responsibility for forming, safeguarding and approving the connection surfaces must still be assigned. Later workers may damage an exposed membrane, while completing the façade prematurely can obstruct subsequent fixings. Include junction work in the construction program: record frame installation, closure of the internal and external zones, and temporary protection from weather or damage. Where openings repeat, install a reference window early to test the interfaces before the main run. Inspect substrate treatment, corners, fixings and trade handovers as well as visible finishes. Put agreed departures directly onto the approved detail because verbal acceptance of one sample will not ensure consistent work elsewhere.
Renovation begins with investigating the existing opening. Removing an old unit may reveal friable reveals, dampness, previous seals or unanticipated layer depths. Allow for these conditions rather than designing only around an ideal opening. Consider a historic-style “Kombi” casement window opening outwards where the established appearance and available junction width may shape design choices. Even so, the perimeter detail must suit the fabric that is actually present. Before removal, record dimensions, visible wall layers, interior and exterior finishes, and sill locations. A shared inspection involving the supplier, installer and, if relevant, the façade or plaster contractor can resolve conflicting assumptions between trades.
Coordinate fixing, movement and following trades
Temperature changes and operation cause frames to move, while the surrounding structure may settle or shift slightly. Sealing products must tolerate that movement for the intended service life. The junction must not clamp the frame rigidly at an unsuitable point or place excessive demand on its fixings. Project-specific design is needed for fixing quantity, position and edge distances. Ask for an explanation of the load path, alignment method, bearing packers and spacing blocks. Complete the sealing and insulating zones only after the unit is securely supported and positioned. Neither foam nor sealant should be expected to perform an accidental structural function.
Subsequent trades can also compromise the joint. Internal plaster, plasterboard, sills, exterior render, insulation, metal flashings and shading devices may conceal the work or pierce it with fixings. Before starting, allocate responsibility for sealing every penetration and identify what must stay exposed for inspection. This is especially relevant to outward-opening folding doors because several leaves operate across a wide opening, increasing the importance of the jamb and floor interfaces. No single sealing method follows automatically, but opening clearance, exterior levels, threshold design and drainage require close coordination. Resolving them before the order is placed is generally preferable to altering completed finishes afterwards.
Organising specification, inspection and handover
A workable specification needs greater precision than “install the windows professionally”. State the frame position, condition of the prepared surfaces and required performance at the internal face, insulated core and exterior face. Cover the head, jambs and sill, together with fixings, sills or thresholds and temporary protection through completion. If the project contains several window types, distinguish repeatable details from special cases. Issue dimensions and drawings before ordering so the frame, gap and accessories can be reviewed as an assembly. The installer must know the limits of the quoted work and where another trade takes over. Compare offers by individual scope items, including surface preparation, removal and disposal, structural fixing, all three joint zones, sill work, protection and records. Identify omissions and vague allowances before comparing totals. A cheaper figure is misleading when reveal repairs, junction profiles or waterproofing below the sill remain unassigned. Describe every alternative clearly so there is no doubt about the construction ultimately commissioned.
Arrange inspection before finishes conceal the work. Photograph the prepared surfaces, structural fixings and each functional zone ahead of plastering, linings or sill installation. Check visually for continuity, adequate laps, sound corners, finished joins and damage-free materials. A query does not constitute a defect merely because it is raised, provided it is resolved before concealment. Obtain records of the system components, maintenance instructions and responsibility for unfinished interfaces. Bloomcabin provides a five-year commercial guarantee for windows and doors, while delivery generally takes four to six weeks after order confirmation. The commercial guarantee sits alongside applicable Australian Consumer Law rights and does not exclude them. Neither the guarantee nor delivery estimate replaces a project-specific review of the installation design.
Frequently asked questions
Is installation foam enough to seal a window?
No. Foam mainly insulates the central part of the gap; by itself, it does not necessarily form the complete indoor air barrier or outdoor weather seal. Additional layers must be selected for the substrate, junction geometry and installation conditions. Ask for all three functions to be specified and recorded individually.
What does “tighter inside than outside” mean?
It expresses the intended moisture strategy, not a product prescription. The room-side detail restricts humid indoor air from entering the gap, while the outer construction supports drying towards the exterior. Tape, membrane, sealant or another system must still be chosen to suit the frame, wall construction, joint dimensions and exposed face.
When should the perimeter joint be designed?
Resolve it no later than the ordering and site-measure stage. Coordinate frame position and dimensions with the wall build-up, fixings, sill, façade and interior finish. Conditions exposed during renovation may still demand adjustment. Preparing a suitable response for damaged or irregular reveals avoids rushed, disconnected decisions once installation is under way.
Who is responsible for sealing between window and wall?
Responsibility follows the contract, specification and agreed trade boundaries. Applying one tape is only part of the task; someone must complete its uninterrupted interfaces with plaster, façade layers, the sill and adjoining construction. Document who does each part, when it is inspected and how exposed work is protected.
How do I recognise an inspectable installation plan?
Look for drawings that show elevations and sections at the head, jambs and sill. They should identify each functional zone, its adjoining layers, the fixing method and the load path. Doors, unusual shapes and low-level junctions may require separate details. Use this information to inspect and photograph the work before it disappears behind finishes.
Next step
No single “sealing product” creates a successful perimeter joint. Performance comes from coordinating the room-side seal, insulated core, exterior weather barrier, structural fixings and adjacent construction. Begin with the wall build-up and frame position before naming materials. Draw the junction on every side, address thresholds and unusual shapes separately, and assign each trade interface in writing. Designing this work before ordering and removal makes quotations easier to compare and allows inspection while the critical layers can still be seen.
