
How long does window replacement take and how disruptive is it?

Planning a window replacement
Good window-replacement planning starts before any sash comes out. First establish which openings should be grouped, when the ordered units will be ready, who will protect each room and how occupants can keep using the home. The immediate impact is usually concentrated around the active workspace: furniture is moved, pathways may close, and temporary noise, dust and draughts are likely. That hands-on disruption is only one part of the calendar. Measure-up, sign-off, manufacture, delivery, removal, finishing and handover all need to connect. Reviewing window types, opening directions and access beforehand makes it easier to plan around household needs, seasonal conditions and other trades.
Checks before buying 1
Do not confuse installation time with project time
Duration needs to be considered on two timelines: the period installers spend at the property and the longer journey from measure-up to a finished, inspected opening. In between, dimensions and connection details need agreement, opening directions require checking, the units must be ordered and transport arranged. These decisions deserve proper review rather than last-minute approval. Delivery takes 4–6 weeks, subject to order confirmation, but that timeframe does not predict the hours required in any room. Keep delivery, the installation start, room order and later finishing tasks as separate entries in the project program.
The type of unit selected also affects how work is organised. A single inward-opening window requires its own clear swing area, unlike fixed glazing or a doorway. Oversized, multi-section and custom-shaped units may add transport, lifting and connection considerations. Rather than excluding a preferred design, identify those needs in the program. Classify every position as a conventional opening, special shape, fixed pane, door or roof opening. The team can then decide which jobs may proceed together and which need a cleared pathway before they start.
What determines on-site removal work
Window count alone reveals little about the workday. More useful factors are the storey, available access, furniture, reveal condition, existing linings, exterior tasks and any uncertainty in removing the old construction. A readily accessible ground-floor opening presents different challenges from one behind a fitted kitchen or above a crowded outdoor area. Internal and external finishing also affect the sequence. Map the movement of removed units, new components, tools and packaging as well as the approach to each opening. Tight stairwells and a lack of safe set-down space can delay every position scheduled that day.
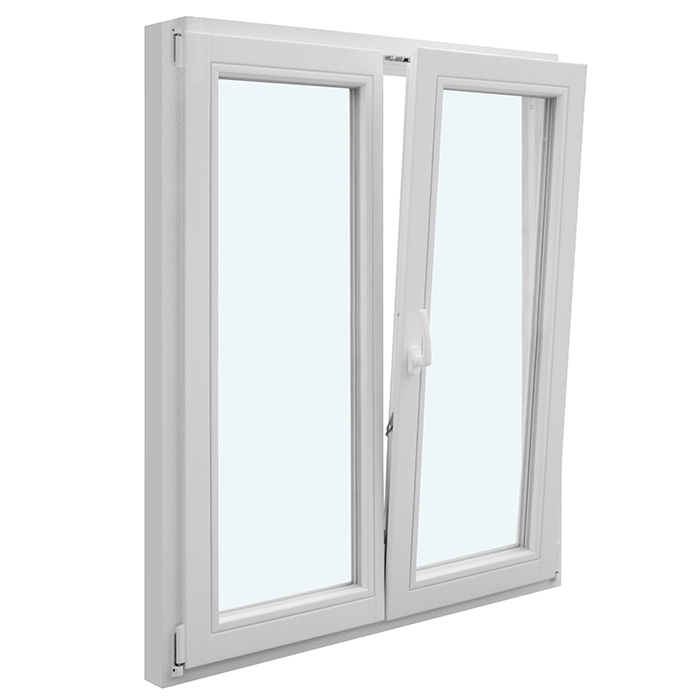
For example, before measuring a double inward-opening window raise the sash arcs, curtains, radiator covers and nearby furniture. Its name explains the window arrangement, not what installers will encounter in the room. Obtain practical answers before the appointment: which spaces need clearing, where can materials be placed, is exterior access necessary, and how will floors, stairs and corridors be protected? Also nominate who can respond if the reveal differs from what was anticipated. Written arrangements cannot remove every inconvenience, but they reduce the chance that an overlooked obstacle stops work on the day.
Checks before buying 2
Choosing the right order in an occupied home
A lived-in home rarely benefits from an automatic top-to-bottom sequence. It may be more practical to begin in spaces that can be surrendered for a few hours or a day, leaving bedrooms and work areas until later. Timing needs particular care for a sole bathroom, a child’s room around sleep or a home office in constant use. Ask whether each room can be restored immediately or must remain available for finishing work. Pets also need a separate plan because open doorways, unfamiliar workers and construction noise can create real management and safety concerns.
Sort rooms into three groups: those that must remain usable, those that can close temporarily and those available only at agreed times. This supports a workable daily sequence instead of a vague promise of speed. Record any periods when occupants need quiet for calls, sleep or focused work, as installers cannot accommodate unknown restrictions. On a larger job, designating one controlled storage zone may help protect the remaining rooms from unnecessary mess. The aim is to contain each day’s disruption rather than allow tools, materials and household belongings to spread through the property.
Plan honestly for dust, noise and weather
Depending on the existing construction, removal may involve drilling, cutting, loosening materials and making good, all of which can generate dirt, dust and noise. Protective sheets help contain debris but are not a substitute for clearing the area. Move artwork, books, plants, loose ornaments and sensitive electronics away. Provide genuine working clearance rather than shifting furniture slightly. Remove or cover dust-trapping fabrics. Beforehand, confirm whether sills, curtains, shutters, internal blinds or linings need to come off, who will handle them and who will reinstate them.
An opening under construction can leave its room temporarily cold, noisy or unavailable. Include the season and forecast in discussions, but do not assume they guarantee a particular outcome. Ask what temporary security and weather protection will be used during a pause, and which openings may need rescheduling in poor conditions. In an apartment building, advance notice of the likely work period is considerate to neighbours. Occupants do not need to supervise technical installation; they can help by maintaining access, providing clear contact details and appointing someone to answer practical questions.

Checks before buying 3
Measuring and approval protect the schedule
The program relies on every ordered unit fitting its real opening and connection, so measure-up is a substantive step. Cover width, height, opening direction, handles, divisions, existing finishes and intended use. A fixed-glazed window changes how the opening can be operated and cleaned when compared with an opening sash. Its suitability depends on location, ventilation planning and whether the glass can be reached. A drawing alone may not show how the room will function. Walk through each space with daily use in mind: note objects in front of the window, the approach side and the sash normally used for ventilation. Identify any occupants who need handles within easy reach. This information does not replace technical assessment, but it can reveal an arrangement that fits on paper yet performs poorly in practice. It also supports an informed, position-specific approval.
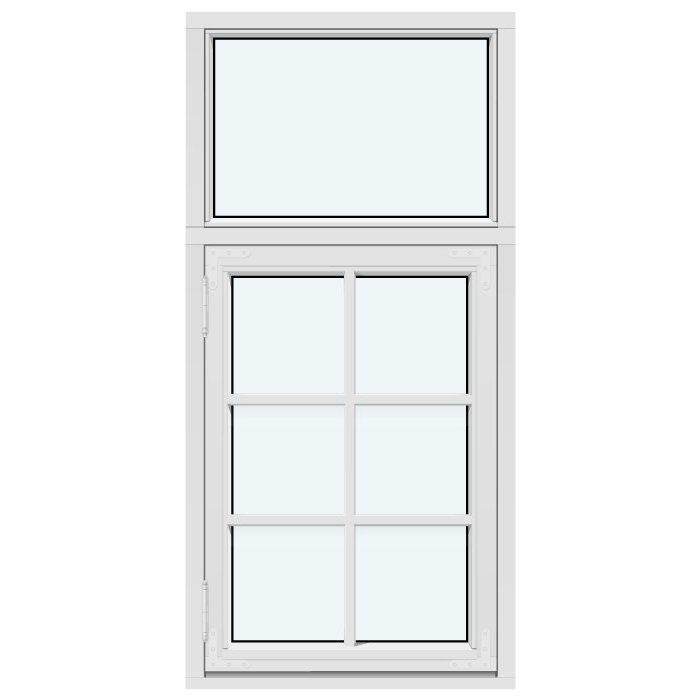
Review and approve every position before ordering. Cross-check the room, sash count, hinge side, elevation, glazing-bar pattern, fixed and opening sections, and any visible special details. Specify whether the design has applied glazing bars, bars that divide the glass or no bars, as the choice can substantially change its appearance. Confirm which figures describe the existing opening and which describe the manufactured unit. Waiting until delivery to resolve those distinctions introduces avoidable risk. A clear record of the approved configuration is among the most effective safeguards against preventable delay.
Treat special formats and large openings separately
Plan an extended glazed frontage or custom shape separately from a group of small standard units. Large elements place greater importance on the delivery and carrying routes, corners, stairs, lifting order and available outdoor working space. Give the team an accurate account of gate widths, gradients, garden beds, balcony balustrades, parked cars and narrow passages so suitable logistics can be assessed. Confirm where vehicles may stop and whether a shared driveway or hallway needs coordination with others. This preparation is intended to make installation orderly; it should not be used to support an unrealistically short estimate.
With Patio Life lift-and-slide doors the name describes a lift-and-slide configuration, while all other characteristics require confirmation for the project. Because a regularly used patio opening may be unavailable during installation, decide how occupants will reach the garden and whether this unit or the remaining windows should be handled first. Discuss any paving, awnings or furniture beside the work area. Photographs from indoors and outdoors provide a reliable record of the existing setting. Establish whether the door can be delivered and stored with the other units or must travel directly to the opening. Its set-down point must leave the entrance and other carrying routes clear. For installation day, nominate the alternative exit and arrange access to locked exterior areas. Giving this opening a dedicated stage prevents it from unexpectedly controlling the entire program.
Checks before buying 4
Roof, upper storey and special geometries
Roof windows involve distinct access and protection arrangements. The opening may sit above furniture, while installers may need to negotiate narrow stairs or vulnerable flooring to reach it. For a pivot roof window discuss the indoor approach, clearance beneath the opening, protection of furnishings and preferred operation. Identify any scaffolding, exterior work or other roofing activity planned for the same period so the trades can coordinate and avoid repeated set-up. A suitably qualified professional should determine the construction method and building-specific requirements.
Angled, triangular or round units also need their own position check. A triangular and angled fixed-glazed window combines fixed glazing with an unconventional shape, but its label does not define the surrounding connections or installation method. Take photographs that include enough of the room and exterior to show context, and request a sketch with the inside and outside views unmistakably labelled. Decide which existing linings are to stay, be removed or be replaced. Existing buildings can still reveal unexpected conditions, but a dedicated record prevents unusual openings from being overlooked among standard positions.
Prepare without taking on unnecessary work
You are not expected to perform advance installation work. Instead, provide installers with a safe, orderly and accessible workspace. Empty the sills, secure breakables and clear the route from the entrance to each affected room. Point out alarm contacts, sensors, cables, air-conditioning equipment and built-in items around the opening. Record unusual conditions early. If heavy furniture cannot be shifted, tell the contractor so the room can be rescheduled, protected differently or approached another way. Several days before work, test each carrying route with doors fully open. Where safe, remove loose rugs, slim tables and objects hidden behind doors. Ask what power points, storage space and access the team genuinely requires rather than attempting technical preparation. Photograph vulnerable finishes beforehand to establish their condition and support a practical discussion about protection.
Household communication is another part of preparation. Arrange supervision for children, a secure place for pets and a quiet room for occupants who need to withdraw. Keep medicines, chargers and essential papers away from protective coverings. Apartment projects may also involve the building manager, owners corporation or body corporate, neighbours and shared spaces. Seek project-specific guidance where common property, heritage controls or structural changes could be involved. Nominate one person for practical questions on installation day and give them the room list, position schedule and contact details. They should not authorise technical changes until the consequences are understood. Agree how questions and decisions will be recorded and who is available if the customer leaves temporarily. Everyone in the household should know which routes must stay open and when a room is ready for use again. One clear line of communication avoids contradictory directions and repeated moving.
Checks before buying 5
Treat doors as a critical interruption
Room-by-room sequencing often works for windows, but an external door needs special planning because it affects security and the household’s normal entry route. A single inward-opening patio door requires unobstructed space for its inward swing, although that product description alone does not confirm suitability for the existing opening. Identify a usable alternative entrance for each exterior door, particularly when work affects the front entry or access to the garden, basement or work area. Ask the contractor when the old door will come out and what temporary security will apply if the job pauses. These arrangements need a direct answer from the installer rather than remaining an informal preference.
Movement through the property can also be constrained by internal doors, connecting spaces and stairwells. Shoes, coat stands or prams in a tight hallway may obstruct the carrying route. Avoid applying tape to a delicate finish unless its compatibility is known; clearing the space and reviewing it with the crew is safer. Plan how the household will function that day, including the available exit, ventilation options and rooms that remain reachable. A brief start-of-day discussion can confirm details and respond to new conditions, but it cannot substitute for the earlier access plan.
Organise handover and outstanding work deliberately
Fitting the final unit does not, by itself, complete the project. Inspect each position jointly before restoring the room. Operate every moving part, verify the specified opening direction, examine visible finishes and compare the result with the approved order. Identify any concern by room and position and support it with a photograph rather than using a broad description such as “the bedroom window”. Confirm whether cleaning, removal of covers, disposal, linings or internal and external connection work remains. This determines whether furnishings can be returned permanently or further access is still required.
For a sliding door include normal day-to-day operation in the joint inspection. The people who will use it should receive a demonstration and raise questions while the installer is present. Do not sign off the work as complete if agreed tasks or clearly recorded items remain open. Equally, a concise list tied to specific positions is more useful than an imprecise complaint made weeks later. File the order, measure-up documents, handover record and care instructions together. Bloomcabin windows and doors have a 5-year commercial guarantee. Australian Consumer Law rights apply separately and cannot be excluded by that guarantee. Careful inspection and organised records remain important from the beginning.
Frequently asked questions
Can I stay at home during window replacement?
Whether staying is practical depends on the project’s scale, the room order and how much disturbance you can tolerate. Parts of the home may remain usable, while active rooms can become noisy, dusty, draughty or inaccessible for a time. Set aside a quieter space, arrange another place to work if needed, and organise care for children and pets when several areas are affected together.
Should I replace all windows in one appointment?
Scheduling the work together can consolidate transport, room protection and project discussions. Stages may be easier where essential rooms must stay available or access is complicated. Choose according to the property’s logistics, the confirmed availability of the units, later finishing tasks and the household routine rather than assuming one method suits every home.
When can furniture go back beside the windows?
Wait until that room has passed its joint inspection and all work there is complete. Check whether cleaning, linings or connection work still requires access. Furniture must not obstruct opening sashes, handles or maintenance areas. Obtain confirmation from the installation team before restoring the original layout.
What if unexpected damage becomes visible during removal?
Removal can expose conditions that were concealed within the existing construction. Before work starts, decide who will photograph and record such findings, who has authority to choose a response and how extra work will be approved. Request a plain-language account of the available options. If an important decision is still pending, the program alone should not be used as a reason to continue.
Must I clarify assistance or building questions before ordering?
Where approvals, financial assistance or technical compliance may affect the project, investigate them before committing to an order or commencing work. The relevant pathway can vary by state or territory, council area, building, ownership arrangement and proposed alteration. Check current official information and obtain confirmation from the responsible authority, scheme administrator and qualified advisers rather than relying on a general claim of approval or eligibility.
Next step
The level of disruption is shaped more by sequencing and preparation than by a universal hourly estimate. Divide the job into verifiable stages: document existing conditions, approve each configuration, resolve access, ready the rooms, agree the work order and inspect every completed position. Delivery takes 4–6 weeks, subject to order confirmation, and should not be presented as a confirmed installation date. A useful quotation covers both the items supplied and the practical movement from the delivery vehicle to each finished opening. Room schedules, photographs and named contacts turn a potentially difficult worksite into a project the household can actively manage.
