
Window reveals, sills and trims when replacing windows
Window planning in detail
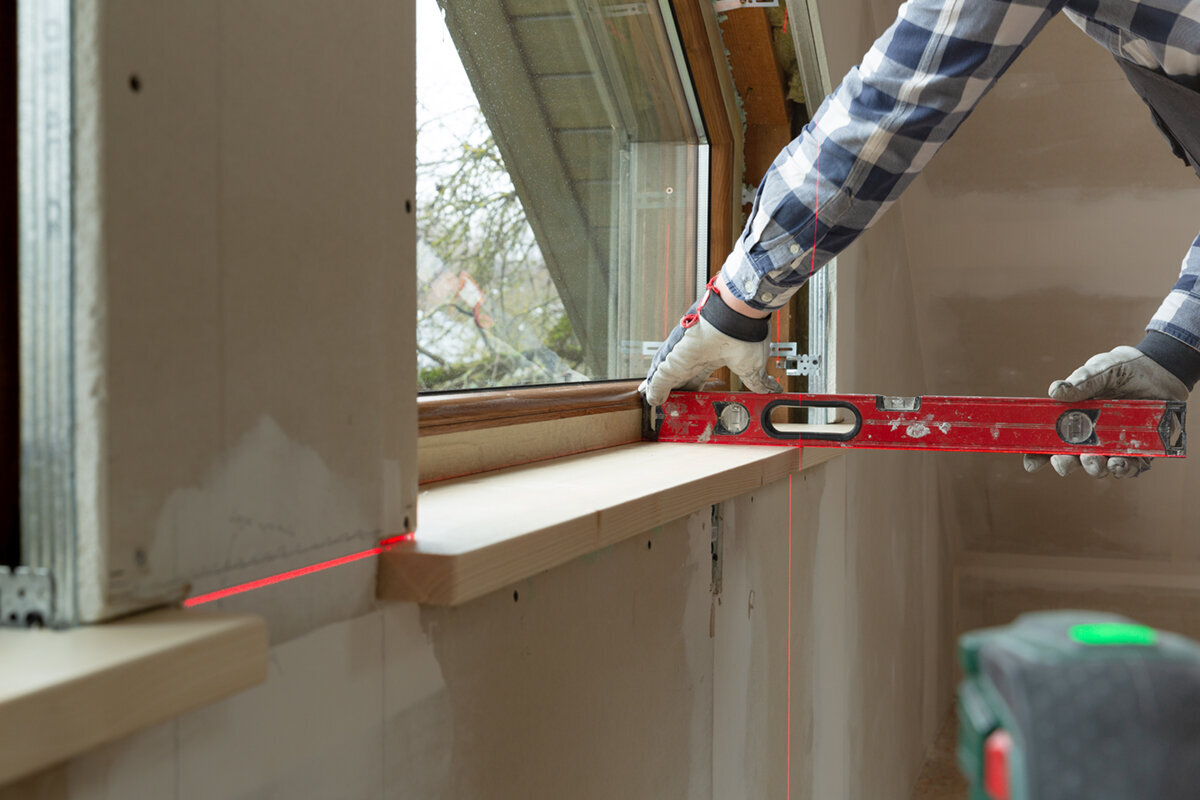
A replacement project extends into the opening around the frame. Taking out the old unit reveals the actual reveal width, the wall junction’s condition, the internal sill position and how rainwater must drain away from the façade. If only window dimensions are ordered, decisions about plaster, trims and sills may be deferred until installation. Survey the complete assembly instead: window, wall construction, interior finish, façade connection, shading and preferred appearance. This is especially important when the replacement frame differs in width or depth. The guide distinguishes technical connections from visible finishes, identifies responsibilities to settle beforehand and outlines what a useful quote and order should record.
Purchase check 1
Treat replacement as a junction project
Think of the replacement window as part of a planned wall connection, not just a new frame. It sits within the structural opening and needs a junction around all sides. The reveal is the finished side and upper face of the opening, internally or externally, rather than the frame itself. Removal may uncover weak plaster edges, aged sealant, wallpaper ends or hidden unevenness. A replacement with the same front view can still reveal more or less wall because frame widths differ. Capture more than clear width and height: photograph each opening, measure in several positions, note inside and outside depths, and record radiators, roller-shutter boxes, tiles and existing sills. This gives the installation team a coordinated junction to work from.
Begin by deciding what should be visible after completion. A continuous plaster finish calls for different follow-up work than an accepted trim edge. In an occupied room, that choice affects dust control, protection and the order of removal, installation, patching and painting. For a single-leaf inward-opening window , confirm that the internal sill will clear both sash and handle. Opening direction is a product characteristic, not a specification for the surrounding connection. Itemise removal, disposal, installation, sealing, the sill, reveal repairs, cover trims, painting and cleaning in the quote. The resulting breakdown shows what the installer includes and what must be completed by another trade.
Read the reveal carefully before measuring
Do not assume an opening is square or consistent. In older buildings, walls can lean, plaster thickness may change, and opposite sides of one opening can have different details. Take width and height readings at the top, middle and bottom, then check depth around all four sides. Record whether the present frame aligns with the interior wall, occupies the wall centre or sits towards the exterior. That position governs the amount of reveal on view and whether the internal sill reaches sufficiently beneath the frame. Add the viewing direction to a sketch, particularly when only one side has tiles or timber lining, so unlike conditions are not confused.
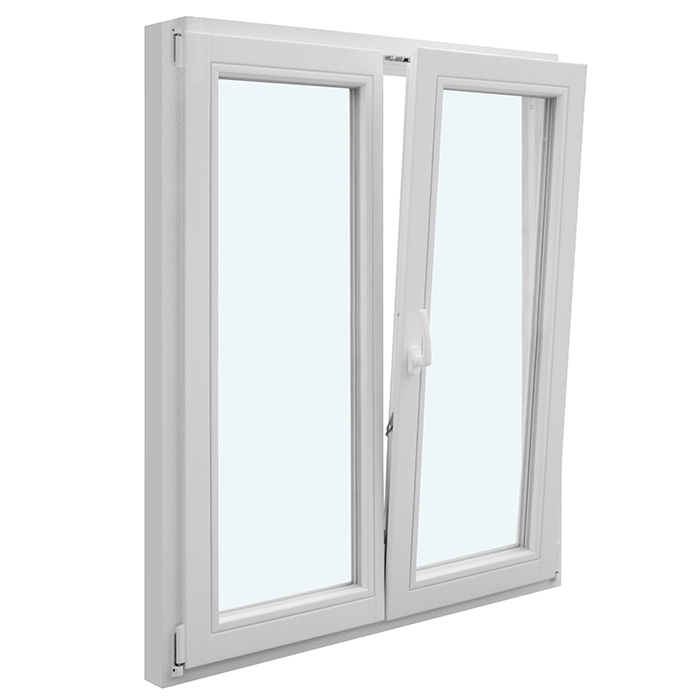
A site visit should also record conditions that dimensions cannot capture, including broken edges, damp marks, cracking, softness, hollow areas and previous patching. Do not infer the cause from these signs; arrange assessment by the relevant professional before concealing them with new finishes. With a two-leaf inward-opening window , the swing paths of both sashes also need space. Projecting sills and side linings must not impede movement. Specify whether the reveal will stay square, flare towards the room or follow the existing treatment. Flaring can change how light is perceived, but it requires an intentionally formed plaster or panel finish rather than an awkward residual edge.
Purchase check 2
Installation position changes visible proportions
The new frame’s location within the wall controls the apparent depth of both internal and external reveals. Moving it from the old position can leave an existing sill too short, make an external finish unsuitable or alter a junction to cladding. Opening type also changes clearance needs. With an single-leaf outward-opening casement window , opening does not occupy interior space, but the sash still needs adequate room outside beside the reveal, sill and nearby features. Rather than comparing elevation and overall size alone, request a section or dimensioned sketch showing the wall, frame and both sills. It can expose awkward edges and identify surfaces that need alteration before work begins.
Setting the frame flush may give a restrained contemporary appearance, although an irregular wall then offers less tolerance. Recessing it makes the reveal more prominent and can respond better to the existing architecture, but increases the exposed connection area. The choice depends on the wall construction, façade, room and visual intent; neither position is inherently superior. Confirm the reference plane used for every dimension—structural opening, completed interior plaster, completed exterior face or old frame. Include the future thickness of insulation, cladding or linings that will be fitted later. Otherwise, a nominally suitable window may leave inadequate space at the sill or reveal once interior finishes are complete.
Internal sills: bearing, depth and daily use
An internal sill serves as both a working surface and part of the window connection. Depending on the existing detail, it may enter pockets in the side walls, meet the frame directly or use end caps. Determine whether removal can leave it intact, whether breakage is likely or whether replacement is already intended. Besides overall length and exposed depth, measure the portion concealed beneath the old frame. Select a front edge that suits the room and note adjoining tiles, recesses, benchtops or wall linings. Treat any new sill as part of one coordinated frame-and-reveal detail, rather than as a decorative board added independently.
Everyday clearances also matter. Handles and sashes can foul curtains, plants, fittings or a deep shelf even when the ordered window size is correct. On a single-leaf inward-opening patio-door unit , pay close attention to the meeting point with the floor because an ordinary interior sill may be unsuitable. During selection, document the material, colour, edge form and side finish, then assign the associated building work. Identify who will remove the existing sill, prepare its base and reinstate plaster or flooring. This avoids leaving an undefined boundary between the window installer, interior finisher and painter.

Purchase check 3
External sills and the façade junction
An exterior sill performs a drainage and façade-finishing role, unlike its interior counterpart. Discuss its fall, end details, frame connection and relationship with the existing façade as a single assembly so rainfall is carried outwards. Removal may leave the old sill intact, damage it or show that it no longer suits the replacement frame’s location. Inspect nearby shutters, façade components, guide tracks and shading that could limit access. Photographs taken obliquely are useful for recording projections, drip edges and connections that a straight-on image may hide.
Choose the exterior sill detail before fitting the window. Establish how it will be supported, how each end will finish and how the visible edge meets the façade. Render, brickwork, timber cladding and sheet or panel finishes require different responses, so one detail cannot suit every wall. For a broad opening such as Patio Life lift-and-slide doors, the base is commonly designed as a door threshold adjoining a patio rather than as a sill. Paving levels, drainage, level changes and sash travel must then be coordinated. A replacement that looks similar does not necessarily connect correctly to the surrounding construction. The agreed detail should state which existing parts remain and which need modification or replacement.
Use cover trims as finishes, not fixes
After fitting, cover trims can define a tidy line between the frame and interior wall. They may conceal a narrow finishing zone, protect a fragile plaster edge or give several windows a consistent treatment. A trim is not a substitute for designing and sealing the underlying joint, nor should it hide unidentified deterioration or movement. Specify whether it belongs on the interior, exterior or both, together with its width and relationship to skirtings and door architraves. Test the proposed trim against the actual wall texture because a straight edge can make pronounced unevenness more noticeable.
Another approach is to carry plaster, stopping compound or a selected lining directly to the frame. The simpler appearance depends on precise edges and an agreed order of work between trades. For fixed-glazed windows , an opening sash creates no clearance issue, but the lining still needs to account for frame depth, sightlines and cleaning access. Assess samples from several positions: stand within the room, look along the wall, and view the frame, reveal and trim colours in daylight. Confirm which joints will remain exposed and whether a trim can be taken off later for inspection or wall renovation. A suitable trim has both its function and its route settled in advance.
Purchase check 4
Plan plaster, wallpaper, tiles and timber linings properly
Extracting the old frame may disturb the finished wall edge. Wallpaper might need either a local patch or broader redecoration. For tiled openings, record where tiles and edge profiles meet the frame and retain matching material where possible. Timber panels, exposed brickwork and finely textured render or plaster each require an appropriate termination. Before removal, photograph and describe colour, texture, pattern, grain and joint direction. This is particularly useful when only selected windows are changing and adjacent units must continue to look the same. An approved sample provides a clearer reference for reinstatement than the instruction “as before”.
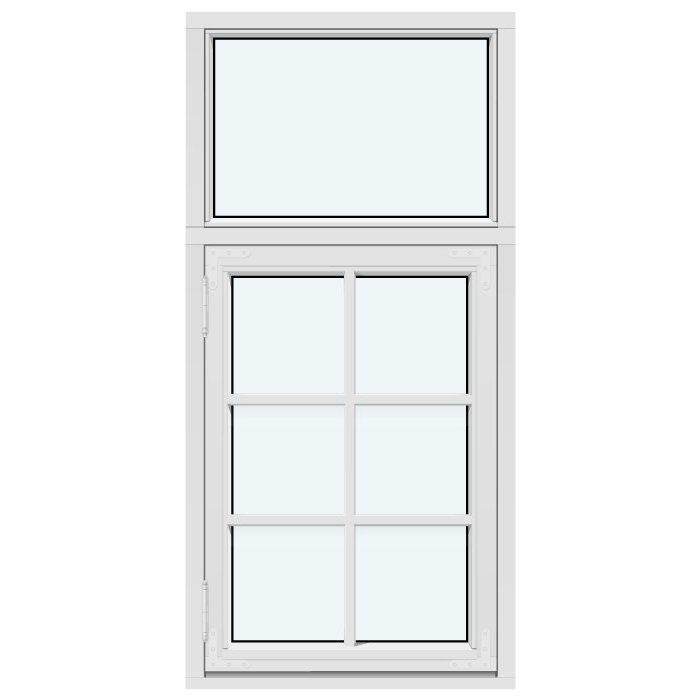
Set the work order before starting. Protect the room and remove the old unit, fit the replacement and complete its connection, then repair visible surfaces once the final frame location is confirmed. Do not presume that new plaster, stopping or paint forms part of the window work. For an outward-opening heritage-style “Kombi” casement window , existing glazing bars and characteristic reveal depths can guide the visual arrangement. This does not require reproducing a particular historic detail. Instead, compare the principal lines before approval: frame profile, glazing-bar layout, reveal edge, sill and façade opening. That comparison shows whether a restrained new junction will read as a deliberate contrast or introduce unwanted visual disruption.
Special shapes need their own detail
Standard rectangular detailing is unreliable for curved, sloping or segmented openings. Consider a round fixed-glazed window : the full perimeter of the reveal needs deliberate resolution. Establish where the plaster or lining ends, whether the exposed distance to the frame remains even and how the curve will be formed. Straight cover trim is not an automatic solution. Where the existing opening is irregular, record it with a template, detailed measurements and photographs. Also determine whether fixed glazing will be cleaned from indoors or outdoors before specifying deep linings or permanent furniture that could obstruct access.
Deep openings, bays and roof windows each require details suited to their geometry. With a centre-pivot roof window, for instance, the work extends through the roof opening’s interior lining and affects the direction of lines across the room; it is not merely a side-reveal problem. Have the actual installation assessed rather than borrowing a detail from an upright façade window. On a sketch of any sloping opening, identify the upper edge, each side, the lower termination and any ceiling junction. Then nominate the edges that require precise alignment and those where a minor existing irregularity can remain. This prevents the final surface-finishing stage from determining the design by default.
Purchase check 5
Break specifications and quotes into checkable parts
A dependable quote records more than window quantity and overall size. For each opening, list operation, handing, frame colour or finish, frame position, interior and exterior sills, reveal treatment and the intended response to existing surfaces. Number the openings and matching photographs so descriptions such as “left window” are unambiguous. Door entries need a separate note about floor conditions. For an outward-opening single-leaf patio door, define how indoor and outdoor flooring meets the unit without treating it as a conventional sill detail. Items still awaiting investigation can be listed explicitly rather than omitted from the scope.
Allocate every responsibility in writing. Identify who conducts the survey, verifies measurements and opening direction, approves release, protects furniture and floors, removes unstable plaster, closes the reveal and restores each finish to the agreed standard. Ask whether referenced photographs, samples and drawings can be incorporated into the order. Distinguish work required for a functioning result from optional appearance upgrades. Replacing an internal sill may be unavoidable when the old one no longer fits, whereas a broader decorative lining could be elective. Clear categorisation makes quotes with genuinely comparable scopes easier to assess.
Check carefully before approval and after installation
Check the proposed window schedule in each actual room before ordering. From inside, verify handing, sash travel, handle position, sill depth and the photograph assigned to the opening. Annotate the sketch with radiators, cabinetry, power points, curtain tracks, tiles and exterior obstructions. Confirm the anticipated 4–6-week delivery period, subject to order confirmation, before scheduling later trades. Bloomcabin provides a 5-year guarantee for windows and doors. These details support planning and coordination but do not replace a project-specific review of everything included in the order.
Inspect the visible arrangement before finishing work covers the installation edges. Compare the order with the number of units, frame positions and opening directions, then operate every sash to check for contact with flooring, sills or reveals. Confirm that the agreed exterior and interior finishes are present and record damaged surfaces or incomplete items. Take well-lit photographs from both sides of every opening. This shared record supports follow-up work; it is not a substitute for an appropriate technical inspection. The room will appear complete only when the windows, surrounding surfaces, trims and sills have been assessed as one finished composition.
Frequently asked questions
Must the reveal always be renewed when replacing windows?
Not necessarily. Retention may be possible when the reveal is sound, suits the replacement frame’s location and works with the selected finish. Extraction can nevertheless chip its edges or uncover previously hidden bands. Before work starts, nominate the responsible trade and specify whether the result requires patching, new plaster, lining or cover trim.
Can the old internal sill remain?
Whether it can stay depends on its condition, fixing and relationship to the replacement frame. Measure the supported area and depth, then test the available space around the handle and sash. Keeping the sill may still require finishing where its connection is exposed. The order should state whether it will be protected in place, altered or removed for replacement.
Are cover trims always the simplest option?
A trim can quickly establish a crisp edge, but it is not visually suitable in every interior. Smooth, flush reveals may look more resolved with plaster carried to the frame. Never use trim to mask a connection that has not been investigated. Select its position, width, finish and joint arrangement from an agreed drawing or physical sample.
What matters most for a new external sill?
Design it together with the frame, reveal and façade so it completes the exterior base correctly. Identify adjoining side components early and assess how the replacement frame position affects the old sill. Where a door meets the floor, coordinated threshold, drainage and flooring details will commonly be more appropriate than a window sill.
Which documents help the installation contractor most?
Provide readings from several locations, photographs from indoors and outdoors, a numbered opening plan, wall-finish information and clear images of adjacent construction and sills. Show the required appearance as well, whether that is flush plaster, a trim or another lining. Listing later trades also allows responsibilities and sequencing to be settled before the order is approved.
Next step
Reveals, sills and trims are integral to a successful window replacement. Together they govern the meeting between frame and wall, the completed room appearance and the remaining work. Survey each opening separately: take dimensions, photograph finishes, nominate the frame location, and resolve the interior and exterior connections independently. Compare quotes by their stated inclusions rather than by the window alone. Approving the frame, both sills, the façade connection and the indoor finish as one package greatly reduces unresolved decisions when installation begins.
