
A Greenhouse Routine for Growing Microgreens
Greenhouse crop notebook / 27
A Greenhouse Routine for Growing Microgreens
A fast crop leaves little room for guesswork. Success depends on appropriate seed, level coverage, a carefully timed dark phase, controlled light and quick chilling after harvest.
Classic Aluminium Greenhouse7–21 days Typical crop-dependent cutting window
1 tray per crop Make germination easy to observe, compare and record
Clean → chilled Maintain quality once the crop is cut
How the crop works
These are not miniature vegetables; they are brief crops managed with care.
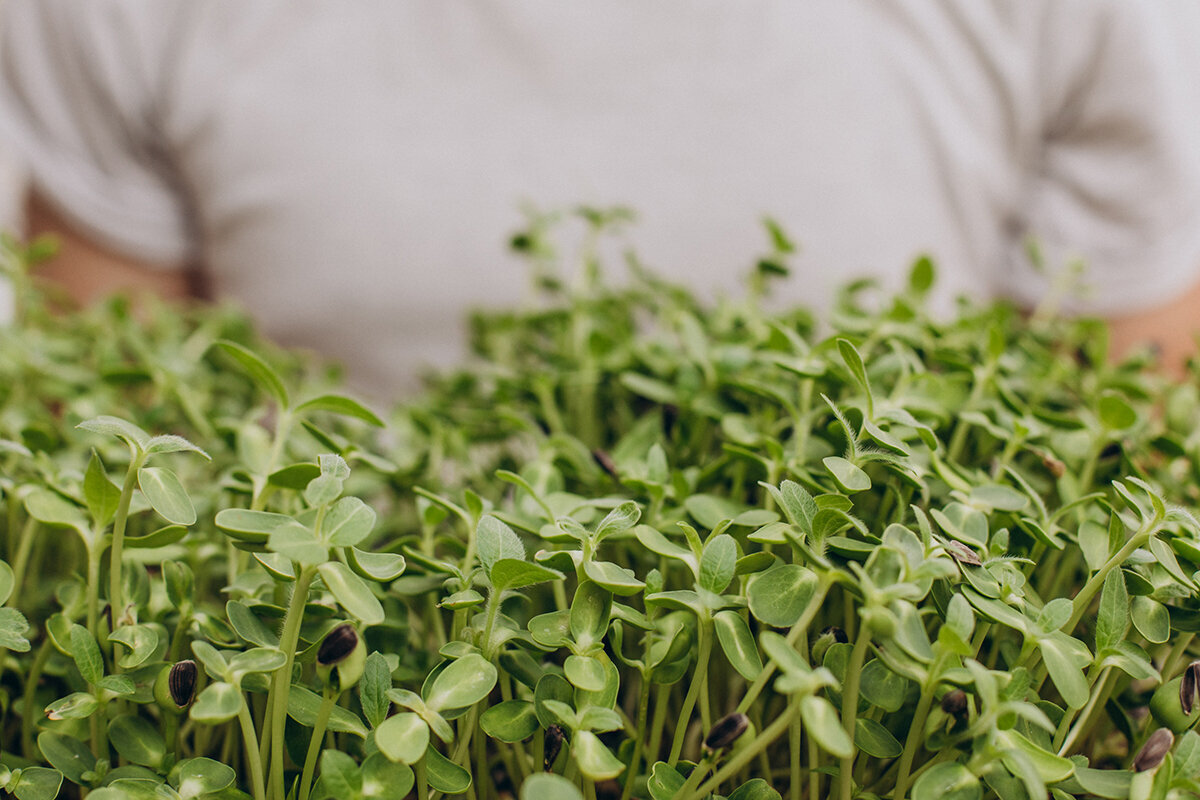
Microgreens are edible seedlings cut after germination, once the cotyledons have opened and, according to the crop and preferred finish, just before or as true leaves first appear. They differ from sprouts because they are normally raised on a shallow medium or purpose-made mat. The stems are cut above that surface, leaving roots, hulls and medium behind.
This distinction changes the role of the greenhouse bench. Tomatoes need room and a season in which to develop, whereas microgreens depend on a routine that can be repeated accurately. Because dry seed becomes food so quickly, mistakes appear almost at once. Excessively dense sowing holds moisture, comfortable morning conditions can turn hot later in the day, and unclean scissors can spoil an otherwise well-managed batch.
Careful work need not be complicated for a home grower. A consistent tray format, a small selection of crops, potable water, a washable work area and a check at about the same time each day are enough to begin. Use the initial month to tune the process. Record the crop, seed lot, sowing weight, any soaking period, when the cover was applied, when light began and the condition at cutting. Your own observations are more dependable than a single harvest date applied to every crop.
Plan for quality before the seed is sown, then safeguard it until the cut greens are cold.
01 / Reading the seed
Match the crop to your routine, not simply to its colour.
For the first sowing, choose a crop whose seed and emergence are straightforward to assess in a single tray. Small brassica seed develops a low, close canopy quickly. Peas and sunflowers produce heavier shoots but call for more space, closer attention to water and diligent cleanup. Leave blends for later. Crops can be combined more successfully after you have learned how each one germinates, drinks and changes in texture as it grows.
Choose untreated, clearly identified seed sold for producing edible sprouts or microgreens. Retain the supplier, germination and lot information, and mark each tray with its crop and sowing date. Those details help you separate a poor batch, reproduce a good result and recognize slower growth during a cool or cloudy spell.
Small seed / fast crop
Broccoli
- Soaking: Usually unnecessary.
- Dark phase: Keep it brief and check progress.
- Character: Mild, fresh and lightly piquant.
- First tray: A useful crop for learning uniform sowing.
Small seed / vivid crop
Radish
- Soaking: Usually unnecessary.
- Dark phase: Brief; remove the cover as the seedlings straighten.
- Character: Crisp, peppery and colourful.
- First tray: Approachable for beginners, provided density is watched.
Large seed / strong growth
Pea shoots
- Soaking: Frequently helpful; allow the seed to drain well.
- Dark phase: A lightly covered tray can encourage anchoring.
- Character: Sweet, succulent and generous.
- First tray: Clear growth is easy to read, but moving air is important.
Large seed / sturdy crop
Sunflower
- Soaking: Often soaked; use clean potable water only.
- Dark phase: Take the cover away promptly as the shoots gain height.
- Character: Crisp and nutty with a substantial bite.
- First tray: Try it after the cleaning routine is well established.
Only untreated seed intended for edible microgreens or sprouts should reach the bench. Seed dressed with treatments, coated seed and seed marketed for ornamental planting are unsuitable. Raise a single crop in each tray while learning, then blend the cut greens after harvest once their separate growth patterns and cutting stages are understood.
02 / Finding the right density
Aim for an even canopy without closing off airflow.
Too sparse
Productive density
Overcrowded
Distribute seed across the surface without leaving heaps and empty pockets. The right density creates a cuttable leaf layer while still allowing stems to lose surface moisture after watering. Ridges and clusters hold dampness against the medium, increasing the chance of weak, elongated and irregular growth.
Tray size, medium and seed rate
Measure the setup, then keep a consistent record.
For a home greenhouse, a shallow tray measuring about 30 × 50 cm is easy to handle and large enough to reveal differences in germination and coverage. Fit a perforated growing insert into a solid lower tray for bottom watering. Use the lower tray only to hold water temporarily rather than leaving it continuously full.
Seed starting amount = tray surface area × a tested rate for that crop.
No single seed weight suits every tray. The appropriate amount changes with seed size, variety, germination, medium, available light and the chosen cutting stage. Start from the microgreen instructions supplied with the seed, weigh each batch on kitchen scales and adjust only after reviewing coverage, surface moisture and harvest condition. Evaluate a new seed lot in a separate test tray.
Use a fresh, light and stable seed-starting mix without raw animal manure, coir from a dependable source, or a mat designed for edible production. Dampen it evenly before sowing, but do not saturate it. Heavy garden soil is a poor match for this shallow, short-lived crop. Immature compost and unidentified materials should also be avoided because the harvest is commonly eaten raw.
03 / Building the tray
Give water, roots and edible leaves separate functions.
Choose a setup that can be taken through a complete cleaning after every crop. Supply moisture to the root zone from underneath while keeping the leafy portion ventilated and relatively dry between waterings.
Airspace at leaf level
Uniform seed layer
Medium and root layer
Perforated insert
Temporary lower reservoir
Set the perforated insert into its solid lower tray. Water can move upward into the medium, after which any remainder can be poured out. Maintain a shallow, level layer with even moisture and scatter the seed without making piles. Roots establish below, while open space around the foliage helps it dry before the next watering.
Surfaces used around food Dedicate sound, washable trays to edible crops. Cracks and damaged edges trap debris and make dependable cleaning difficult.
How deep to fill Many quick microgreen crops need only a slim, level layer. Larger pea and sunflower seed usually requires firmer support than finely sown brassicas.
How water moves Pour water into the solid tray and allow it to reach the roots from beneath, then empty what remains. Do not leave the insert standing with its roots underwater for extended periods.
How air moves Keep visible clearance around all sides of each tray. Air movement needs to reach the leaves and the spaces between trays rather than merely circulating elsewhere in the structure.
04 / Making the move into light
Use darkness to assist germination, not as an inflexible timetable.
A second tray, dome or modest weight can help certain crops retain even moisture and maintain contact with the medium at the start. It should not dictate the same covered period for every sowing. Watch the crop, temperature and strength of emergence to decide when to uncover.
Step 01
Sow and make contact
Level seed coverageStep 02
Establish roots
Inspect every dayStep 03
Begin the light period
Moderated daylightStep 04
Finish in moving air
Dry and uprightSmooth the damp medium, distribute the seed across it and apply only the pressure needed for contact. A light mist may settle the seed, but standing water should not form.
Inspect progress each day. If new roots raise the insert or the emerging shoots press firmly upward, ease the weight or uncover the tray. An off odour or warm, motionless air calls for attention.
As the cotyledons start to unfold, transfer the trays to a bright greenhouse position where light and heat can be moderated. Do not expose pale new growth abruptly to intense midday sun through the glazing.
Supply water from below when required, provide ventilation and cut the crop once it is crisp, balanced in growth and at the intended stage.
Stop when these signs appear: Do not continue growing or harvest a tray that smells musty or sour, carries fuzzy material, stays wet across the surface, becomes slimy or collapses in patches. Move the suspect batch away and discard it, clean nearby surfaces, and reassess sowing density, water, temperature and air movement before starting again. Washing does not restore the safety of a visibly questionable crop.
05 / Managing the greenhouse
Reserve the most stable bench position for the crop with the shortest cycle.
A greenhouse can place daylight, water, tools and the harvest route within a compact workspace. Its enclosure also allows heat and moisture to build rapidly around microgreens. Rather than pursuing high temperatures, maintain moderate, steady conditions that let leaves dry without exposure to accumulated heat or severe direct sun.
For many familiar crops, about 18 to 24 °C offers a reasonable place to begin. Measure beside the trays instead of relying on how the doorway feels, and check again during the brightest part of the day. Canadian greenhouse conditions vary widely by region, but clear sun after a cold night can warm shallow trays surprisingly fast. Open the roof vents and door before excess heat builds. During summer heat, shade over the bench or lightweight shade cloth can help more than additional watering, which cannot correct heat-stressed leaves.
Depending on region and exposure, daylight in spring and fall may support sturdy, quick crops when the glazing is clean and unobstructed. In dim winter conditions, safely installed grow lighting can supplement the available day; raising the temperature does not replace missing light. Use a small circulation fan gently so that one tray edge does not dry continuously. Keep the crop away from condensation, cold drafts at the entrance and still pockets behind stored pots.
Classic Aluminium GreenhouseSeed
storage
storage
Sowing
setup
setup
Crop
care
care
Harvest +
chilling
chilling
Treat the greenhouse bench as a compact workspace for food.
Keep at least one hand-width open beside the trays, prevent hose ends and watering nozzles from touching the floor, and set aside a clean surface for labels, cutting tools and unused harvest containers. The adaptable interior of a Classic Aluminium Greenhouse can be arranged into an orderly, compact growing area. Prioritize washable work surfaces, gentle circulation, seasonal shade and direct access instead of squeezing a tray into every gap. Each crop should be reachable for inspection, watering and cutting without shifting unrelated garden tools, and the entire workspace should remain easy to clean.
06 / Keeping food handling clean
Maintain a forward workflow so used equipment never returns to the harvest side.
Since microgreens are frequently served raw, hygiene belongs at every stage of production. Select untreated seed meant for edible sprout or microgreen use, and use potable water for soaking, irrigation and any washing. Clean your hands before touching either seed or harvested greens. Keep animals, soiled garden equipment, raw animal manure and unfinished compost out of both growing and cutting areas.
Washing away dirt and sanitizing a surface are different tasks. Begin by removing medium, roots and other visible material with water and an appropriate cleaner. A food-contact sanitizing product can then be used on the clean surface according to its label. At the end of a crop, empty the tray, remove the root layer, wash trays and tools, rinse as directed, sanitize when appropriate, allow everything to air-dry and store clean items away from growing medium, hoses and outdoor footwear.
Stop: used trays, dirty hose ends, spilled medium and garden footwear stay outside the area used for cutting, packing and chilling.
01Receive
02Wash
03Sow
04Tend
05Cut and chill
Keep seed dry, clearly labelled and apart from pesticides and other chemicals. Prepare trays, tools and bench surfaces before they touch food. Confine medium and seed handling to the sowing area. While the crop grows, water from below with care and clear away waste. At cutting time, use clean sharp equipment and appropriate containers, then move the greens into refrigeration promptly. Used trays and medium must not travel backward into the clean cutting and packing space.
07 / Choosing the cutting point
Let crop condition set the harvest, rather than relying on a promised date.
Estimates of 7, 10 or 14 days are only starting points. Actual timing changes with light, temperature, variety, seed lot and the stem length you prefer. Look for upright growth, even colour, fully spread cotyledons, dry clean surfaces and the fresh flavour expected from that crop. Where practical, cut in the cooler portion of the day before heat accumulates beneath the glazing.
With a clean, sharp knife or pair of scissors, make the cut slightly above the growing surface. This clearance limits pieces of medium and prevents soil or fibres from being dragged into the harvested greens. Microgreens that are clean and dry at harvest do not always require washing, and retained water may reduce storage quality. When washing is needed for kitchen use, choose potable water and dry the leaves thoroughly before refrigeration.
Cut only an amount that can be eaten, shared or packed while its quality is high. For most households, sowing 1 or 2 trays several days apart supplies fresher greens more consistently than starting a large group that all reaches cutting stage together.
Radish
Firm, crisp cotyledons
Broccoli
Tender, uniform canopy
Pea
Soft young shoots
Sunflower
Strong paired leaves
Radish is ready when the open cotyledons are crisp and the familiar peppery flavour is present. Broccoli can be cut once its delicate canopy has an even green appearance. Decide on your preferred pea-shoot length before the stems toughen. For sunflower, choose the sturdy paired-leaf stage and harvest before excessive extension, clinging hulls or leaf damage detracts from its nutty quality.
The crop is not finished until it has been chilled.
Remove cut microgreens from greenhouse heat without needless delay. Place them loosely in clean containers suitable for food and refrigerate promptly. Keep them separate from raw meat and unwashed produce. Quality is best preserved when the trip from cutting bench to kitchen remains brief.
08 / Troubleshooting the tray
Use a poor result to diagnose the process instead of immediately adding water.
Problem sign
Long, pale stems
Long, pale stems
Elongated and leaning
Uneven or insufficient light is a likely cause, especially when combined with overly long covering or excessive density. Remove the cover at the appropriate stage and provide bright, moderated light. Check whether the crop is bending toward one side of the greenhouse. More heat will not strengthen pale, weak growth and may worsen heat stress.
Healthy sign
Dry and upright
Dry and upright
Surface remains wet
Reduce the volume supplied, use the lower tray carefully and encourage mild circulation. Examine seed placement as well: densely packed small seed can make a damp, felt-like layer even when the wider greenhouse has ventilation.
Problem sign
Patchy emergence
Patchy emergence
Uneven germination
Begin with the water distribution in the medium and the placement of the seed. Dry margins, a saturated centre or clustered seed will all produce an irregular stand. Dampen and level the medium before sowing, then record whether soaking, gentle pressure or a short covered period improved that particular crop.
Healthy sign
Dry harvest, chilled promptly
Dry harvest, chilled promptly
Short storage life
Select only sound, dry leaves and work with cleaned cutting equipment. Shorten the time spent in greenhouse heat, avoid packing damp greens and refrigerate soon after cutting. If quality still declines quickly, review the clean workflow as well as post-harvest handling, moisture inside the package and storage temperature.
Practical questions from the growing area
Microgreen questions and answers
Should greenhouse microgreens receive direct sunshine?
Not necessarily. They benefit from ample daylight, but strong sunshine passing through glazing can rapidly heat a shallow tray and damage tender foliage. Use a bright position where ventilation and seasonal shade can moderate conditions. Because winter daylight differs greatly across Canada, supplemental grow lighting may be useful when natural light is limited or persistently unreliable.
Does every crop require soaking and added weight?
No. Growers often soak larger pea and sunflower seed, while small brassica and radish seed generally goes straight to the tray. A cover or light pressure is likewise determined by crop, temperature and seed lot. Use the supplier’s directions, inspect the tray each day and respond to emergence rather than imposing one covered schedule on every crop.
May different crops share a tray?
They can, although separate trays provide a more dependable start. Crops vary in seed size, moisture uptake, emergence rate and preferred cutting stage. Keep records for each one first. Combining the greens after cutting allows every component to be raised and harvested on its own timetable.
Is added fertilizer necessary?
For many microgreens, the reserves within the seed and an appropriate medium support the entire brief growing period. Extra nutrients should not be the default. Establish consistent emergence, adequate light, controlled bottom watering and good hygiene first. If the selected crop or system calls for feeding, follow the specific instructions supplied for it.
Can a greenhouse be used for seedlings that will be eaten raw?
Yes, when the entire process is handled as food production. That means potable water, suitable seed, fresh medium, clean tools and trays, no animals in the work area, clean hands, enough air movement for drying and quick chilling. Rainwater should not be used for a ready-to-eat crop unless its quality is demonstrably controlled. The structure itself cannot make a batch safe; the daily routine does.
References and next steps
Use dependable references to improve your own crop records.
The German, European and North American references below provide background on seed, hygiene, crop management and the difference between sprouts and microgreens. They can help you evaluate risk, refine each tray cycle and keep a clearer record of decisions about water, medium, greenhouse conditions and cutting.
Continue with Bloomcabin: Planning a greenhouse interior: layout, crops and care · Managing a greenhouse through summer · Browse more Bloomcabin gardening ideas
- BfR: Food-related STEC/EHEC risks and prevention— Guidance from Germany’s Federal Institute for Risk Assessment on recognizing and reducing foodborne STEC/EHEC risks.
- LAVES: Hygiene for sprouts and seedlings— Information from Lower Saxony’s consumer-protection and food-safety authority on sprouts, seedlings and hygienic handling.
- EFSA: Scientific assessment of seed and sprout risks— A European Food Safety Authority assessment concerning seed and the production of sprouts.
- Virginia Cooperative Extension: Producing microgreens under cover— University extension guidance covering crop and system fundamentals for greenhouse and controlled indoor production.
- Penn State Extension: A practical introduction to microgreens— University extension information about sowing, media, lighting, watering, cutting and routine crop decisions.
Begin with a clean tray in a position you can shade, then refine the same process with every crop.Classic Aluminium Greenhouse
