
Growing Ginger Successfully in a Greenhouse
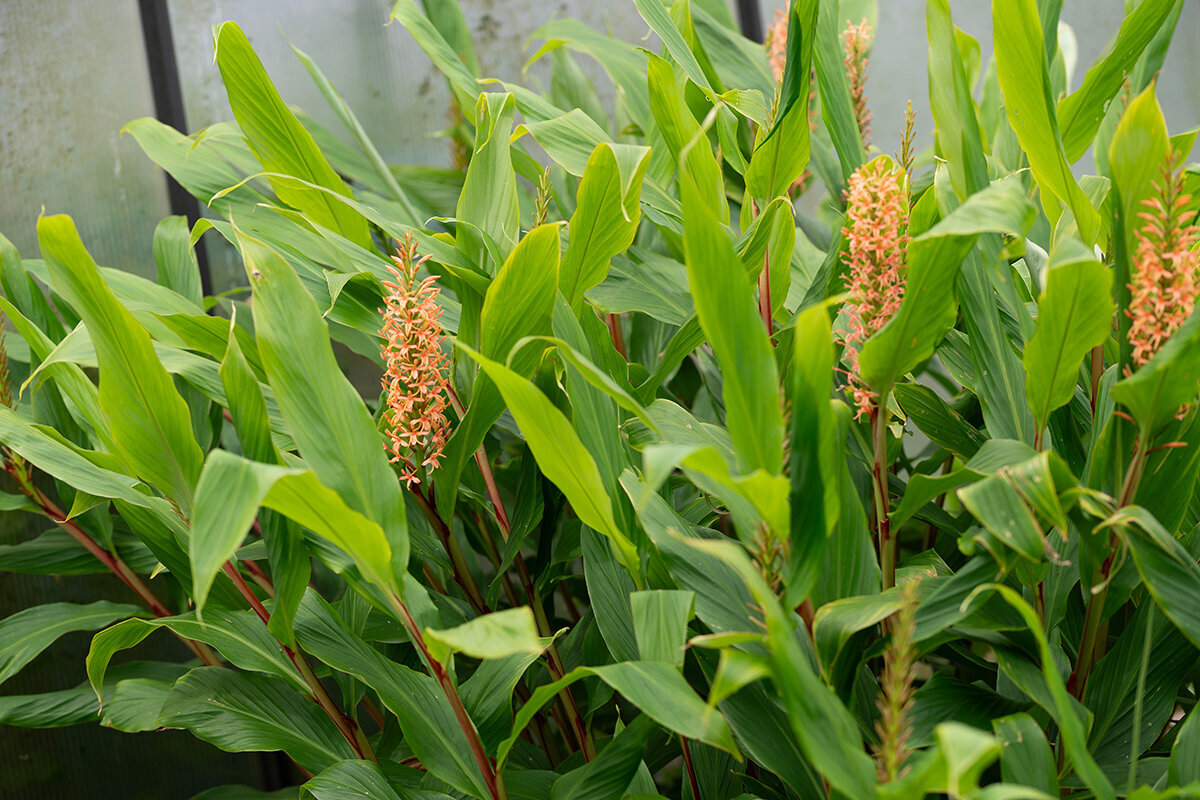
Classic Aluminium GreenhouseGreenhouse growing profile · Canada
Held warmth / unhurried growth / fragrant harvest
Growing ginger successfully
in a greenhouse
A productive ginger crop depends less on recreating the tropics than on providing a long stretch of steady root-zone warmth, gentle humidity with moving air, and time for the rhizomes to travel sideways.
What protection changes
The real value of glass for ginger is not simple shelter, but the ability to hold favourable conditions beyond the outdoor summer.
Ginger is a warmth-seeking crop built around an edible rhizome. In much of Canada, open-air conditions do not stay warm and predictable long enough for substantial branching below ground. Under cover, plants can begin earlier, hold a more even temperature around the container or bed, and continue more gently as autumn nights cool.
The useful part develops out of sight, so swings in the growing medium matter. Cold, soggy conditions followed by drying can check growth or invite damage. Give the rhizomes width, easy drainage and moisture that is consistent but never waterlogged. Begin with controlled warmth, then keep the crop moving without extended cold interruptions.
Northern, coastal and cool-summer gardens Wake the rhizomes indoors or in a gently heated space so low night temperatures do not steal the early weeks.
Interior sites and elevated gardens Keep plants protected through late cold snaps; once summer arrives, vent before heat collects.
Warmer southern and inland gardens Lead with ventilation during hot spells, add temporary shading when necessary and check pots rather than watering by habit.
Mountain and very short-season sites Use the protected space to maintain the warmth that outdoor nights cannot supply consistently.
01 / Build the crop from sound stock
The quality underground at planting shapes everything that follows.
Ginger starts from sections of rhizome, not botanical seed. Look for clean, recently handled stock from a nursery or specialist grower. A piece from the grocery aisle may grow, yet its health history is uncertain and sprouting may have been suppressed. Reject anything soft, damaged or questionable before it enters warm greenhouse media.
Keep
Dense, plump and active
- An unwrinkled surface
- 1 or 2 visible buds
- Clean cuts that have dried
- A fresh scent and substantial feel
Set aside
Any softness deserves attention.
- Mould growth or a fermented smell
- Dark hollows or collapsing joints
- Pronounced shrivelling
- Undersized or weak sections
For a home crop, the Bavarian State Institute for Viticulture and Horticulture recommends sections of about 30–40 g carrying 2 growth buds. Cut a larger hand with a clean knife, then leave each fresh face in a sanitary, well-ventilated place until it has dried and callused fully. Healthy firmness, clean equipment and dry air at the wound are simple ways to reduce the risk of decay.
02 / Warmth before visible growth
Let temperature set the pace of pre-sprouting.
A ginger rhizome may show no movement for several weeks while roots begin forming below the surface. Place it in a shallow, drained tray containing barely moist coconut coir or an open-textured propagation mix. Bottom heat or a reliably warm indoor location at 22–26 °C works well; use about 24 °C as a practical reference point.
Days 1–2Dry the fresh cutsClean air, no added moisture.
Weeks 1–2Warm holding stageBarely damp, never saturated.
Weeks 3–4Rooting and bud movementLook for the first shoot.
Weeks 4–6Move into final containersKeep protected before the move.
Maintain slight moisture without soaking the propagation mix. Allow its surface to lose some dampness before adding water carefully. If a cover is fitted, lift it every day so humid, stale air can escape. Prepare the permanent container or bed when strong green shoots and fine roots appear. Transplant before neighbouring pieces knit their fragile roots together.
03 / Give the rhizomes width
Keep the planting shallow, turn buds upward and reserve space for later top-ups.
Because new growth runs outward, choose width before excess depth. For 1 starting section, provide roughly 25–35 L and at least 30–35 cm of growing medium. Space several plants about 30 cm apart in a wide trough or bed. Multiple generous drainage openings and a slightly raised base prevent standing water. Leave working room for inspection, irrigation and later additions of medium.
Buds face up
Aim each growing point toward the surface.
Aim each growing point toward the surface.
A shallow start
Only 3–5 cm at first.
Only 3–5 cm at first.
Unblocked drainage
An open mix above clear outlets.
An open mix above clear outlets.
Fill the container with a high-quality peat-free mix amended with mature compost and an aerating mineral material such as perlite, pumice or fine expanded clay. Dense garden soil is difficult to drain or monitor in a pot. Lay the rhizome with its buds facing up, cover lightly and water once with care; do not leave it continually saturated. When new fingers become exposed during summer, cover them with another 2–4 cm of loose mix or mature compost. Protect the rhizome from light without packing material deeply around the stems.
04 / Manage conditions, not appearances
Combine moisture in the air with oxygen below and a clear route for excess heat.
Warm-climate origins do not mean ginger should sit in permanent wetness. It favours gentle atmospheric humidity and steady moisture around the rhizome, but drainage and oxygen remain essential. Time irrigation so the surface can breathe between waterings. The goal is a warm, responsive growing space rather than a sealed room filled with steam.
Temperature
Check the medium, not just the air.
About 25–30 °C during active growth
StartHigh summerMaturity
Water and air exchange
Moist at depth, oxygenated throughout.
Irrigate the medium and keep air moving through the structure.
Exposure
Plenty of light, softened when necessary.
Respond before foliage overheats.
Temperature management
For pre-sprouting, keep conditions near 22–26 °C. Once transplanted, active plants benefit from a root zone that remains above 20 °C where possible and often grows strongly at 25–30 °C in summer. Take readings in the medium as well as in the air. Bright March sunshine may heat the glazing while the pot stays cold overnight, and chilled media can pause an otherwise healthy plant for weeks.
Irrigation and ventilation
Apply enough water to moisten the full rooting depth, then wait until the top 3–5 cm feels dry while the layer below remains slightly damp. A slow application at soil level or drip line keeps leaves drier than frequent overhead watering. Begin airing the greenhouse in the morning and increase air exchange during muggy weather. Persistent moisture on glazing, foliage and containers signals a need for less frequent irrigation and more ventilation.
Brightness and overheating
Filtered sun suits ginger, although deep shade will produce weak plants. Choose a bright position and soften strong midday exposure through the glazing. When heat persists, exterior shade cloth around 30–40 percent may help. Coordinate doors and roof openings early enough to establish crossflow. Shading supports ventilation; it cannot compensate for trapped hot air.
The Classic Aluminium Greenhouse can anchor a practical setup, offering spring protection, adjustable ventilation in warm weather and room to separate tall ginger stems from shorter crops that prefer more sun.
05 / Notes for the active season
Build care around brief checks that are easy to repeat.
Healthy ginger changes quietly above the growing medium. Stems remain upright, leaves stay clear and daily differences are usually subtle. That steady appearance comes from timely, restrained care rather than drastic action after the plant is already showing damage.
Water check
Test the medium before reaching for the watering can.
Feel the top 3–5 cm. If that layer has dried but the medium underneath is still faintly moist, watering time is close. Apply water gradually around the stems until some drains out, then clear the saucer. In beds, a drip line or slow soaking can wet the rhizome area without leaving puddles. Bright, warm conditions may require this every 1–3 days, while overcast periods call for much less.
Nutrition check
Support growth without letting salts accumulate.
Compost supplies an initial reserve, but the crop remains active for a long period. After robust shoots develop, offer a weak organic liquid fertilizer every 2–3 weeks or apply a balanced slow-release feed as directed on its label. A moderate supply that includes adequate potassium is useful. Before treating pale leaves as hunger, inspect the temperature, drainage and root condition; cold or saturated media can prevent nutrient uptake.
Top-up check
Protect exposed rhizomes while leaving stems open to air.
When a growing rhizome reaches the surface, add 2–4 cm of loose fresh mix or mature compost. This is normally needed only 1–3 times during summer. A light layer of shredded leaves, straw or untreated hemp fibre can reduce evaporation and temperature spikes. Keep mulch clear of the stem bases so tender tissue is not smothered.
Keep short notes on the planting date, first shoot, hot spells, feeding and the onset of autumn yellowing. Over a long season, written observations make it easier to separate normal maturity from trouble. Allow suitable room for pots, movement and ventilation from the beginning; the Classic Aluminium Greenhouse can serve as a durable framework for that arrangement.
06 / Let each region shape the schedule
Use measured conditions in your own greenhouse instead of chasing an idealized tropical calendar.
A cold beginning to spring
Start in late winter or early spring at a warm indoor station, on a heat mat or inside a tempered greenhouse. Wait to use an unheated structure until nights have moderated and the container medium remains clearly above 15 °C. A medium temperature near 20 °C helps initiate vigorous growth. This early advantage matters most in northern, elevated and late-frost locations where the warm season is compressed.
Intense inland heat
During a hot spell, measure conditions around dark pots and near the floor as well as at head height. If the medium remains substantially above 30 °C, increase ventilation sooner, provide shade where needed and irrigate carefully. Flooding a hot container will not cure heat stress and may drive oxygen from the rhizome zone.
Rainy or humid districts
Extra humidity is usually unnecessary here; the concern is how slowly the crop dries. Elevate pots, empty saucers and maintain open space around each container. Use doors and roof openings together. If surfaces remain damp, lengthen the interval between waterings before adding any further moisture.
Extended autumn warmth
Continue moderate care while the leaves remain sound and green. Additional warm time allows mature rhizomes to gain size and flavour. Begin reducing water only when shorter days, cooler nights and widespread yellowing show that growth is easing naturally. A single yellow leaf is not, by itself, a reason to add fertilizer.
These shifts are easier to manage when the structure supports access and airflow. Use the Classic Aluminium Greenhouse to plan broad container areas and uncluttered paths, with doors and windows positioned for warm-weather control. Its design page also offers a second look at the Classic Aluminium Greenhouse.
07 / Investigate before intervening
A symptom is a starting point for inspection, not a diagnosis on its own.
Begin with the medium, the rhizome area and the pattern across the whole plant. A leaf fading evenly in October carries a different message from a green summer shoot that collapses suddenly. Isolate the container whenever decay is a possibility, and avoid transferring runoff or growing material to healthy plants on hands or tools.
Even late-season yellowing
The crop may be reaching maturity
Dry or browned tips
Review sun, heat and root-ball moisture
Little or no new growth
Inspect warmth, nutrition and compaction
Fine pale specks or threads
Inspect the leaf undersides for mites
Collapse or softened rhizomes
Isolate promptly and investigate rot
Work from the pattern
Widespread yellowing late in the crop: This can be a normal sign of maturity. Ease back on irrigation, discontinue strong feeding and choose whether to lift the crop or leave it briefly for further development.
Scorched-looking patches or browned ends: Assess sunlight through the glazing, dryness in the container and excessive heat around the rhizomes. Soften midday exposure, restore an even watering pattern and move more air. Keeping the pot constantly soaked will create another problem rather than solve the first one.
Weak stems with lower leaves fading slowly: Measure the growing-medium temperature and inspect drainage openings, compaction and the feeding record. Restricted container volume can also slow development. Change 1 likely limiting condition at a time so you can identify what helped.
Speckled, webbed or lacklustre leaves: Inspect beneath the foliage for spider mites, particularly where conditions are hot, dry and still. Separate an affected plant if necessary, rinse the leaves carefully and remove a light infestation mechanically while improving circulation. Before choosing any pesticide, use Health Canada’s product and label database to verify its Canadian registration and directions, then check provincial and municipal restrictions.
Green shoots wilting suddenly, softened tissue or dark-smelling rhizomes: Respond immediately to possible root injury or advanced decay. Move the plant and its medium away from the healthy crop, and keep diseased material out of home compost. Wash containers and tools thoroughly, then review the drainage and irrigation of nearby plants. Never retain affected rhizomes for planting. Clean stock, separated media and a long rotation are safer than trying to recover badly damaged tissue.
08 / Choose the stage of harvest
Lift the crop when its texture and flavour match the way you plan to use it.
Ginger offers 2 useful harvest stages. Young ginger is pale-skinned, juicy and tender. A later crop becomes firmer and more strongly flavoured and will keep somewhat longer. Greenhouse protection allows you to select the stage instead of letting the first cold night make the decision.
Young ginger
Delicate and best used fresh
- Lift while leaves are still green
- Wash with a light touch
- Prepare or preserve soon
Fully developed ginger
Denser and better suited to keeping
- Wait for the plant’s natural decline
- Dry in shade with good circulation
- Reserve only perfect sections for replanting
Harvesting young ginger
The LWG notes that fresh ginger may be ready in 3–4 months. Select a vigorous plant and gently expose an outer section, or tip out the entire pot. At this stage the skin is thin and pale, and the flesh is juicy with less fibre. Use young ginger in tea, syrup, pickles or delicately flavoured dishes. Consume it soon after rinsing or refrigerate it briefly. If taking only part of the crop, disturb the central branching as little as possible.
Waiting for fuller maturity
Leave the plant growing until its foliage naturally declines if you want denser, more aromatic rhizomes. Reduce irrigation gradually as most leaves yellow and nights cool. Choose dry weather for lifting. Empty a container carefully or loosen a bed with a garden fork instead of pulling the stems. Trim away stem remains, brush off loose soil and place the rhizomes in circulating air for several hours.
Do not leave freshly lifted ginger to bake in direct sunlight or seal it in packaging while damp. Keep healthy pieces for a short period in cool, dry and frost-free conditions, inspecting them regularly. Firm, undamaged sections with distinct buds may be separated as next season’s planting stock. Remove questionable medium after harvest and clean pots, tools and drainage points so the following crop begins in a sanitary space.
Questions from Canadian growers
Practical greenhouse ginger answers
Is year-round greenhouse ginger realistic?
Only if dependable warmth can be maintained in every season. Most home growers in Canada will find it more practical to treat edible ginger as a long crop for the warm part of the year. An unheated greenhouse cannot maintain the root temperature needed for winter growth and may bring development to a halt. A better sequence is to start with warmth in late winter, grow under cover during summer and plan the harvest for autumn.
What level of light does greenhouse ginger prefer?
Provide a bright setting, but watch for foliage and containers overheating in strong summer sun through the glazing. Filter the midday light during prolonged hot weather. The plant’s response, moisture within the root ball and an actual root-zone reading are more useful than prescribing a fixed number of sunny hours.
Will a raised greenhouse bed work?
Yes, provided its medium is open, drains readily and becomes sufficiently warm in spring. Allow about 30 cm between planting points and retain enough depth to cover exposed new growth later. Pots offer greater control when individual plants must be isolated, moved during a cold snap or watered independently.
What can delay the first ginger shoot?
The rhizome may still be dormant, may have received a sprout-suppressing treatment, or may be sitting in conditions that are too cold or wet. Confirm that it remains firm with no dark, softened areas. Maintain only slight moisture and a temperature near 22–26 °C. Even healthy material can remain below the surface for several weeks.
Is daily misting necessary?
No. Misting cannot replace moisture delivered to the rhizome zone. A light spray may be useful during pre-sprouting or when the air is exceptionally dry, but closed covers, continually wet leaves and stagnant air can encourage trouble. Prioritize an evenly moist yet aerated medium, unobstructed drainage, dry foliage overnight and regular ventilation.
How should the greenhouse be arranged for ginger?
The crop uses little floor area, but its rhizomes need wide containers and its tall stems need circulating air. A warm position near the growing surface is also valuable. The Classic Aluminium Greenhouse works well with a broad pot or bed area along 1 side and an open path for irrigation, topping up, inspection and lifting.
References for the growing plan
Research and practical guidance for a crop that needs time.
The following horticultural material supports the recommendations on temperature, early propagation, growing media, irrigation, plant health and harvest. Scale the methods for a home crop and adjust them to the measured conditions in your Canadian greenhouse and local growing season.
More from Bloomcabin: Setting up a greenhouse: layout, plants and care · Classic Aluminium Greenhouse overview · Frequently asked questions about Bloomcabin aluminium greenhouses
- Bavarian State Institute for Viticulture and Horticulture – Growing your own ginger
- LWG – Ginger: cultivation information and growing tips, PDF
- FiBL – Guide to protected ginger cultivation, PDF
- University of Illinois Extension – Watering and Soil Moisture Guidelines for Ginger
- University of Illinois Extension – Fresh Ginger Rhizome Cultivation: Pre-Sprout Process
- University of Florida IFAS Extension – Ginger, Galangal, and Turmeric Production
- Bavarian State Institute for Viticulture and Horticulture – Practical experience growing ginger
