
How to Grow Melons in Your Greenhouse
Greenhouse growing · Canada
Growing melons
full of flavour in your own
greenhouse
Success with melons under glass comes from balancing heat, ventilation, moisture and climbing room. Once the vine has dependable support, the greenhouse can produce aromatic fruit while remaining an inviting place to work through summer.
From warm propagation to a fragrant late-summer harvest
The main principle
Build a place for warmth
so the fruit has time to sweeten.
These vigorous vines prefer heated root conditions, abundant light and soil that drains readily. While fruit is swelling, moisture should remain consistent and air should circulate well enough that wet leaves do not linger.
Protection makes the different needs easier to balance, but it also gives the gardener more responsibility. Vines need ventilation, irrigation, training, crop thinning and sometimes manual pollination. In many domestic greenhouses, small or medium muskmelons use the available room efficiently: they climb well, often signal ripeness with aroma and can be carried by a broad cradle. Compact watermelons are another option, although they demand extra room, sturdier supports and careful cultivar selection. Begin the layout with sunlight, usable height and comfortable working access rather than simply filling the floor.
Match the cultivar to its supports
Four melon types
for a protected summer garden.
The name on the packet is only the beginning. Consider the space the mature plant and its fruit will occupy, and watch for terms such as early maturing, compact, small fruit, suited to protected growing or suitable for trellising.
In Canadian locations with brief or unsettled summers, fewer days to maturity can be especially valuable. A first attempt need not pursue record size. Choose fruit that can finish ripening while the vine remains easy to inspect and support and the aisle and neighbouring crops stay usable. The cultivar description should also explain expected weight, vigour and pollination needs.
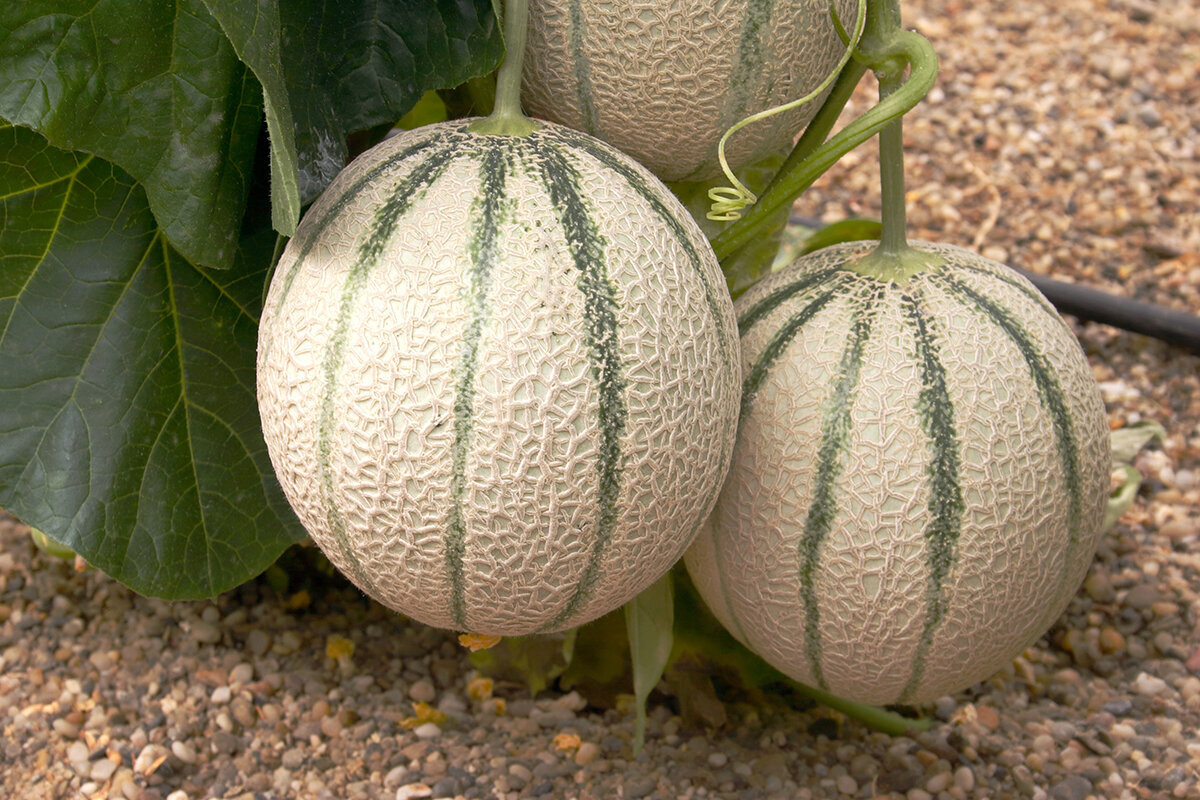
- Galia and netted melons Juicy green-gold fruit with a distinctive netted rind. Many varieties sit well in fabric slings, but ripeness cues and stem release remain variety-specific.
- Charentais and cantaloupe Small to medium, intensely fragrant fruit with notes of apricot, flowers and warm earth—ideal when flavour matters more than maximum size.
- Honeydew and smooth-skinned melons Their readiness can be harder to read. Combine the cultivar's notes with changes in the underlying rind colour, surface appearance and feel instead of waiting for one colour or a powerful aroma.
- Small-fruited watermelons These make a dramatic crop, but they call for ample overhead room, substantial trellising and a spacious cradle. A seedless cultivar must be paired with an appropriate variety that produces compatible pollen.
A seedling's route to the trellis
Supply warmth first. Handle roots carefully.
Wait for stable greenhouse conditions before transplanting.
01 / Seed
Germinate in warmth
02 / Seedling
True leaves
03 / Transition
Harden off
04 / Bed
Plant into warmth
Germination with warmth. From mid to late April, place 1 seed in each adequately sized pot. Melons resent damaged roots, so separate pots avoid thinning and repeated transplanting. Maintain even dampness without saturating the medium. Bottom heat can be useful in a cool room, but after emergence the seedlings benefit more from abundant light than from extra heat. This encourages short, sturdy growth.
The first true leaves. Give seedlings enough light to remain stocky and resilient. Do not move them through a succession of pots merely to follow a date on the calendar. Transplanting a young plant with an intact, well-colonized root ball is safer than handling an overgrown specimen whose roots circle the pot or fall apart.
Harden off and plant out. Acclimatize seedlings gradually to brighter greenhouse light, moving air and daily temperature variation. Start with brief sheltered visits, avoiding cold draughts and a sudden exposure to strong noon sun. Because Canadian spring conditions vary greatly by region, transplant only after both the greenhouse and root area remain dependably warm. Keep the root ball intact and at its previous depth. A plant with 2 to 3 true leaves is at a useful stage, although the conditions on site should decide the timing.
The root zone
Create drainage, then irrigate with care.
Melons use plenty of nutrients, yet their roots perform poorly in compact, oxygen-starved soil. Prepare a deep, warmed and freely draining planting area, blending in a moderate amount of finished compost throughout rather than surrounding the plant with a small rich pocket inside cold ground.
Loosen the whole planting zone in a ground bed and remove hollows where water collects. Soil should retain moisture yet regain air after watering. Mature compost supports the start; add nutrients in response to need, not habit. A raised bed can help where soil dries slowly. Keep the surface clean and water so as little soil as possible splashes onto leaves. Heavy, cold soil is improved by structure, warmth and patience, not ever more fertilizer.
Use the largest practical container. Small pots can overheat, dry in patches and restrict developing fruit during summer. For 1 vertically trained plant, approximately 30 to 40 L is a reasonable minimum guide, while additional volume makes water and nutrients easier to regulate. Select a structurally stable, porous medium, unobstructed drainage holes and a base that cannot tip. Container moisture will need checking more frequently than soil in a bed.
Organizing the climbing framework
Direct new growth toward its support
before the vine spreads through the room.
Roots
Open base
Flowers
Fruit
Turn below the roof
1 primary stem
Airy base
Guide side shoots
Route the tip onward
Inspect the plant in stages, beginning at soil level. Lead 1 primary stem loosely beside its cord or trellis. Open the lowest part enough for ventilation without removing productive leaves indiscriminately. Place selected laterals where foliage, blossoms and melons will not merge with the next plant into a shaded, damp mass. Parts resting on the soil may be removed when necessary.
At the top of its allotted space, turn the principal shoot onto another secure line, lay it across, or stop it according to vigour and the intended crop load. Bloomcabin's article on the Classic Aluminium Greenhouse offers ideas for arranging paths, beds and attachment locations together. Vertical melons are easier to manage when fixing points, ventilation, cultivation space and access are considered as parts of the same layout.
The morning task
A quick pollination visit
calls for a light touch in the morning.
Open roof vents and doors sometimes admit bees and bumblebees, but their visits cannot always be timed to the crop. Each blossom is available briefly, and a receptive female bloom may be missed.
Identify
Morning
Transfer
Mark
A male bloom grows from a narrow stalk without a swelling at its base. Below the petals of a female bloom, a miniature melon-shaped ovary is already visible. Poor pollen transfer may prevent set or produce undersized or uneven fruit. On bright mornings, locate newly open blooms and remember their positions.
Work on a dry, bright morning. Lift pollen from a fresh male bloom with a soft artist's brush and lightly touch it onto the female stigma. A detached male bloom can also serve as the applicator. Treat the other open flowers and record the date with a coloured tie or small tag. Allow the following week for a successful ovary to enlarge consistently; do not decide after a day. Avoid condensation-wet petals and rough movement among tender stems.
Seedless watermelon plants also depend on pollen transfer. Consult the cultivar directions and include the specified pollen-bearing partner, since an arbitrary watermelon variety may not be suitable.
Thoughtful selection
Fewer fruit often make
the better harvest.
A lush vine may appear able to finish every melon it sets, but its resources are limited. Each retained fruit draws on the same leaves, moisture, nutrients, light and remaining ripening season.
After several ovaries begin swelling, favour evenly developing fruit in accessible positions. Retain those on sound growth where sunlight and sling space are available; remove damaged, distorted, trapped or very late fruitlets while they are small. Crop load varies with cultivar, mature fruit size, rooting volume, weather, light and time. Reassess it as the plant develops instead of relying on a universal quota.
Excess nitrogen may create dark, tender leaves and sprawling growth while postponing blossoms and fruit. Moderate feeding paired with a realistic crop load directs more of the vine's effort toward ripening.
Retain
well set
well set
Retain
well lit
well lit
Cull
pinched
pinched
Cull
damaged
damaged
Cradle
what remains
what remains
Allow clear space around each selected rind, stem and bearing shoot. Congested fruit is awkward to examine and remains damp longer after humid conditions. Early thinning is kinder to the plant than waiting until an unsuitable melon has become heavy, shaded, abraded or difficult to carry safely. Confirm that its supporting shoot remains sound and within easy reach.
A small structural task
Prepare the cradle
while the melon is still light.
Broad support
Room to grow
Secure attachment
Check regularly
Choose soft mesh, clean wide fabric or a purpose-made fruit net that spreads the load instead of pressing a thin line into the rind. Shape it as a hammock rather than tying it around the melon. Include plenty of expansion room: a snug early fit may later scar, distort or constrict the ripening fruit.
Carry the load on a dependable overhead line or trellis, not on the fruit stalk or a slender lateral. During rapid enlargement and after irrigation, inspect each support at least 2 times a week. Correct damp fabric, tightening edges, stem tension, contact with glazing and any sling that has shifted or carries weight unevenly. Supporting fruit is a continuing cultivation task rather than a single installation job.
The care rhythm
Keep moisture consistent and nutrition restrained.
Avoid a sudden drought near maturity.
Planting
Vine growth
Fruit set
Ripening
After planting: Soak the root area sufficiently to unite the root ball with the surrounding medium. Before irrigating again, allow slight drying at the surface while maintaining moisture farther down. Roots require both water and oxygen. Increase the amount gradually as foliage expands rather than alternating severe dryness with saturation, especially in pots with small reserves that heat rapidly.
During flowering and fruit set: Consistent moisture is particularly important at bloom and initial fruit development. Apply water at soil level or through a controllable drip line so foliage does not remain wet. Feel beneath the upper layer before irrigating; hot greenhouse air does not necessarily mean the roots are dry. Fewer, well-judged soakings generally reach roots better than frequent splashes at the surface.
During ripening: Never impose an abrupt water shortage. Reduce needless surplus while preventing wilting and large moisture swings. A long dry spell followed by saturation can contribute to splitting and irregular development. Finished compost supports early growth, and a balanced supplement may later be applied as directed on its label. Very dark, soft foliage and excessive shoot growth can signal surplus nitrogen. Bring the vine to maturity through steady care rather than trying to intensify flavour by withholding water suddenly.
A room for air
Warmth is valuable.
The air still needs to move.
The space should remain sunny and active rather than closed and breathless. Circulation moderates temperature peaks, shortens the time leaves stay wet and supports firm growth, while also making morning crop work more comfortable.
When outdoor conditions permit, combine roof ventilation with a doorway or another low inlet. Rising hot air can then leave while cooler air enters below. Temporary light shade, preferably outside the glazing, may be useful during severe midday sun without leaving the greenhouse permanently dim. Irrigate the soil in the morning, preserve clear working aisles and train foliage away from glass and walls. Moisture condensed during a cold night should disperse promptly after sunrise.
In the Bloomcabin Accessories section offers equipment for airflow, shade and crop training. Whatever you choose, keep the arrangement straightforward enough to adjust reliably during hot weather.
A 5-minute crop scan
Make each inspection brief and consistent.
1 / Start beneath leaves
Turn over young foliage and look for aphids, eggs, fine webbing, pale speckling or sticky deposits. Spider mites favour dry heat, and a small early infestation is usually easier to address accurately.
2 / Read the leaf
A flour-like coating, yellow tissue, scorched margins or dead areas should be investigated. Consider moisture on the foliage, ventilation and the likely cause before selecting any control measure.
3 / Examine stems and fasteners
Look closely at the crown, clips and ties. Replace fasteners that chafe or tighten, and promptly clear fallen foliage, spoiled fruitlets and decaying material using clean practices.
4 / Check soil and slings
Puddles, algae and decomposing scraps add humidity and provide sheltered pest habitat. At the same time, verify that each fruit cradle is dry, secure and free of pressure marks. Keeping the aisle clean also helps protect the crop.
Prevention begins with enough spacing, circulating air, dry foliage, clean equipment, restrained feeding and prompt removal of crop debris. Keep irrigation away from the stem and investigate wounds or colour changes around the crown. Identify the disorder or pest before acting, and remove heavily affected material carefully. Before using any pest-control product in a Canadian home garden, confirm the product and its label in Health Canada's current registry, follow that label and check any additional rules that apply in the province or municipality. If identification remains uncertain, seek regional horticultural advice rather than treating by guesswork.
The final stage
Decide when to pick by combining
several changes in the developing fruit.
Ripening shows through a group of subtle shifts rather than a single decisive sign. Their sequence differs among melon types and cultivars, so the stated crop duration is an estimate, not a preset picking day.
01
Fragrance
02
Rind
03
Stem
04
Timing
Fragrance. Many ripe muskmelons produce a distinct sweet aroma near the blossom end, whereas smooth-rinded cultivars may have little scent. Treat fragrance as supporting evidence and compare it with the other signs.Surface and underlying colour. Use the cultivar description to judge changes in netting, gloss and the colour beneath the rind. Depending on type, green may soften toward cream, gold or another warmer tone. A glossy, firm green surface frequently indicates that the fruit needs longer.
Stem behaviour. At full ripeness, certain muskmelons develop an abscission layer and separate more readily beside the stem. This behaviour is cultivar-dependent and should not be used as a general watermelon test. Record when fruit set occurred, then compare likely maturity time, expected weight, aroma and rind development. If blossom-end softness is relevant to the cultivar, press only lightly; forceful testing can bruise a melon that took months to grow.
If the cultivar does not detach on its own, cut the fruit during a cool morning with clean scissors or a knife. Never tug the stalk or vine. Handle netted rinds gently, and wash the outside as well as the knife and board before cutting. Refrigerate sliced melon promptly. A whole muskmelon may stand briefly at room temperature, but extended storage diminishes its scent and texture. Serve it simply while its greenhouse aroma is still fresh.
Questions from the melon house
Practical answers for greenhouse melon growers
How should a small greenhouse be stocked with melon plants?
Use fewer plants than an empty floor might suggest. Beginning with 1 plant in each large pot or clearly designated bed location leaves room to learn its mature spread. Preserve a proper aisle, clearance from the glazing and enough vertical reach to inspect every flower, tie, shoot and cradle comfortably. An uncrowded canopy generally finishes fruit more reliably than a room filled at soil level.
Is manual pollination necessary?
Not in every case, although it often improves reliability. Insects can arrive through open doors and vents. If visits are scarce or set is weak, transfer pollen carefully between fresh morning blooms.
What causes blossoms to drop before fruit develops?
Early blooms are commonly male, making some loss expected. After female blooms appear, inadequate pollen, overheated days, cold nights, irregular moisture or surplus nitrogen may interfere with set. First review the flower type, greenhouse climate, irrigation pattern and feeding.
Can melons be raised in greenhouse containers?
Yes. Select a compact or small-fruited cultivar, provide a stable vessel of about 30 to 40 L or more, and install dependable trellising. Keep drainage openings unobstructed and inspect moisture more often than in a bed, since summer heat affects pots quickly.
Do leaves near maturing fruit need to be cut away?
Take out foliage only when it is unhealthy, damaged, resting on soil or creating persistent crowding. Sound leaves make the sugars used for melon growth and sweetness. Reposition shoots to improve light and circulation without abruptly placing the fruit in harsh noon sun.
Which greenhouse layout works for upright melon vines?
Prioritize usable ridge height, a load-bearing route for cords or trellis work, and clearance for slung melons above the aisle. Air exchange matters just as much: as foliage fills out, roof openings and a door should still provide an unobstructed exit for rising heat.
Sources
Sources and further reading
LWG Bavaria – Melon growing trial 2025
Recent German trial findings covering cultivar performance, yields, fruit weights, plant health and protected melon production.
LWG Bavaria – Melon growing trial 2024
German field-oriented data on cultivar performance and cultivation methods used in Bavarian horticulture.
LVG Heidelberg – Greenhouse melon varieties 2024
German comparisons of watermelon and muskmelon cultivars, including plant health, fruit traits and yields.
Weihenstephan-Triesdorf University – Melons in greenhouse and open ground
German practical examples showing vine training and the use of suitable netting to carry suspended melons.
Bingenheimer Saatgut – Watermelon growing information
German propagation and cultivation notes covering planting, care, pollination and watermelon maturity.
University of Minnesota Extension – Growing melons in the home garden
US extension information on warm soil, cultivar choice, pollination, irrigation and harvest.
A final invitation
Plan a dependable climb for every vine.
Floor area alone does not determine whether melons succeed. The crop also needs usable ridge height, ventilation through an expanding canopy, comfortable access for pollination and care, and reliable attachment locations for cords and heavy fruit. Treat the greenhouse as a growing system that connects warm roots with the final aromatic harvest.
One adaptable starting point is the Classic Aluminium Greenhouse. Its traditional, orderly form can frame an upright melon crop. Beds or large pots, climbing lines, roof vents, fruit cradles and accessible aisles can be considered together, leaving room for herbs and summer work under glass.
Classic Aluminium GreenhouseDevelop the layout
Review the arrangement and dimensions of the Classic Aluminium Greenhouse when deciding how to provide broad aisles, upright crop areas and trellis locations that remain easy to reach.
Explore additional protected-growing configurations through the Classic Aluminium Greenhouse.
For further planning around long-lasting materials, appearance, placement and airflow, visit Bloomcabin Accessories and use those ideas to shape a bright, airy greenhouse for a future melon crop.
