
Growing Parsley in a Greenhouse
The Green Etching House · Notes on Greenhouse Herbs
Growing Parsley in a Greenhouse
Parsley can be a working crop, not merely a finishing touch. Start it patiently in a bright, cool spot with reliable airflow, and one small greenhouse planting can supply the kitchen repeatedly.
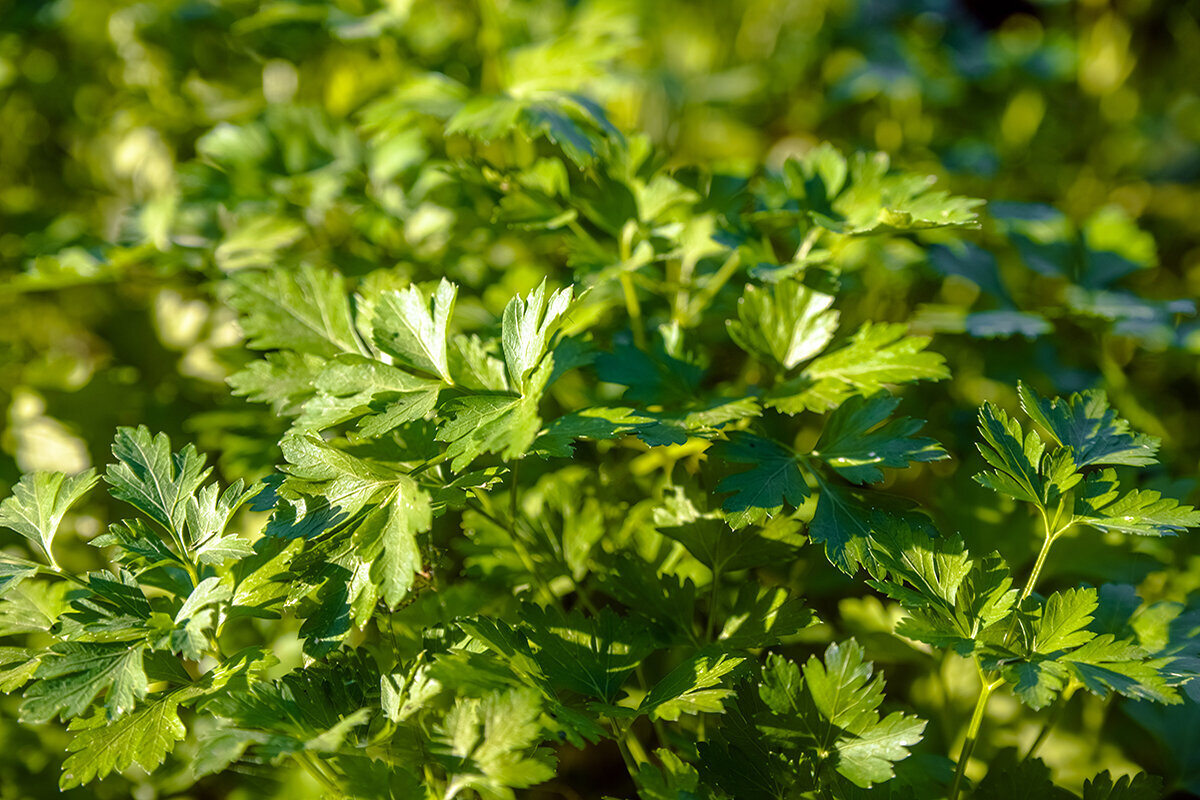
Flat-leaf parsley carries broad, open foliage that rinses easily and delivers a pronounced flavour. It is especially useful in salads, sauces and cooked dishes.
Curly parsley builds a compact mound of finely ruffled leaves. An airy position near the front of a bench shows off its texture and keeps stems accessible for regular picking.
Study 01 · Establishing a useful herb crop
Give parsley a proper place
Established parsley forms a substantial rosette of divided leaves, releases a clear herbal scent and stores enough energy below ground to recover from repeated harvests. Under cover, it works well as a small ongoing leaf crop instead of greenery bought or grown for a single meal.
Growing it this way calls for an unhurried routine. Sow fresh seed into an open-textured medium, maintain even moisture, provide abundant light and vent before warm air becomes still. Once rooted in, each rosette occupies modest bench space yet can provide kitchen stems over many months.
In Canadian gardens, the chief benefit of greenhouse cover is the ability to soften weather extremes rather than maintain constant warmth. A protected bench supports early starts, shields pots from pounding rain and can extend picking in spring and fall. During summer, however, doors and vents must keep the growing space bright and breathable. For one way to organize propagation, herbs and seasonal crops, consider the Classic Aluminium Greenhouse as a durable framework with clearly separated working areas.
Study 02 · Choosing the foliage
Profile A · Open foliage
Profile B · Close-textured foliage
Comparing flat-leaf, curly and root parsley
Base the choice on kitchen use, cleaning and harvest habits rather than the seed-packet photograph alone. Both familiar leaf forms perform under greenhouse cover. A dependable cultivar, recently packed seed and several sowings made at different times will support a more even supply.
Flat-leaf
Broad, exposed leaf surfaces. Simple to rinse and easy to pick one stalk at a time.
- Open, spreading habit
- A practical option for salads and sauces
Curly
Finely ruffled leaves. Ornamental texture, harvested from the mature outside growth.
- Compact, closely packed habit
- A handsome choice for the front of a bench
Flat-leaf parsley is also widely known as Italian parsley. Its open foliage makes soil splash, greenhouse dust and isolated aphids easier to notice and rinse away. During harvest, the distinct stalks can be followed clearly down to the rosette. The flavour works in gremolata, vinaigrettes, soups, salads, herb oils and sauces.
Curly parsley looks denser, with tight frills that give the plant an ornamental quality. Those folds take extra attention at the sink, and wet foliage should be allowed to dry promptly. An open position along the front of a bed or staging keeps the older stalks within reach while protecting the developing centre.
Where root parsley fits: Root parsley, sometimes sold as Hamburg parsley, appears in some seed catalogues. It is raised mainly for its swollen root, so the growing medium must be deep, loose and free of stones. Although worthwhile as a specialty crop, it is less convenient than leaf parsley on a small bench intended for frequent foliage harvests.
Study 03 · Working with slow germination
Set up the sowing and let it take its time
Uneven, delayed emergence is normal for parsley. Seed freshness and the surrounding conditions both influence the pace, so allow 2–5 weeks. Avoid digging into the tray to look for progress. Instead, keep moisture and temperature steady and mark each container with its cultivar and sowing date.
IFresh seed and an airy medium
Recently packed seed in a clean, fine and loose sowing mix.
IISowing depth and surface cover
Place seed about 1 cm below the surface and identify every pot.
IIISteady hydration
Prevent drying without saturating the mix.
IVWarmth before emergence, light afterwards
Maintain 20–25 °C for germination, then provide bright light at once.
Prepare the seed and medium. Choose fresh seed and, if available, a fine peat-free mix intended for propagation. Loosely fill deep modules or small pots and confirm that excess water can escape. Seeds require air as well as water while germinating, which makes a compressed, airless medium unsuitable.
Cover at the correct depth. Distribute the seed sparingly and add roughly 1 cm of mix above it. A gentle press is enough to establish contact. Record the date and cultivar. If a transparent lid is used at first, open it each day and take it off when seedlings appear.
Guard against moisture swings. The mix must remain moist throughout the lengthy wait, but saturation is no better than drought because standing water removes oxygen from the root area. Apply water from below or through a fine spray, judging each tray by how the medium feels rather than following a rigid timetable.
Adjust conditions after sprouting. Germination is favoured at approximately 20–25 °C. At the first sign of seed leaves, shift the seedlings into strong light and cooler air. High temperature with poor light produces weak, elongated stalks. During late winter, place insulation beneath pots resting on cold metal or stone.
An optional preparation is to soak seed in room-temperature water for 12–24 hours before sowing. Soaking may assist initial water absorption, but sound seed and stable care still matter more. Inspect moisture every day. When true leaves develop, increase spacing and provide light with mild air movement.
Study 04 · Root establishment and greenhouse climate
Deep roots below, useful light above and fresh air throughout
Direct sowing in the final bed or container minimizes disturbance to the developing taproot. If plants are started elsewhere, move them while young and after the rootball has become cohesive. Support the entire ball, retain its original planting depth and leave about a hand-width between vigorous rosettes. That spacing makes inspection, picking and air movement easier. Pots also require sufficient depth, drainage openings and a mix that retains its structure.
A long planter can give the bench a calm, orderly appearance, provided it is not packed too tightly. Gaps between crowns speed drying and make it possible to remove full stalks without pressing against neighbouring plants. Put taller crops behind parsley on narrow staging, but do not mistake its preference for cooler conditions for tolerance of poor light.
Assign parsley a well-lit part of the herb area, away from pockets of trapped summer heat. A Classic Aluminium Greenhouse can separate low herbs from taller fruiting plants that create shade or prefer warmer air. Canadian conditions differ widely by region and season, so adjust ventilation, temporary shading and bench position to the weather at the site. Clean glazing helps make the most of weak seasonal light, while shade during fierce summer sun never substitutes for opening the greenhouse early.
Study 05 · Moisture, fertility and sound foliage
Aim for sturdy leaves rather than lush excess
- +Soak the root zone, then reassess. Feel beneath the surface instead of applying a token amount every day. Moisture should be reasonably even through the roots, yet no container should remain in a saucer of water. Irrigate thoroughly after the top layer has begun to dry, and do not let the entire rootball become parched.
- +Use fertilizer with restraint. Mature compost incorporated moderately into a humus-rich bed is often sufficient. Container plants may benefit during active growth from occasional weak organic liquid fertilizer. Fading older leaves can signal declining nutrients, whereas limp yellow foliage in saturated mix more often points to poor aeration.
- +Direct water beside the plant, not into its centre. Apply water low with a narrow-spouted can or a soft stream so most leaves stay dry. Irrigating in the morning allows any splash to evaporate while the greenhouse is being aired.
- +Keep crop areas distinct. Avoid assigning parsley to a crowded, persistently humid corner beside delicate seedlings. Clear access, appropriate gaps and reachable pots prevent difficulties more effectively than a rushed response after pests have spread.
A practical long-term herb area includes staging at an easy harvesting height, protection beneath the containers and water close at hand. The Classic Aluminium Greenhouse can provide that underlying structure, with routes, ventilation and separate crop areas planned before the pots arrive.
Study 06 · A better way to pick parsley
Remove full stalks to keep new foliage coming
Harvesting is straightforward: choose a mature stalk on the outside and sever it low on the plant. Avoid skimming leaf tips from across the top. New growth depends on the undamaged centre, while short, bare remnants from shallow trimming interfere with cleanliness, appearance and future productivity.
- Work from the outer ring. Identify the oldest and most developed stalks around the perimeter.
- Trace each stalk to its origin. With clean, sharp scissors, make a low cut while staying clear of the crown and adjacent new shoots.
- Keep the heart intact. The close, upright leaves in the middle are the material for a later picking.
- Take modest amounts often. Small, regular harvests are preferable to removing nearly all the foliage at once.
Delay washing until close to cooking whenever possible, and dry the leaves thoroughly afterwards. If a larger quantity is needed, pick on a cool morning once surface moisture is gone but before the greenhouse heats up. This is also a convenient time to inspect the undersides of leaves and the centre of each plant.
Study 07 · Parsley as a 2-year crop
Know when the plant moves from leaves to flowers
The foliage-rich first season is normally the useful kitchen stage. A plant that comes through winter may resume growth in year 2, elongate into flower, form seed and finish its biennial cycle. Foliage often becomes firmer and more bitter once flowering starts. This transition is a natural planning point rather than evidence of poor care.
Year 1 · Producing leaves
Build the rosette and pick from it
Moving through winter
Keep it, slow it down or begin again
Year 2 · Producing flowers
Retain one for seed or free the space
Year 1: establish the crop and harvest. Begin a batch in spring, maintain steady care and remove robust outside stalks as they mature. Another sowing in late summer can supply younger plants for fall and the beginning of cool weather. Households that use plenty of parsley will get better results from overlapping batches than from continually exhausting one rosette.
Winter: decide whether to maintain or replace it. A protected, unheated greenhouse may keep parsley green through short days, although growth will be slow. Reduce watering, admit fresh air briefly during dry weather and withhold heavy fertilizer. The herb tolerates light frost, but roots above ground in pots are more exposed. Cover reduces wind and excessive winter moisture without promising a harvest throughout every Canadian winter.
Year 2: collect seed or make room for younger plants. Increasing daylight prompts overwintered parsley to lengthen and form flowering stalks. A healthy plant true to its cultivar may be kept for seed. Where tender cooking leaves are the priority, replace flowering specimens with younger ones. The soundest schedule combines spring and late-summer sowings with a small overwintered group only where conditions allow.
Study 08 · Crop health and greenhouse hygiene
Diagnose the growing environment before intervening
Begin with 4 checks: moisture in the medium, the time leaves remain wet, the distance between rosettes and the presence of pests on tender growth. Remove badly damaged foliage and clean the tools, then correct placement, irrigation and airflow before considering any additional response.
Symptom
What to inspect
Practical next step
Priority
Foliage feels sticky, young leaves curl or clusters of small insects gather under leaves and on stalks.
Examine soft shoots and nearby seedlings for aphids and discarded skins, rather than concentrating only on the worst-looking leaf.
Move the container away from other plants if practical. Wash minor colonies off with a controlled jet, increase circulation and repeat inspections. Do not encourage soft growth with too much nitrogen.
Address without delay
Older foliage turns yellow while the mix stays dense and saturated well after irrigation.
Inspect the outlet holes and saucer, look for compacted mix and compare watering frequency with the amount the plant is actually using.
Stop irrigating until conditions warrant it, clear dead matter and restore drainage. Extra fertilizer is not a remedy because roots deprived of oxygen cannot use added nutrients effectively.
Change the watering practice
Pale or dark spotting develops after the leaves have remained damp for an extended period.
Look over both sides of every leaf. Check for crowded pots, drops from condensation, contaminated tools and recently introduced plants already showing marks.
Cut away marked foliage and place it in household garbage. Irrigate at the surface of the medium early in the day, air the greenhouse promptly, clean the scissors and minimize handling while plants are wet. Drier foliage and wider gaps help slow further movement.
Improve sanitation
Growth is pale, slender and stretched, with unusually soft stalks.
Consider seasonal day length and the useful light reaching the bench. Look for obstruction from tall plants or dirty glazing, and determine whether warm greenhouse air is paired with inadequate brightness.
Provide a brighter position and wider spacing. Wash reachable glazing safely, but do not attempt to solve low light by adding fertilizer. Without supplemental lighting, slow winter development is expected.
Find a better position
Kitchen note
For flavour and quality, keep parsley alive and within reach so it can be picked when meal preparation begins.
Handle picked parsley as a perishable ingredient
Parsley shows its best character soon after cutting. Gather only the required amount, rinse when needed and remove surface water with a spinner or gentle patting. Dry leaves can be held loosely in the refrigerator for a few days. Avoid enclosing damp foliage tightly, since trapped water hastens deterioration.
For a surplus, chop the leaves and freeze manageable portions, including in ice-cube trays with a small amount of water. Stir parsley into hot food near the end of cooking. Drying works, though much of the lively aroma and colour is lost. The tender upper parts of the stalks can also flavour pesto, stock, herb oil and sauces.
When assigning crops through the year, treat the Classic Aluminium Greenhouse as a series of usable seasonal areas. Parsley earns productive space in spring and fall; during peak summer heat, move it to a cooler section apart from the most vigorous fruiting plants.
Common questions
Answers about parsley under cover
Can parsley grow in an unheated greenhouse?+
Yes. It is most productive from spring through fall and may continue during mild parts of winter. Provide sufficient light, restrained moisture and protection against pots freezing solid. Cold temperatures and short days slow development substantially. An unheated structure can lengthen the season, but it does not reproduce heated, artificially lit production.
How long does parsley take to germinate in a greenhouse?+
There is no exact emergence date. Freshness, warmth and moisture all affect the result, with 2–5 weeks serving as a reasonable planning range. Keep the sowing mix moist without saturating it. Wait several weeks before filling only the clearly empty gaps with new seed.
Should parsley grow in a bed or a container?+
Either approach is suitable. A bed buffers changes in moisture and offers an established root area; pots are easier to relocate during heat or pest trouble. Whichever system you choose, provide depth, open-textured medium and working drainage holes. Do not crowd the rosettes or keep them perpetually wet.
Why is my greenhouse parsley flowering?+
The plant is biennial. After overwintering, it normally sends up flowering growth in year 2 as daylight and temperature increase, and strong heat may accelerate the change. Replace flowering plants when tender leaves are wanted. Keep a healthy, true-to-type specimen only when seed production is intentional.
How often can I harvest parsley?+
Begin once the rosette has several mature outside stalks it can afford to lose. Cut a small number low on the plant, preserve the centre and leave ample foliage for recovery. Frequent restrained picking sustains production better than occasional severe cutting or trimming only the leaf ends.
References and additional guidance
Horticultural reading
Continue exploring Bloomcabin: Made-to-measure aluminium greenhouses · Aluminium greenhouse questions and answers · Bloomcabin blog
- Bavarian State Research Centre for Viticulture and Horticulture. Guidance on planted parsley, including cultivation and cultivar information.LWG information sheet on planted parsley
- Bavarian Garden Academy. Home-grown fresh herbs: cultivation, harvesting and kitchen use.LWG information sheet about fresh garden herbs
- Royal Horticultural Society. Advice for raising parsley.RHS parsley cultivation guide
- University of Minnesota Extension. Home-garden parsley: establishment, maintenance, picking and storage.Minnesota Extension guide to home-grown parsley
- University of Illinois Extension. Parsley cultivation, harvesting and uses.Illinois Extension parsley resource
- Iowa State University Extension. Practical germination guidance and temperature information for vegetables and annual plants.Iowa State seed-germination guide
