
Growing Radishes in a Greenhouse
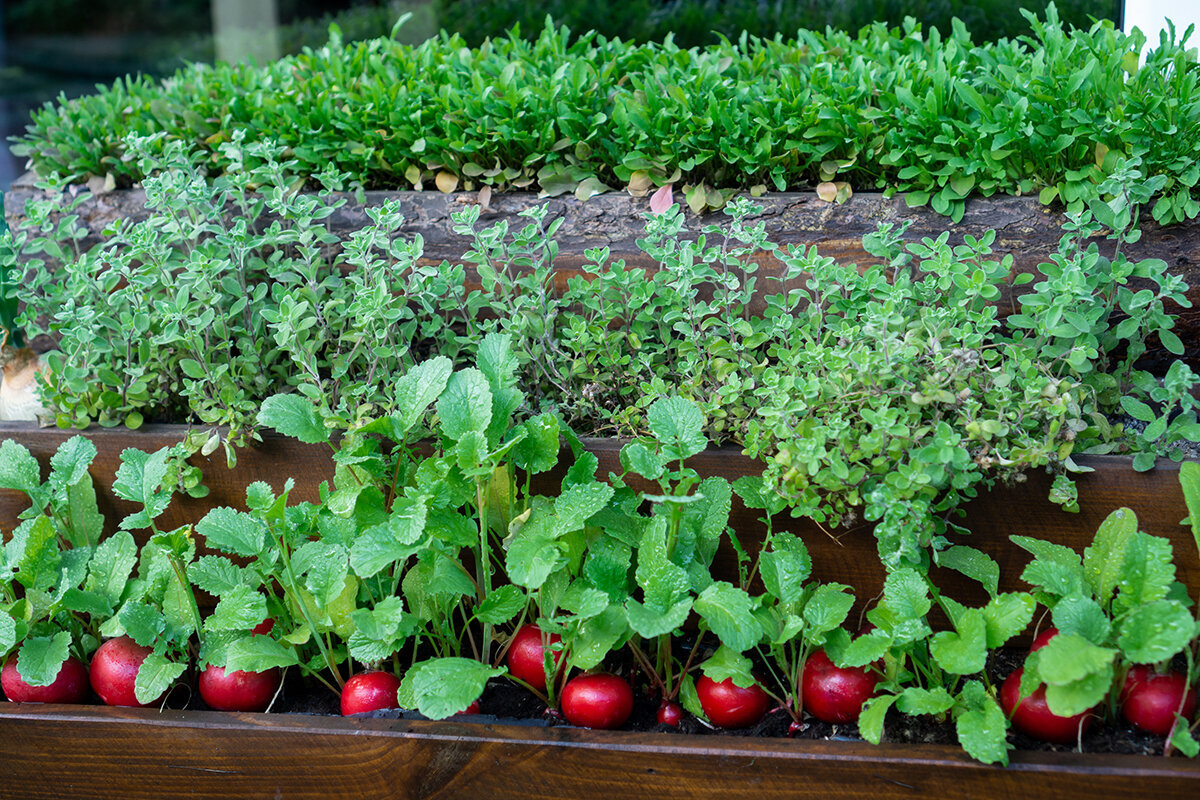
Greenhouse growing note 07 / Canada
Growing Radishes in a Greenhouse
Radishes race from seed to harvest, leaving little room for delay. Prepare loose soil, give each plant room to expand and maintain even moisture. Inspect the first visible shoulders a few days sooner rather than discovering the crop too late.
At soil level — sow / space / inspect / harvest
01 / THE BETWEEN-CROP
Put short gaps in the growing calendar to work.
A radish row can occupy the pause before tomatoes or cucumbers, follow a cleared lettuce bed, or share a cool autumn area with corn salad (mâche). Because the crop matures quickly, prepared beds need not sit unused between larger plantings.
02 / THE TROUBLE LINE
Strong leaves are not proof of a well-formed root.
Healthy-looking foliage may hide a disappointing crop. The roots need uncluttered space, crumbly soil that does not distort them and a dependable water supply. Shelter makes those factors easier to adjust, although accumulated greenhouse heat can bring good eating quality to an abrupt end.
03 / THE DAILY CHECK
Respond to conditions inside the structure, not just packet directions.
Check sun and temperature where the plants actually grow, test the earth before reaching for the watering can and lift one root ahead of the main harvest. When conditions turn warm, moving air and modest shade help more than another dose of fertilizer.
Choosing types by time and root shape
Start with the harvest window, then select a suitable root form.
Small salad radishes fit a rapid greenhouse rotation. Daikon and winter types can also be worthwhile, but their roots demand more depth and space, while their longer development belongs in a separately planned part of the season.
Quick / compactRound salad radishes
Round red, pink, white and multicoloured radishes are reliable candidates for a brief opening under cover. In suitable conditions, many reach useful size within a few weeks. Their relatively shallow roots fit loosened surface beds, wide planters and vacant edges awaiting the next major crop.
Quick / deeperLong radish types
An elongated root brings a distinctive shape to the plate, but it needs a deeper run of stone-free soil than a round type. Rake the seedbed level, loosen it thoroughly and remove old roots or compacted material. Slim shoulders still require proper spacing.
Fine textureSmall speciality varieties
Compact, mild varieties lend themselves to frequent small sowings. Their petite appearance can be appealing at the table, yet it narrows the picking window. Leave them only a few days too long in a warm structure and tender flesh may become pithy and more pungent while the tops still look healthy.
Long seasonDaikon and winter radishes
Reserve these radishes for an intentional autumn or winter planting rather than treating them as temporary fillers. Provide deeply worked earth or a tall planter containing a fine, uniform mix. Their variety-specific development period and wider spacing must be allowed for; they cannot simply replace quick salad types.
A round salad variety makes a revealing first crop. Within a short period, it shows how plant spacing, soil condition, water and temperature interact beneath the surface. The Classic Aluminium Greenhouse offers a bright, accessible setting where several short rows can be fitted carefully around taller plantings.
Sowing station
Mark a well-spaced row now, before swelling roots compete for room.
Sow directly into the final growing position. Radishes emerge rapidly, gain no useful advantage from occupying propagation space and respond poorly to disturbed roots. Prepare a level bed that drains freely while remaining workable. Take out stones, solid clumps, unfinished plant matter and fresh manure before making the drill.
1–1.5 cmdeep2–3 cmsow4–6 cmthin10–15 cmbetween rowsFrom day 20check
A measured sequence for sowing, rows and thinning
Set seeds 1–1.5 cm below the surface, cover them loosely and press just enough to establish contact with moisture. For many small salad types, 2–3 cm is a workable starting interval. After emergence, reduce round varieties promptly to about 4–6 cm apart. Adjust larger cultivars for their mature dimensions and defer to the directions on the specific seed packet.
Thin while spaces are still visible rather than waiting for the tops to knit together. Where pulling might unsettle a neighbouring seedling, snip the unwanted plant close to the surface. What matters is reserving underground expansion room before thickening begins.
Useful bed geometry without excessive feeding
Allowing about 10–15 cm between rows provides working room for thinning, inspections and selective picking without surrendering unnecessary greenhouse space. Arrange broad containers as an open grid instead of a packed ribbon of seedlings. Leaves need airflow, and each root needs a clear path to its characteristic shape.
Modest additions of finished compost can improve both texture and moisture retention. Fresh manure or nitrogen-heavy fertilizer, however, may favour abundant tops over firm roots. Work the upper layer well for small round cultivars; elongated ones call for additional depth and especially careful removal of stones and rough debris.
Good greenhouse organization makes precision worthwhile: bed edges, tools and water stay convenient, and a rapid crop soon reveals whether the arrangement works. When designing the space, consider Bloomcabin aluminium greenhouses as options for establishing accessible paths and durable growing areas. Preserve enough working room to tend each row without rubbing the foliage or compressing the bed.
Building a succession schedule
Divide the sowing so the entire crop does not mature together.
The most practical radish harvest comes in several modest waves. Sow one short row or part of a planter, then add another section seven to fourteen days later. Several small plantings extend what would otherwise be a very brief supply.
This spacing of sowing dates also reduces exposure to one bad spell. An initial batch could encounter unexpected warmth, a missed watering or dim weather, while the following one may receive cool air and steady moisture. It also avoids having every root in a compact greenhouse demand picking and kitchen attention at once.
Day 0Sow a small section.
Record both cultivar and sowing date, since maturity rates differ.
Record both cultivar and sowing date, since maturity rates differ.
Day 7–14Sow the next section.
Look for consistent germination in the earlier row and loosen any crusted surface with care.
Look for consistent germination in the earlier row and loosen any crusted surface with care.
Day 10–14Thin decisively.
Establish the survivors at their permanent interval before they become crowded.
Establish the survivors at their permanent interval before they become crowded.
From day 20Check, then harvest in stages.
Sample individual roots, remove those at eating size and give less developed neighbours only a little longer.
Sample individual roots, remove those at eating size and give less developed neighbours only a little longer.
After clearingPrepare the bed promptly.
Follow with another fast crop that prefers cool conditions, or ready the area for tomatoes, cucumbers and other principal plantings.
Follow with another fast crop that prefers cool conditions, or ready the area for tomatoes, cucumbers and other principal plantings.
Climate control
Let the structure buffer harsh weather without allowing it to accumulate damaging heat.
Cooler conditions favour firm, pleasant roots
Radishes prefer the cooler parts of the growing season. Moderate temperatures keep them moving, while quality generally improves toward the low end of their comfortable range. Canada has no single greenhouse calendar: from late winter into spring, and again as summer heat gives way to autumn, useful sowing opportunities depend on regional light, local weather and the protection available. An unheated structure can reduce exposure to wind, hard rain and cold nights.
10–18 °Cfavourable quality range for many salad radishes
Begin ventilation before the crop shows heat damage.
Sunshine can raise the temperature inside glazing surprisingly fast while the day outside still feels mild. Move air through doors and vents before the soil area becomes hot. In a warm spring spell or during summer, modest shading and a cooler edge position may help. Keep rows away from reflected warmth and pockets of motionless air.
Do not sacrifice useful light: choose a bright area rather than the heavy shade beneath mature tomato foliage. Even so, greenhouse temperature often decides whether radishes remain dense and mild or turn coarse and hot. Along with a head-height thermometer, observe direct sun, soil warmth and air movement at crop level. Controllable ventilation in a Classic Aluminium Greenhouse can be particularly helpful when tending rapid crops that prefer cooler weather.
Water and soil
Aim for uninterrupted, even root expansion.
Because their roots stay near the surface, radishes have little capacity to bridge wet-and-dry swings in that layer. Moisten the whole active root area without leaving it saturated. Planters may warrant a daily look during sunny periods, whereas a cool, well-prepared ground bed can remain moist longer.
Judge watering by continuity rather than a preset schedule. Dryness pauses development and may strengthen pungency; drenching a dry bed can then trigger rapid expansion and cracking. Permanently sodden earth has too little air. Apply water with a fine rose or direct it gently at soil level so the leaves remain drier and the amount stays manageable.
The growing medium should release surplus water but retain enough for steady development. Use mature compost sparingly and avoid fresh manure or strongly nitrogen-rich products, which may encourage foliage, branching or poorly sized roots. When crooked roots have already appeared, restore the structure by removing stones and opening compacted layers instead of adding more fertilizer.
Reading the evidence in the root
When quality slips, identify the pattern before changing the routine.
Radish failures usually leave understandable clues. Shape, texture and taste reflect a compact history of the crop: crowding in the row, accumulated greenhouse warmth, changing water supply and any obstruction that prevented smooth expansion.
Lots of leaves, no root
Crowded plants, excessive heat and nitrogen-heavy soil are frequent explanations. For the following sowing, create space sooner, improve cooling and avoid recently enriched ground. Dry spells may interfere as well. Impressive growth above the soil says little about progress underneath.
Cracked or split root
Fluctuating water supply is the usual trigger. Development pauses in dry earth, then a large drink drives expansion too rapidly for the skin. Maintain stable moisture without keeping the bed saturated, and pick individual roots when ready rather than holding them for their neighbours.
Pithy, spongy or very hot
Excess warmth, dry conditions and delayed picking most often cause these defects. Increase airflow earlier, shift later sowings into a cooler period and test roots before the foliage appears fully mature. A rounded shoulder visible at ground level calls for inspection rather than patience.
Forked or crooked roots
A root may be diverted by stones, compressed soil, coarse material that has not decomposed or inadequate depth. Prepare the next seedbed more completely and choose a finer container medium. Soil structure must be corrected before sowing; extra fertilizer cannot straighten an already malformed crop.
The harvest window
Pick after the root has sized up but before texture declines.
- Week 1 Maintain gentle, consistent moisture along the drill until seedlings emerge uniformly; avoid flooding or sealing the surface.
- Week 2 Set seedlings at the final interval recommended for the cultivar. The purpose is sound root development, not cosmetic tidiness.
- Week 3 Lift the first test plants. When rounded shoulders appear above the soil, check what has developed below.
- Weeks 3–5 Gather mature radishes over several visits. A modest root with firm texture is preferable to an oversized one left beyond peak quality.
A cool morning is a good time to pick. Where the earth is firm, loosen each root rather than pulling sharply. Trim the foliage soon afterward because it continues to draw moisture. Refrigerate the roots with protection against drying, but expect their liveliest crunch close to the day they were lifted.
Clean, tender young leaves can also be eaten—slice them into soup, blend a peppery portion into pesto or add a small amount to salad. Serve the roots with butter and bread, soft cheese, herbs or young greens, or prepare a quick marinade. Compost foliage that is yellow, bitter or badly damaged.
Hygiene for crops grown under cover
Clear problems promptly so the following planting begins cleanly.
Radishes belong to the brassica family and can encounter pests shared by arugula, kohlrabi, pak choi and cabbage. Flea beetles leave many small holes in young foliage, while slugs favour moist, shaded entry points. Repeatedly planting relatives in one confined area can also increase exposure to root maggots and soil-borne trouble.
Make sanitation the first defence. Clear old roots and other residue, keep paths and bed margins orderly, and limit prolonged leaf wetness. Avoid an endless sequence of brassicas in one patch. After several radish plantings, rotate to lettuce, spinach or another family suited to the season. In a compact structure, moving between containers and ground beds can provide that change.
Give new rows frequent brief inspections because a rapid crop offers little recovery time after delayed action. Remove plants that are clearly diseased or badly infested, handle affected material responsibly and tidy the soil surface before reseeding.
Frequently asked questions
Practical answers for greenhouse radish growers.
Is year-round greenhouse radish production realistic in Canada?
Several crops may be possible, but regional conditions make a universal year-round schedule unrealistic. Local daylight, winter soil temperature and the greenhouse’s ability to shed summer heat determine the dependable periods. Hot conditions can promote bolting, harsher flavour and poorly developed roots unless ventilation, shade and moisture are managed closely. At the other extreme, limited winter light and cold, wet soil can slow the crop considerably.
Do greenhouse radishes need full sun?
Provide a bright position, especially during cooler and dimmer periods, but do not equate maximum sun with better roots. If sunshine drives temperatures upward, ventilate in advance and add light shade where necessary. Rows under mature tomatoes may face both reduced light and competition below the soil.
Why are my radishes producing leaves but no roots?
Begin by assessing spacing, warmth, moisture and the physical condition of the soil. Crowding deprives each plant of light and underground room, while heat, drought or nitrogen-heavy fertility can favour foliage. Establish small varieties at about 4–6 cm promptly and inspect one root early rather than trusting an impressive canopy.
What container depth suits radishes?
Small round salad radishes can succeed in a reasonably deep planter when drainage is open and the medium remains loose. Elongated cultivars require substantially more root room, while daikon and winter radishes belong in a tall vessel or deeply worked bed. Base the final choice on the mature dimensions of the cultivar.
Should radishes be started in seed trays?
Generally, no. Sowing where the plants will finish protects delicate roots, and this crop develops too quickly to gain much from trays. Save propagation benches for plants that benefit from transplanting and place radish seed directly in its prepared bed or planter.
References and additional guidance
Background material for planning the crop.
More from Bloomcabin: “Setting up a greenhouse: layout, plants and care” · Long-term greenhouse planning · Bloomcabin blog
- Germany’s Federal Plant Variety Office — Vegetable variety trial guideline German guidance covering trial characteristics, quality assessment and cultivar-specific evaluation of radishes.
- Humboldt University of Berlin — Winter vegetable planting plan A German seasonal reference that places radishes within autumn and winter sowing schedules.
- Royal Horticultural Society — How to grow radishes Advice on seed placement, plant intervals, watering, picking and frequently encountered crop issues.
- University of Minnesota Extension — Growing Radishes Extension information about soil preparation, irrigation, harvest decisions, pests and radish disorders.
- Oregon State University Extension — Radishes Extension recommendations for repeated sowings, crop management, picking and refrigerated storage.
- Penn State Extension — Managing flea beetles Information on monitoring, sanitation, rotation and protective approaches for flea beetles affecting brassicas.
Turn a brief opening into a useful harvest
Let the quieter interval between major crops produce something fresh and crunchy.
A vacant strip of bed, an appropriately sized planter or the cooler margin of a growing area can supply repeated radish harvests. Their rapid development makes careful greenhouse work especially visible and rewarding when light and airflow are well managed.
A greenhouse option from Bloomcabin
Create a bright, readily ventilated garden room for early seedings, summer crops and the useful intervals around them. One possible starting point is the Classic Aluminium Greenhouse.
