
Propagating Greenhouse Cuttings: From Shoot to Root
Bloomcabin Greenhouse Journal · The Propagation Bench
Propagating Greenhouse Cuttings: From Shoot to Root
A newly severed shoot is vulnerable living tissue. Before it can function as a separate plant, it must limit moisture loss, initiate roots and adjust to independent growth.
A greenhouse makes those early stages easier to observe and repeat than a chance position on a windowsill. Success comes from adapting the cutting method, preparation, porous medium, subdued light and moisture level to the species rather than imposing one formula on every plant.
A dedicated bench inside the Classic Aluminium Greenhouse creates a sheltered, organized work area where roof ventilation can support day-to-day propagation care.
Stock plantStart with a healthy, correctly identified plant. Reject shoots showing stress, disease or pest activity.
Bench environmentProvide softened brightness, suitable warmth around the medium, consistent moisture and regular fresh air—not a sealed enclosure that stays wet.
Next stepWait until a branching root system can maintain the cutting outside its protected conditions before moving it to a larger pot.
Warmth is only one reason to use a greenhouse. The greater advantage is sheltering the delicate rooting period from abrupt weather while controlling illumination, moisture, airflow and temperature as separate factors.
Leaves continue to transpire immediately after a cutting is taken, yet new roots are not available to replace the lost water. The base still needs oxygen, the medium must remain damp without becoming airless, and the foliage needs mild light without excessive heat. Outdoor wind, heavy rain, a hot afternoon or a cold night can disturb that balance quickly. Glazing and vents make shade, irrigation and airflow easier to manage with care.
Continuous heat and saturated air are not the goal. High temperatures speed moisture loss, while wet surfaces and persistent condensation favour decay and disease. Treat the bench as a moderated zone inside the greenhouse: tidy, sheltered, lightly shaded and opened for air when required.
Stage 01 · Inspect the source plant
Good propagation begins before the blade comes out
Whatever condition exists in the stock plant can follow the cutting. Select vigorous, true-to-type growth from a plant that is hydrated but has not become weak and soft after recent overfeeding. Reject material with leaf spots, distorted shoots, webs, aphids, spider mites, feeding marks or blackened, soft stem tissue. Forming roots does not cure a systemic infestation, infection or other problem already present.
A cool morning often provides well-hydrated material for herbaceous and semi-ripe cuttings. Shade the harvested shoots immediately, prepare manageable batches and place them in the medium promptly. Flowers, buds, fruit and seed heads draw on reserves needed for root formation, so they are usually removed.
Look for vigorous shoots with normal colour, characteristic growth and no visible pests.
Use only clearly labelled material that you are entitled to multiply.
Choose non-flowering growth at the correct maturity rather than a showy but depleted tip.
If the stock plant is dry, water it the previous day instead of harvesting drought-stressed shoots.
Stage 02 · Match plant and method
Choose by biology, not by a single recipe
Growth form and tissue maturity govern the choice. A node is important for many stem cuttings because leaf attachments and tissue capable of rooting are concentrated there. Leaf, stem, cane and root techniques succeed only in species able to regenerate both the necessary roots and shoots from the selected part.
Softwood cuttings
Tender, flexible shoots
Fuchsia, pelargonium, coleus and basil are among the plants commonly propagated from young shoots between late spring and summer. This material may establish rapidly, but it can also lose moisture very quickly.
Semi-ripe cuttings
Shoots that have begun to mature
Rosemary, lavender, sage, numerous evergreens and ornamental shrubs may suit this method as their summer growth begins to firm. Reducing leaf area and moderating humidity can be useful.
Hardwood cuttings
Leafless sections of mature dormant wood
Currants, willows and certain other woody plants can be treated this way. Dormant leafless pieces transpire less, but they must be collected at the appropriate resting stage and inserted with the basal and upper ends correctly oriented.
Leaf or cane cuttings
Methods limited to responsive species
African violets and many begonias can generate plantlets from leaf tissue. Sections of cane may work for dieffenbachia or dracaena. Root formation by a leaf does not guarantee that it can also produce a complete shoot.
Root cuttings
Regeneration from below-ground tissue
Only selected perennials, including phlox and oriental poppy, can send up new shoots from pieces of root. This is its own propagation technique and cannot be substituted for a stem-cutting method.
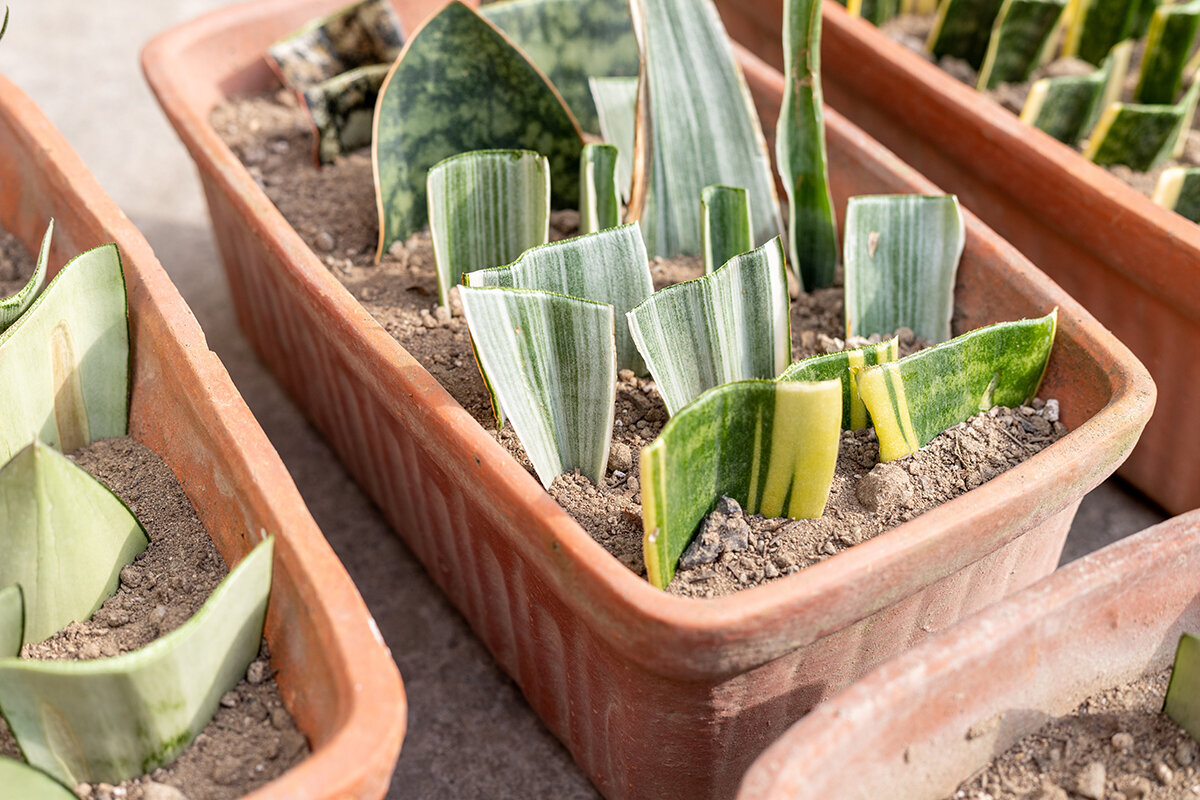
Special case: succulents
Allow for species-specific wound care
Some succulents should develop a dry surface over the cut before being placed in medium. Humid enclosure can worsen rot in susceptible plants, so use reputable instructions for the particular species.
Stage 03 · Make and prepare the cut
Work accurately while the tissue is fresh
Select a sharp knife or pair of scissors suited to the shoot; a crushed stem is not equivalent to a cleanly severed one. Wash the work surface and containers first, then disinfect the tool between stock plants or batches, particularly when handling valuable collections or plants intended for sharing. Use a pencil or dibber to open a hole in the damp medium before insertion. This protects tender basal tissue and prevents any applied rooting product from being wiped away.
01
Clean start
Use washed trays, clean labels and tools, fresh medium and clean hands. Dirty pots and soil from the garden should stay away from the propagation area.
02
Collect the material
For an ordinary tip or stem cutting, choose either a sound growing point or a vigorous section of stem. The plant species determines length and node count; there is no dependable universal measurement.
03
Reduce transpiration
Strip off lower leaves that would be buried, as well as flowers and fruit. Where very large leaves create spacing or moisture-loss problems, cut them cleanly in half rather than removing all working foliage.
04
Confirm which end is down
Cane and stem pieces must retain their natural orientation. Contrasting upper and basal cuts can help identify the ends of hardwood material, although the correct treatment still depends on the species.
05
Set and identify
Position the required node in the medium, press gently around it and add water with restraint. Immediately record the species, cultivar, date and method, plus the source plant or batch code where relevant.
Basal cut · lower node · remaining foliage · surface of medium
Reading a cutting
Use the diagram as a starting point, then follow the species
The familiar leafy stem piece is a useful model, but it cannot describe every plant. Consult reliable species guidance before scoring woody stems, covering nodes, trimming foliage or using a rooting product.
- Basal end: place this end in evenly moistened medium after making a clean, uncrushed cut.
- Lower node: for many conventional shoot cuttings, this sits below the surface while the retained foliage remains clear of it.
- Remaining leaf area: keeps the tissue active, although an excessive area accelerates moisture loss.
- Growing tip or upper bud: keep it clear of the medium so it can become the next visible shoot.
- Planting depth: provide enough contact to hold the piece upright without burying leaves or soft tissue that could decay.
Stage 04 · Moderate the bench climate
Protect the cutting without enclosing it in wet air
Extra humidity can temporarily slow water loss from fresh leafy cuttings. It should not create stale air, dripping foliage or a soaked root zone. Healthy conditions leave the leaves firm, the air clean-smelling and the medium evenly damp while retaining oxygen.
Softened lightChoose strong but indirect brightness or add light shade. Summer sunlight passing through glazing and a clear cover can raise leaf temperature too far.
Clear coverA dome or supported plastic cover slows evaporation. Open or vent it if droplets remain for long periods.
Warm root zoneGentle heat beneath the medium may help species that prefer warmth or root slowly. Measure the medium directly with a thermometer rather than heating the entire greenhouse continuously.
Fresh-air movementCoordinate roof vents, doors and any air circulation. The foliage needs renewed air without exposure to a forceful, drying current.
Free drainageKeep trays above standing water, select pots with open drainage holes and do not allow prolonged saturation.
Canadian greenhouse weather varies widely by region and can also change during a single day. Inspect the bench when solar gain is strongest rather than relying only on a morning check. Summer covers may require both shade and venting. During cold spells, glazing reduces exposure but does not by itself provide adequate frost protection for tender material.
Stage 05 · Prepare the rooting medium
Maintain moisture without displacing oxygen
Choose a clean medium that keeps its structure, drains readily, matches the size of the cutting and supports it upright. Garden soil usually performs poorly in small cells because it compacts, wets unevenly and may introduce insects, weed seeds or pathogens. Moisten the mix throughout before use, then let all surplus water escape.
| Rooting material | Air space | Water-holding capacity | Practical considerations |
|---|---|---|---|
| Mix rich in perlite | High | Moderate | A lightweight option for numerous houseplants and tender shoot cuttings. Because water moves through it readily, small propagation cells should be inspected before they become fully dry. |
| Coir-perlite blend | Moderate to high | Moderate to high | This combination can distribute moisture more evenly while preserving useful pores. Begin with clean ingredients and avoid packing them tightly into the container. |
| Coarse sand blended with peat or coir | Moderate | Moderate | A conventional option when clean components of the proper grade are available. It supports inserted material securely, though it may feel heavier and more compact during later repotting. |
| Rooting in water | Low near the stem base | Very high | Useful for a limited range of readily rooted indoor plants. Roots produced under water may need a careful transition to potting mix, and the water requires regular renewal and inspection. |
Stage 06 · Evaluate root formation
New foliage or callus is not proof of an established root system
Callus may precede roots in some species, while others initiate roots directly from nodes or other responsive tissue. Stored reserves can even power a new leaf while the root system remains inadequate. Avoid repeatedly pulling the cutting from its medium. Instead, watch for sustained new growth, gentle anchorage, pale roots visible at drainage holes or through a clear container, and a cohesive root ball that has not become tightly congested.
Move the plant only after several roots have branched enough to supply it when the humidity cover is absent. Select a pot that is only moderately larger and fill it with a somewhat richer mix suited to the species. Water evenly, then return the plant to a bright position away from direct midday sun. Extend the time without its cover gradually over several days. Rooted tissue can still fail if it has not adjusted to drier air and greater transpiration.
Stage 1Newly inserted: the tissue contains water, but newly formed functional roots are still absent.
Stage 2Initiation: callus or the first roots become visible, so both surrounding humidity and medium moisture still need careful checks.
Stage 3Root branching: the developing structure can support careful repotting and a gradual move to less-protected conditions.
Stage 07 · Diagnose setbacks
Treat the cause suggested by the symptom
Remove cuttings with obvious rot or extensive mould before the problem reaches neighbouring plants. Examine other losses without changing everything at once: one symptom may have several explanations. Adjust only 1 or 2 conditions initially and note how the batch responds.
Symptom A
Wilting in wet medium
Water may be leaving the foliage faster than the cutting can absorb it, or the basal tissue may already be impaired. Possible factors include heat, direct sunlight, excessive foliage, incorrect planting depth and early decay.
Response: Reduce light intensity, examine the base for decay, raise humidity briefly and confirm that the medium is damp without being saturated.
Symptom B
A darkened, soft base
Excess irrigation, blocked drainage, contaminated supplies or persistent droplets under an unopened cover commonly precede rot. A rooting product cannot restore oxygen to a saturated medium.
Response: Discard affected pieces, wash the equipment and containers, replace the medium with a fresh porous mix and reintroduce controlled ventilation.
Symptom C
Faded patches or dry foliage
Glazing combined with a transparent cover can intensify solar heating. The leaves need light, but they can become too warm before functioning roots are able to replenish water.
Response: Relocate the tray to a bright spot beyond direct midday rays, add temporary shade and inspect it during the warmer part of the afternoon.
Symptom D
Algae, mould or stalled growth
Development may slow because surfaces stay wet, the mix is old, illumination is inadequate, temperatures are unsuitable or the source tissue was taken at the wrong maturity. Slow progress can also be normal for the species.
Response: Increase spacing, improve cleanliness, clear away dead foliage and verify temperature. Then compare the season and technique with a trustworthy reference for that plant.
Stage 08 · Keep batch notes
Turn each attempt into useful evidence
A written record makes propagation easier to repeat. Keep a small notebook or weather-resistant labels beside the bench. Local conditions are more informative than a generic national calendar: coastal humidity, dry interior air, intense summer sun and long cold periods can create very different greenhouse routines across Canada. Even separate shelves within one structure may behave differently.
Note losses with the same care as successful plants. The useful outcome is not a flawless rate; it is learning which stock plants, stages of maturity, media, bench positions and seasonal windows produce resilient young plants in your setting.
Example of a bench note
BatchH-26 · semi-ripe rosemary · 8 cuttings
Plant materialPest-free lateral shoots without flowers, collected during the morning
Rooting mixEvenly damp coir and perlite in a clean propagation tray
Bench settingStrong filtered brightness, a vented cover and a moderately warm surface outside direct sun
Recorded progressDay 8: no wilting; Day 18: firmly anchored; Day 25: branching roots
Adjustment for the next batchPrepare fewer cuttings of more consistent size and trim the foliage slightly further.
Common bench questions
FAQ
Treat these replies as general orientation. Valuable, woody, protected or reluctant species also require reputable plant-specific instructions.
Is a rooting product necessary for every cutting?
No. Coleus, pelargoniums, pothos and many other readily rooted herbaceous or indoor plants often establish without one. If a more difficult species may benefit, search Health Canada's current product and label databases before selecting a product, then follow its directions and use it sparingly. Place a small amount of powder or gel in a separate clean container and discard the remainder rather than returning it to the package.
Does a humidity cover need to stay shut throughout the day?
No. It can slow the drying of leafy material, but it needs daily observation and ventilation. Increase the opening period if foliage remains covered in droplets, the medium is saturated or fungal growth becomes visible, then reassess irrigation, light and airflow. Succulents and other rot-sensitive plants may require little enclosure or none.
Should cuttings be inserted directly into greenhouse beds?
Fresh porous mix in clean pots, cells or shallow trays is generally easier to control. Bed soil and ordinary garden earth may compact, carry unwanted organisms and develop uneven wet and dry areas. Separate containers also simplify identification, isolation, inspection and movement of each batch.
When will greenhouse cuttings be ready?
There is no single timetable. Species, method, season, stock-plant health and conditions around the tray all affect progress. Tender shoots may establish relatively soon, whereas woody material can require considerably more time. Use several branched, functional roots as the signal instead of a calendar deadline.
What should be included in a useful propagation station?
Begin with a level surface that is easy to wash, unobstructed drainage, adjustable shade, a way to monitor temperature, effective ventilation and enough separation between batches. The Classic Aluminium Greenhouse provides a durable and accessible setting that can be arranged differently as the seasons change. Its Classic Aluminium Greenhouse format also supports a clearly divided work zone with roof ventilation that can be adjusted as conditions change.
References and next steps
Useful sources for responsible propagation
Continue with Bloomcabin: Made-to-measure aluminium greenhouse · Classic aluminium greenhouse · Aluminium greenhouse with accessible roof ventilation
- Canadian Food Inspection Agency – Plant breeders’ rights and variety information
- Department of Justice Canada – Plant Breeders’ Rights Act
- Health Canada – Pest-control product and label databases
- University of Illinois Extension – Houseplant propagation overview
- University of Illinois Extension – Leaf, cane, root and stem cutting methods
- Royal Horticultural Society – Plant propagation techniques
