
Replacing Windows in Winter: What to Consider
A Practical Winter Window Plan
Winter does not, by itself, rule out replacing a window. What matters is whether each opening can move from the old unit to the new one in a controlled sequence. Removal should wait until the replacement is on hand, the reveal is ready and the crew can shelter the wall junction from the weather. Winter conditions differ widely across Canada, so the actual site and forecast are more useful than a nationwide temperature shortcut. Homeowners can limit exposure by confirming measurements, handing, access, perimeter details and room use ahead of time. A staged appointment may be practical when a leaking window needs prompt attention or the project is already divided into phases. This guide covers winter scheduling, product decisions and site preparation so each part of the home can be closed again promptly.

01 / Verify the survey
Plan the sequence before watching the thermometer
Temporary exposure is the main concern. A disciplined crew dismantles the existing frame, checks and prepares the reveal, positions and secures the replacement, then finishes the specified perimeter work. Opening several rooms simultaneously creates avoidable cooling and leaves the building less protected. It is usually easier to finish one room or one section of the elevation before starting another. That sequence also leaves time to deal with concealed masonry damage without exposing additional openings. When the date is booked, establish the work order and identify who can approve a change if the site differs from the measurements or survey notes.
Weather changes how the crew handles materials, access and temporary shelter. Driving precipitation, ice underfoot or forceful wind may prevent the opening and perimeter from being handled safely and kept dry. Product data for the chosen tapes, foams, sealants and coatings—not a generic temperature limit—determines whether those materials can be applied. Have the contractor assess the proposed assembly against the conditions on site. The postponement plan should identify who monitors the forecast, when the decision will be communicated and where the products will remain safely stored. A workable second date is better than forcing the original booking.
Match the unit to both the wall and daily routine
Settle the specification before fixing the winter date. In addition to frame width and height, verify the clear opening, reveal depth, sill interface and preferred operation. A visually suitable design may still fail in daily use if the sash meets a radiator, furniture or an obstacle outdoors. Where straightforward operation is the priority, an inward-opening window with a single sash can be a practical arrangement. Its title tells you how it opens, but not every component or installation detail. Confirm the available sizes, glazing, hardware and perimeter requirements for the specific opening.
Survey every opening separately when replacing a full set. Windows that appear identical may have different reveals because of earlier renovations or the junction between an original house and an addition. Build a schedule showing the room, elevation, rough opening, handing, sill height, interior sill and nearby items such as shutter boxes, radiators or services. Use it to compare quotations and supplied components. Decide on handles, ventilation, privacy and cleaning access before production. A late change to sash operation can alter both the work sequence and wall detailing. For windows and doors, Bloomcabin states a delivery period of 4 to 6 weeks, subject to the confirmed order.
02 / Set the installation details
Read the opening before dismantling it
Conditions beside the frame often determine whether the changeover stays on schedule. Loose finishes, soft substrate, old sealant, uneven surfaces or moisture staining may remain hidden until dismantling begins. Take wide and close photographs from indoors and outdoors, then flag unusual areas during the survey. The contractor can allow for repairs, surface preparation or extra time where visible evidence warrants it. This advance record is especially valuable in cold weather, when an unforeseen delay beside an exposed opening is disruptive. Assign responsibility for examining the substrate, repairing small breakouts and deciding when a discovery requires work to stop.
Treat the perimeter gap as a designed wall junction rather than spare space around the frame. The interior side, centre of the joint and weather-facing side must work with the particular wall and exposure. Ask the contractor to explain the proposed layers and materials for this building instead of specifying one universal detail. Include the sill, outer reveal and existing shading in that discussion. The plan should explain temporary shelter during the changeover and when exterior finishing will occur. Moisture concerns, building-envelope questions or a wider renovation should be reviewed by a professional with the appropriate expertise. Winter simply makes clear coordination more important.
Ready each room and contain the chill
Good access saves more time than improvised protection on installation morning. Remove curtains, plants, furniture and fragile belongings from the work zone. Clear a continuous path from the entry and arrange floor protection with the crew. Keep radiators accessible and free of stored items. Closing doors to unaffected rooms can contain dust and drafts without obstructing the workers’ route. While a window is out, make other arrangements for pets, children and anyone who is particularly sensitive to cold. Confirm which spaces may be aired and which should stay closed during the work.
Prioritize rooms according to household needs rather than exterior appearance alone. A bedroom or office may be left vacant for several hours, whereas work in a kitchen or bathroom often requires tighter coordination. Existing doors can isolate occupied areas when only part of the window set is changing, but supplies must never obstruct vents or escape routes. A large, frequently used opening such as Patio Life lift-and-slide doors needs generous staging space for delivery, unpacking and controlled handling. Establish the route into the house, the place for packaging and the condition of outdoor walking surfaces in winter. A configuration name does not tell the crew the product’s weight, measurements or site requirements; confirm those details for the actual order.
03 / Build a workable day-of plan
Sort out exterior access and temporary protection
Start the site check at the property entrance. Review parking, the carrying route and the ground immediately below each opening. Snow, ice, leaves, bicycles and outdoor furniture can turn a clear summer path into a winter obstacle. If the contractor requests power, lighting or tool-staging space, make sure these can be provided safely. Ask early how upper-storey openings will be reached. The contractor, not the homeowner, should select the ladder, scaffold or other access method. Coordinate cladding, render and sill alterations with the window work so the exposed interfaces are not left as an afterthought.
Contingency supplies should be ready without encouraging work in unsafe conditions. Ask whether temporary boards, covers or tarps will be available for the brief period between dismantling and closure, and identify who authorizes their use. Give the crew any necessary building-management or access contacts before arrival. In a multi-unit property, elevator bookings, courtyard access and quiet-hour rules may affect the programme more than the temperature. A pre-order visit can reveal these constraints. Put the daily unit count, sequence, surface protection, disposal arrangements and decision contacts into the written plan.
Select operation for ordinary life, not one season
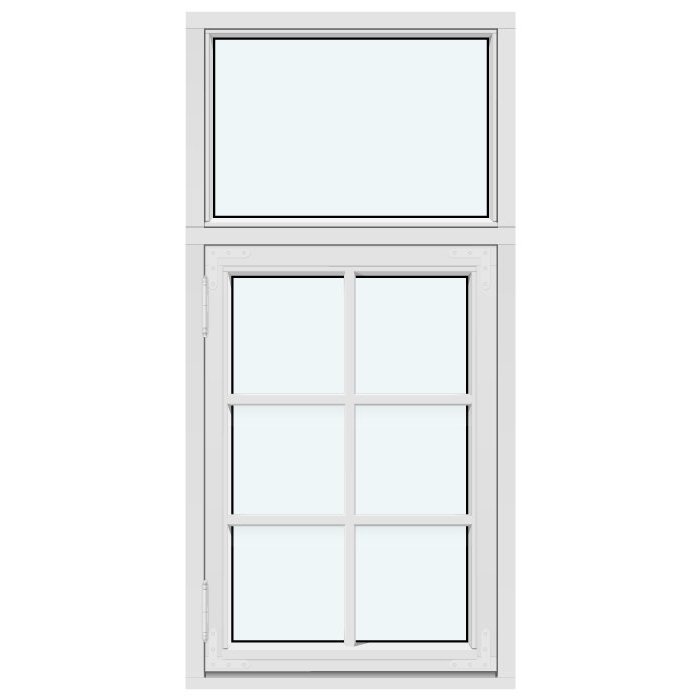
A replacement project lets you improve an awkward operating arrangement. For every room, consider frequency of use, handle reach and the person expected to operate the sash. Outward movement requires unobstructed exterior space, where a railing, planting or accumulated snow may interfere. Inward movement uses floor or counter clearance indoors. Above a work surface or where the interior is tight, a top-hung window that opens outward is one option to compare. Use a simple plan showing the sash arc, handle and normal furniture instead of judging from the exterior elevation alone.
Include cleaning and upkeep in the choice. Determine what glass and frame areas are accessible indoors, whether the handle remains usable and whether the sash has enough clearance through its full movement. Matching divisions across neighbouring windows may produce a balanced elevation, but each operating section still has to function comfortably. Reversing the handing or direction can also affect sills, reveals and shading. Resolve these points during final measurement. There is no inherently superior winter opening style; the selected unit must work through every season and fit the wall detail planned for that address.
04 / Finalize the order and site
Balance ventilation, glass area and daylight
An opening does not always need an operable sash. Where another part of the room provides the required ventilation, stationary glazing may prioritize the view and natural light. Fixed windows belong in the comparison with operable designs. Suitability depends on the room’s ventilation plan, cleaning access, location and purpose. A stationary pane removes the need to adjust a sash on site, which may shorten one installation task, but it is not automatically preferable. Identify the spaces where occupants need direct, routine ventilation before deciding how many operable units to order and where they should go.
Bars alter both the character and visual proportions of a window. Decorative bars and true glass-dividing bars are different constructions, so the quotation and drawing should use the intended term. If the goal is a broad, quiet glass area, specify no bars; if divisions are wanted, verify their width, placement and symmetry on the drawing. One stationary glazed section beside an operable section can organize a wide opening while preserving ventilation. Review the arrangement from inside and from the street, then approve a final elevation for every affected opening, particularly where dimensions or sash layouts are not identical.
Resolve unusual shapes and character details before production
Circular, sloped and segmented openings require a more detailed survey than standard rectangles. Measuring visible glass or tracing the old frame is not enough; a professional should capture the true geometry of the opening. For a fixed circular window the survey must show how the curve meets the wall, inner reveal and outer finish. Scaled photographs are useful supporting records, not a substitute for measured drawings. Ask how plaster, cladding and existing ornament will meet the new frame. Do not leave these decisions for a rushed winter installation day. Where the work remains uncertain, finish the investigation and detailing before choosing the appointment.
A façade with historic character also demands close attention to proportions and visible detailing. An outward-opening Kombi casement in a heritage style names a style and operating arrangement; it does not prove suitability for every existing building. Compare the sash pattern, bars, proportions and opening direction with neighbouring units and the original elevation. Before ordering, find out whether the address or scope calls for municipal permission, heritage review or condominium approval. Publication of Canada’s National Model Codes does not make one code applicable everywhere; the National Research Council directs users to provincial or territorial officials to identify the codes and regulations in force locally. Confirm the project with the municipality and appropriately qualified professionals rather than assuming either permission or prohibition. Early review reduces the risk of changes after delivery.
05 / Inspect and record the finished work
Give roof windows and doors their own plans
A roof opening combines interior finishes, roofing and direct weather exposure, which makes it a distinct winter work area. With a roof window with a pivoting sash, review roof access, protection below, integration with the roof plane and possible disturbance to interior linings as well as the unit size. Dust and finish repairs may still occur when the new window has dimensions similar to the old one. Move or cover furniture and flooring beneath the opening carefully. The crew should select suitable conditions and decide whether coordinating roof and vertical-window work on the same day is sensible.
Do not add exterior or patio doors casually to a window appointment. These larger openings may serve as main household routes and therefore need a separate circulation plan. An inward-opening patio door with a single panel provides a different arrangement from an outward-opening version, and its interior arc deserves the same scrutiny as the patio outside. Review the threshold, drainage, adjoining floor and everyday traffic with the contractor. Keep another entrance available while the work area is open. The plan should also state how the property will be made secure overnight if an unforeseen delay prevents completion.
Plan the walkthrough, records and follow-up
Set aside time to inspect the completed work with the installer. Move each operable sash through its full cycle, test the handles and look closely at the visible perimeter on both sides. Ask which adjustments are complete and what finishing must wait for curing, sill work or render repairs. Photograph every room and the transitions into existing finishes. Add any visible concern to the handover report or a dated deficiency list. If winter weather delays an exterior task, record the outstanding scope, temporary protection, responsible party and expected follow-up.
Store the order confirmation, invoices, care guidance, product literature and handover record together. Bloomcabin’s commercial warranty for its windows and doors runs for 5 years; consult the conditions issued with the order and retain the documents they require. After the products have been used for a while, recheck their operation and the visible joints, especially if household use or indoor conditions have changed. Report a concern to the agreed contact instead of altering hardware or perimeter work yourself. Organized records make later questions easier to trace without suggesting that a problem is expected.
Questions homeowners often ask
When should weather trigger a postponement?
The contractor must assess the specified materials, access and real-time site conditions together. Heavy rain, ice or strong wind may make safe work or reliable shelter impossible. Before installation day, establish when the decision will be communicated, what temporary measures are available and which alternate date can be used.
How long is each room exposed?
There is no reliable universal duration. Opening size, reveal condition, access, quantity and perimeter work all affect the schedule. Ask the contractor for an estimate based on the proposed sequence. Completing one room before beginning another and clearing the route in advance helps minimize drafts in occupied areas.
Should the heating be turned off?
Ask the crew what is appropriate for the affected space and heating system. Radiators, controls and pipes must stay accessible while being protected from impact and debris. Avoid a whole-home adjustment based on a general rule. Keep belongings away from the active opening and from any equipment the crew needs to reach safely.
Is a one-window winter project practical?
A single leaking unit may be scheduled on its own. It still needs an accurate survey and perimeter design that works with the wall, reveal and nearby windows. If a broader renovation is likely later, coordinate the appearance, measurements and technical interfaces now so the first replacement does not conflict with the future plan.
Which details belong in the written order?
Create an opening-by-opening record of measurements, handing, divisions, interior and exterior appearance, supplied components, perimeter work, sequence and responsibilities. Include access, furniture protection, disposal and the postponement procedure. Bloomcabin lists 4 to 6 weeks for confirmed window and door orders; timing remains subject to order confirmation.
From plan to appointment
A successful winter replacement depends more on readiness than on the date. Confirm the unit, measured opening and work order before production, then prepare the rooms, access routes and wall junctions. Agree on acceptable conditions, temporary shelter and the postponement process with the contractor. Treat doors, roof windows and unusual shapes as separate site tasks, and record the final walkthrough. With responsibilities and contingencies settled in advance, work during colder months can proceed as an organized opening-by-opening project.
