
Window Replacement Details: Reveals, Sills and Finishing Trim
Planning the Complete Window Opening
A window replacement involves more than the frame itself. Once the old unit comes out, the real reveal width, condition of the wall junction, position of the interior sill and route for shedding water away from the exterior wall become clear. Ordering only by window size leaves decisions about plaster, trim and sills for installation day. Instead, survey the opening as a whole: window, wall construction, interior finish, exterior junction, shading and the look you want should be considered together. This matters especially where a new frame has a different width or depth from the old one. This guide helps you separate visible finishing choices from technical junctions, clarify responsibilities in advance and prepare useful information for a quotation and order.
Buying checklist 1
Treat replacement as a wall-junction project
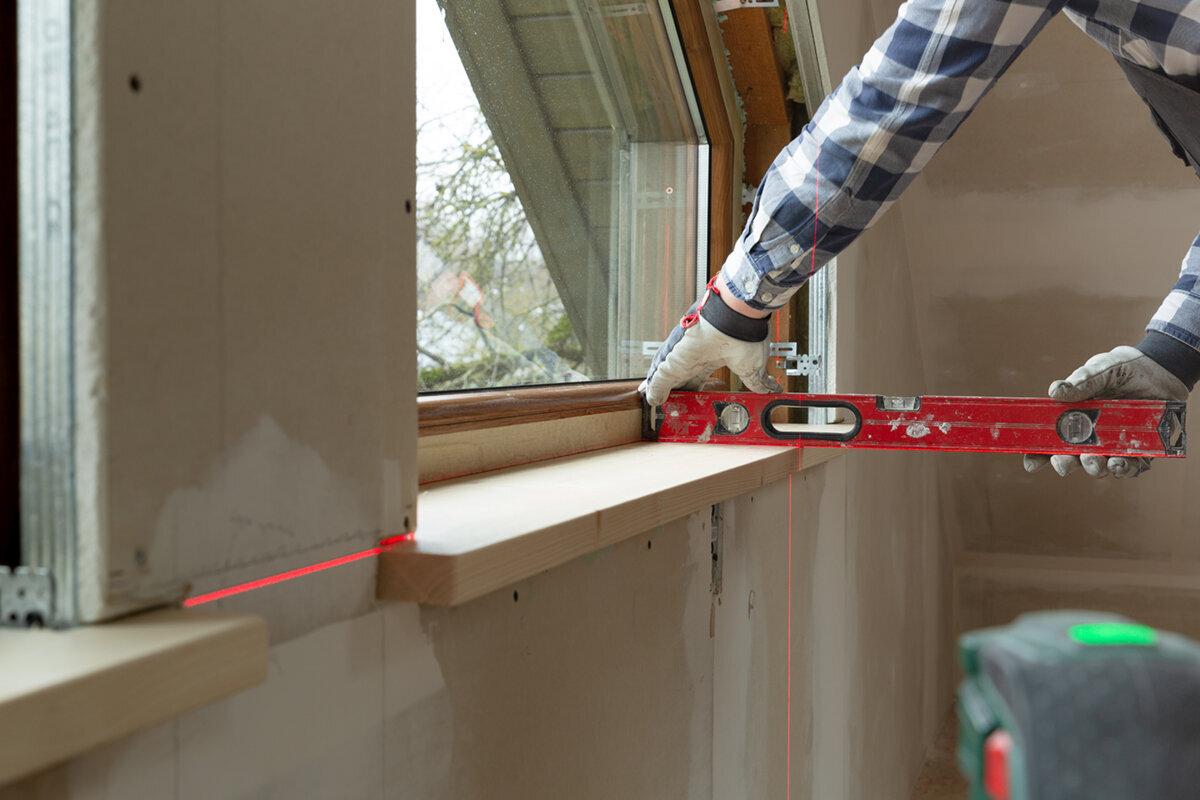
A new window is smaller than the rough opening and needs a planned connection to the surrounding wall on every side. The reveal is the side and head surface of the opening, inside or outside; it is not the same as the frame. Removing the old unit can expose loose plaster edges, aged sealants, wallpaper edges or hidden irregularities. Even a window with the same face dimensions can show more or less reveal because its frame is a different width. A site measure should therefore cover more than the clear width and height. Take photographs of every opening, measure at several points, note depths from both sides, and record radiators, shutter boxes, tile, and existing sills. That turns a product selection into a wall-junction project that can be coordinated.
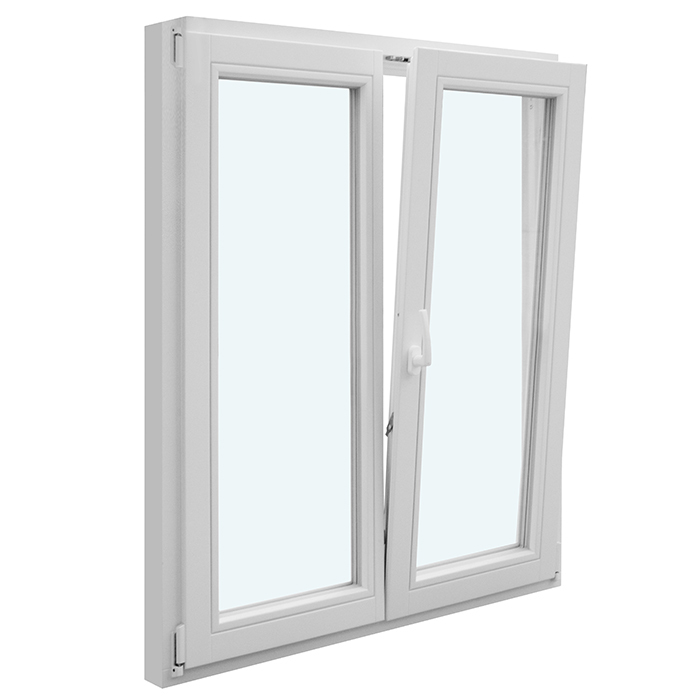
The key question is which surfaces should remain visible when the work is complete. A continuous plastered reveal calls for different follow-on work than a neat edge finished with trim. In occupied rooms, this affects dust control, protection and the sequence of removal, installation, repairs and final painting. For a window with 1 inward-opening sash you must also check that the new interior sill leaves enough room for the sash and handle. The product identifies the opening direction, but not the finished wall detail. List removal, disposal, installation, sealing, sill work, reveal repairs, trim, painting and cleaning separately in the quotation. This makes it clear what is included and what another trade must complete.
Read the reveal carefully before measuring
Reveals are rarely identical everywhere. Older walls may be out of plumb, plaster layers may vary in thickness, and the left side of an opening may differ from the right. Measure width and height at the top, middle and bottom; take depth readings on all four sides. Also establish whether the existing frame is flush with the inside wall, centred within the wall or closer to the exterior face. Its location shapes the visible reveal and determines whether an existing interior sill reaches far enough beneath the frame. A sketch showing viewing direction avoids misunderstandings, particularly where only one side is tiled or a reveal is wood-lined.
During the site visit, look for conditions that one measurement cannot show: crumbling edges, moisture marks, cracks, soft areas, hollow spots or earlier repairs. These observations do not establish a cause, but they are a reason to have the appropriate professional assess the area before finishes are closed. For a window with 2 inward-opening sashes the swing paths must also be considered: a deep projecting sill or side lining must not obstruct operation. Decide whether the reveal should stay square, flare toward the room or connect with an existing design. A widened interior reveal can change the sense of light, but it needs a deliberately finished plaster or panel surface rather than an improvised leftover edge.
Buying checklist 2
Frame position changes visible proportions
The new frame’s position within the wall controls how deep the interior and exterior reveals appear. If it is moved relative to the old unit, an existing sill may become too short, an exterior finish may no longer fit or a connection to cladding may need to change. Opening style also affects the clearance required. For a casement window with 1 outward-opening sash the interior remains clear while the sash is open, but the exterior reveal, sill and surrounding space must accommodate its movement. Compare more than the overall size and elevation; ask for a section drawing or at least a dimensioned sketch of wall, frame and sills. It will show early where a new edge occurs and which surface needs finishing.
A flush frame can create a calm, contemporary look, but may leave less tolerance for an uneven wall. A recessed frame emphasizes the reveal and may work well with existing architecture, while increasing the visible junction surfaces. Neither choice is universally better. The right solution depends on the wall build-up, exterior, room and intended appearance. Ask exactly which reference surface every dimension uses: rough opening edge, finished interior plaster, finished exterior face or the existing frame. If insulation, cladding or a new floor finish will be added later, allow for its final thickness. A window that fits on paper can otherwise end up too close to the sill or reveal finish after interior work is completed.
Interior sills: support, depth and daily use
An interior sill is both a useful surface and a finishing detail. It may run into side-wall pockets, stop at the frame or end with side returns. During replacement, establish whether it can remain intact, may be damaged during removal or should be replaced anyway. Measure not only its length and visible depth, but also how far it runs beneath the existing frame. Decide what front edge suits the room and whether the sill meets tile, an alcove, a countertop or wall panelling. A new sill should not be treated as a loose decorative board: its transitions to the frame and side reveals need to be designed as one detail.
Clearance to handles, sashes and built-in elements is also practical. Curtains, plants or a deep shelf can make daily opening difficult even where the window dimensions are correct. For a patio-door unit with 1 inward-opening sash the relationship to the floor needs especially careful thought: a conventional interior window sill is not automatically the right solution. When choosing finishes, record material, colour, edge profile and side treatment as visible decisions, but link them to installation responsibilities. Who removes the old sill, prepares the substrate and restores plaster or flooring? This prevents unclear handovers between window installation, finishing work and painting.
Buying checklist 3
Exterior sills and the façade junction
Outside, the sill has a different role from its interior counterpart: it forms the lower finish at the façade and should direct precipitation away from the wall. Its slope, side junctions, connection to the frame and transition to the existing exterior surface should therefore be discussed as one assembly. An existing exterior sill may remain undamaged during removal, be affected by it, or no longer suit the new frame position. Check whether adjacent façade components, shutters, guide rails or sun shading restrict the work area. Angled photographs help capture drip edges, projections and junctions that are easy to miss head-on.
Do not leave selection of an exterior sill until after the window is installed. Ask in advance about its precise bearing, intended side treatment and visible transition to the façade. Render, brick, wood cladding and panels each require their own detail; there is no single universal solution. At a large opening, such as for Patio Life lift-and-slide doors, the lower connection often becomes a threshold and patio condition rather than a window-sill detail. Exterior surfacing, drainage, finished heights and door movement then belong in the same plan. Avoid assuming that a visually similar new unit will automatically connect to every existing component. Only a coordinated detail shows what can stay, what must be adjusted and what needs replacement.
Trim as a visible finish, not a substitute for planning
After installation, trim can provide a clean visual line between the frame and interior wall. It can be useful for covering a narrow junction, protecting a delicate plaster edge or creating a consistent treatment across several windows. It does not replace a properly planned perimeter joint, and it should not be used to conceal unknown damage or unresolved movement. Decide beforehand whether trim is required inside, outside or on both sides, how wide it should be and whether it relates well to existing baseboards or door trim. On heavily textured walls, trim can emphasize unevenness rather than soften it.
Alternatively, the reveal can be plastered, filled or finished with another surface treatment right up to the frame. This creates a more minimal appearance but requires clean edges and a clearly sequenced scope of work. With fixed windows there is no sash-clearance requirement, but frame depth, the visible edge and cleaning access remain important when selecting a lining. Review samples from more than one viewpoint: from within the room, along the wall and in daylight. Ask which joints will stay visible and whether trim can be removed later if the junction requires inspection or the wall is renovated. The best trim is one with a clearly defined purpose and route.
Buying checklist 4
Plan plaster, wallpaper, tile and wood linings properly
Removing an old frame can disturb the edge of a finished surface. With wallpaper, decide whether a narrow strip can be patched or the wall needs a new finish. With tile, establish whether the tile edge reaches the frame, whether profiles are affected and whether matching replacement material is available. Wood panelling, exposed masonry and fine textured plaster each need their own approach. Record colour, texture, pattern and direction of boards or joints before removal. This is especially important when replacing only certain windows while neighbouring ones remain unchanged. A prepared sample area is more useful than a vague instruction to make it look as it did before.
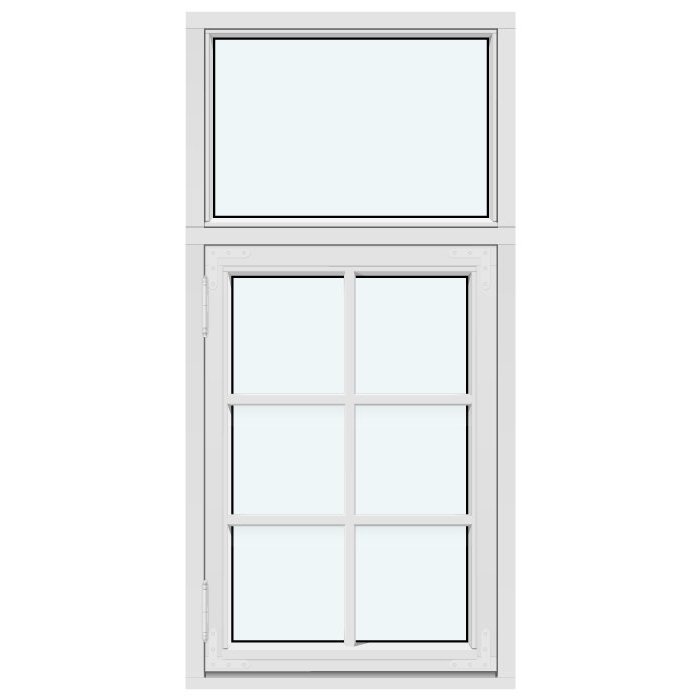
Plan the sequence realistically: arrange protection and removal first, install the new unit and complete its perimeter junction, then carry out visible repairs once the final frame position is fixed. Fresh plaster, filler or paint should not be assumed to be included without confirmation. With a historic-style outward-opening “Kombi” casement window the appearance can be coordinated deliberately with existing glazing bars and characteristic reveal depths. That does not mean a particular historic detail must be copied. It means comparing the visible lines in advance: frame face, glazing-bar pattern, reveal edge, sill and façade opening. This helps determine whether a simple junction provides an intentional contrast or makes the composition look unsettled.
Special shapes need their own detail
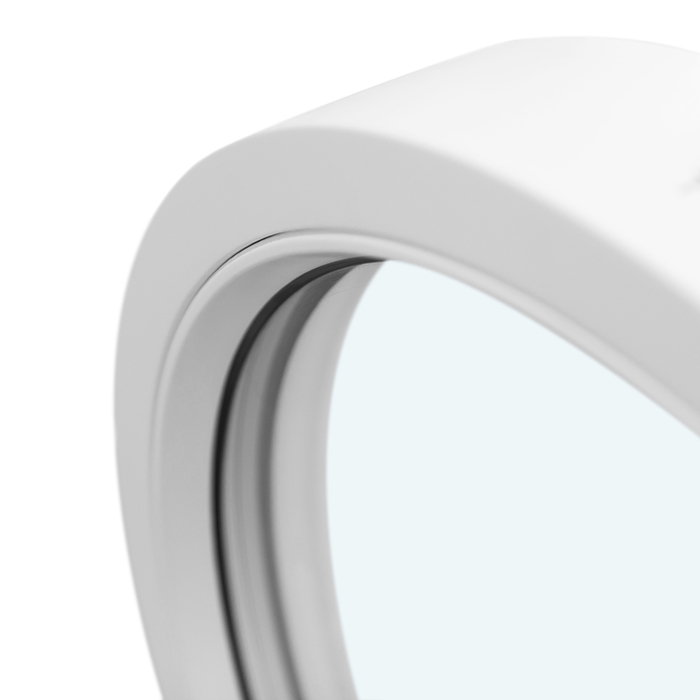
Round, angled and segmented openings cannot reliably be planned using the approach for a standard rectangular window. With a round fixed window the continuous reveal edge is particularly important: where does plaster or lining stop, how even does the visible gap around the frame appear, and how will the curve be formed? Straight trim is not a standard answer here. Where the existing opening is irregular, make a template and take detailed photographs and measurements. Fixed glazing can also require different interior or exterior cleaning access; address this before choosing deep linings or permanent furniture nearby.
Roof windows, bays and very deep wall openings also bring their own junction conditions. A centre-pivot roof window, for example, involves more than a side reveal: it includes the interior lining of the roof opening and its visual lines in the room. Do not copy details from vertical façade windows without having the installation condition reviewed. For angled openings, a sketch can usefully identify the visible edges: top edge, side junction, lower finish and, where relevant, transition to the ceiling. Then decide which lines must be exact and where a small irregularity in the existing construction is acceptable. That prevents the final appearance from being decided only at the last filling stage.
Buying checklist 5
Break the scope and quotation into checkable parts
A useful quotation describes more than the number and outer dimensions of the windows. For every opening, it should identify opening style, handing, frame colour or finish, frame position, interior sill, exterior sill, reveal treatment and work to existing surfaces. Add position numbers to photographs so that “left window” cannot be interpreted differently. Describe floor conditions separately for doors. For a patio door with 1 outward-opening sash, for example, establish how the inside and outside meet the existing floor without confusing the finished result with a window-sill solution. Unknown items can be listed as matters to be assessed; they should not disappear invisibly from the scope.
Ask for clear responsibilities. Who carries out the site measure? Who confirms dimensions and opening direction before release? Who protects floors and furnishings? Who removes loose plaster, closes the reveal and restores the surface to the stated finish standard? Also ask whether samples, drawings or photographs can form part of the contract documents. Separate essential work from optional design choices. A new interior sill may be necessary because the existing one no longer fits, while a wider decorative lining may be optional. This distinction makes quotations easier to compare because it avoids comparing scopes with different, unstated amounts of work.
Check deliberately before release and after installation
Before ordering, compare the window schedule with the actual rooms. Confirm opening direction from inside, sash movement, handle positions, sill depth and the right photograph for each opening. Mark radiators, built-in furniture, electrical outlets, curtain tracks, tile and exterior components on the sketch. Before releasing the order, ask the applicable provincial, territorial or municipal authority which locally adopted rules and approvals apply; Canada’s National Model Codes are models rather than a single permit rule in force everywhere. Give the authority the building type and details of any change to the opening. Ask about the expected 4–6-week delivery period, subject to order confirmation, and coordinate later trades accordingly. Bloomcabin’s commercial warranty for windows and doors is 5 years. These details support scheduling and organization but do not replace a project-specific review of the scope.
After installation, review the visible result before final repairs conceal the work. Do frame position, opening direction and number of units match the order? Can the sashes move without touching the sill, reveal or floor? Are the agreed interior and exterior finishes present, and are damaged surfaces recorded as outstanding work? Photograph every opening inside and outside in good light. This is not intended to replace technical inspection; it creates a clear shared record for work that remains. Only by viewing frames, sills, trim and surfaces together can you judge whether the replacement feels complete in the room.
Frequently asked questions
Must the reveal always be renewed when replacing a window?
No. A reveal can remain if its condition, the new frame position and the chosen final finish allow it. Removal can still damage edges or create new visible strips. Before work starts, establish whether repairs, replastering, lining or trim are planned and who will carry out that work.
Can the existing interior sill stay?
That depends on its condition, how it is built into the opening and where the new frame will sit. Measure its support, depth and clearance to the sash and handle. Retaining a sill does not automatically eliminate follow-on work if its junction will later remain exposed. Confirm before ordering whether it will be protected, adapted or replaced.
Is trim always the easiest option?
Trim can create a quick, crisp visible edge, but it will not suit every room. A plastered junction may look quieter in a smooth flush reveal. Trim must not be used to hide unresolved junction problems. Choose width, position, finish and joint pattern from a sample or drawing.
What matters most for a new exterior sill?
It must work with the frame, reveal and existing façade as the lower exterior finish. Check early which components meet it at the sides and whether the new frame position changes the existing sill. At doors close to floor level, a coordinated threshold and floor-junction detail is often needed instead of a window sill.
What information is most useful for the installation team?
Helpful records include measurements at several points, interior and exterior photographs, a position sketch, information about wall finishes, and images of sills and adjacent components. Add the result you want: a flush plastered junction, trim or a lining. Identify follow-on trades as well, so timing and responsibilities can be coordinated before the order is approved.
Next step
In a window replacement, reveals, sills and trim are not afterthoughts. They determine how the frame meets the wall, how the room looks after installation and which jobs remain open. Treat every opening as its own junction condition: measure the existing work, photograph finishes, set the frame position and plan the interior and exterior separately. Compare quotations by clearly stated work, not by the window unit alone. When the frame, sills, façade junction and visible interior finish are approved together, there are far fewer surprises on installation day.
