
Caring for timber windows: cleaning, recoating and inspection
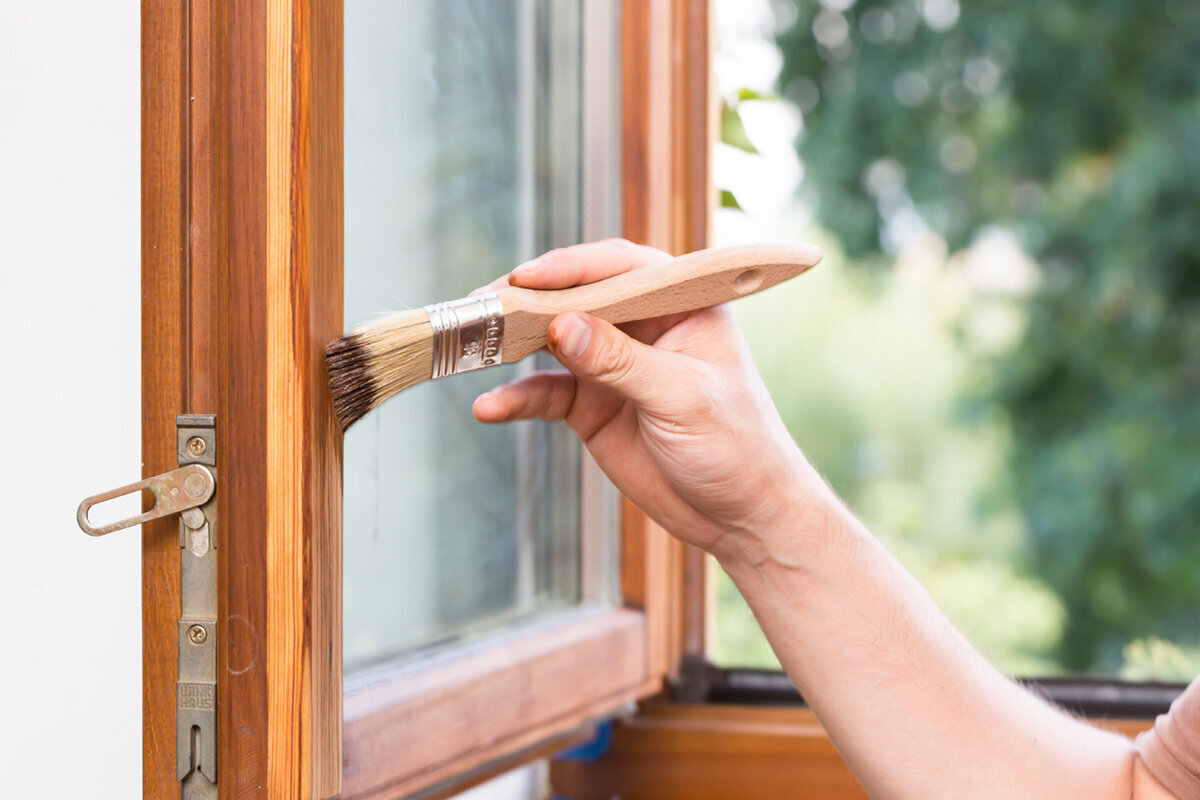
Maintaining your timber windows
Timber frames seldom weather at the same rate. A rain-facing elevation may develop a flat, powdery appearance while matching windows on a more sheltered wall remain uniform. In Ireland’s changeable Atlantic conditions, it is more useful to connect washing, inspection and possible refinishing than to rely on one rigid timetable. Looking only at the broad, visible face can leave rebates, bottom edges, glazing margins and outlets unnoticed. Applying another finish prematurely may instead cover dirt, trapped damp or an unresolved fault. The approach below helps you survey each unit, separate routine upkeep from remedial work and fit refinishing around other building tasks. The objective is timely, evidence-based care for each window rather than frequent treatment for its own sake.
Survey the windows before reaching for paint
Begin by deciding whether the visible problem is dirt resting on sound protection or deterioration within the protective film itself. Use soft, indirect daylight for the survey and operate every sash that can open. Note fading, coarse patches, hairline splits, damaged corners, dark marks and hollows where rain might linger. Give extra attention to bottom rails, sash-to-frame junctions and the space below weather bars. Label photographs with the date, room and elevation so later changes can be compared reliably. Assign each observation to an action such as washing, watching or obtaining expert advice. The resulting schedule will reflect the condition of individual units instead of treating every window in the property alike.
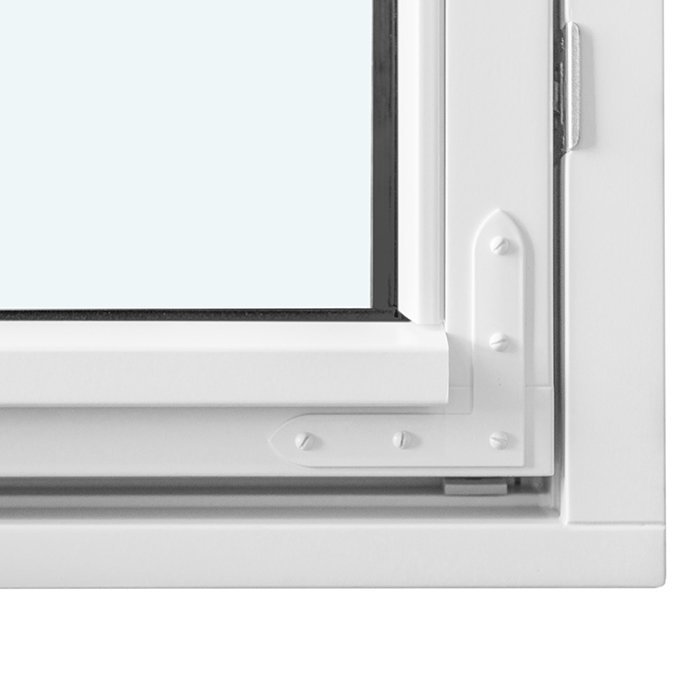
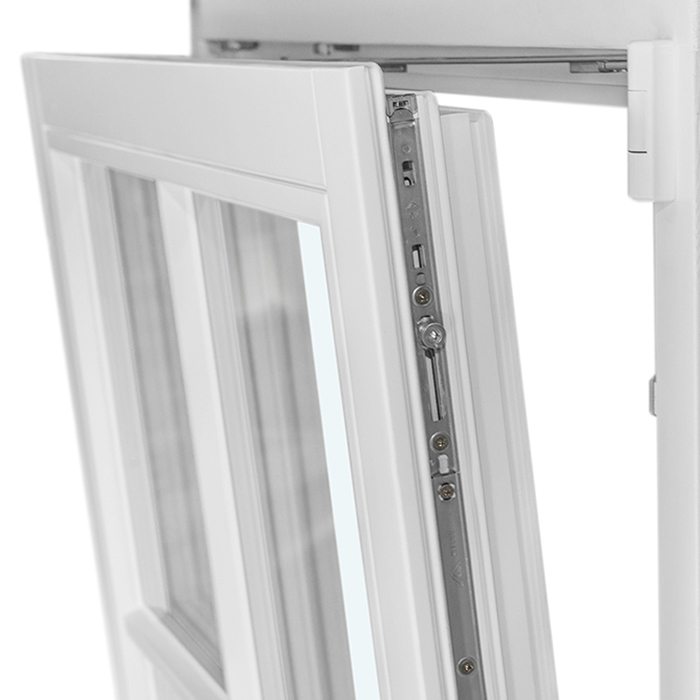
Decide whether a mark is superficial or suggests another problem. A scrape caused by a flowerpot or cleaning implement is not equivalent to damage that keeps returning at one bottom corner. For an inward-opening window with one sash , inspection should cover the rebate, gaskets and exposed fitting areas as well as the outside face. Operate the sash and note rubbing, missing specified covers or rainwater left in a corner. Then compare the suspect area with another window facing the same direction. That comparison can help separate an isolated knock from usage-related wear or exposure shared across the wall. Although a sound finish shields the timber, it will not correct poor adjustment, redirect unwanted water or repair a defective junction.
Wash first for a clearer assessment
Washing has a diagnostic purpose as well as improving appearance. Once deposits are gone, it becomes easier to tell ordinary grime from genuine loss of finish. Lift loose material initially with a gentle brush or non-abrasive cloth. In many cases, warm water and a mild product approved for the relevant coated surface will suffice. Clean manageable sections downwards, avoid prolonged wetting and finish with a separate clean-water wipe. Keep the cloth moist rather than saturated, and replace dirty water before it transfers residue elsewhere. Pay close attention when drying rebates, junctions and edges, where liquid can otherwise linger. Wait until the timber is dry before making the final judgement.
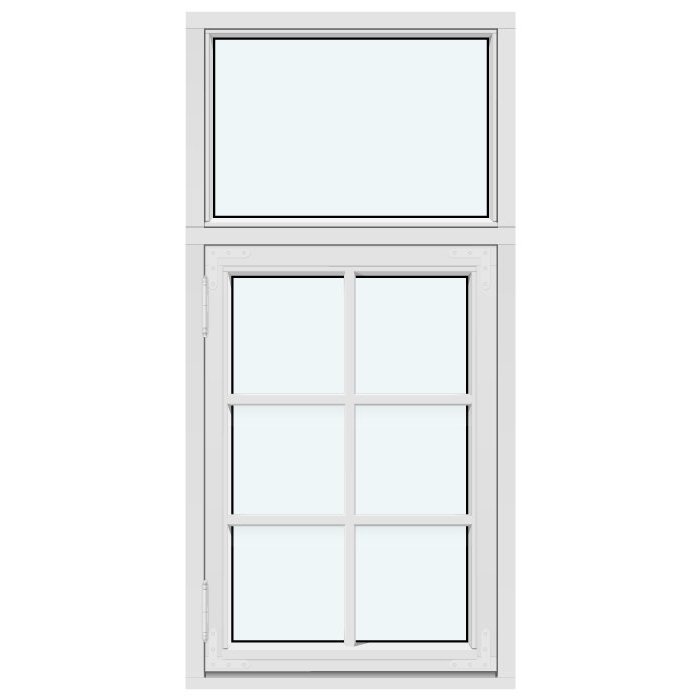
Do not use scouring powders, rigid brushes, abrasive pads or powerful solvents unless compatibility with the finish has been established. Pressure washing is also unsuitable for ordinary upkeep because it can send water behind seals and into rebates or adjoining construction. Treat the glass separately and reserve different cloths for it, preventing grit picked up from one material from scratching another. For a design such as the “Kombi” outward-opening casement in a heritage style, take extra time around glazing bars, corners and tight junctions. Limit the amount of water and review these details from more than one angle afterwards. Residual cleaner or dampness can alter the appearance temporarily, so allow both to clear before diagnosing deterioration.
Examine every part of the window
Consider exposure separately from construction
Record the direction each window faces, whether an overhang shelters it and whether plants, paving, a downpipe or splash water are nearby. Such context can account for uneven ageing without proving that anything is defective. In Ireland, wind-driven rain and damp spells may affect exposed elevations differently from protected walls, while leaves, pollen and dust create other cleaning demands. Arrange windows into comparable groups and set priorities from their observed condition and exposure. Sheltered units still warrant attention because grime, impact marks or awkward movement may arise even when their finish remains visually consistent. One property-wide maintenance date would fail to recognise these practical differences.
Give the built details a separate visual review. Make sure any reachable drainage slots remain unobstructed by soil, insects or remnants of old paint. Inspect bottom edges for lifting finish, and look for dirt, splitting or disturbance at flexible junctions. With a one-leaf patio door opening outwards , concentrate on the low-level frame and threshold. Footwear, wet belongings and regular traffic affect this zone differently from a window above ground level. Clear accessible rebates only in the manner described by the product’s maintenance information. Where rain repeatedly pools at one point, another coat is not the first answer; have the path taken by the water and the underlying reason investigated.
Interpret what the finish is showing
Age alone does not justify renewing a continuous coating that regains an even appearance once washed. Continue observing it and maintain it carefully. A coarse, powdering, split or locally bare surface needs another response. Peeling material, visible wood and discolouration where damp repeatedly occurs all warrant closer investigation of both cause and repair extent. Avoid probing a doubtful patch with a sharp object or covering it experimentally with paint. Compare the perimeter, central area and bottom edge instead. A small repair is appropriate only if the timber, moisture level and join between old and new layers are compatible with the proposed treatment.
Identify the existing finish and its approved maintenance products before deciding how to recoat. Clear treatments, translucent stains and solid-colour systems have different appearances and refurbishment requirements, so colour preference cannot settle the specification by itself. Ask the product maker or an experienced contractor what washing, keying or sanding, priming and compatibility checks are required. If records of the earlier treatment are unavailable, make investigation of that unidentified finish a stated item in the quotation. Moving to another type of coating should be designed as one coherent build-up rather than an improvised extra layer. Poorly matched materials may lose adhesion despite looking satisfactory at first. An agreed trial patch in an inconspicuous position can provide useful information, but the rest of the substrate must still be examined.
Organise refinishing as one complete process
A durable result depends on the order of operations. Survey the window, diagnose unusual areas, wash it, specify the required preparation and apply the finish only afterwards. Material that is loose or incapable of carrying a coating needs proper removal, while stable areas may call for lighter preparation under the chosen system. Keep sanding residue out of seals, rebates and glazing margins. Mask glass and adjoining materials without blocking outlets or restricting anything that moves. Define whether the job covers isolated defects, every exterior face or the whole unit, and record that scope for both quotation and completion inspection. Thorough preparation generally matters more to performance than the speed at which paint is put on.
Choose a suitable dry period and observe all application requirements for the specified products. Conditions before and during the work matter: wet timber, intense sunlight and temperatures outside the permitted range can be as troublesome as rainfall. Progress through clearly bounded parts of one unit rather than opening up unfinished work on numerous windows. Agree how long the sashes will need to remain open and how occupied rooms will be kept usable and protected. On a window with fixed glazing , there are no opening-sash fittings to service, yet its top sections, exterior frame edges and glass-to-frame margins still require attention. Plan safe access to each face in advance and allocate responsibility for removing masking and covers without leaving residue.
Keep coatings away from seals, fittings and glazing margins
A timber window relies on its frame, sash, finish, gaskets, operating fittings and glass functioning together. Wipe gaskets using a non-abrasive, slightly moistened cloth, while noting adhered dirt, deformation or obvious damage. Leave them unpainted and avoid unapproved treatments that might degrade the material or attract grime. The correct service products and lubricants for fittings depend on the particular unit; coating everything with general-purpose oil is not good practice. Stiff movement does not by itself identify the timber finish as the cause. Record the circumstances and location of the resistance rather than altering the fittings without guidance. Instructions issued for the individual window should govern operation and maintenance.
Inspecting the margin of the glass carefully is more valuable than covering it quickly. Note gaps, brittle material, contamination and evidence of damp that returns. If the reason or repair method is uncertain, glazing junctions and operating fittings should be handled by someone with suitable experience. For a two-sash window opening inwards , test the leaves separately. Confirm that each closes uniformly, its gasket appears properly seated and the central meeting area has not accumulated debris. Follow the intended operating order and never relabel primary and secondary leaves without justification. Different behaviour between the two may arise from how they are used, their adjustment or their orientation. A precise written and photographic record reduces the chance of treating a visible symptom while missing the point from which it originates.
Review the window as a complete assembly
Plan for access and unusual shapes
Difficult access changes the equipment, safety planning and time needed for care. High gables, roof areas, windows over extensions and broad door sets all need an appropriate working method. Never lean through an unprotected opening or substitute furniture and unsuitable ladders for proper access equipment. Before commissioning wider maintenance, map what can safely be reached indoors and what requires a professionally arranged exterior platform or specialist involvement. Show access, coverings and other protective provisions separately when comparing prices. Otherwise, a low painting quotation may simply omit scaffolding, safe work equipment, masking or final cleaning. How the work will be reached is therefore part of defining its scope and sequence, rather than an issue to improvise when the job starts.
Shape affects the amount of detailed work, although the underlying approach remains unchanged. With fixed triangular or sloping windows , angled sections can retain contamination in patterns unlike those on square frames. Follow the entire outline during inspection instead of concentrating on the easiest face to see. Reflections from a broad pane may disguise slight changes in neighbouring timber, so alter your viewing position. Quotations should state expressly whether awkward exterior edges are covered. If regular access to a component is inherently complex, combine its planned inspection with suitable gutter, roofing or façade works to share access and protection arrangements. That efficiency should not postpone attention to exposed timber, a broken finish or damp that is already recurring.
Fit maintenance around façade work and replacement plans
Review the wider building programme before commissioning the refinishing of several units. Upcoming gutter repairs, façade washing, scaffolding, wall decoration or alterations to sills can determine the sensible sequence. Coordination prevents later trades from marking or dirtying newly finished frames. Allocate responsibility for masking, protecting junctions, preventing scaffold contact and completing the final surface review. Keep separate decisions for units needing only upkeep, those requiring repair and those whose more substantial damage calls for further assessment. An itemised window schedule is more useful than one undivided sum. Making every frame the same colour does not remove the need for a technical decision about the condition of each one.
Renewing a finish differs fundamentally from installing another window. A replacement specification must bring together dimensions, opening method, glazing, surrounding connections and the circumstances of installation. When considering a Super Low Uw passive-house window with outward opening , do not treat its name as evidence that it fits the proposed building or project. Establish the requirements professionally, then compare written offers prepared to the same brief. Consider the visual relationship between retained and new units as well as the maintenance literature available for each. Bloomcabin provides a five-year guarantee for its windows and doors, and delivery takes four to six weeks from order confirmation. Those terms do not replace measurement, technical review for the specific property or coordination of the project timetable.
Build a useful enquiry and completion checklist
Provide more than a request to paint the windows. A contractor needs the quantity and approximate size of the units, their opening methods, elevations, height, accessibility and visible defects. Supply both contextual and detailed photographs, preferably taken after washing. State whether the finish looks solid or translucent and include any records of earlier products or work. Seek separately priced or described advice for washing, small repairs, full refinishing and investigation of underlying causes. Ask which allowances cannot be confirmed until an area is exposed or examined more closely. This level of information should lead to a clearer offer, with intelligible assumptions, inclusions and exclusions, instead of an opaque single figure unrelated to condition.
The enquiry should describe how the contractor will check coating stability and possible damp, what preparation is proposed, and how glass, fittings, gaskets and neighbouring surfaces will be shielded. Establish separately how defects in timber, glazing or perimeter seals are to be resolved before decoration. For an extensive opening such as Patio Life sliding lift doors , list the frame, track area and reachable drainage points as distinct inspection zones. At completion, view the finish under clear light and operate every moving component. Confirm that tape and protective film have gone, drainage remains open and the contractor has recorded the treated locations. Decoration must leave the unit fully usable. The handover record should distinguish maintenance, repair and anything deliberately outside the agreed work.
Create a repeatable review schedule
Regular triggers make long-term upkeep manageable. A brief survey may follow a dirty season, severe weather or the general exterior review of the property. Detailed washing and professional input are necessary only when contamination or condition indicates a need. Maintain a basic log for each room and elevation, supported by photographs, observations and completed actions. Following refinishing, add the product system, contractor details and relevant maintenance literature. Over time, the log will show whether a mark was isolated or continues to develop. It also provides useful continuity for a future owner, another contractor or work being organised elsewhere on the building envelope.
Arrange prompt investigation if a finish begins lifting, timber appears damaged, drainage is obstructed, a sash fails to shut correctly or dampness keeps returning. Delay can turn a limited defect into more extensive repair, while an early diagnosis separates routine surface upkeep from structural or functional concerns. Use the same order at each ordinary review: observe exterior faces, examine frame edges, clear permitted rebate areas, inspect the gaskets, operate the unit and record the outcome. Revisit an earlier repair when conditions allow and confirm that the area remains dry, sealed and operational. This process also suits a pivoting roof window, although its accessible interior and weathered exterior require different routes of inspection. Always defer to the maintenance information for the specific product.
Questions about timber-window upkeep
What determines a suitable cleaning interval?
Base the interval on accumulated grime, orientation, nearby vegetation and the state of the finish. Wash the unit when deposits could harm the surface or prevent an accurate visual review. Brief checks carried out regularly are preferable to occasional harsh treatment with unsuitable products. Observe any maintenance directions issued for the window and its coating.
Should a dull patch be painted immediately?
No. Careful washing may restore the appearance, while persistent dullness can indicate that protection is declining. Decide on the work only after establishing the finish type, dryness, adhesion and condition of the substrate. Areas that peel, expose the layer below or repeatedly discolour need expert examination before more coating is added.
May timber windows be pressure-washed?
Pressure washing should not form part of ordinary timber-window maintenance. It may damage finishes and seals or push moisture through joints, rebates and surrounding connections. A non-abrasive cloth, controlled amount of water and compatible mild cleaning product are safer choices. Seek experienced advice before tackling deposits that do not respond to that approach.
How should a stiff sash be handled?
Gently clear only the rebate areas intended for routine access, then note exactly when and where resistance occurs. Do not alter or oil operating fittings unless the relevant instructions permit it. Grime, alignment, movement in the unit or another defect may be responsible. Consult the manufacturer’s information or arrange examination by a competent person.
Which signs indicate that maintenance is insufficient?
Ordinary upkeep may not resolve visibly deteriorated wood, extensive peeling, recurring damp marks, suspect junctions or failed operation. Obtain a diagnosis and proposed repair method before choosing the next intervention. That evidence allows an informed choice between a confined repair, comprehensive refinishing and, where genuinely necessary, replacement.
Choosing the next action
Good timber-window stewardship starts with measured inspection rather than automatic repainting. Wash the unit, then work methodically through its frame, edges, rebates, gaskets, fittings and adjoining construction. Judge every elevation on the exposure and condition actually observed, keeping a record for each element. Before refinishing, confirm the old system, substrate, precise work scope and reason for any damage. Difficult access, bare wood, persistent damp or faulty operation all justify experienced assessment. This approach changes sporadic painting into an organised preservation plan for the window assembly as a whole.
