
How to determine window and door handing
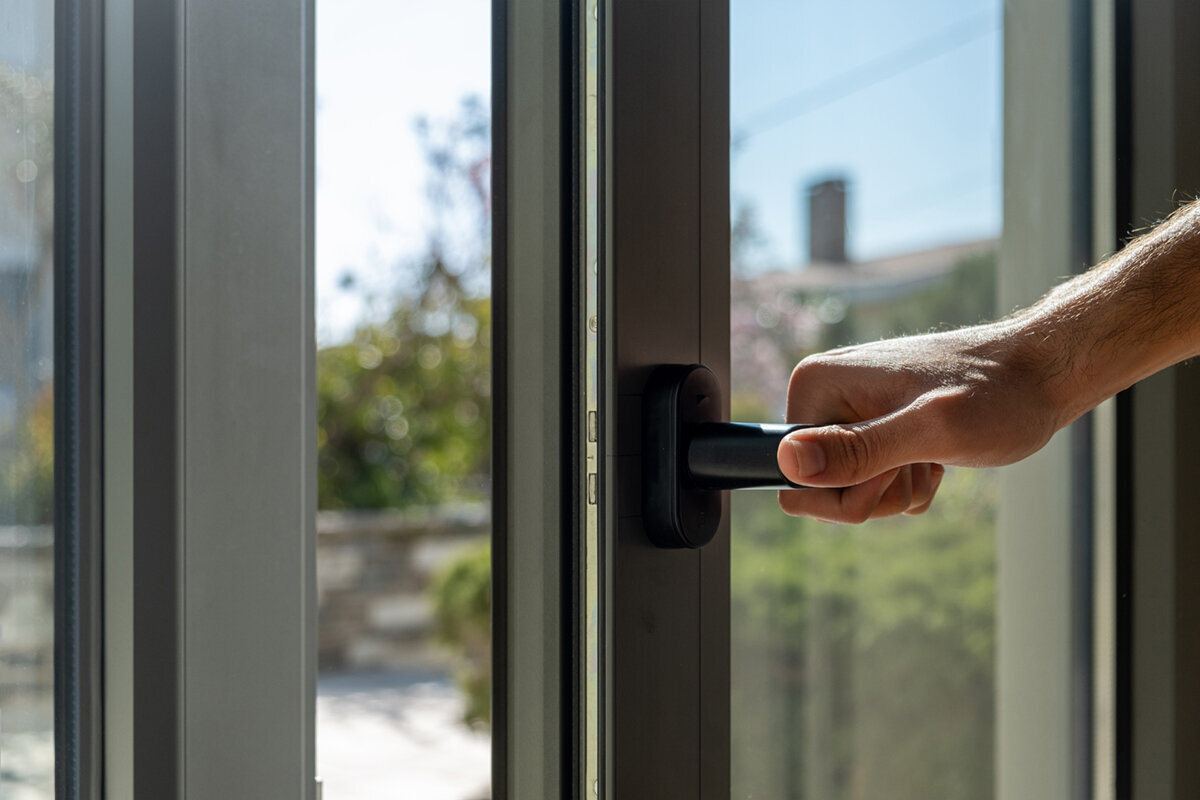
A guide to planning window and door openings
Calling a window or door “left” or “right” leaves a vital detail unstated: the observer’s position. A person facing an opening from the room may describe it differently from someone outside. Ambiguity becomes costly across a project containing several rooms, patio openings and entrance doors. A sash might hit a radiator, cut across the patio route or swing beside the wrong piece of furniture. Record three facts independently: the perspective used for the drawing, the edge carrying the hinges, and the path taken as the sash opens. The method below turns those facts into a consistent schedule, covers less familiar opening systems and supports a room-by-room review before the order is approved.
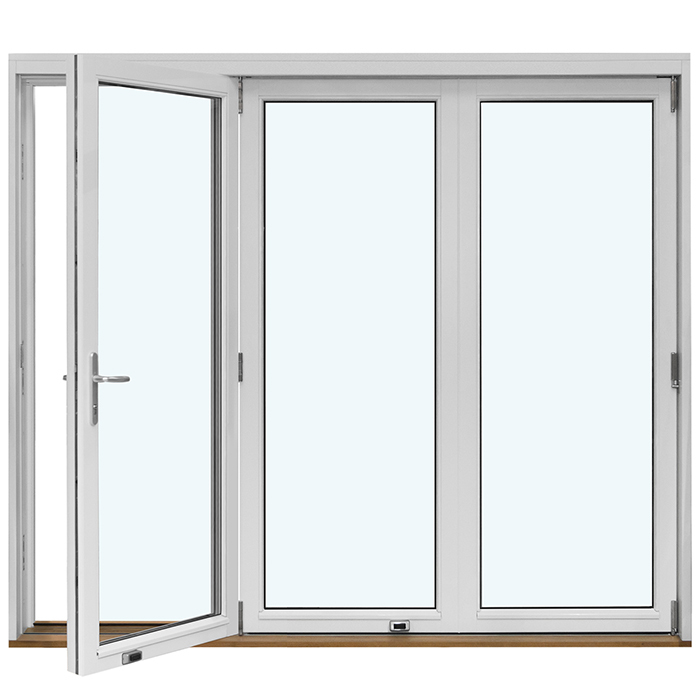
Handing consists of three separate details
Begin an unambiguous order by defining the observer, rather than choosing a side immediately. Label every sketch “inside view” or “outside view”. Next, identify the hinged edge. If the hinges appear at the left from the labelled perspective, record left handing; if they appear at the right, record right handing. Then specify whether the sash travels towards the interior or exterior. Keeping all three entries together prevents different participants from looking at one unit from opposite positions and reaching conflicting conclusions.
People often use handing, hinge position and opening movement as though they meant the same thing. Treat them as separate entries during design. Handing locates the rotational edge; opening movement describes the area swept by the sash. A window moving into the room needs internal clearance, while one moving away from it needs clear space outside the façade. Memory aids are unsafe unless the observer’s position is defined. Use a fixed schedule sequence such as “room, unit reference, perspective, hinges, movement”. It remains clear when measuring, fitting and purchasing involve different people. Where a supplier uses unfamiliar notation, obtain an explanation before accepting the drawing.
Identify the hinges before assigning a side
Face the proposed or fitted unit from the perspective written on the drawing. Locate the hinges, or otherwise identify the edge around which the movable sash rotates. Hinges appearing at your left indicate left handing from this labelled position; those at your right indicate right handing. Concealed ironmongery calls for a simple diagram. Outline the frame, place the sash inside it and use two small circles to identify the rotational edge. Add an arc to show the route followed during opening. Label the handle edge as well, ensuring that the operating side is not mistaken for the hinged side.
For an single-sash window opening into the room the process is easy to picture. First confirm that the drawing represents the room-side perspective. Identify the hinged edge and show the sash in its open position. The sketch will reveal possible clashes with a shelf, worktop or radiator. Although the product description may say that the sash moves indoors, it does not select the required left- or right-hand arrangement for your project. Choose that separately and verify it on the order confirmation. A site photograph is useful supporting evidence, but not a substitute for the diagram; label its camera position and direction. Where openings look alike, match every image carefully to its unit reference.
Derive inward and outward opening from use
The chosen movement determines where clearance is needed. A sash travelling indoors sweeps through part of the room; one travelling outdoors requires the same attention beyond the wall. Review more than its maximum opening. Mark the usual ventilation position, access to the handle, curtains, shutters and any other shading equipment. For each window, note the normal place from which a person will operate it. Follow the action step by step: approaching the window, taking the handle, moving back if necessary and guiding the sash around nearby objects. Consequently, an arrangement that appears balanced on an elevation may prove awkward when used from inside.
For a front door, an external door that swings outwards may suit an entrance where indoor clearance needs to be protected. Decide by studying the entrance itself, rather than relying on the product label. Consider where the user stands while unlocking the door and how the step, landing, letterbox or bicycle affects movement. State whether the chosen perspective is indoors or outdoors, then shade the swept area on the plan. Allow for visitors and objects that might occupy that space. Reversing the movement later commonly alters the hinges, lock and handle relationships as well. Any such revision must therefore be carried across the complete unit schedule, not added to one isolated drawing.
Read floor plan, elevation and swing arc together
Use the plan to test whether the sash has an unobstructed path on either side of the wall. Show walls, openings, furnishings and walking routes at a consistent scale, or at least in sensible proportion. From the hinge point, an arc representing one quarter of a circle identifies the swept zone. It can reveal problems concealed by an elevation, such as hall furniture behind an entrance door, a bed beside a window or adjacent sashes meeting at a corner. Label the arc as interior or exterior so its meaning cannot be reversed. Beside a corner, also illustrate the clearance available for a hand to reach and operate the handle.
An elevation complements the floor plan because it shows the division and position of individual sashes. With two adjacent windows, a symmetrical appearance may be desired, while operation in the room suggests opposite hinge sides. Even for panelled internal doors the selected design still needs testing against the route people will actually take; product category alone cannot settle the handing for a particular room. Repeat one unit reference throughout the documents, such as G-01 for the kitchen and F-03 for the bedroom. Every elevation should identify the relevant wall, the observer’s position and the opening arrow. Ask how the supplier defines its illustrated perspective and marks the hinges. A labelled diagram is safer than a spoken instruction that merely says the door moves towards the left.
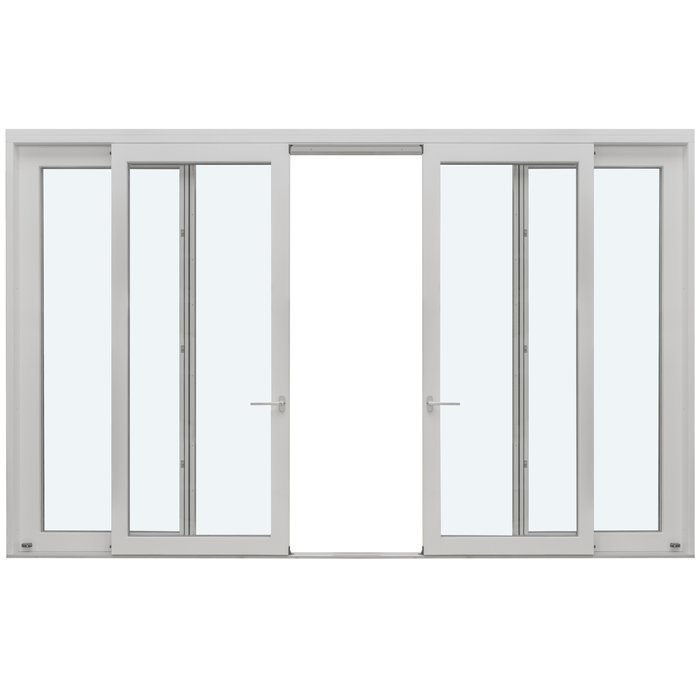
Plan patio doors from furniture and outdoor space
A patio door serves adjoining indoor and outdoor areas, so examine its movement from each. A table, sofa, curtain or radiator may occupy the internal sweep, while seating, containers, steps or a route along the wall may limit the exterior. Illustrate the open sash on both sides and test whether the handle can be reached comfortably when going in either direction. Decide whether the everyday passage must stay fully unobstructed or whether the door will usually provide ventilation only. Rehearse ordinary tasks, such as carrying a tray into the garden or using the opening after the outdoor furniture has been arranged. Such scenarios expose practical difficulties that a vacant plan may conceal.
An single patio door that opens into the room requires a different assessment from a door moving towards the garden. Beside fixed furniture, the hinged edge can determine whether the handle remains usable. A narrow outdoor area must still be reviewed independently. Replace a vague enquiry such as “patio door, left” with a complete entry, for example: “view from room, hinges at left, opens into room”. Add the intended function, such as keeping the garden route unobstructed beside the handle. Say whether furniture positions are final or indicative. Otherwise, a later layout revision may invalidate the original choice without anyone noticing. Recording its purpose makes the configuration easier to understand and reassess after design changes.
Two sashes need an additional functional decision
Double windows and doors need more information than a side designation. Choose the leaf used first for ordinary access and identify the secondary leaf. From one declared perspective, document the hinges, handles and motion of each. Include an arc for both leaves. Without those arcs, readers cannot tell whether they move towards the centre or separate from it, or whether either leaf impedes operation of its neighbour. The use of the opening should determine which portion provides the preferred clear route. Give each leaf a functional label, such as “leaf A — primary” and “leaf B — secondary”, instead of describing them solely as the left and right halves.
With an double-sash window opening into the room avoid assuming that its two parts operate identically. Establish which sash is used routinely, how the other is released and where the handle appears from the room-side perspective. This matters when a table, kitchen work area or tall cupboard is close to the opening. Test the window with only the primary sash open as well. Can it be used comfortably, or does an item of furniture have to move first? That answer may favour another division or an alternative opening system. Ask for written confirmation covering both the operating sequence and the handing. Otherwise, installation may reveal that both sashes function, but the one intended for everyday use occupies the less convenient position.
Record sliding and folding movement, not swing handing
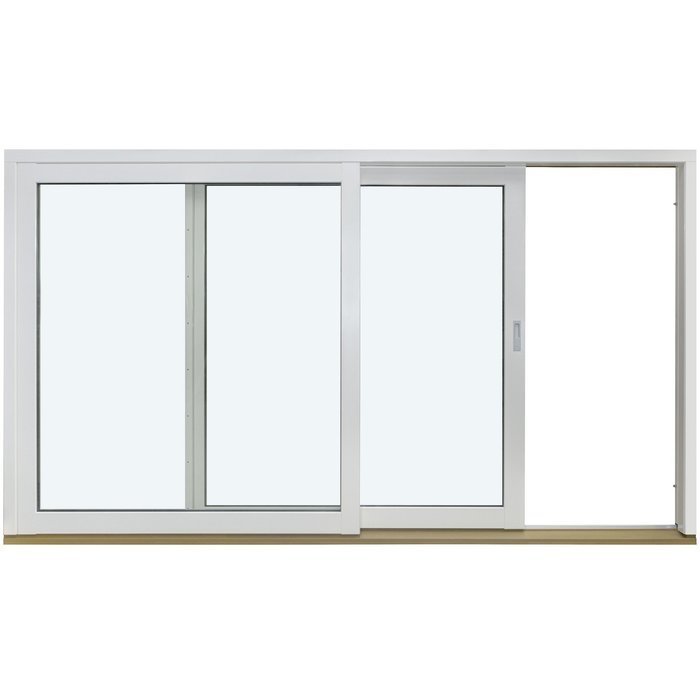
A sliding door lacks the conventional hinged edge of a swinging sash. Instead, identify the mobile panel, its route and its resting place after opening. Use an expressly named perspective and write, for example, “room-side view; mobile panel travels towards the right”, rather than the vague phrase “right opening”. Specify the preferred access portion and whether the mobile panel passes on the room side or exterior side of a fixed panel. Illustrate the shut arrangement beside the open arrangement. This makes clear which panel uncovers the passage and where it finishes. The manufacturer’s drawing should provide the final comparison for this system.
For Patio Life lift-and-slide systems record both the travel route and the final location of the mobile section. Their product name cannot determine which arrangement suits an individual project. Review handles, curtains and furnishings across the full sliding path, rather than concentrating solely on the clear opening. For folding systems, document the order and direction in which the leaves gather. Show the position of the folded stack, the path of each leaf and the portion released first for access. A small plan containing each joint communicates this more effectively than one horizontal arrow. If several opening systems share a façade, draw them on one exterior elevation to expose inconsistent notation, awkward handle alignment or intersecting movement areas before ordering.
Treat top-hung, pivoting and roof windows separately
A top-hung window turns along its upper edge, making lateral handing less important than projection, direction of travel and controls. Note whether the sash moves towards the room or the exterior, and identify the handle or opening device. For a top-hung window projecting outwards, a useful schedule entry is “upper hinges; opens out”. Check the projected sash against occupied outdoor space and nearby building components. The operator’s position should also be recorded. Confirm the exact arrangement and ease of operation from the relevant product documents instead of applying terminology intended for a side-hinged unit.
Reversible and pivot windows rotate around an axis rather than ordinary hinges at one side. The axis location and the clearance required indoors and outdoors are the key facts. For a centre-pivot roof window, show the user’s operating position, the open sash and the intended use of the space below. A handle placed on one side of a drawing does not identify the true rotational axis. Add a sectional sketch showing how much of the sash travels indoors and how much projects outside. A fixed light does not open, although its position beside operable units may influence the composition of the elevation. Use clearly different symbols for fixed lights and moving sashes, and ensure that no fixed section receives a handing entry in the schedule.
Create one project-wide handing register
Keep one master register rather than distributing decisions among messages, photographs and plans. Useful headings include unit reference, room or wall, unit type, observer’s perspective, opening movement, hinged edge or sliding route, leaf sequence, user notes and drawing revision. Transfer dimensions from the controlling plan without treating dimensional checks and handing as one decision. Assign a separate row to every unit so revisions remain visible. Repeat its reference on the plan, elevation and purchase documents, preventing similarly named doors and windows from being mixed up. Give each row a clear stage, such as “open”, “coordinated” or “approved for order”, so an undecided direction cannot appear final.
Review the register alongside the wider design. Structural openings, floor levels, electrical layouts, heating, kitchen units and furniture may all alter how comfortably a sash operates. Trace familiar journeys, including arrival at the coat storage, movement between kitchen and patio, and access from a bed to a window. During renovation, tape the proposed arc on site or move a cardboard strip matching the sash width through the area. This demonstrates spatial conflicts without making claims about technical performance. Following a design revision, reconsider the affected rows and issue a new register revision. Share it with any designer or installer using separate drawings, then compare their documents with it. Ask a suitably qualified professional to assess project-specific suitability where necessary.
Reconcile the drawing with the order details
Complete the decisive review before placing a binding order. For every line, compare the latest drawing with the unit reference, stated perspective, opening movement, hinged edge, sash count and travel route. Never compensate mentally for an unlabelled or reversed view. Read the named perspective and inspect the hardware or panel route from there. Next, test the illustrated sweep against the current furniture and outdoor layout; a design change can turn a sensible arrangement into an obstruction. Prefer a dated print or locked file for final review. Tick each line separately instead of giving the entire register a general approval. Record queries in writing and request a drawing that resolves them clearly.
Make sure the project team also applies each term consistently. If a document says only “left” or “right”, establish the observer’s position before accepting it. Reject any designation that cannot be verified from the hinges, arrows or panel route. Check schedules and attachments against the principal order document: an accurate diagram cannot correct a contradictory order line. Bloomcabin windows and doors carry a 5-year guarantee. The stated delivery period is 4–6 weeks, subject to confirmation of the order. Neither commercial detail verifies the selected arrangement. The safest final record is a coordinated handing register whose entries agree with every drawing and order line before purchase.
Common questions
Does left-handed always mean left from indoors?
No. A left-hand label has meaning only after the observer’s position is declared, and documents may adopt opposite perspectives. Name the perspective on the sketch, then identify the rotational edge and hardware as they appear from there. Finally, compare your notation with the manufacturer’s diagram instead of interpreting an abbreviated label by itself.
How do I determine door handing in a new build before hinges are fitted?
Place the opening on a plan and choose the area through which the door should travel. Identify its rotational edge, state the observer’s perspective and add the indoor or outdoor movement. Test the illustrated arc against furnishings, circulation and exterior features. Include this fully labelled diagram in the documents sent with the order.
What else must I specify for a double patio door?
State the chosen perspective and movement, then identify the primary leaf, the secondary leaf and the preferred access portion. Illustrate and name each leaf with its own opening arc. The resulting diagram communicates operating sequence, handle position and movement to every participant, including those who joined after the initial design work.
Is a sliding door handed left or right?
For a slider, describe panel travel rather than applying swing-door handing. From a declared perspective, identify the mobile panel, say where it moves and name the fixed section it passes. Compare those entries with the manufacturer’s drawing and confirm that the intended side of the passage becomes clear.
At what stage should handing be confirmed?
Confirm it after the plan, furniture, floor construction and important outdoor areas have been coordinated, but before accepting the final order. Match each unit reference to its drawing and order line. Ask for written and illustrated clarification wherever the arrangement remains uncertain, and repeat the check for any unit affected by a later revision.
Next step
Handing should be a documented design choice, not an assumption. For each hinged unit, begin with the observer’s perspective, then record its hinged edge and direction of movement. Sliding, folding and specialist windows need the relevant axis, panel route, mobile section or folded-stack position instead. Opening arcs on a plan test practical operation, while an elevation records divisions and sash layout. Consolidate these details in a register organised by unit reference, then reconcile it with the drawings and individual order lines. The result is one consistent basis for manufacture, ordering and installation throughout the project.
