
Flush or Raised Door Thresholds: Drainage and Floor Levels
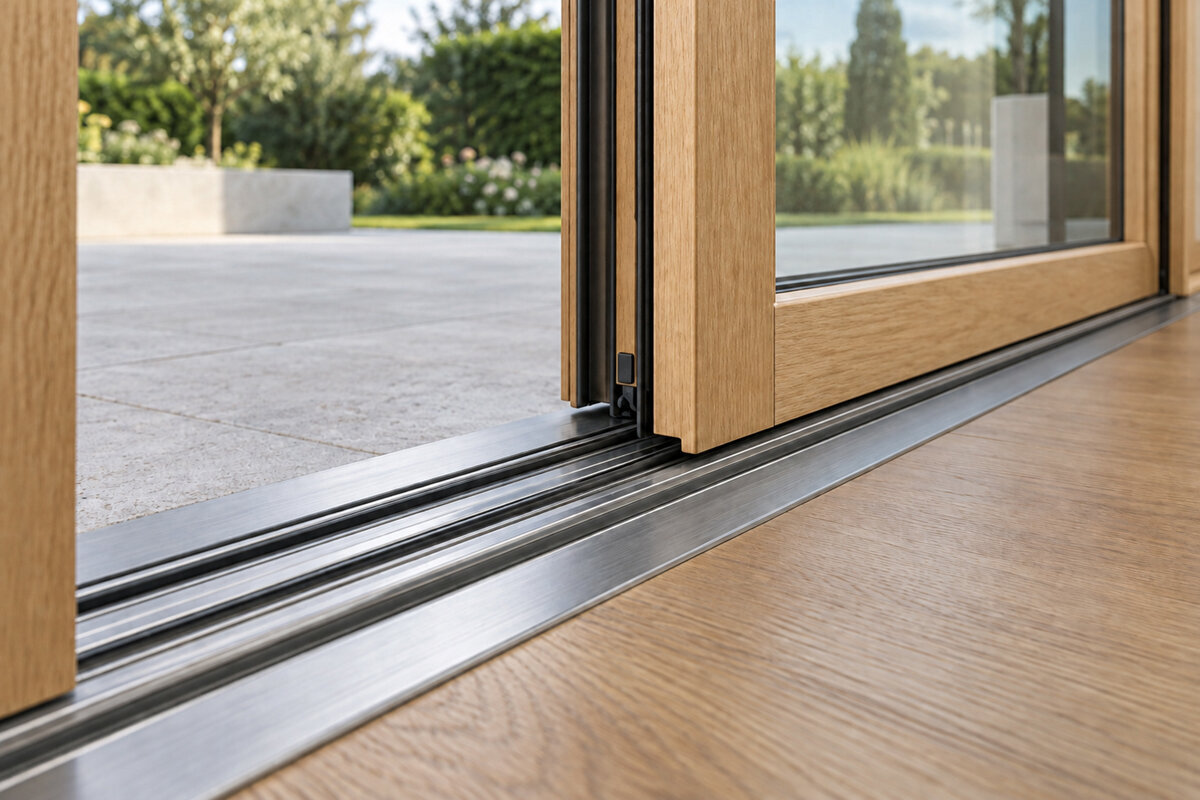
Comparing door thresholds
Threshold choices can remain unnoticed until the terrace, indoor flooring and door specification are already settled. Yet the finished room surface, outdoor paving, structural waterproofing and rainwater route all converge here. A nearly level crossing can feel comfortable and visually restrained, provided drainage and adjoining construction are coordinated with care. Raising the threshold produces an obvious step and leaves extra depth for resolving the junction, but changes both ease of passage and the room’s appearance. Appearance alone should not decide it; the whole assembly matters. Before configuring or ordering the door, review its type, the exposed elevation, the outdoor layers and planned finished heights in a logical sequence.
The threshold brings several trades together
An outside door is not just a meeting point between completed surfaces. Its structural opening, frame, waterproofing, insulation, screed, room finish, terrace construction and outdoor surface converge beneath and beside it. Every layer brings its own height, joint and installation stage, so threshold selection cannot be left to the door supplier alone. Considering only the exposed top edge may hide clashes until paving or flooring is fitted. Instead, prepare one section through the opening. Mark the completed indoor level, the intended outdoor height and the route carrying water away from the entrance. Using a single, clearly identified datum keeps structural, finishing and landscaping measurements aligned.
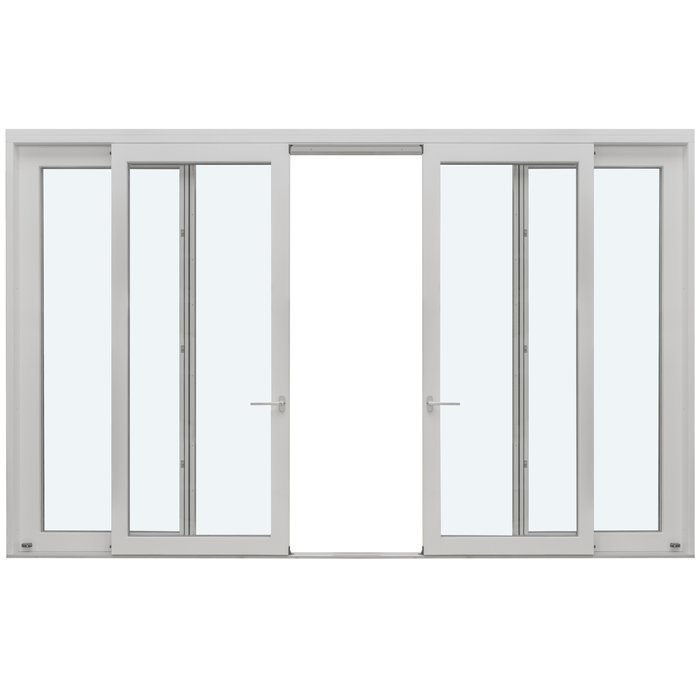
This coordination is especially visible with large glazed openings. A Patio Life door with lift-and-slide operation identifies the opening mechanism; the surrounding construction determines whether the crossing looks discreet or distinctly stepped. Along with the opening width and height, give the window supplier dimensioned levels for the completed surfaces on both sides. Show the outward fall, proposed drainage components and selected finish on the drawing. Mark every dimension as either verified or provisional. This turns a broad request such as “minimal step preferred” into a brief that the relevant specialists can test, rather than leaving several contractors to interpret the same wish differently.
Flush describes the transition, not an absence of planning
In ordinary conversation, level or almost-level access usually means that occupants do not notice an awkward step from the room onto the terrace. It may improve the outward view, ease furniture placement and make movement more comfortable. The frame, drainage and junction construction still remain, however. With little visible height available, the concealed water-bearing layers and floor details must operate as a coordinated system. Possible elements include a slim channel, a locally lowered surface or carefully arranged paving layers. Keep three ideas separate: the level seen by the eye, the height crossed underfoot and the structural levels below. Record each one unambiguously in the section because they may not coincide.
When aiming for a level crossing, begin with completed surface heights rather than the structural edge. A thicker indoor covering selected afterwards may reduce the available depth, while the outdoor substructure, adhesive and drainage layers can change it too. For a patio door with one leaf that opens inwards the swing area inside must also be considered: rugs, mats or furniture should not inadvertently interfere with operation or the lower junction. Ask specifically in the quotation which level refers to the frame, clear opening and finished surface. Also establish whether a shown line is a design level or an existing level already measured. This prevents two parties from working from different datums and discovering the error only after ordering.
A raised threshold makes use of level differences
A raised threshold establishes a deliberate change between the interior and exterior. Beyond giving a more traditional look, it can arrange dissimilar floor constructions in a legible way. Extra separation is often useful where the terrace is lower, its finish may be replaced later or the drainage junction needs additional depth. In an existing opening, it may also simplify working with an indoor height that cannot be altered. The compromise is equally clear: users feel the step and must account for it every day. Assess this practically by considering anyone carrying shopping or using a walking aid, buggy or serving trolley, together with how frequently the route is used.
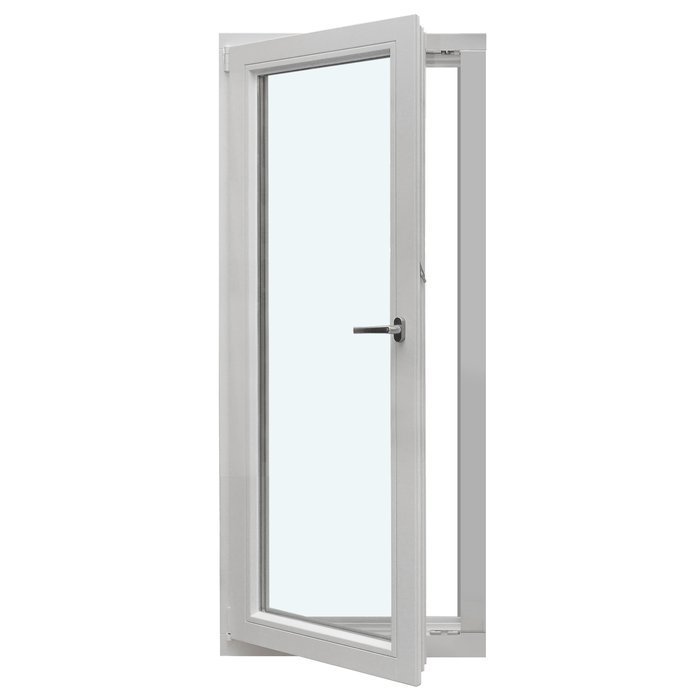
Even with added height, the paving cannot simply rise to the frame. Surface finish, waterproofing and runoff must be resolved together. A patio door with one leaf that opens outwards also changes how the space just outside works because the moving leaf needs an unobstructed arc. On a compact balcony or narrow terrace, that requirement can influence furniture, planters and paving edges. Ask for a section showing both completed surfaces and the door in its open position. Review the entrance under two conditions: closed during rain and fully open during everyday passage. This reveals whether the raised edge provides worthwhile construction tolerance or merely makes access harder.
Putting rain, wind and splashback in context
Exposure differs from one elevation to another. A sheltered loggia, a deeply covered doorway and an unprotected patio entrance will not meet rain and wind in the same way. Position, overhangs, nearby walls, the size of the approach and wind-driven water all matter. Ireland’s Atlantic influence brings generally cool, windy conditions, but exposure still varies by location and from year to year, so it cannot dictate one threshold type for every home. Where more water may reach the junction, prioritise an evident escape route, maintainable drainage and coordinated seals. At an existing property, inspect rain direction, splash marks and runoff from adjacent surfaces; these observations add useful context to the measured survey.
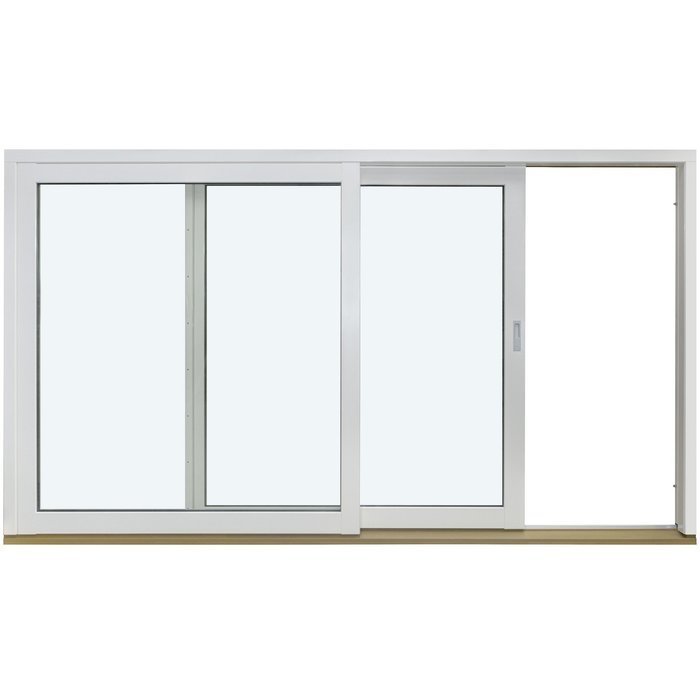
Do not plan water handling only for normal weather. Consider leaves in a channel, runoff from an adjoining surface and wind-driven rain when the door leaf is open. A sliding door moves laterally and may create a generous opening, yet its bottom guide still has to work with the drainage outside. Ask the designer or installer to trace the journey of water on the drawing: where it reaches the threshold, where it might gather, how it leaves and how the area will be maintained. Discuss the result if the planned outlet becomes blocked for a time. Credible detailing addresses routine rainfall and foreseeable vulnerable points during more severe exposure.
Plan falls and drainage away from the door frame
The finish outside the doorway contributes directly to water control rather than serving only as decoration. Its slope, joints, boundaries and junctions determine whether runoff travels towards or away from the opening. A channel may intercept water, but cannot compensate for an uncoordinated external construction. Position it where it can be reached, provide a defined discharge connection and allow for cleaning. Gravel margins, paving on supports and closed surfaces each behave differently. The specialist overseeing the external works and building junction should choose a solution suited to the proposed assembly. Draw the route beyond the channel as well, ensuring that discharge reaches an appropriate destination instead of transferring the problem elsewhere.
At a wide opening, the line in front of the frame is especially long, so small level differences can show across its full width. For Siegenia doors with sideways sliding action ordering should start with agreed survey dimensions and a section, not merely an inspirational terrace photograph. Decide how installation relates to each stage of the outside construction and allocate protection duties until completion. New finishes, exposed junctions and residual building moisture require a deliberate sequence. Nominate the person who will compare the height with the approved drawing immediately before fitting. This reduces the risk of a terrace contractor later improvising alterations to a threshold arrangement that has already been fixed.
Record internal floors, screed and external finishes as a level chain
A straightforward schedule of levels is the most useful decision tool. Begin at the structural floor indoors and list the insulation, screed or levelling course, adhesive and final covering in sequence. For the exterior, record the load-bearing substrate, water-resistant or separating courses, the drainage layer or supporting system, and the final surface. Then plot the frame and the required finish beside the doorway. The schedule shows whether the selected layers can deliver a shallow crossing or whether something needs adjustment. If a material remains undecided, label its final height as an unresolved design input rather than inserting an estimate as though it were confirmed. That avoids false accuracy in the order.
A typical conflict arises where a slim finish is planned inside but a build-up with a substructure or large-format paving is wanted outside. Instead of simply raising the external finish at the end, review the entire chain. With a patio door with two leaves that open outwards both leaves and the generous passage must be included in the height study; the terrace needs suitable finished levels as well as enough room for their travel. Supply the survey team with samples or precise thickness details for the finishes. State in writing which layer establishes the ordering datum and who must communicate revisions. “About level with the kitchen” is too vague to support a final order.
Opening type changes how the transition is used
Select the opening method and threshold as a pair. A hinged leaf limits how close curtains, plants and furniture may stand. Doors swinging indoors occupy room space; those swinging outside require a clear area on the terrace. Sliding systems, including lift-and-slide designs, remove the sweeping movement but introduce requirements for the guide, operation and integration with the floor layers. Wanting a shallow threshold does not answer how the entrance must function: perhaps only for ventilation, perhaps as the usual garden access, or as a broad opening when entertaining. Consider whether users will have both hands available and from which side they normally operate the door. Repeated movement patterns may deserve greater weight than the elevation alone.
Test movement directly on the floor plan. Add the open leaf, trace someone carrying a tray or pushing a buggy, and mark any indoor rug. For an external door configured to open outwards keep the sweep free from steps, unsecured mats and permanently stored objects that could create a tripping risk. Consider which leaf or side will be used during rain and whether an overhang or porch changes the arrangement. Where space is tight, plot the handle, balustrade and neighbouring walls as well. This practical exercise often reveals more than a product photograph when deciding whether everyday use favours a shallow crossing or a visibly separated junction.
Refurbishment: expose and assess existing junctions first
New construction allows heights to be coordinated early; refurbishment begins by establishing the existing build-up. Old coverings can conceal mixed layers, previous repairs and unexpected junction positions, while adjacent rooms may already fix the indoor floor height. If the door and terrace are both changing, treat them as one scheme. Measurements taken only from the visible opening cannot establish the detail that will be possible after removal. Survey the existing condition before committing to the door, finishes or drainage. If concealed construction could determine the solution, ask the responsible specialist whether selective opening-up or additional investigation is warranted. Clearly identify every assumption made about layers that have not been seen.
A fully level transition may still be possible in refurbishment, but could require changes to the external build-up or internal floor. Conversely, retaining an existing level difference can be sensible where it preserves sound junctions and keeps work manageable. With an entrance door with an infill panel opening outwards the same sequence applies as at the terrace: the product defines the door configuration, while the suitable threshold and junction detail follow the real installation conditions. Record photographs, dimensions, finish edges and visible damage before work starts. Identify images as internal or external and place a scale beside them. This helps contractors relate proposals to the same starting point rather than different assumptions.
Maintenance begins with accessible details
Correct positioning alone cannot keep drainage effective indefinitely. Leaves, earth, grit and ice may accumulate in channels, outlets, joints or beside the frame. With a visually discreet threshold, ponding may be the first sign of a blockage. Provide practical access for inspection and cleaning. Find out whether covers lift away, where debris is likely to settle and who is expected to maintain the area. Thick outdoor mats and planters placed close to the entrance may also interrupt runoff. Inspection frequency should reflect the setting: locations beneath trees, on exposed elevations or near recent building work may need attention sooner than a protected, regularly cleaned doorway.
Care extends to the room side as well. Water carried in on footwear or used for cleaning should not remain against vulnerable junctions. Avoid loose accessories that may impede either door travel or drainage. Through the seasons, watch for movement in the exterior finish, settled edges and altered joints. Following exceptionally heavy rain, inspect the route to confirm that water can still pass freely. Such checks cannot substitute for specialist judgement, but they can highlight small defects before they worsen. The best threshold is not necessarily invisible; its drainage path, maintenance access and routine care should be readily understood by the people using it.
Make a sound decision with a complete enquiry pack
Request quotations after assembling the principal project information: opening dimensions and direction, indoor and outdoor photographs, a plan, proposed completed floor heights, finish-layer details, drainage location and intended use. Explain whether the outside surface exists already or will be newly built. Rather than asking only for a shallow threshold, request a junction proposal suited to the levels and exposure. List matters still awaiting a decision, such as paving thickness or the programme for terrace work. The specialists can then point out competing requirements and specify which inputs must be settled for the survey or, at the latest, before the design is approved.
Compare proposals on more than door appearance. Ask which height datum each supplier used, what the door package covers, what remains for the flooring, waterproofing or landscaping trades, which details must precede ordering, and who signs off the final survey. Have inconsistencies between quotations explained instead of judging them only by the exposed threshold height. Where appropriate, engage a suitably qualified designer or installer to assess the junction and its fit with the project. Bloomcabin gives windows and doors a five-year guarantee; usual delivery is four to six weeks after the order is confirmed. Neither detail removes the need to coordinate the threshold and neighbouring construction in good time.
Common questions
Is a flush door threshold always the better option?
No. It can make passage pleasant and the room feel open, but needs particularly precise coordination of levels, water management and junctions. At a highly exposed or structurally complex opening, a raised threshold may offer more planning flexibility. The installation situation, daily use and complete junction concept remain decisive.
May the terrace be designed after door fitting?
Construction may happen later, but the terrace design belongs in the process before the door order is final. Its finish, build-up depth, fall and drainage shape the junction directly. Without those inputs, neither the correct outside level nor its connection to the threshold can be determined reliably.
What measurements should I bring to the site survey?
Bring structural and opening measurements, the completed indoor floor height, details of the intended outside construction and images taken from each side. Record the opening direction, drainage and features such as canopies. A section using one identified datum communicates more than unrelated measurements.
Does every low threshold need a drainage channel?
No. The appropriate means of receiving and routing water depends on the outdoor finish, slope, exposure, junction construction and wider drainage arrangement. A channel is one option, not an automatic requirement. Ask the responsible specialists to design and explain the entire runoff path for the particular opening.
What else should be checked for outward-opening doors?
Keep the door’s full sweep unobstructed when open. Account for furniture, pots, steps, mats and runoff across the terrace. Wind and rain can make the chosen swing direction more or less convenient in practice. Mark the arc, handle and walking route on the terrace drawing.
Next step
Whether the crossing is level or raised, a suitable threshold comes from coordinated heights and drainage, not a single door feature. First draw the indoor floor, frame and outside construction in section. Then review exposure, runoff, opening method and routine movement. Added height can organise differing levels clearly, while a shallow crossing works best when every junction is prepared consistently. Before the survey, confirm the finished surfaces, the datum used by all trades and ownership of the connection work. The chosen door can then support the intended transition without forcing late compromises in paving or the building junction.
