
Garden shed assembly tools: a practical checklist
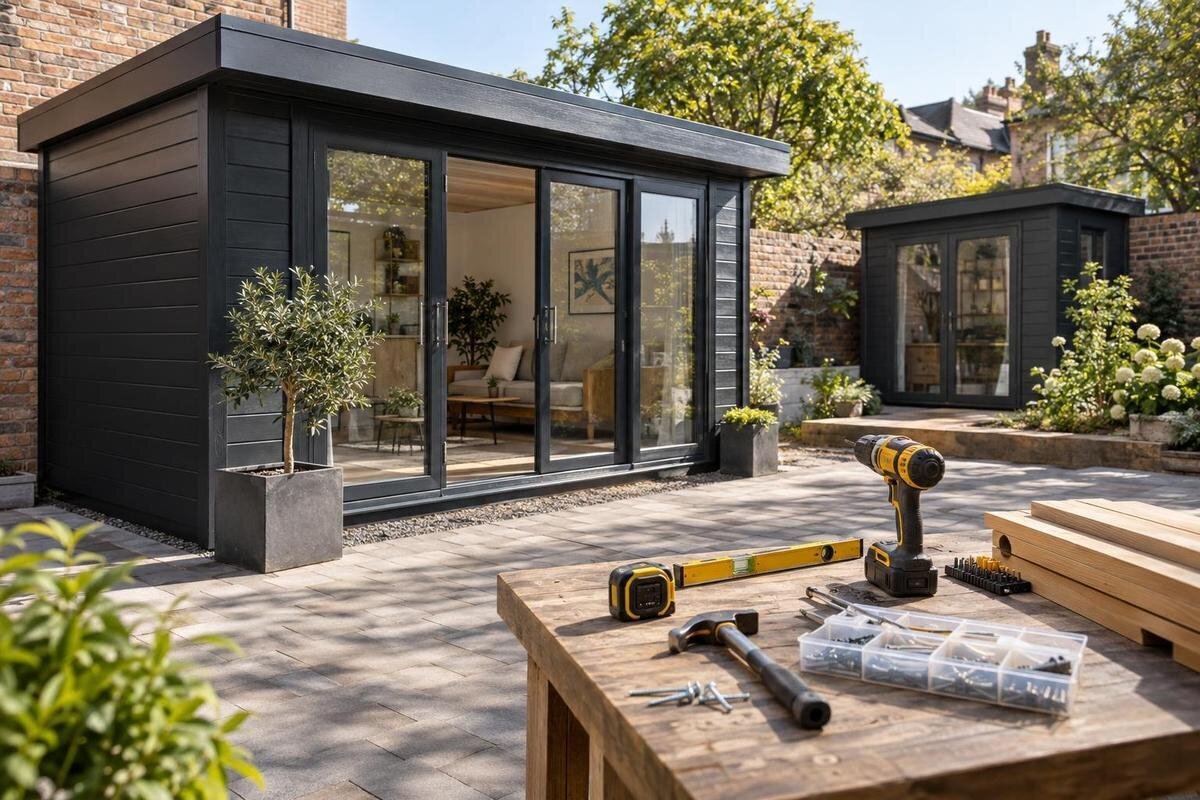
Garden shed assembly
Putting together a garden shed is easier to organise when the right tools are ready, but a generic list is only a starting point. The equipment depends on the assembly instructions, the fasteners supplied and whether the job calls for hand tools or a drill/driver. Use this checklist to decide what to borrow or buy, confirm the requirements for your chosen model and arrange the work area before you open the kit.

Before you buy tools 1
Use the instructions for your exact shed
Start with the assembly guide for the exact model, not a shopping list written for garden sheds in general. Look for a tools or preparation section and note every named item: screwdriver type, bit size, measuring aids and consumables. A product name or photograph does not reveal what fasteners or tools are required. If you are comparing the Verdana 1 garden house, use assembly information for that model when preparing your list; do not transfer requirements from a different shed just because the products look similar. Record whether each item is essential or optional. If the build is divided into stages, note when each tool is needed and keep each entry specific; writing only “drivers” may leave the important bit type unclear.
Make three columns—required, optional and unclear—and check each line against the kit’s stated contents and the tools you already own. Write down sizes and quantities exactly as given, especially for bits and measuring equipment; a broad label such as driver does not identify a suitable fitting. This sort-out can stop you buying a full new set when one attachment is all you need, or overlooking a small consumable. If instructions are not available before purchase, ask the retailer or manufacturer how to obtain model-specific guidance and what equipment is expected. Keep the reply with your order details and check those same requirements again before assembly.
Check what the kit includes before buying tools
Before buying anything, separate the shed kit from the tools you must provide. Read the product information and contents list for the exact model, checking which parts and fittings are included and whether any tools are explicitly required or excluded. A photograph of a completed building is not a kit inventory, and a list of fixings is not a list of equipment. For the Verdana 2 garden house, as with any model, match the requirements to that specific choice rather than assuming another version has an identical pack. If access to assembly information affects your purchase, ask how to obtain it before placing the order.
When the kit arrives, use its packing list to confirm the supplied parts and keep this separate from your personal tool checklist. Mark each required tool as owned, borrowed or still to source; this makes purchase planning more precise and can show where one tool might cover several tasks, if the instructions allow. If a separate tool set or accessory is mentioned, confirm whether it is included in what you are ordering rather than assuming the word kit covers it. Do not budget for replacement fixings or extras just because they might be useful: first establish whether they are specified. If something is unclear, ask whether it is a component supplied with the kit or a tool you provide.
Before you buy tools 2
Hand tools for fastening
Keep the hand tools named in the guide together and choose them for the fasteners in the kit. A hand screwdriver is useful where instructions call for controlled tightening, while an interchangeable set can cover different heads only if it includes the correct type and size. Fit the tip properly rather than pressing a near match into a screw; a slipping driver can damage the head and make later tightening difficult. If you are considering the Durano spacious garden shed, check the equipment against its own assembly guidance instead of assuming one screwdriver set suits every shed. Note the tool names exactly as written, including any distinction the guide makes between a driver and a drill.
Other hand tools, such as a spanner or pliers, belong on the list only if the guide calls for them. If a size or type is specified, copy it rather than taking a vaguely similar tool from a mixed toolbox. A small tray or dish is not a substitute for a tool, but it helps keep the fasteners for the current step in view. Put each tool back in the same place after a stage, and do not use a screwdriver as a pry bar or pliers as an improvised fastener tool. Such substitutions can damage parts or give you poor control. Keep the common tools within reach without placing them on components.
Measuring and marking tools
A tape measure, pencil and square are useful for reading and marking dimensions when the instructions call for those checks. Use the units shown in the guide and measure from the reference point it names; do not assume a drawing is to scale. A square can help you compare a corner or mark a straight reference, but it does not decide where a part should go. When checking the Veltor 1 garden house, base any measurements on its actual instructions rather than a generic diagram or the model name. Keep the tape and pencil beside the manual, and jot down a reading if you will need it again rather than relying on memory.
Mark only where the instructions allow, using a pencil or a removable label on packaging when a note is needed. Avoid making permanent marks on finished surfaces unless the guide identifies a marking point. Before a measurement-based step, read the sentence and diagram together, then check the figure against the part labels; this helps prevent working from the wrong panel or dimension. Do not cut, drill or alter a component because a mark seems necessary if the assembly guide does not ask for it. If two measurements seem inconsistent, stop and check the instructions or request clarification rather than adjusting the part by guesswork.

Before you buy tools 3
Drill/driver, bits and battery
A drill/driver may or may not be required, so check the instructions before borrowing or buying one. Where a powered driver is specified, note the exact bit type and size and match it to the stated fastener. A general-purpose assortment is not useful if it lacks the fitting you need, and a worn or poorly fitting bit can slip. If you are considering the Orello 1 garden house, use the relevant model guidance to establish whether a powered tool is needed; do not infer that from the product title or image. Include any listed hand screwdriver as well, and do not assume a drill is needed simply because the kit has many fasteners.
If your tool is cordless, check the battery and charger ahead of time, and confirm a borrowed tool comes with a compatible battery. Keep the specified bits beside it rather than searching for them midway through a step. Follow the tool maker’s instructions and the shed guide for how to use it; do not apply more force simply because a fastener is slow to turn. Stop if the bit slips, the head does not match or the part will not seat as described. Recheck the specified bit and the sequence before continuing, using a manual driver where the guide permits.
When a level or square is needed
A spirit level or square can be useful when the assembly guide asks you to check alignment, but neither needs to be bought automatically for every shed. Use the reference surfaces and check points named in the instructions; testing a different edge can give a reading that is irrelevant to the step. For the Modano 1 garden house, as for any model, the assembly guide—not the model name—determines what checks and tools apply. Keep the level clean and easy to read, and set it down where it cannot be knocked off the work area. Treat it as a measuring aid, not a method for redesigning a base.
A tape measure may be needed for a comparison only if the guide specifies the points to measure. Record the reading in the stated units and avoid estimating distances from a printed picture. A level can show whether a surface appears level relative to the tool, but it does not explain how to correct a prepared base; this checklist is not an engineering plan. If components fail to align or the instructions seem inconsistent with the work area, pause and seek model-specific guidance rather than forcing a fit or calculating an adjustment. The aim is to have the right checking tools available, not to make structural decisions from guesswork.
Before you buy tools 4
Protective equipment belongs on the checklist
Put personal protective equipment on the checklist as well as tools. Eye protection may be appropriate for tasks that can send dust or small particles into the air, while sturdy footwear helps protect feet around stored components. Gloves can be useful for handling parts, but they should not interfere with grip or safe operation of a rotating tool; follow the equipment makers’ advice. Check whether the shed assembly guide names any task-specific protection. For the Garden Tool Shed M, as with any model, the product name does not tell you which PPE to use; base that decision on the actual instructions and the tools planned. Choose items that fit securely and keep loose clothing, jewellery and hair clear of moving parts.
If the tool list includes a noisy powered tool, check its instructions for any additional protective equipment rather than assuming eye protection is all that is needed. Keep the work area bright enough to read markings and small fixings, and make sure the floor is clear so a tool or loose item is not underfoot. Where access equipment is needed, use equipment intended for the task and follow its maker’s directions; do not improvise a raised platform from boxes or stacked materials. These are planning checks, not a replacement for the safety guidance supplied with a tool or kit. Keep the relevant instructions available before you start.
Keep fixings and tools organised
Small parts are easy to misplace when packets are opened together, so plan a simple sorting method before starting. Use separate trays or containers and keep fasteners grouped by packet or instruction step; a label can point back to the part number in the guide. Do not mix similar-looking pieces just because they seem interchangeable. If you are considering the Garden Shed S, keep notes and tool lists for that model separate from any other kit you may be planning. The aim is to keep the right instructions, fasteners and bits together, not to assume the model uses a particular set. Leave unopened packets together until the relevant step.
Lay out only the tools needed for the first part of the job, with the rest nearby but out of the working path. A tray for bits, a marked container for fasteners and a clear place for the instructions are often more useful than spreading every tool on the ground. Put away each item after the stage where it is used, and return open fastener packets to their labelled container during breaks. This routine makes it easier to notice if a tool is missing and cuts down on repeated searching. Keep tools off panels and components so they are not hidden beneath parts or knocked over; a written tick-off can show what is still needed.

Before you buy tools 5
Set up a clear work area
Choose the assembly area with the tool work in mind: allow room for the tools and instructions, provide enough light to read small labels, and set aside a clean, stable surface for organising loose components. The space needed depends on the kit and its assembly directions, so do not use the finished building’s footprint as the only guide to clearance. Keep walkways open and set tools somewhere they cannot roll or be covered by parts. If the work area is outdoors, plan to protect instructions, loose fasteners and power tools from wet conditions. This is workspace preparation, not guidance on designing a base.
Check for small consumables only after reviewing the list. These might include a pencil, removable labels for packets or a replacement driver bit of the specified type, but none should be treated as universal requirements. A clean cloth or protective sheet may help keep the area tidy if it will not obstruct or mark components. Make sure any battery-operated tool is ready if the instructions call for it, and keep its charger and accessories together. Do not stock up on extra fixings or adhesives on the assumption that every shed needs them; use only items named or approved in the model-specific guidance.
Check tool condition before and after assembly
Before starting, run through a physical tool check: compare your list with the instructions, confirm the correct screwdriver and driver bits are present, and make sure measuring tools are available if called for. Look over handles and bits for obvious wear or damage, and make sure a cordless tool has a charged battery if the guide requires it. Put on the planned PPE and keep the manual where you can consult it. If a required item is missing, resolve that before beginning rather than stopping mid-step to improvise. For borrowed tools, check that the necessary attachments are included as well as the main tool.
When you pause or finish, return tools to their place and count borrowed equipment back in; it is easy to leave a bit, tape measure or small hand tool among the packaging. Keep the manual, your notes and any unopened or unused kit items together until you have confirmed what belongs to the project. Store tools and batteries in line with their own instructions, and update the checklist if an approved alternative was used. A tidy final inventory makes later maintenance or adjustments less dependent on memory and leaves the assembly area free of loose equipment.
Frequently asked questions
Do I need a drill/driver to assemble a garden shed?
Not always. The instructions for your chosen model may specify hand tools, a drill/driver or particular bits. Check them before borrowing or buying equipment. Do not assume a powered tool is required simply because the kit includes fasteners.
Can I use the tools I already own?
Yes, if they match the types and sizes named in the instructions and are in good condition. Compare each required item with your own tools; a large assortment does not guarantee it includes the specific screwdriver bit or measuring aid you need.
Should I buy tools before ordering the shed?
First check whether assembly guidance is available for the model you are considering, then compare its requirements with what you own or can borrow. If the information is unclear and affects what you would need to buy, ask the retailer or manufacturer before ordering.
Is a spirit level always required?
No. Use one when the instructions call for a level check or list it as a tool, and follow the reference points given. A level does not explain how to correct a prepared base, so do not use it as a substitute for the relevant guidance.
What should I do if a driver bit slips?
Stop rather than pushing harder. Check the fastener type and the bit specified in the instructions, and look for visible wear or damage. If the mismatch remains, seek model-specific advice instead of substituting a similar-looking fitting or altering a component.
A useful garden shed assembly tools checklist comes from the instructions for the exact model. Separate supplied parts from the equipment you provide, record specified bit sizes and mark each tool as owned, borrowed or still to source. Then organise the tools and fixings so they are easy to find, and check their condition and your work area before starting. That keeps preparation focused and avoids assuming that a generic list suits every shed.
