
Growing Broccoli in a Greenhouse
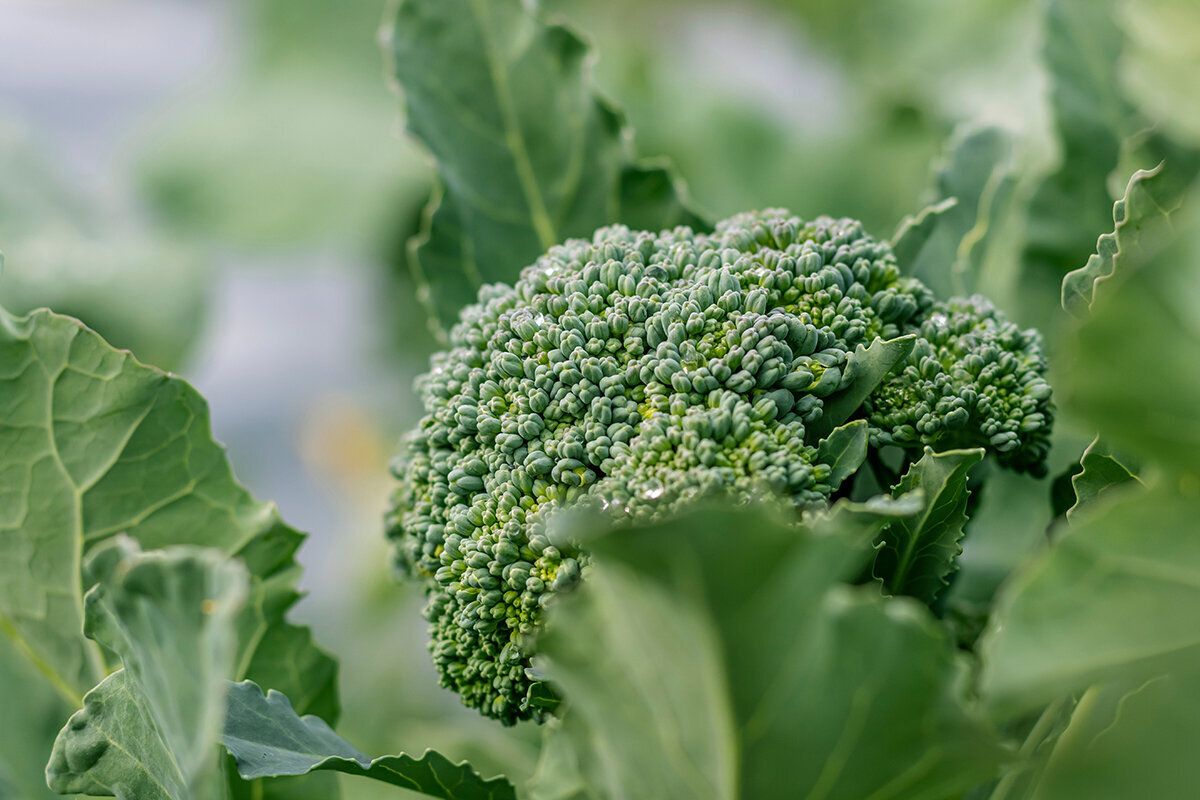
What the crown reveals
Broccoli Growing Under Glass
A dense, deep-green head records the plant’s growing history. Missed watering, sudden warmth, cramped roots and a late cut can all be read in the finished buds.
Broccoli earns its greenhouse space during Ireland’s cooler growing periods, but the structure should temper the weather rather than trap heat. Start with sturdy plants, reserve room for mature foliage and vent moisture before humid air settles around the crowns.
Most suitable seasonsThe cooler weeks of spring and autumn
Room between plants50–60 cm per plant
Seedling temperature guideRoughly 18–21 °C during propagation
Main threatHeat and trapped humidity as heads develop
01 · Cool conditions, actively managed
Broccoli gains protection from a greenhouse, not a warmer climate.
How the system works
Glazing, vents, doors, temporary shading and measured watering can moderate abrupt changes outdoors. The aim before head initiation is an evenly established, vigorous plant, rather than lush leaves hurried along by excessive warmth.
Broccoli is a cool-season brassica that performs best without sudden checks. Regular moisture, vigorous young plants and restrained temperatures during bud formation encourage tight crowns. A greenhouse gives useful control over these factors, but excess warmth still works against the crop.
02 · Match the type to the space
Pick a broccoli form that suits the bed and its seasonal role.
Days to maturity may dominate the seed packet, yet greenhouse growers should also compare the finished head, the spread of mature leaves and the variety’s potential for producing shoots after the first cut.
Compact heading form
Crop ready earlier
Brief season · less bed space
Sprouting broccoli
Repeated small harvests
Tender shoots · extended picking
Calabrese
Substantial central crown
Wide canopy · ample clearance
Quick-maturing heading forms
These varieties suit a brief spring crop before the bed is reassigned to tomatoes or cucumbers. Their yield centres on the main crown. Harvest as soon as the clustered buds are tight and unopened; how many secondary shoots follow varies with the cultivar.
Branching sprouting forms
Rather than concentrating growth in one large crown, sprouting broccoli supplies numerous smaller shoots over time. This works well for frequent modest pickings. Its branching frame can become crowded, so maintain a route for air and examine the plants regularly.
Full-sized Calabrese forms
Traditional blue-green Calabrese commonly develops a strong central crown before producing smaller shoots. Its foliage occupies considerable room. Summer planting may position the important head-building stage in cooler autumn weather, provided the variety is appropriate for that intended cutting period.
For a simple first greenhouse crop, select a robust heading cultivar labelled for the intended season. To extend picking, add several sprouting plants separately instead of forcing unlike types into one timetable. Retain each packet or label until harvest, since the variety name and season help explain unexpected timing or crown shape.
03 · Quality begins at transplant stage
Aim for youthful, robust plants rather than starts held past their prime.
A broccoli transplant may still look tidy after its roots have filled the cell. Do not leave it confined merely to make the planting date more convenient. Ageing, stressed or tightly bound plants have a higher risk of making undersized crowns too soon, a response growers call buttoning.
Sow one seed in loose propagation compost and add a covering only a few millimetres deep using the same compost. Keep the mix evenly moist without saturating it. As soon as seedlings emerge, place them in bright light at a noticeably cooler temperature. After the first true leaf develops, light feeding is preferable to a rich dose that forces soft growth.
Begin gradual hardening once the plants carry several proper leaves and lift with a stable rootball. Greenhouse shelter eases the change but can disguise sharp contrasts: sunshine may heat the glasshouse swiftly even though the following clear night is very cold.
The route from seed to crown
01
SowingFresh compost; cover lightly.
02
GerminationStrong light; mild air circulation.
03
Move to a larger potMake space for root growth.
04
AcclimatiseIntroduce exposure in stages.
05
Plant outSet at mature spacing and water thoroughly.
Before shoots appear, keep the compost consistently damp without leaving it sodden. Supply bright light immediately after emergence. Soft air movement helps stems stay short and sturdy while reducing the time that droplets remain on the leaves.
Shift plants before roots form tight circles. Where practical, lift seedlings by a leaf rather than the stem. Across several days, expose them progressively to stronger light, more moving air and wider temperature variation, taking care that the compact rootballs never dry out.
Plant readiness matters more than a simple count of weeks. Choose firm, actively extending transplants with several proper leaves, a compact root mass and a youthful habit. In Ireland, suitable dates vary with exposure, daylight, frost risk and conditions inside the greenhouse. Work backwards from the chosen harvest period, allowing both the variety’s stated development time and the propagation stage.
04 · Use spacing to manage the microclimate
Lay out the bed for the final canopy, not the newly planted starts.
A bed can look sensibly planted at first yet become overcrowded later. Small transplants disguise their eventual spread. Once the broad blue-green foliage meets, humidity lingers around developing heads, routine checks become difficult, and competition for moisture, nutrients and sunlight intensifies just when the crowns are forming.
Treat 50 cm as the working minimum for compact plants where a row receives good air exchange. Widen that clearance up to 60 cm where cultivars grow large, the autumn crop remains for longer, or humidity escapes slowly. Allow about 60 cm between rows as a dependable guide. Include paths and ventilation lanes in the layout: space that seems generous beside a young plant becomes important when the leaves reach full spread.
Keep both ends of the row reachable. You need to see beneath leaves, test dampness below the soil surface and cut the main head without leaning across the crown of an adjoining plant.
A bed arranged for air and access
Air entering the house
Unobstructed vent corridor
Unobstructed vent corridor
Planted broccoli line
Leaves kept open
Leaves kept open
Route for cutting
Firm, dry footing
Firm, dry footing
Keep the tallest plants away from the air route linking the door and roof openings. In a slender greenhouse, one roomy row reached from either side generally functions better than a pair of narrow beds squeezed against the path and glazing.
Container production is possible, provided each specimen has a sufficiently large, deep pot and fertile compost that remains structurally sound. Leave about 50 cm between plants. Sunlight warms pots and depletes their water reserve faster than it does a soil bed, making more frequent moisture checks necessary.
05 · The greenhouse as a climate room
Good crowns come from a steady pattern, not one ideal thermometer reading.
Broccoli tolerates cool weather, but the developing head responds poorly to stored heat and uneven soil moisture. Aim for bright, cool days with air moving through the foliage. A workable propagation range is 18–21 °C . During head formation, remove surplus heat whenever the season allows. On sunny mornings, begin ventilating before any leaves start to wilt.
Prolonged temperatures around or above 20–22 °C, coupled with uneven watering, may produce coarse, loose or early-maturing heads. Small glasshouses can reach this level before outdoor air feels hot. Place a maximum–minimum thermometer among the leaves to catch spikes. The Bavarian Garden Academy’s guidance for small greenhouses advises ventilation openings totalling at least one quarter of the floor area; Irish wind and site exposure still require judgement.
Pressure ↑Crop stage →
Severe
Growth checked
Buds separating
Flowers opening
Moderate
Irrigate
Increase air exchange
Make the cut
Light
Growth even
Crown beginning
Buds compact
A routine for daily air exchange
- Early in the day
- Open roof lights and the doorway before sunshine stores excessive warmth inside. Confirm that air is travelling through the crop, since one slight gap often has little effect in a greenhouse crowded with foliage.
- Around midday
- Reserve shading for unusually fierce, sunny conditions and apply it with restraint. Broccoli requires plentiful light, but neither a heated crown nor sluggish roots. Thoughtful crop timing and active venting usually accomplish more than continually darkened glazing.
- Towards evening
- Ahead of a forecast cold night, adjust openings without sealing damp leaves inside. Let the crop surface dry before darkness whenever conditions allow, and avoid directing an abrupt stream of cold air straight across the plants.
- Once watering is finished
- Allow surplus moisture to leave through effective venting. Persistent condensation, soaked foliage and a continually wet path are poor substitutes for genuine greenhouse cooling.
06A · Managing water
Maintain dependable moisture throughout the active roots.
Alternating dry soil with saturation checks steady broccoli growth. Between planting and harvest, keep the active rooting layer moist, oxygenated and consistently supplied. Water deeply enough to reach below the topsoil, then schedule the next application by examining the soil and considering current weather and plant growth.
Because the crop is covered, rainfall does not reach its roots, while sunlight, ventilation, soil type and pot size continually alter demand. Examine moisture within the rooted depth by hand or with a trowel. Drip irrigation or careful watering at soil level leaves heads and foliage drier than overhead spraying. Morning application also allows humidity to clear before night.
06B · Supplying nutrients
Build growth consistently instead of feeding in sudden pulses.
Broccoli is demanding, yet abundant nitrogen cannot replace healthy roots, adequate light, steady water or suitable temperatures. Where possible, start with a soil test and a mature, well-structured bed. Fully rotted compost improves structure and moisture retention; keep fresh manure away from the crop. Base the feeding programme on the soil’s existing condition instead of using a universal maximum dose.Let soil information lead Use the test result and observed plant growth to decide whether more feed is needed.
A moderate feed once plants are established may prove useful. After the central crown is removed, a further light application can support side shoots when the plant remains healthy and soil conditions warrant it. Avoid sudden heavy feeding: excessive nitrogen, fast extension and generous spacing can combine to encourage hollow stems. Do not add individual micronutrients merely on suspicion.
Water supply and fertility exert their strongest combined influence while the crown gathers. Plants that have not repeatedly stopped through thirst or shortage enter this stage better equipped to form uniform, closely packed buds.
07 · Interpreting crown development
Compact heads are prepared long before harvest day.
A broccoli crown is composed of numerous unopened floral buds. Its quality is determined before the familiar head becomes visible. First, the plant must develop ample foliage and a root system able to supply water and nutrients steadily. When its stage of growth, cultivar and weather align, the central growing point changes and arranges the buds into a compact cluster.
A defect seen near harvest may therefore trace back much further. A tiny crown on a small plant often follows confinement in a pot, temperature shock, dry compost or disturbance during transplanting. By contrast, coarse spreading buds or yellow flowers tend to indicate a later episode of excess warmth, inconsistent moisture or delayed cutting.
Before the crown startsBuild foliage at a lively but balanced rate. Young plants require room, aerated roots, dependable water and nutrition applied with restraint.
As the crown initiatesReduce fluctuations inside the greenhouse. Prevent heat accumulating, avoid lapses in moisture and do not make sudden changes to feed strength.
While the buds are sizingPreserve an air channel around the head. Inspect frequently and cut while every bud remains firmly shut rather than sacrificing texture to gain a few more centimetres.
08 · Reading warning signs
Crown symptoms point back to an imbalance in the growing routine.
Do not answer every flawed crown with one routine treatment. Read the symptom against the plant’s age, condition of its roots, temperature history, watering pattern and airflow. The initiating stress may predate the visible damage by weeks.
Crown appearing too soon
Buttoning
Undersized plant.
Buds becoming coarse
Crown opening
Warmth or water stress.
Buds turning yellow
Moving into bloom
Cut without delay.
Cavity in the stem
Stress during rapid growth
Reassess the growing record.
An undersized crown formed early
Buttoning
What may have happened: Growth of the young plant was interrupted by factors such as prolonged confinement, cold or heat, insufficient water, inconsistent nutrition or transplant disturbance. Crown production began before enough foliage had developed.
Lowest-impact action: Harvest the usable little head. Before sowing again, review propagation timing, root condition and the planting date. Heavy feeding now cannot reliably reverse the existing plant’s switch from leaf growth to crown formation.
Separating or enlarged buds
An increasingly open surface
What may have happened: Likely factors include heat while the crown was forming, stagnant humid air, irregular watering, an abrupt growth burst or late harvesting. The separate buds stand out more clearly as the tight, finely textured head begins to loosen.
Lowest-impact action: Vent earlier whenever sunshine starts warming the house, keep the rooting layer evenly damp and avoid sharp increases in fertiliser. If the crown is ready, harvest promptly rather than waiting for the first flowers.
Yellow flowers or a yellow cast
Crown advancing towards bloom
What may have happened: The crop matured more quickly than it was being checked and harvested. In warm conditions, firm green buds can elongate and open within a short period. This usually indicates that the cutting window was missed, rather than establishing that the plant is diseased.
Lowest-impact action: Cut the head at once. Healthy stalk, buds and flowers can still be eaten, although quality and texture are better while the cluster is closed. During warm spells, inspect the remaining crop daily.
Brown tissue or a hollow stem
Stress within the plant
What may have happened: Irregular watering, unusually vigorous extension, surplus nutrients, wide spacing, varietal sensitivity and imbalanced micronutrient supply can interact. A hollow section surrounded by firm stalk is usually a quality defect, not proof that the food is unsafe. Remove soft, rotten or discoloured material with a generous margin.
Lowest-impact action: Arrange a test of the bed or compost rather than applying a particular micronutrient on guesswork. Bring both watering and feeding back to a stable pattern. At harvest, trim away damaged or decayed portions and clean the equipment used.
09 · A calm, regular crop check
Early signs of caterpillars, aphids and excess damp are easy to miss.
Greenhouse cover blocks some weather, not every pest. Cabbage-white and moth caterpillars can slip through doors or vents and conceal themselves in folds beside the crown. Aphids gather on tender tips, whereas flea beetles make pinholes in young foliage. Check the crop no less than twice weekly, with extra inspections in warm weather and during crown formation.
Begin with the most localised, least disruptive response. Pick off solitary caterpillars, wipe away limited aphid colonies or knock them from sturdy leaves with a directed water jet. Remove badly infested pieces and spent brassica remains from the greenhouse. Insect mesh can help only if adequate ventilation is retained. If a pesticide is required, Irish home gardeners must select an Irish-authorised product approved for amateur use on that crop and purpose, and observe every label direction, including any stated harvest interval.
Humidity control is also practical disease prevention. Maintain the planned gaps, apply water at ground level rather than over the crown, and remove dead leaves. Low outdoor temperatures do not justify closing every vent immediately after watering.
A quick five-minute circuit
- Check beneath the foliage for eggs, caterpillars and aphid colonies.+
- Part the leaves gently, confirming that surfaces are dry and air reaches the centre.+
- Test moisture several centimetres down before watering; a dry surface alone is not dependable evidence.+
- Inspect young crowns for widening buds, yellow marks and caterpillar droppings.+
- Take damaged leaves out of the house instead of abandoning them beside the walkway or propagation bench.+
Wait a number of years before growing broccoli or related brassicas again in that bed. A long rotation substantially reduces pressure from pests that overwinter and diseases carried in soil. Apply the same principle to permanent greenhouse beds and outdoor vegetable ground.
Where the knife should pass
Central crown
Closed green flower buds
Closed green flower buds
Position of the cut
Clear of the lower axils
Clear of the lower axils
Lower leaf joints
Keep these undamaged
Keep these undamaged
Later branching shoots
Retain their buds
Retain their buds
Making the cut: Harvest when the central head has reached a useful size but every bud is still tightly closed. In the cool of morning, use a clean, keen knife and retain a generous length of stalk. Position the cut above strong lower leaf axils, leaving the rooted and healthy rest of the plant in place.
Care after the first harvest: Many Calabrese and sprouting cultivars produce smaller secondary stems from buds retained in the leaf axils. Continue watering evenly. A light supplementary feed may support this second crop when it accords with the soil condition and previous feeding programme.
10 · Cut while the crown is ready
Harvest the main crown, then leave side shoots to develop.
Do not chase supermarket size once the surface starts loosening. Judge readiness by tightly folded buds, a firm head and tender texture rather than maximum diameter. The prime stage is over when buds elongate or show yellow. Inspect daily in warm weather, as a compact green crown can progress rapidly towards open flowers.
Later shoots are an especially useful glasshouse crop: tender, modest in size and convenient for individual meals. After removing the centre, continue reliable watering, take off only diseased foliage and protect the air route. Gather each shoot while its buds remain closely grouped.
Cool the harvested broccoli promptly; a heated kitchen will reduce its quality. In the refrigerator, provide a humid environment without leaving free water on the crop. Use it soon after cutting, because retained warmth rapidly reduces both tenderness and fresh flavour.
For practical walkways, effective roof venting and productive cool-season beds, consider the Classic Aluminium Greenhouse by Bloomcabin. Its adaptable, uncluttered layout supports successive broccoli crops, leafy vegetables and young plants while leaving routine access easy to organise.
11 · Choosing the right Irish growing period
Arrange the schedule so crown formation occurs during dependable cool weather.
Coastal, windy and exposed locations
Ireland’s Atlantic influence often brings cool, breezy conditions, although daylight, frost and exposure differ considerably by place. Greenhouse shelter can support early establishment, but very early plants may still need frost protection. Autumn crops can also benefit as temperatures gradually become milder.
Inland or well-sheltered locations
Use the cooler periods before and after summer. An early planting can be cleared in time for tomatoes or peppers, while a later one develops when nights are becoming cooler. Even in spring, sunshine may drive glasshouse temperatures upwards unexpectedly; start ventilation before stored heat affects the plants.
Urban gardens and heat-retaining corners
Schedule broccoli near the cooler edges of the principal growing season instead of maturing crowns during peak summer heat. Glazing in a built-up or sheltered sunny garden may warm sharply even when the outdoor air seems moderate. Sow the later crop so that its decisive growth coincides with shorter days and cooler nights.
Choose a target harvest window, then work back through the packet’s maturity period and the time needed to produce sturdy transplants. A Classic Aluminium Greenhouse works best when its real pattern of sunlight, accessible doorway, clear paths and roof ventilation are considered together. Automatic vent openers may be useful where manual adjustment is not practical early each morning.
12 · Questions from greenhouse growers
Small, timely adjustments are generally wiser than a drastic intervention.
Before adding fertiliser, shade or crop protection, reconstruct the conditions the crop experienced. Heat accumulation, irregular watering, constricted roots, crowding or harvesting too late could be the underlying problem.
Will broccoli grow under glass without heating?+
Yes. An unheated greenhouse can be especially useful during Ireland’s cooler transitional periods. Its value is shelter from wind, driving rain and variable weather, rather than the creation of tropical conditions. Extended cold may still bring frost inside, so protect young plants when necessary. Ventilate on bright days even where the air outdoors remains cool.
What number of plants is realistic in a compact greenhouse?+
Calculate capacity from the mature leaf spread, not the size of a transplant. At 50–60 cm spacing, a single row holds few large plants, but harvests from secondary shoots can improve its productivity. Edges may temporarily carry seed trays, lettuce or low herbs as long as the ventilation route stays clear.
Why do broccoli heads stay small?+
The cultivar may naturally remain compact, but old or stressed transplants, drought, poorly timed temperatures and breaks in feeding can also restrict the crown. An unusually early head on a small plant often indicates buttoning. It remains edible; for the next planting, use younger starts and provide steadier growing conditions.
When does broccoli under glass need shade?+
Short-term shading can soften an exceptional spell of intense sunshine, but it cannot substitute for good crop timing and ventilation. Broccoli requires strong light to build the foliage supporting each crown. Improve airflow through the openings, stabilise watering, and shade only when the temperature beside the plants continues to climb too quickly.
Can broccoli grow in a container?+
Yes, if each plant has a large, deep container holding fertile, freely drained compost. Leave roughly 50 cm between plants. Pots heat quickly in sunshine and retain less available moisture than a bed, so examine them more often and water deeply without allowing persistent waterlogging.
Sources and further reading
Horticultural material consulted for this crop plan.
Explore related Bloomcabin pages: Bespoke aluminium greenhouses · Bloomcabin smart greenhouse options · Planning greenhouse use over the longer term
- Bavarian Garden Academy — Advice on planning and operating compact greenhouses
- Bavarian Garden Academy — Guidance on raising or purchasing transplants
- Bundessortenamt — Vegetable variety and value-testing guidance
- University of Minnesota Extension — Advice for growing broccoli at home
- University of Minnesota Extension — Water management for vegetable crops
- University of Maryland Extension — Home-garden broccoli cultivation
- University of Massachusetts Extension — Broccoli crown quality and physiological problems
Let the crown shape the plan
Put the quieter, cooler gardening months to productive use.
A well-designed greenhouse has purposes beyond sheltering tomatoes that enjoy warmth. For broccoli, it can become an adjustable buffer where bright light and cooler conditions are balanced. Allocate a deliberate row, leave room for fully expanded foliage, preserve an uncluttered cutting route and vent before damp warmth collects among the crowns.
Plan a Classic Aluminium Greenhouse for a planned rotation of broccoli, lettuce, young brassicas and the first spring herbs. Dimensions, roof vents and paths can be coordinated so everyday care and climate control work together. Explore the Classic Aluminium Greenhouse and compare it with another Classic Aluminium Greenhouse to create a well-ordered growing space for the long term.
Classic Aluminium GreenhousePlanning choice 01 Identify the coolest dependable cutting period.
Planning choice 02 Mark the bed using the spread of mature broccoli.
Planning choice 03 Keep a clear, dry aisle for inspection and harvest.
