
How Long Does an Aluminium Greenhouse Last? Care and Spare Parts
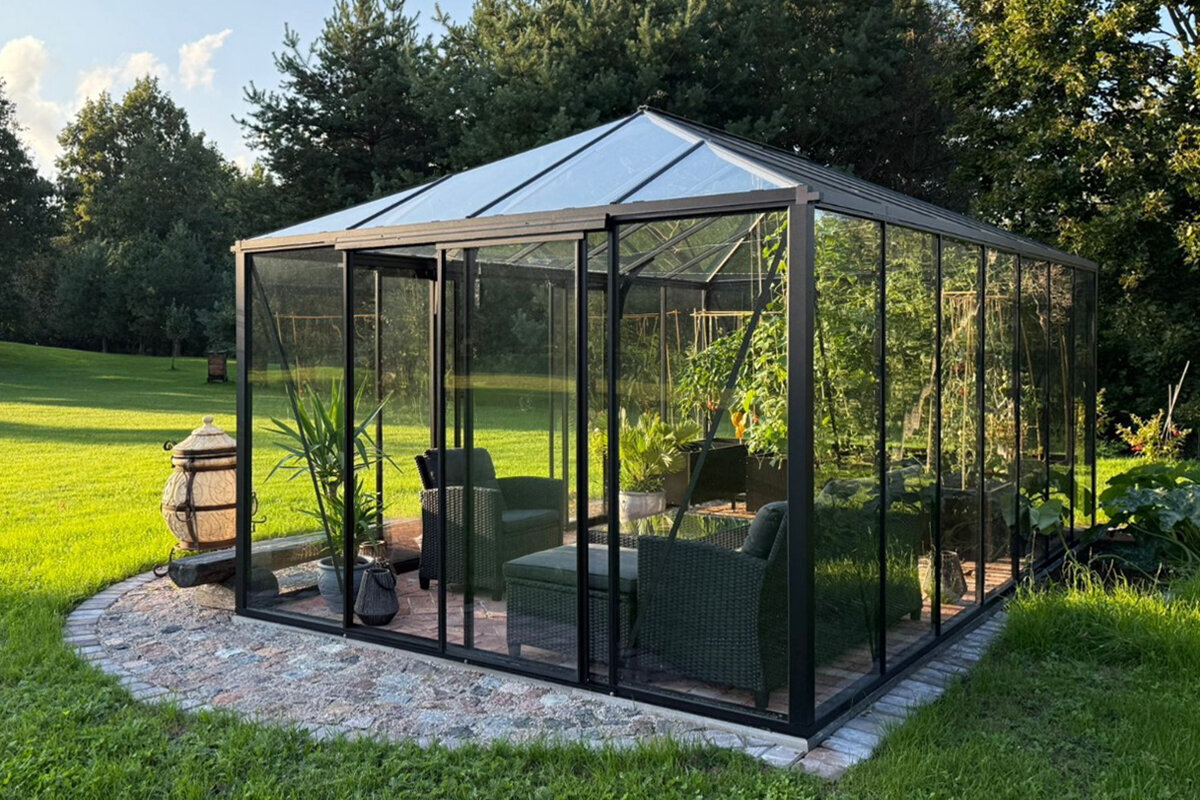
Long-term ownership
An aluminium greenhouse’s lifespan starts with the right decision before purchase.
Frame material alone cannot reveal an aluminium greenhouse’s likely service life. Correct installation, reliable ground support, scheduled inspections and later access to correctly matched wear components are equally important.
The short answer: what really determines lifespan
With thoughtful planning and consistent care, an aluminium greenhouse may serve a garden for a long time. One universal figure would be misleading because foundations, installation, exposure and attention to flexible or moving parts differ considerably.
The profiles do not determine everything. Continued service also relies on dry connections fitted without tension, sound glazing, effective drainage and an established way to obtain compatible spares. Frequent modest inspections generally prevent more trouble than delayed, extensive repairs.

01
Structure
Accurate foundation alignment and properly secured profiles reduce distortion, tension and continuing pressure at the joins.
02
Care
Gentle cleaning, close observation and prompt correction of movable elements can stop minor defects from developing further.
03
Spare parts
Accurate model records, order paperwork and component photos simplify requests for compatible seals, rollers, glazing or fasteners.
Structure, location, maintenance and matching parts shape use across many growing seasons.
Many gardeners buy an aluminium greenhouse with years of use in mind. Aluminium resists corrosion and needs modest care, yet service life reflects the condition of the complete assembly. Glazing, seals, openings, fasteners and foundations warrant the same scrutiny as the profile framework.
Anyone intending to use a greenhouse for years should look beyond appearance and today’s equipment. Consider whether the structure is clearly designed, whether components can be reached and inspected, and whether the manufacturer supplies parts for typical wear points. That makes repairs far easier.
The following sections explain the principal influences and provide an orderly approach to caring for an existing structure. They cannot substitute for its installation manual or a project-specific expert inspection, but they can help you notice concerns promptly and plan for sustained use.
Inspection 01 · Checkpoint 01
Why aluminium alone does not define lifespan
Aluminium works well for greenhouse framing because routine upkeep is modest and it does not rust in the manner of untreated steel. The profile is not the sole influence on durability. Mixed-material junctions, bolted joins and damp pockets need attention. Installation quality governs drainage and whether neighbouring components remain aligned without unwanted tension.
The way the greenhouse is used changes its condition too. Doors and vents operated frequently, heavy objects resting on the frame, or accessories installed later may concentrate pressure in particular places. Look beyond the broad profile surfaces to hardware, fasteners and glazing alignment. Even a tidy greenhouse requires observation of the individual details that make up the structure.
Pay particular attention to corners and junctions near ground level. Small amounts of soil and vegetation can accumulate in these places, allowing dampness to linger. Lift the material away carefully, examine each visible fastener for security and note whether adjoining profiles still line up naturally. Following an identical inspection route at regular intervals gives you a useful basis for recognising gradual movement or other changes.
Review any accessory added after assembly to ensure that it neither interferes with the frame nor narrows an operating path. Use only the designated attachment locations, avoiding extra tension and dirt traps that cannot be reached easily.
- Maintain an even supporting surface, as tension in the profiles can unnecessarily strain glazing, doors and opening windows.
- Clear leaves, soil and retained dampness from junctions instead of allowing debris to sit against them.
For a straightforward introduction, consider a standard Classic greenhouse with easily accessible frame and connection areas.
Inspection 02 · Checkpoint 02
Foundation and site as the supporting base
A firm base spreads loads while preserving the intended shape of the greenhouse. Minor variations in level may make doors bind, introduce stress into glazing or require fasteners to be adjusted. Design the ground support as an integral structural element rather than something added later, always following the directions supplied for that model.
Assess the chosen location realistically. A windy, open Irish plot, overhanging limbs, splash-prone ground and recurring waterlogging present different challenges from a sheltered garden. Watch how sunlight, rainfall and access routes behave on the site. Ask the local planning authority or a suitably qualified professional about uncertain local or construction matters. Think ahead to changes around the greenhouse as well. Beds, supports for climbers, water butts and furniture may gradually restrict working space beside the panels. Keeping that space open makes cleaning and examination of the base, glazing and drainage substantially easier.
Future use of the nearby garden deserves separate consideration. Added planting beds, trellises, water storage or seating may narrow the route used for care and obstruct the side elevations. Reserve a clear strip for cleaning and for examining drainage, glazing and base junctions. There should also be a safe, practical route for carrying tools and replacement components to the structure when work is required.
Inspect beyond the foundation edge too. Encroaching roots, settlement along the perimeter or later paving can redirect run-off while making the lowest frame sections difficult to reach.
- Use appropriate measuring equipment to verify the base’s diagonals, elevations and anchoring positions before installation begins.
- Keep sufficient working room on every side to reach the gutters, glazing and bottom profiles during maintenance.
Where the greenhouse meets a house wall, a large regular lean-to model needs particularly careful planning of foundation and wall connections.
Inspection 03 · Checkpoint 03
Inspect glazing, seals and adjoining joints
Glazing and gaskets provide essential weather protection. At season’s end, and following unusual conditions, confirm that each pane remains firmly positioned, its edges appear sound and every sealing strip makes continuous contact. Movement, gaps or clips that have shifted merit investigation, as they may point to a loosened fastener, frame movement or deterioration in an elastic component.
Use a restrained cleaning method. Flush away grime with ample water and a gentle cleaner approved for the relevant material, because harsh or abrasive agents may harm finishes and gaskets. Avoid concentrating pressurised water on edges or junctions. Working carefully removes deposits while giving you a well-lit opportunity to examine the glazing closely.
Compare present condition with earlier observations instead of searching solely for conspicuous breakage. Uneven contact along a gasket or a glazing clip sitting differently may provide the first warning. Note the precise location and date when you notice it. A written or photographic record helps establish whether the condition is progressing and supports a more specific request for assistance or parts.
While an opening is held safely ajar, examine the nearby gasket surfaces. This angle can reveal uneven contact on closing or a localised point receiving more pressure than expected.
- Record a deteriorating sealing strip promptly, before moisture and debris penetrate farther into the adjoining junction.
- Clean panes using soft equipment while checking clips, edges and profile channels.
With a Classic greenhouse with standard frame these recurring visual checks fit easily into seasonal garden routines.
Inspection 04 · Checkpoint 04
Doors and windows as moving wear points
Operable components frequently reveal structural movement first. Investigate a dragging door, resistance in a window opener or a new sound rather than dismissing it. The cause might be debris along a track, a loosened fastener, shifting alignment or an individual item reaching the end of its serviceable condition. Force risks transferring extra pressure to the hardware and glazing.
Maintain tracks and hardware as directed in the product documentation, removing leaves, soil and vegetation. Where the instructions allow adjustment, mark the original setting before making incremental changes. A cracked or deformed component, or a problem without a clear cause, calls for the correct spare or competent guidance rather than a makeshift alteration.
Do not prop vents open using improvised cords, wedges or objects left jammed in place. These methods may impose awkward forces on tracks and junctions. Operate the provided controls and retainers, checking their action carefully. When an opening refuses to stay where required, find the reason promptly rather than allowing its operation to worsen.
Complete a short operating check once cleaning is finished, since disturbed debris may enter a track. Move each opening slowly in both directions and confirm that its travel feels consistent.
- Test doors and windows at intervals; smooth running matters more than play disguised temporarily.
- Cut back vegetation near operating paths to prevent interference with hardware, gaskets and ventilation mechanisms.
For a regular lean-to greenhouse in its larger format the wall-side movement and cleaning areas should remain accessible from the outset.
Inspection 05 · Checkpoint 05
Water management avoids unnecessary strain
Rain, condensation and irrigation are normal inside and around a greenhouse, but water should not sit unseen at its junctions. Keep the guttering, discharge points and lowest profiles unobstructed. Examine them closely once leaves have fallen. Repeated overflow or pooling in one location warrants tracing both the source and the route of discharge before residue builds up.
Internal moisture needs equal attention. An orderly layout makes routine watering, airing and washing simpler, whereas pots pressed against the frame or continually damp compost may conceal developing problems. Preserve a usable route beside each wall so that drips, algae and loosened gaskets are visible without emptying the greenhouse. Observe drainage during wet conditions as well as fine weather. A shower will expose overflowing gutters, splash patterns and puddling more clearly. Confirm that run-off leaves the base area rather than settling beside it, and watch for silt or other residue accumulating nearby.
Wet-weather observation often reveals more than an inspection on a dry day. Use the period after a shower to locate spills, splash marks and persistent pools. Follow the discharge path beyond the base and note any nearby build-up. Adjusting storage, planting positions or the maintenance schedule may make these vulnerable places simpler to inspect consistently.
- Remove debris from gutters and discharge paths after leaves fall and ahead of an extended spell of rain.
- Arrange watering routines so water does not repeatedly splash against doors, profiles or sensitive connection joints.
A standard Classic greenhouse provides an uncomplicated starting point for planning drainage paths and future access for upkeep.
Inspection 06 · Checkpoint 06
Respond properly after weather and winter
Ireland’s Atlantic weather makes a post-event inspection especially worthwhile after a storm, substantial snow or impact from a branch. Circle the greenhouse indoors and outside, checking pane seating, profile alignment, openings and gutters. Photograph anything unusual before intervening, as the images can help a professional or the manufacturer identify components and understand what occurred.
Cold-season action must reflect the particular location, structure and product manual. Clear an accumulation only when you can protect the glazing, roof and yourself throughout the work. Do not stand on any element unless it is expressly intended to carry a person. If the garden repeatedly experiences substantial loading, arrange a competent assessment for that site rather than relying on broad advice.
Inspect promptly rather than postponing the task until regular garden activity resumes. Soon after the incident, displaced clips, loose vegetation and obstructed drainage may be simpler to locate. Choose good visibility and secure footing. Where the extent of damage remains uncertain, stop imposing further pressure on the structure and obtain informed guidance before deciding what to do next.
Survey the surrounding garden after severe conditions too. A damaged limb, displaced object or shifted piece of furniture may threaten the greenhouse later, despite no immediate sign of harm.
- After exceptional weather, check first for loose parts, broken glass and blocked outlets before using the greenhouse.
- Keep photographs and notes about damage; they make a factual spare-parts enquiry much easier.
For garden schemes beside a wall, a regular lean-to model in a full format can make careful site assessment especially important.
Inspection 07 · Checkpoint 07
Arrange spare parts early and precisely
Reliable access to compatible spares contributes greatly to extended ownership. Profiles, gaskets and hardware that appear similar are not necessarily interchangeable. Retain the order confirmation, precise model reference, installation papers and useful photographs of the completed structure. For any request, supply detailed images, measurements and a clear description of where the item was fitted to reduce mistaken identification.
Requests often concern gaskets, glazing retainers, fasteners, door wheels, window hardware or a replacement pane. Similar appearance in a photograph is not enough; verify every detail against the specific greenhouse. A part that repeatedly comes loose or fails may be reacting to a problem nearby, so examine its mounting and neighbouring pieces rather than replacing the symptom alone. A concise component record is valuable when seeking spares. Keep the model reference, approximate purchase date, affected assembly and supporting paperwork together. Pair detailed photographs with a wider image that shows orientation and context.
A simple inventory also makes a spare-parts request more precise. Store the model reference, purchase period, relevant assembly and available paperwork together. Add a wider contextual photograph beside each detailed image so the location is unmistakable. This can clarify whether one worn item is involved or whether neighbouring parts and their fasteners also require examination.
- Keep electronic copies of paperwork and photographs, ensuring that identification details remain available well beyond the original purchase.
- For enquiries, always state the fitting location, photograph, approximate measurement and visible markings on the component.
A standard-format Classic greenhouse is easier to support over time when its documents remain complete with the garden records.
Inspection 08 · Checkpoint 08
Repair, adjust or seek professional assessment
A newly noticed issue does not always justify extensive work. Local grime, an obstructed track or one ageing gasket can often receive focused attention. Fractured glazing, pronounced frame deformation, persistent leaks or an opening that still misfits after an authorised adjustment require a different response: investigate systematically and avoid introducing extra pressure.
Deal first with personal safety and limiting further deterioration; restore operation and appearance afterwards. Prevent access to an area containing broken glazing, and undertake work only with suitable protective equipment. Building alterations, local requirements and insurance questions vary with the circumstances, so discuss them with your local authority, insurer or an appropriately qualified professional.
Use an orderly process before attempting repair: make the area safe, investigate what produced the damage, consult the documents and only then select the remedy. Otherwise, even the right component may be strained again by incorrect fitting. Keep the removed item and informative photographs until identification is certain, as they show its form, attachment method and former position.
Decide whether you are seeing one isolated failure or the result of repeated pressure. New hardware or a fresh gasket will remain effective only when its mounting, alignment and surrounding components are suitable too.
- Use a compatible component for the particular model; do not improvise substitutes across damaged fasteners or sealing points.
- Obtain competent assistance whenever structural sections, glazing or the greenhouse’s stable alignment might be involved.
For systematic upkeep, owners of a large regular lean-to greenhouse should plan repair access and unambiguous part identification in advance.

Comparison
What supports long-term use
This overview separates maintenance steps you can influence from matters decided before purchase or during assembly. It helps assess greenhouse condition objectively and order actions by urgency.
| Area | Helpful long term | Warning sign when checking |
|---|---|---|
| Foundation | Even, structurally sound and formed according to the installation directions. | Scraping door or visibly uneven joints. |
| Frame | Clean profiles and checked connection points. | Distortion, loose screws or persistently wet connections. |
| Glazing | Secure seating, intact edges and seals lying evenly. | Rattling, cracks, gaps or displaced clips. |
| Moving parts | Clear running paths and regularly checked fittings. | Stiff movement, play, rubbing marks or blocked guides. |
| Drainage | Clear gutters and a defined water route. | Overflow, deposits or recurring drip marks. |
Make maintenance a yearly routine
A short, repeated walk-round reveals changes while they remain manageable. Match the steps to your model, site and the guidance in your documentation.
01
Spring: deep clean
Clean panes, frames, gutters and access areas gently. Then inspect seals, clips and fittings in good light.
02
Early summer: test operation
Open and close doors and windows several times. Clear plant matter from guides and note unusual resistance.
03
Late summer: inspect water routes
Inspect discharge points ahead of autumn leaf fall. Position containers and equipment to preserve access to inner walls and bottom profiles.
04
Autumn: document condition
Record notable areas in photographs and retain the relevant measurements, creating useful evidence for a future parts request.
05
Winter: check after events
After notable weather, inspect glazing, frame and drainage from a safe position. Follow the operating instructions.
Checklist for buying and ownership
Use these points to guide conversations when choosing a greenhouse and as a compact inspection for one already assembled.
01. Does the selected model have a consistently even, sound base prepared to its stated requirements?
02. Is working room retained on each side for maintenance, examination and changing a component?
03. Have you safely filed the model reference, fitting papers and details for parts enquiries?
04. Are openings, gutters and frame sections accessible without furniture or planting blocking the approach?
05. Are siting, drainage and overhead branch risks appropriate for the way you plan to use it?
06. During inspection, do gaskets, retainers and fasteners look present and free from damage?
07. Have you established straightforward cleaning, operating and post-weather recording checks?
08. Will you secure damage before using compatible replacements or obtaining professional assistance?


Common questions on aluminium greenhouse service life
What service life can an aluminium greenhouse offer?
No single duration applies reliably. The frame forms just one element of the complete greenhouse. Its foundation, installation, exposure, maintenance, glazing and gaskets all influence dependable service, as does continued access to the correct replacement components.
Does an aluminium greenhouse need regular maintenance?
Yes. The work is generally modest, but it remains worthwhile. Wash the profiles and panes, keep discharge routes clear, examine gaskets and fasteners, then operate doors and windows. Frequent observation can reveal developing irregularities while they are still straightforward to address.
Which parts usually wear first?
Give close attention to gaskets, pane retainers, hardware, runners and bolted joints. Movement, dampness, debris and repeated use affect these items. Which one deteriorates first will still vary with the greenhouse, installation standard, operating pattern and weather at the site.
Can I replace one damaged pane?
Some designs allow this when the correct glazing and retention components remain obtainable. Secure the immediate area before identifying the greenhouse, pane specification and exact installation position. Measurements and clear images help confirm the item. Treat fractured glazing as a safety risk throughout the work.
How should I respond when a door starts dragging?
Begin by removing vegetation and debris from the track, then look for any fastener that has visibly loosened. If dragging continues, examine alignment and make only adjustments permitted by the instructions. Forcing the opening or adding improvised packing may transfer harmful pressure to its hardware, glazing and frame.
Does spare-parts availability really matter when buying?
Yes. Continued ownership includes the practical ability to restore a particular worn component. File the exact model reference and supporting documents carefully. You can then request the proper gasket, retainer or item of hardware instead of adapting something that merely looks similar but does not fit correctly.
Plan the right greenhouse
Thinking long term means caring for details
Service life is not one fixed entry on an aluminium greenhouse specification sheet. It develops from suitable placement, a correctly formed foundation, accurate assembly and attention to emerging changes. Glazing, gaskets, drainage paths and all operable components warrant recurring inspection.
Well-organised model records and a planned care routine support years of practical use. Bloomcabin can assist when selecting a greenhouse for your intended garden layout. Before choosing, review the supplied documentation, the space available for maintenance and whether compatible model-specific spares can be obtained.
Explore greenhouse solutions and choose a structure whose care and use fit naturally into your garden routine.
