
Choosing insect screens for windows and patio doors

Coordinating screens with windows and doors
Leaving insect-screen decisions until after new windows or a patio door are fitted can expose practical clashes. A frame may no longer clip into position, a moving sash may brush the mesh, or the route outdoors may feel awkward. Width and height are only part of the assessment. Trace the complete action instead: where is the handle, how does the glazed unit move, and what space must stay unobstructed during ordinary use? Screens may be stationary, detachable, hinged, laterally operated or rolled away. A sound layout considers the glazing, door, hardware, solar shading and mesh together. For a home with several openings, coordinating them at one stage is generally more effective than treating each later alteration in isolation.
01 / Map each opening
Let the opening action lead, rather than the mesh style
Begin by deciding whether the mesh remains stationary while the glazed unit moves, or whether the screen must open to provide access. A fixed pane has no travelling sash to accommodate, so a permanent mesh panel will often be adequate. For fixed-glazed units , however, verify that the intended fixing face is flat and can be reached. An operable window presents a different problem. A sash travelling outwards needs exterior clearance, whereas one travelling inwards occupies room space. Position the mesh beyond that travel path, or select an arrangement that moves away before the sash reaches it.
Create a separate record for every unit, covering its type, direction of travel and hinged edge. A note such as “bedroom window” says too little; “single sash opening inwards, right-hand handle, roller-shutter channel outdoors” is much clearer. Record how ventilation will work as well. Is the window normally tilted, opened completely, or used in both ways? Will the outside of the glass need to be reached from the room? Measure the widest intended angle, then rehearse the task: operate the handle, move curtains aside, open the sash and test exterior reach. This exposes tight spots that a photograph of the closed unit may conceal. State whether the mesh is expected to remain daily, overnight or only for a season. That information helps prevent future interference with cleaning, handle use or full travel. Once the entire path is understood, compare stationary frames, roller screens and other movable formats.
Base the window choice on activity, not the room label
A stationary frame offers an unobtrusive answer where nobody passes through and protection is wanted for an extended period. A detachable tension frame may also work, although drill-free retention depends on the existing profile and the ledges available to grip. Hinged and roller formats permit access to the glazing, but they require sufficient depth for rails or a cassette, or enough room to swing. On a single-sash window opening inwards , an extra frame on the room side is most likely to obstruct travel. Exterior mesh can keep that inner path unobstructed, provided its position works with the outside sill and every neighbouring fitting.
Different routines, rather than room names alone, create different requirements. A kitchen handle may be operated repeatedly, a bathroom may need the sash opened quickly and widely, while a bedroom screen might remain effective throughout the night with the window open. Look for curtains, indoor blinds, plants and projecting handles that narrow the working zone. Being physically possible to install does not guarantee convenient operation. When requesting a quotation, establish the proposed fixing side, how the handle will be reached and what actions are required whenever the mesh is opened or taken down. Rank the desired outcome at each location: uninterrupted exclusion of insects, ready access for cleaning, or straightforward seasonal removal. If the layout cannot deliver all three equally, that ranking reveals which function should govern the specification.
02 / Trace the required clearance
Allow exterior travel room for an outward-moving sash
When a window travels towards the exterior, the critical overlap occurs beyond the wall line. Its sash sweeps through space that cannot also contain a stationary mesh panel. The same geometry affects outward-opening top-hung windows: the bottom edge projects away from the building while the top remains attached. Mesh fixed immediately beyond that path may block the action. Let the actual dimensions determine a workable arrangement instead of applying one presumed layout to every unit. Photographs taken from both sides while the window is open usually communicate the available space better than a simple width-by-height entry.
Inspect the area at the sash’s widest position, when previously hidden obstructions become apparent. Downpipes, balcony balustrades, planters, shutters, deep reveals and exterior shading can all intrude. Clearance is needed for the handle and the user’s hand as well as for the sash itself. If the outside face is cleaned regularly, include that routine in the assessment; a panel requiring tools for removal may be impractical there. State during the survey whether wide opening is essential or a limited ventilation setting will satisfy normal use, as that choice may influence the format more than the room’s dimensions. Repeat the check with awnings, blinds or other shading deployed because their occupied area may be quite different when operating.
Survey profiles, reveals and nearby fittings accurately
A useful quotation requires more than the clear aperture and overall unit dimensions. Record the flat fixing ledge, reveal depth, protruding gaskets, weather mouldings, handles and separation from shutter or external-venetian-blind channels. Take readings at several points because an older opening may not be square or uniform. Include one close photograph showing a tape and another showing the complete setting, so every obstruction can be located. If the glazing includes structural or decorative bars, determine whether they project into the intended screen plane. An elaborate technical drawing is unnecessary; the important result is an unambiguous location where the chosen system can lie evenly without fouling another component.
Describe the proposed attachment precisely instead of relying on broad labels such as “drill-free” or “screw-fixed”. Detachable clips, hanging brackets, clamps and screws rely on different surfaces and affect cleaning and operation differently. Establish what hardware will remain attached when the mesh is taken away, whether seasonal removal is practical, and whether future work on gaskets, ironmongery or blinds will still be possible. For renovation work, settle the order of decisions: verify the window and door sizes, then coordinate outside accessories and mesh positions. Otherwise, a newly specified rail could occupy the very ledge reserved for the screen. Label each survey image as an indoor or outdoor view; without that reference, the handle and hinged edges can easily be reversed when the information changes hands.
03 / Weigh the system options
Let everyday traffic determine the patio-door arrangement
At a patio entrance, the screen behaves as another door rather than a passive mesh insert. The number of users, trips to the garden, children, pets and movement of furniture should therefore influence the format. A hinged panel requires an unobstructed arc. A pendulum version may return after a person passes, but it still occupies swinging room. A laterally moving screen needs somewhere beside the aperture in which to rest, while a pleated panel folds into a smaller bundle but still depends on accessible tracks and grips. Follow the actual journey from the dining table or kitchen to the garden when assessing the layout; the outline of the doorway on a plan does not show how that route functions.
For a single-leaf patio door opening inwards , any screen must remain beyond the interior leaf’s course. An exterior moving panel is often a sensible starting point, although steps, water drainage, balustrades and blinds can change the final detailing. Pay particular attention at floor level. A badly placed rail or hard-to-see change in level must not make tripping more likely. Ask about the usable passage, grip height, direction in which the mesh panel moves, how it closes and the space genuinely unobstructed after opening. Those operational details shape comfortable access more than the nominal door dimensions. Rehearse the journey from the room and again from the garden because a handle positioned conveniently on one side may prove awkward from the other.
Reserve a resting zone for a sliding screen
A sliding door removes the need for a swinging leaf arc, but its moving panel and adjacent resting space still have to be mapped. The mesh will commonly travel laterally, with the open material gathered or guided to one side. For Patio Life lift-and-slide units , identify which glazed panel moves, where its controls are located and whether the proposed mesh crosses that panel’s route, a stationary side light or any part of the main profile. Knowing the Patio Life model family is not a substitute for recording the visible frame ledges and reveal depth at the actual opening.
Test the proposal against ordinary household journeys. Consider carrying a tray or plant, or pushing a buggy through the doorway. Decide whether the whole screen must retract or whether partial access is adequate. For sliding-door layouts , specify whether the mesh travels across an active panel, a stationary glazed section or a wider combination of panels. If people go in and out repeatedly during an evening, a smooth action and an obvious grip may be more valuable than concealing the retracted bundle. Add room-side curtains and outdoor awnings or shades to the drawing. Request views showing every component both deployed and retracted; these can reveal a covered handle, blocked fixed pane or loss of the preferred side of the doorway. The drawing should also state the clear width after the mesh has been parked. The overall opening dimension does not tell you how much passage remains available.
04 / Verify the measurements
Assess folding doors and broad apertures as distinct layouts
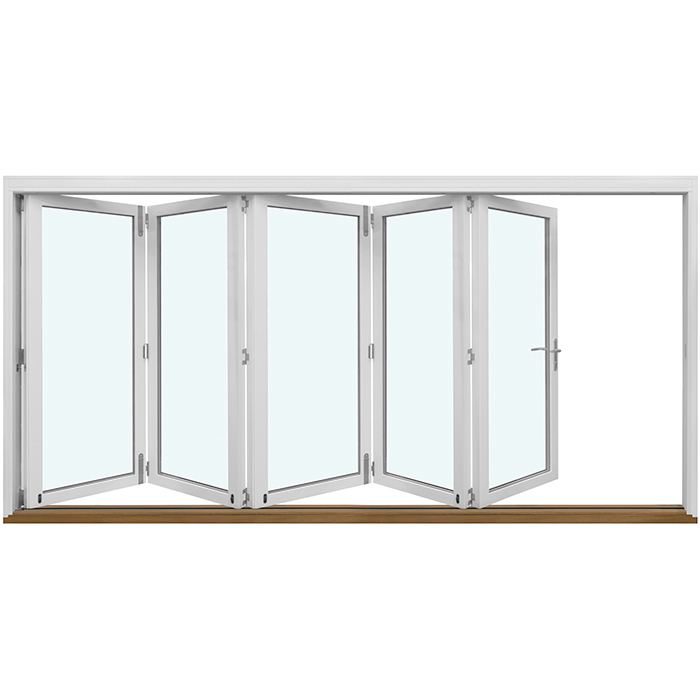
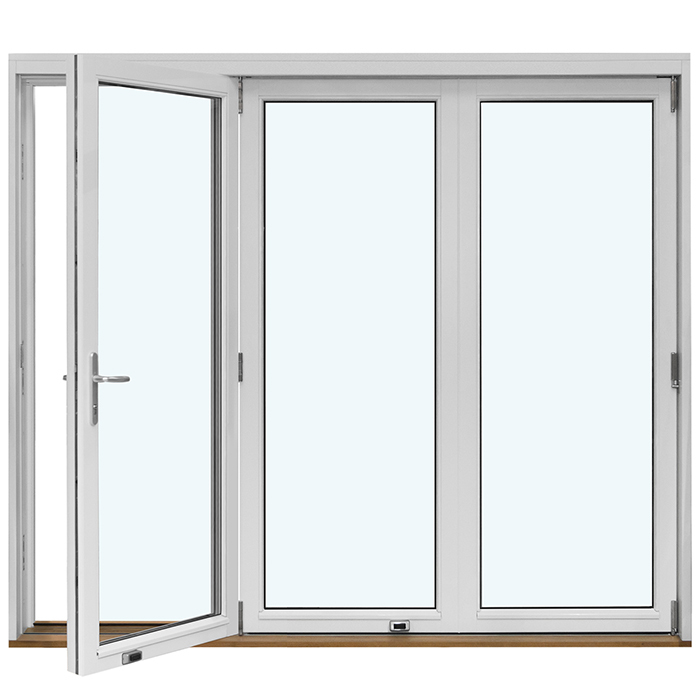
A folding assembly changes its footprint considerably as it operates. Its multiple leaves gather into a bundle, and the position of that bundle may decide whether an added screen is workable. Where the leaves fold towards the exterior , stacking happens in the outdoor zone, where a stationary panel placed ahead of them would commonly obstruct movement. Retractable mesh has to cover the full usable width while also respecting the side occupied by the stacked door leaves. Establish whether the household usually opens the complete frontage or only part of it. Full-width summer use calls for a different operating approach from a routine narrow passage. Define that preferred route first, then choose where the retracted screen should gather.
With a broad glazed elevation, maximum mesh coverage can distract from everyday stability, reach and handling. Consider how the system will behave in windy weather, during repeated journeys and when it is removed for a season. Plot the door-leaf bundle, folded mesh, grips and shading on the same scaled overhead sketch, particularly where terrace furniture or large pots sit near the wall. The second image illustrates one folding-door layout, and the third illustrates another. Together they show that compatibility depends on where the leaves gather, not merely on the full aperture measurement. Review each proposal with the doors completely spread, partly deployed and shut, ensuring an uncommon position does not conceal an unresolved clash.
Judge shaped and inaccessible glazing on its own terms
Some glazed sections never provide ventilation and need not be approached like operable windows. Circular, semicircular and sloping fixed panes instead call for an accurate outline survey and a decision on whether mesh is useful there at all. For fixed triangular or sloping glazing , an ordinary rectangular frame may leave important sections uncovered. Determine the intended protected area and whether the perimeter can be secured against the profile or the reveal. Bespoke outlines are best communicated through an accurate template, elevations and the available installation depth, rather than guessed diagonal measurements. On an asymmetrical template, label the room face, outside face, top and bottom. Rotation or mirroring may look plausible on a drawing yet fail when brought to the opening. Where ventilation comes only from an adjacent operable member in the same group, screening that member alone may be more practical than extending mesh across all the stationary glass.
Roof glazing, high stairwell windows and elevated rooflights also require a realistic method of operation. A screen that can theoretically move but can only be reached through improvised means is unlikely to be cleaned or used regularly. On a centre-pivot roof window, for instance, the grip and sash follow a different course from a vertical wall unit, and the mesh must accommodate it. Decide in advance who will undertake cleaning, seasonal removal and any repairs. A permanent panel may be preferable where the window is seldom operated, whereas complexity offers little benefit without usable access. Choose according to reach and routine instead of imposing one format throughout the building. For elevated units, record where the user will stand at floor level so both future handling and the installation position are evaluated.
05 / Clear the specification for ordering
Choose mesh and visibility for the intended setting
Mesh affects the visual openness of a protected window, but appearance should be balanced against the demands of its location. A living space may benefit from a restrained view through the material, whereas a busy doorway might place robustness first. Children, pets and frequent carrying through a patio entrance create stresses unlike those at an upper-storey window opened occasionally. Look beyond the marketing name of the mesh. Ask how it is washed, held under tension and repaired if one section is damaged, and establish how much frame will be seen from either side. At a doorway, also check that people can perceive the closed mesh when moving between spaces with contrasting light levels.
Consider the colour and apparent weight of the surrounding frame as deliberate choices. Light direction and viewing angle can change how pale or dark mesh appears, so inspect samples beside the intended opening rather than relying on showroom lighting. View them in daylight, after switching on the room lights and from the places where people normally sit. Around a doorway, users should be able to detect the frame through touch as well as vision. If the project covers several doors and windows, decide which outward or inward face should look consistent. Visual continuity is worthwhile only when it does not compromise the busiest route. Record the exact frame finish and mesh selection against each opening, avoiding later assumptions based on colour names that sound alike.
Use the quotation to verify compatibility
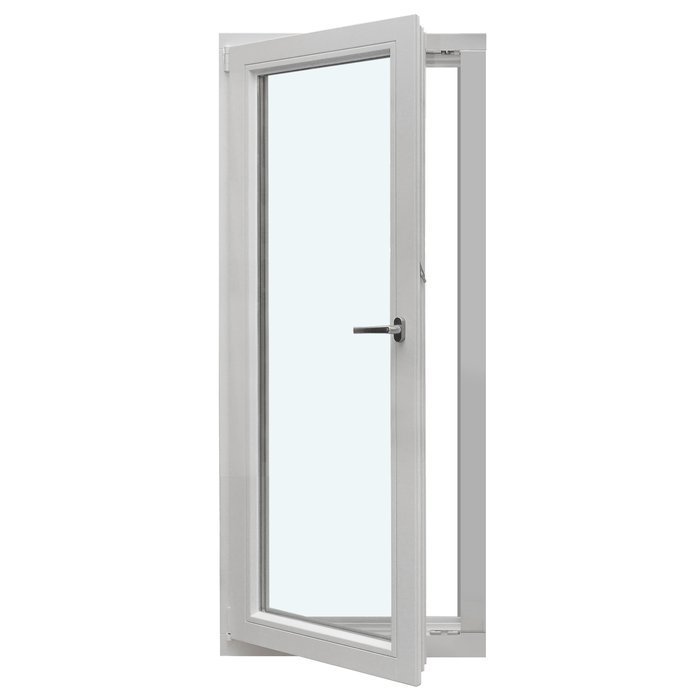
A properly detailed quotation links a specific arrangement to each labelled aperture. It should identify the measurements used, the fixing face, the method for moving or detaching the mesh, and any fittings left permanently on the original frame. Compare the defined scope as well as the combined price in EUR. Where the hinged edge is omitted, or the direction of door travel is uncertain, the specification is not ready. The first image depicts a patio door with one leaf travelling into the room; its plan must show the relative positions of that leaf and the extra screen. The document should also say whether measuring, installation, removal of existing items and later adjustment are included.
Before authorising manufacture, ask four final questions. Can every window reach the position intended for it? Are all required handles still usable? Does the normal route to the patio remain direct? Is the proposed screen clear of shading, sills, railings and furniture? Have any discrepancy from the survey resolved in writing before production begins. Bloomcabin windows and doors have a five-year commercial guarantee, while delivery is four to six weeks from order confirmation. Neither detail removes the need to agree measurements and compatibility. Complete the final review before ordering, while accessories and opening directions can still be coordinated. Assign a distinct reference to every aperture and repeat it on the quotation, sketch and photographs, making similar-sized units easier to distinguish.
Questions customers often ask
Can every existing window accept a retrofitted insect screen?
No. Suitability depends on the frame profile, usable fixing ledges, direction of travel, handle location and neighbouring items such as shutter channels. A stationary panel interacts differently with a fixed pane and an operable sash. In addition to width and height, record the reveal depth, projections and every part of the sash’s course.
What works at a busy patio entrance?
Start with the way people use the doorway. Hinged and pendulum panels occupy an arc, whereas a laterally guided format needs an unobstructed resting zone. Account for buggies, trays and outdoor furniture moving through regularly. Prioritise uncomplicated operation, reachable grips and a direct passage rather than making the closed screen as visually discreet as possible.
Will a screen make window cleaning awkward?
It may, depending on access and the chosen format. A permanent panel stays attached during cleaning, while a detachable one must be released and replaced safely. Establish beforehand how the inside and outside glass faces will be reached and what action moves the mesh away. For elevated windows, that routine must remain manageable from a safe working position.
Which details matter for a lift-and-slide door?
Supply the complete dimensions, the quantity and position of sliding panels, their operating side, exposed frame ledges and all adjoining construction. Include photographs looking towards the opening from the room and from outdoors, together with an image of the door in use. Mark the resting location available to laterally moving mesh and identify the section used for routine passage.
Is it better to order the windows and screens together?
Coordinating both at the design stage reduces clashes around exterior-opening sashes, patio entrances, shutters and solar shading. Adding mesh later can still work, but the installed profiles need a careful survey. Settle the screen layout before the glazing enters production so its fixing faces, grips and travel zones can be aligned with the window or door.
What to do next
Effective insect protection complements the operation of a glazed opening rather than simply covering it. Survey each window and patio door separately, recording how it travels, which edge is hinged, where its grip sits, the intended fixing surface, nearby accessories and all required clearance. Stationary mesh generally belongs where nobody passes, while an operable screen should follow the household’s actual route. Before comparing formats, assemble the measurements, photographs and a basic drawing showing the open position. This approach makes the screen an integrated element of the window, door and terrace layout instead of an inconvenient addition made afterwards.
