
Plan realistic greenhouse yields per square metre
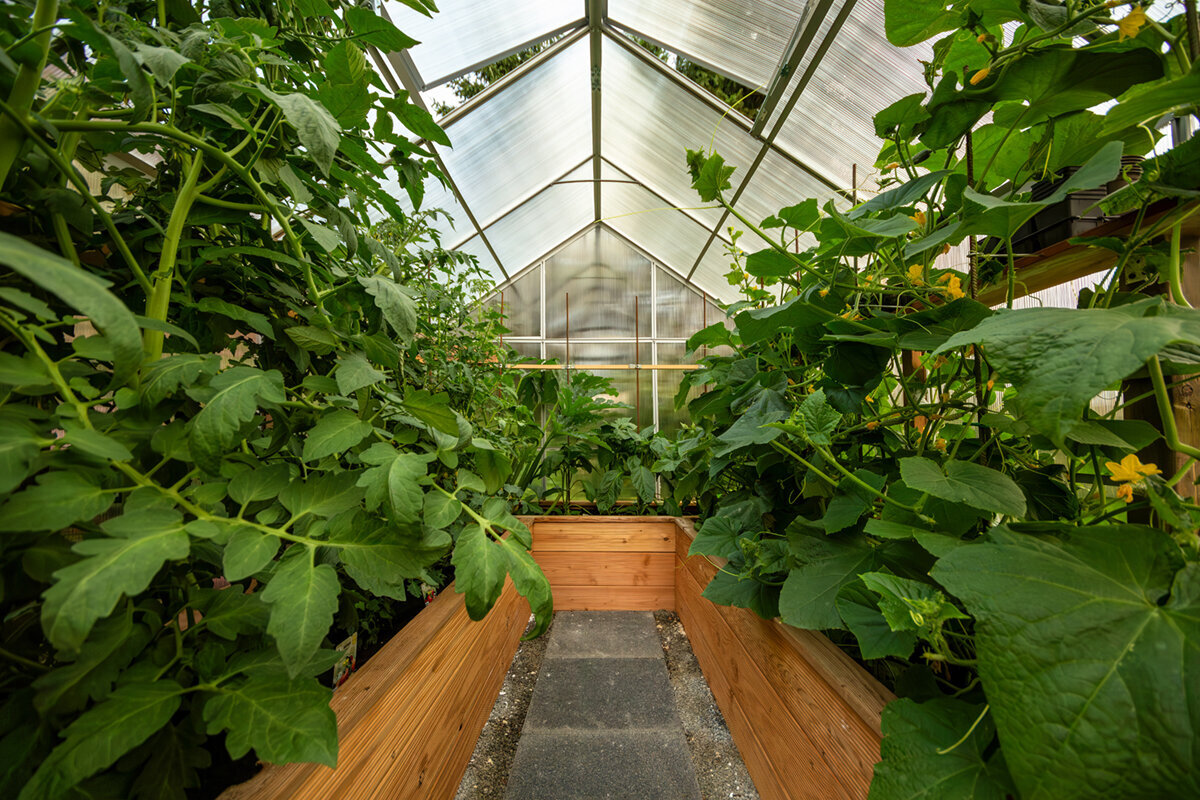

A greenhouse lengthens the growing season and shelters crops that favour warmth. Its footprint, however, tells you little about the eventual harvest. Beds packed with plants may initially appear efficient, yet restricted air circulation, unwanted shade and awkward access can reduce performance. Begin a realistic plan by examining the circumstances in your garden.
The best value comes from keeping an area useful across many months. Early salads can finish before tomatoes claim the space, followed in late summer by another sowing or resilient autumn crops. Planning around time as well as area makes the structure useful beyond its summer tomatoes and gives each changeover a clear place.
Include approaches, water points and the order of gardening tasks when drawing the beds. Convenient access encourages timely picking and closer observation. Estimating harvests for the available area therefore becomes a personal design exercise: consider what you cook, how you garden and where daylight reaches.
Step 1: Map the space
Separate growing space from the footprint
Build a reliable layout by distinguishing the outer size, routes through the structure and ground that will carry crops. Leave clearance for doors, protect beds from foot traffic and keep side plantings within comfortable reach. Those allowances enable dependable watering, tending and gathering rather than wasting room. Put paths and beds on one scaled drawing before ordering seed or young plants.
Headroom affects the productive use of the interior too. Taller crops require suitable supports and positioning that will not leave shorter neighbours in lasting shade. Assign climbing vegetables to vertical zones, with low growers placed where daylight remains available. Orderly zones make the interior easier to use. Test the drawing against ordinary tasks: decide where a watering can, secateurs and picking basket can rest while the route stays open. Good workflow discourages neglect of the far side of a bed. When positioning tall plants, allow from the outset for training, removing side shoots and reaching the crop at harvest.
Measure the beds you can reach indoors, accounting for opening doors, water storage and harvest baskets.
Use accessible margins for short crops picked quickly, rather than obstructing them with awkward, hard-to-reach plants.
For a freestanding growing layout, the Classic greenhouse in standard form gives beds, paths and changing seasonal crops an easy-to-read framework.
Step 2: Track daylight
Treat the location as part of production
The crops worth growing are shaped by the daylight reaching the structure. Across several days, note the shadows made by nearby houses, trees and boundaries. Some summer shade may be useful, whereas the same position can restrict growth during darker periods. Record the direction of the strongest sunshine when arranging tall and short crops.
Compass direction does not tell the whole story. Reflected light, changing leaves and proximity to masonry influence warmth and brightness around the greenhouse. A wall-side position may retain heat or receive less moving air than an open one. Choose planting dates and crops from what you observe rather than from an ideal diagram. Follow where shade travels and how long it remains. A spot lit early can become cooler once afternoon shadow reaches it, allowing different parts of the interior to serve different plants. Ireland's Atlantic conditions, the sun's seasonal path and nearby foliage can all change this pattern, so continue recording it as the year progresses.
Before planting, record brightness in the morning, around midday and later afternoon on several different days.
Allocate the sunniest positions to light-demanding crops, keeping less intense areas available for flexible use.
If the available wall belongs in your proposed layout, a large standard Lean-To greenhouse lets you plan around the particular daylight found beside the building.
Step 3: Select crops
Match planting to meals and seasons
Useful productivity is measured by what reaches your table, not merely by the heaviest crop. Tomatoes, cucumbers, peppers, aubergines, salads, herbs and propagation each demand different amounts of heat, attention and room. Begin with a limited selection that appears often in your cooking. You can then understand the structure's growing pattern without crowding it.
Mixed planting works best where the crops share compatible growth speeds and mature sizes. Quick leafy vegetables can occupy spring openings until bigger plants require them. Avoid neighbours that will later contest the same daylight and circulation. Give every crop a likely finishing or replacement date so future openings appear on the plan. Think about how you use the harvest as well. Frequent small pickings favour conveniently placed leaves and herbs, while preserving crops or larger batches generally require an uninterrupted block. A defined priority simplifies maintenance and keeps very different demands from meeting in too little room.
Give priority to produce used frequently, leaving seldom-eaten varieties out of valuable corners and central beds.
Pair brief starter crops with later principal planting, then release the shared area before competition begins.
To organise main crops alongside shorter supporting plantings, the Classic greenhouse for a standard garden can divide neatly into defined beds with plant numbers kept practical.
Step 4: Leave breathing room
Protect output through sensible spacing
Crowded planting commonly leads to poorer outcomes. Watered foliage takes longer to dry, disease inspection becomes awkward and ripening produce is difficult to reach. Use the distance advised for the individual cultivar, judging room by its dimensions at maturity. What seems like an underfilled bed at planting time may be the correct allowance for later growth.
Crops occupy beds in distinct ways. Climbers call for overhead room and dependable training, whereas broad, bushy forms spread sideways. Small salads and herbs may fill openings among immature principal crops for a while, but remove them before they begin competing. Regard interplanting as a scheduled temporary phase. Reassess distances as growth continues because plants may become more vigorous than forecast or bend towards brighter areas. Take off older leaves only where necessary, and train climbing stems while they are young enough to keep routes and neighbouring crops unobstructed. These adjustments retain the intended order as summer growth accelerates.
Set out canes or a line to mark each planting place, keeping planned distances clear beside full trays.
Judge space by eventual foliage and the reach needed for picking, rather than by immature plants alone.
For orderly rows and practical tying positions beside a house, a full-size standard Lean-To greenhouse can support an open, accessible planting arrangement.
Step 5: Regulate growing conditions
Coordinate moisture, ventilation and temperature
Everyday habits influence output. Apply water according to need around the roots, without leaving foliage wet for extended periods. Feel below the soil surface before adding more, since the upper layer may not reflect moisture deeper down. Mulching, well-chosen pots and an orderly bed design may even out moisture, though observation remains necessary.
Opening the greenhouse is an integral gardening task. Heat may build quickly on a mild or sunny day, while night-time and changeable Irish weather require openings to be reviewed again. Use condensation, foliage and the indoor temperature as practical signals. Circulating air helps moderate the environment, although it cannot compensate for crowding or missed inspections. Irrigate evenly according to need instead of applying a large volume by default. Pots, sections of soil and plants at different stages lose moisture at varying rates. Examining the plant and moisture near its roots is more informative than obeying an unchanging timetable. Early attention lets you alter care before prolonged strain develops.
Make watering time an inspection round for wilting, pests, ready produce and any need to alter ventilation.
Vary the amount applied according to current weather, plant development and substrate, rather than using fixed calendar quantities.
For gardeners who prefer short, well-ordered routes for routine care, the standard Classic greenhouse offers an interior that can organise beds and routine inspections clearly.
Step 6: Plan through the year
Schedule each bed for successive crops
Productive ground need not remain occupied continuously; it needs purposeful timing. Put resilient early crops in when local conditions permit, while reserving an agreed changeover for the main warmth-seeking plants. Once those are harvested, the bed may carry herbs, leafy crops or a green-manure planting. The workable sequence will reflect your site and the time you can devote to care.
A seasonal chart helps expose clashes in advance. Enter each intended sowing and planting date, when the crop is likely to finish, and what might succeed it. Include spare time for slower growth, holidays and difficult weather. Treat this as a flexible view of future vacancies and pressure points, not an inflexible programme. Prepare the bed between occupants as part of the sequence: clear crop debris, roots and supports before the next planting needs the room. Recording the date on which clearance really occurred will reveal successful combinations at the end of the year and improve later schedules around the time you actually have available.
Assign each crop a planned finish, preventing its intended successor from arriving before the bed becomes available.
Have compost, pots and seed prepared for changeovers so an available bed can be replanted without needless delay.
Where successive crops are planned along the side of a building, a full-size standard Lean-To greenhouse can make each seasonal section straightforward to approach and manage.
Step 7: Manage picking
Let harvest records inform later choices
Picking belongs in the space plan rather than simply following it. Regular removal of ripe produce from numerous fruiting crops can support further development, while missed vegetables may place an avoidable load on the plant. Harvest at suitable ripeness and nominate routine inspection days. The same visits can reveal early demands for added room, irrigation or support.
Use a straightforward garden log. Alongside quantities, enter the cultivar, planting date, problems encountered and whether the result pleased you. A completed growing year gives much better evidence about crops suited to your beds than exceptional results reported from unrelated settings. Store the record where it is convenient, whether near the greenhouse or on an accessible device, and update it before details are forgotten. Photographs add another useful comparison. They capture the point at which foliage became congested, reveal underused sections and show how the arrangement evolved as the season moved on.
During peak growth, inspect the crops several times each week to catch ripe produce and developing trouble promptly.
Assess a crop through flavour, useful picking period and maintenance demanded, rather than only its weight or count.
To keep observation and picking convenient within the daily garden routine, use a Classic greenhouse as a standard model as an orderly centre for seasonal growing activity.
Step 8: Learn from the season
Refine a personal standard over successive years
Review the layout candidly once the season closes. Identify ground that remained unused, crops that became congested and harvests you particularly enjoyed. Then distinguish likely causes: poor positioning, delayed planting and an unsuitable cultivar each require a different response. Limit the following year's alterations to a small set, making the effect of each adjustment easier to recognise.
Match the structure and fittings to the way you garden. Confirm that working space is adequate, beds are accessible and water or the kitchen can be reached conveniently. For a position beside the house, give the local planning authority the site details and ask what needs checking, including drainage and separation from nearby features. Consult current product literature as well. Total weight alone should not define success. A modest but effortless crop used often at meals may be more worthwhile than a sprawling plant demanding constant attention. Let the review shape the next layout around actual usefulness, the work involved and your household's habits.
Read through the season's notes, then select at most two practical adjustments to test during the next growing year.
For any building proposal, contact the local planning authority promptly instead of treating forum comments as project-specific guidance.
Where a routine favours growing immediately beside a building, compare the full-size standard Lean-To greenhouse with the circumstances and advice relevant to that particular site.



Comparison
Which space strategy suits your growing?
Choose according to household priorities rather than chasing an isolated output figure. The comparison connects each planting approach with its workload, crop selection and spatial pattern.
| Strategy | Suitable for | Layout and guidance |
|---|---|---|
| A few main crops | Tomatoes, cucumbers or peppers | Allow generous spacing, clear climbing zones and comfortable harvest paths. |
| Staggered mixed growing | Salads, herbs and fruiting vegetables | Use time-limited gaps; write down handover dates for main crops. |
| Sowing and propagation | Young plants and early batches | Provide benches or work surfaces and consider where later plants will move. |
| Season extension | Early and late leaf crops | Watch the weather, choose robust varieties and reserve empty beds for follow-on crops. |
| Harvests for everyday use | Regularly used vegetables | Limit crop numbers, keep checking routes short and document ripening times clearly. |
A growing plan in five steps
A simple plan before the season prevents many space problems. Work from available area through crop choice to review, rather than putting plants wherever a little room happens to remain.
01
Sketch the interior
Map the beds, routes, doorway clearance and water point. Identify brighter sections, shaded patches and places with awkward access.
02
Prioritise crops
Choose vegetables you will genuinely use first. Only then add herbs, salads or experimental varieties in free spaces.
03
Add mature sizes
Position crops using their dimensions at maturity, adding training structures and sufficient approach room for tending and picking.
04
Schedule crop succession
Place starter, principal and later crops on a timeline. Add likely finishing points, with spare intervals for slippage.
05
Document results
After each season, record what worked. This leads to realistic decisions about varieties, spacing and the next area layout.
Checklist for realistic yield expectations
Revisit these checks before planting and as the season advances. They keep the usable area organised and relate each choice to conditions you can observe.
01. I have measured growing beds independently from the circulation routes they require.
02. I have observed how daylight moves across the location during the day.
03. I choose crops for what I use, not just visual variety.
04. I use the mature dimensions of every crop when positioning it.
05. My layout gives sensible places to short, tall and climbing crops.
06. I leave workable changeover periods between spring, summer and later planting.
07. I monitor moisture, humidity, crop health and produce ready for picking.
08. I preserve notes on strong and weak results to inform another season.
Common questions about harvest planning under glass
How can I measure harvests against the planted greenhouse area?
Measure only ground or benches carrying plants, and keep a seasonal harvest record for each crop. When reviewing it, include whether the produce was used and the attention needed to obtain it. Your own results become more informative after several growing years; an undifferentiated benchmark should not be treated as an obligation.
Does denser planting automatically increase yield?
No. When plants are crowded, they share limited water, nutrients and daylight; damp foliage persists and routine attention becomes awkward. Follow the cultivar's recommended distance and allow for its final dimensions. Open room improves circulation, inspection and access for picking, often making the planted area work more effectively.
What types of crop are worthwhile under greenhouse cover?
Your garden and cooking habits should decide. Heat-seeking vegetables, spring salads, culinary herbs and propagated plants occupy different parts of the calendar. The most rewarding choices are those you can tend well and gather often. Weigh flavour and effort against the actual greenhouse setting instead of pursuing exceptional totals.
Should I keep every area planted all the time?
No. Deliberate gaps can simplify changeovers, avoid congestion and absorb delays in crop development. Schedule starter and successor crops rather than keeping beds continuously packed. At times, leaving ground open for soil care, another sowing or removal of finished growth is more useful than squeezing in an additional plant.
What does a crop calendar contribute to layout planning?
It displays when each crop occupies a bed and the point at which that place becomes available again. Mark the dates for sowing, setting out, likely picking and removal. The timeline exposes overlaps before a principal crop meets a lingering predecessor. Later, compare planned and actual dates to refine the following year's order.
Who should I ask about planning a greenhouse on my site?
Before committing to a greenhouse, send its position, dimensions and construction details to the relevant local planning authority for project-specific guidance. This is particularly useful beside another building. Include boundaries, drainage and any contractual or site conditions in your enquiries rather than assuming a general online answer settles the proposal.
Plan the right greenhouse
Productivity starts with a suitable plan
Harvest from the planted area is an outcome, not a guaranteed quantity. When the design accommodates daylight, access routes, planting distances and the order of seasonal crops, the greenhouse becomes easier to work and more closely aligned with ordinary garden life.
Choose a focused selection initially, keep notes through the opening season and revise the layout gradually. Observations can then lead to identifiable changes, helping the available beds provide useful room for herbs, vegetables and the gardening knowledge you develop.
Explore greenhouse designs that work with your planting arrangement, chosen crops and regular gardening habits.
