
Planning Corner Windows: Glass Corner or Corner Post?
Window planning
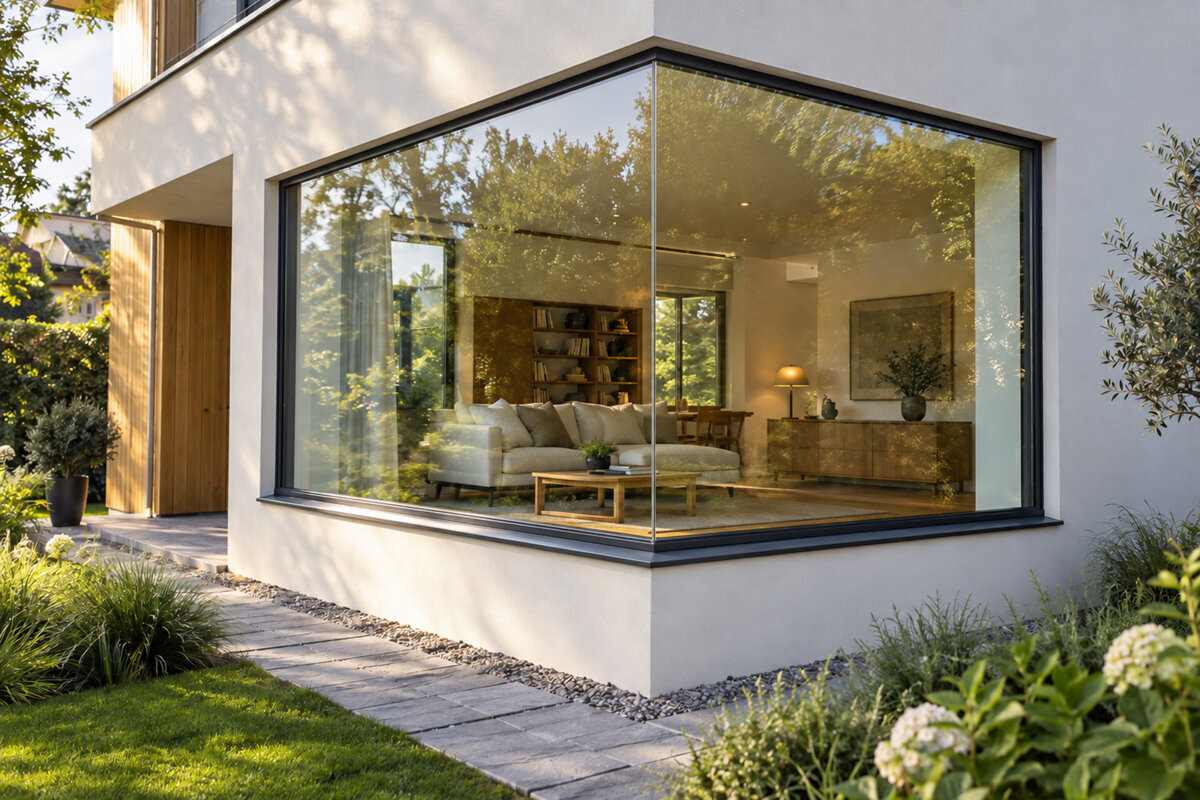
Daylight is only one consequence of choosing a corner window. The choice also governs the stopping point of the outlook, possible furniture layouts, and the meeting of roof, wall, weather seals and frame. Resolve the central question early: is the external angle to read as continuous glass, or will a visible post separate the two faces? With glass, attention stays on the scene outside; a post gives the construction a legible centre and may make fixed and opening sections easier to organise. An elevation by itself is a poor basis for deciding. Review visual character, movement through the room, measurements, structural support and interface details together before confirming opening formats, glazing bars or manufacturing sizes.
01 / Define the room effect
Judge the options from where the room will be used
Begin at the future seat rather than on the pavement outside. Glass meeting at the building edge can leave very little between the occupant and the scene beyond. Around a dining table, sofa setting or desk, that treatment may make the garden feel more present. It also turns the angle into a strong interior feature, drawing notice to curtains, tall planting or shelving placed nearby. A post gives each outlook its own boundary instead. This need not feel second-best: where wall panels are narrow, the elevation has a traditional rhythm or the façade is intentionally divided, one vertical element can bring welcome visual order.
Review the outlook from each side of the room and under changing daylight. Perhaps one face looks towards planting while its partner addresses a driveway, adjoining property or blank wall; an all-round panorama then offers less advantage. Use the plan to plot seated and standing positions, circulation, table level, chair backs and curtain locations. The drawing will show whether glazing reveals the intended scene or a post gives the composition a useful reference point. Ask the designer to provide an interior elevation with the proposed frame dimensions as well as the outside elevation. Occupants experience this feature mainly from within, so that perspective should guide the comparison.
Each corner type creates its own construction problem
In the glazed version, the panes converge at the outside angle of the building. Although the meeting line is intended to look narrow and restrained, the detail still has to allow for component movement and adjacent connections. It cannot be designed as two ordinary fixed lights joined as an afterthought. Structural design, frame routing, glass specification, seals and the neighbouring wall layers need to be resolved as a system. The relevant professional must determine the support for construction over the opening. A visually light junction must never be mistaken for a structural support. To compare proposals properly, obtain elevations, a plan section taken at viewing height, and a section from the head down through the sill. Label the meeting glass, frame location, any post, wall build-up and exposed inside edge. Those drawings reveal differences that similar renderings may conceal.
With a post, the two window faces meet against an element that remains visible. This provides a clear frame junction and can make the proposed route for structural loads easier to communicate. It still requires individual design. Its thickness, depth in relation to the outer wall and junctions on both faces will change the composition. Treat the post as an intentional feature rather than whatever space remains. Scaled drawings should test both fine and broader profiles. The aim is not simply the narrowest option, but proportions that work with the floor-to-floor scale, window pattern and vertical features elsewhere on the elevation. Specify whether the post is centred internally, shifted towards either window or lined through with the wall return. That choice also changes sill details, internal linings, furniture placement and the view from outside.
02 / Plan the opening
Fixed glazing brings calm; opening creates use
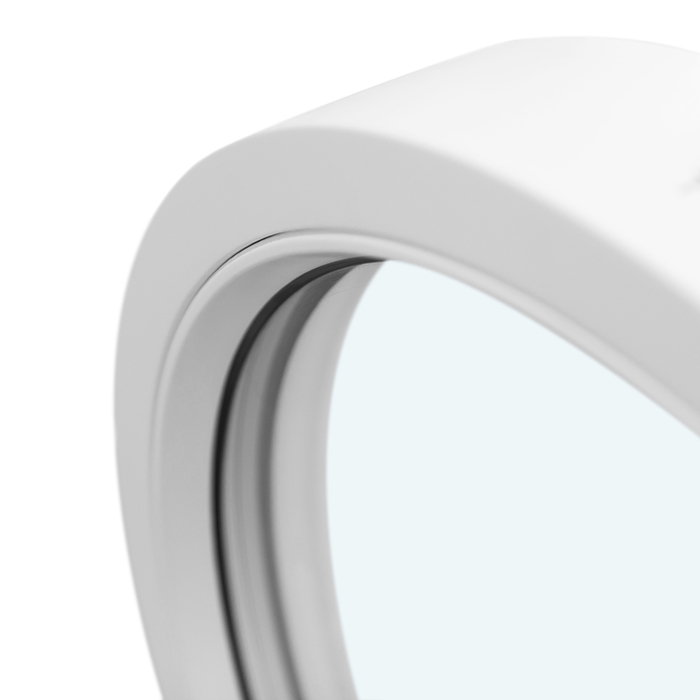
Many successful corners reserve most of the area for fixed glass. Without opening hardware or moving sashes, the sightline stays comparatively clear. One useful reference for a wide uninterrupted face is a fixed-glazed window is one possible reference. Its name confirms that the glazing is fixed; it does not make the product a ready-made corner assembly. The dimensions, fixings, interfaces and relationship with adjacent units all require separate project design. Decide first what genuinely requires ventilation and what only supplies light and outlook. That distinction keeps opening hardware from crowding an otherwise broad glazed area. Make an inventory of ventilation already available through doors and windows elsewhere in the room. The opening arrangement can then respond to everyday use rather than being imposed merely for visual symmetry.
Put ventilation where occupants can reach and manage it comfortably. A sash at the angle may be workable when furniture does not obstruct it and the handle remains accessible. In many layouts, locating the operable section to one side allows the corner glazing to stay fixed. Consider how the glass will be cleaned, whether a dining table blocks the handle, and where the open sash will project. A single-sash window opening inwards represents a separate inward-opening product category rather than proof of compatibility with a corner assembly. Confirm any proposed combination for the individual project. Show the handing and travel of the sash on the plan at the outset. The same drawing should identify the user’s operating position and the surfaces that must remain reachable during cleaning.
The opening direction needs room on both sides
When a sash opens into the room, it competes with circulation, curtains and furniture. Plot its full arc instead of relying on the nominal width alone. Kitchen wall units, a tap or pendant fitting may obstruct a window near the corner; elsewhere, a chair could occupy the arc. Opening outwards removes the movement from the interior, but requires unobstructed space beyond the wall and coordination with planting, terrace activity and solar-control fittings. Choose by considering everything around the window, rather than its closed appearance on the elevation. Test the practical positions too: shut, fully open and partly open as it would normally be left for a quick change of air.
For high-level or shallower openings, an top-hung outward-opening casement can introduce another way of operating a high or shallow opening. Rather than serving as a direct substitute for a full-sized sash at the corner, it can place ventilation away from the principal expanse of glass. Before choosing it, identify the intended user, check that the handle is within reach, consider control in windy weather and verify that exterior shading can still work separately. There must also be a practical cleaning method. Describe the outcome plainly, for example: “Provide ventilation in the left light and preserve the clear outlook through the right-hand corner.” That is more precise than requesting an opening corner. State whether reaching across furniture is acceptable or whether clear access must always be maintained.
03 / Coordinate the construction
Align scale and divisions across the façade
The composition works best when the corner pattern has an evident relationship with nearby windows. Set sill levels, window heads and vertical joints against the openings alongside it and on the storey above. Continuous corner glass visually links the two walls, which can expose even small discrepancies between their lines. A post offers a deliberate pause and may reconcile unequal widths on the adjoining faces. Draw all nearby external features as well, including rainwater pipes, eaves, reveals and housings for exterior blinds; these may dominate the angle more than expected. Study a straight elevation and an oblique view. From the approach, several frame edges, wall returns and the post can visually stack together.
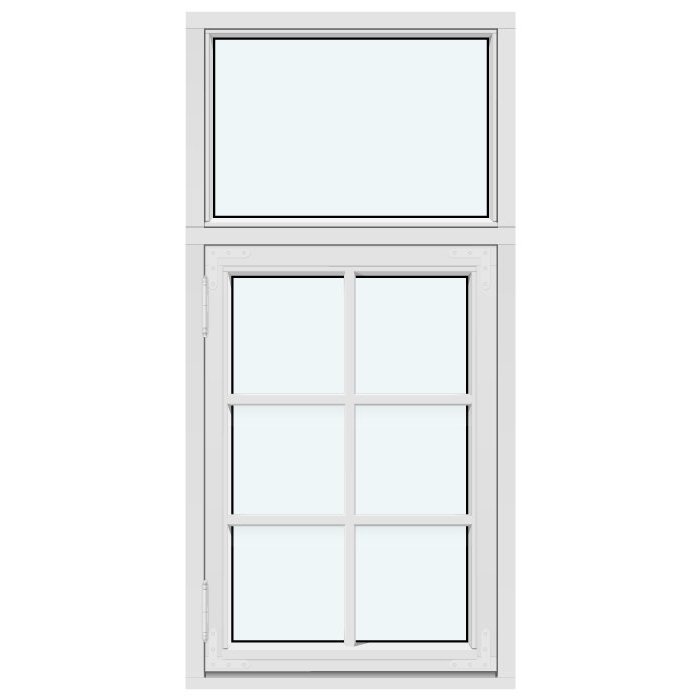
Glazing bars need a scheme of their own. Applied bars create the appearance of panes, whereas true dividing bars physically separate the glass. At the building angle, either grid meets another plane rather than continuing along one wall. Choose intentionally whether corresponding lines wrap through, reflect one another or finish at the corner. An “Kombi” casement window opening outwards offers an example of a divided window composition, but says nothing about how a particular corner can be constructed. Request the two adjoining elevations on the same sheet. This makes it easier to see whether posts and bars form a planned rhythm or meet awkwardly. Give every horizontal line a stated level and datum so unequal unit widths do not accidentally result in displaced grids.
Junction joints matter more than a perfect visualisation
A wall angle brings several systems into one small area: room finishes, structural or bracing components, insulation, cladding and window interfaces. They need a coordinated detail rather than separate assumptions. The junction design should shed weather, relate the inner and outer seals correctly and permit the expected movement. With little framing to hide the work, a slender glazed angle exposes any poorly resolved transition. Perspective artwork is therefore insufficient for construction. Obtain sectional details and assign responsibility for coordinating the window package with the shell and façade work. The drawing set should include at least the sill-level arrangement, the head and the base connection. Review the order of installation as carefully as the drawn lines. A technically plausible section may still fail to explain which contractor proceeds first or whether a surface needed for later work will remain accessible.
Introducing a post does not eliminate the interfaces; it simply makes their dividing line explicit and usually easier to read. The side and head connections still need to correspond with the wall layers and weather seals. Sequence is critical. Ordering units before the controlling wall and façade information is final can leave the site team inventing a junction. Distinguish dimensions for unfinished openings, completed external faces, clear glazing and frames, and give each drawing a named datum. That discipline helps different contractors interpret the same corner consistently. Include spaces for the approved revision and date, preventing the survey, quotation and fabrication drawings from being based on separate issues. Recheck the corner whenever wall thickness or façade construction changes before the order is released.
04 / Check the details
Consider solar gain, privacy and shading together
Because the panes face different ways, their daylight and heat effects will not follow the same daily pattern. One face may receive strong morning light and the other become brighter later; glare at the table or reflections on a monitor may follow. Before choosing the glazed area, observe where work screens, seating and cooking positions will sit and how the outdoor space is used during summer. More glass does not necessarily improve comfort if it restricts a practical furniture arrangement. Ask the project designer to assess the proposed glazing and warm-weather comfort within the complete scheme. Record which light qualities are welcome and when problems are likely. Give each orientation its own brief instead of applying one statement to the entire corner.
Indoor and outdoor shading solve different problems, and each alters the way the angle is seen. For a glazed junction, tracks and guides should preserve its visual lightness and avoid interfering with operation. A post may provide a natural divide between two independent shading elements. Privacy also deserves a side-by-side assessment: glazing towards a private garden may remain open, while the face towards a path needs greater screening. The degree of transparency, operability and shade need not match. Resolve sills, curtain rails and any insect screens before installation so they feel integrated rather than added later. Establish the parked position of controls, rails and folded fabric as well, including the portion of glass they cover.
Do not force terrace access into the glass corner
If glazing turns the corner beside a balcony or terrace, plan the doorway as a distinct function. Access needs an intelligible route, enough clearance for a leaf or sliding panel, and a properly designed transition between the floors inside and outside. Avoid asking one minimally framed corner to provide the principal view, routine ventilation and the main exit at once. A quieter arrangement often results when fixed glass occupies the angle and the door is positioned farther along an adjacent elevation. The outlook, circulation and furnishing can then be solved without competing for the same space. Draw ordinary movement through the doorway and less frequent tasks, such as taking out a bulky object or rearranging outdoor furniture.
A Patio Life lift-and-slide door is catalogued as its own lift-and-slide configuration and may be assessed beside the corner within a wider scheme. Other sliding doors can provide access independently too. Their names do not promise a particular threshold detail, dimension or method of joining to corner glazing. Work through the layout instead: locate the passage, establish where the moving panel rests and protect enough floor area for seating. A hinged terrace door needs a different study because its arc occupies usable space. Test the proposal with an everyday journey—carrying a tray from the kitchen, using the handle, allowing two people to pass and retaining room for an outdoor chair. A simple sequence like this exposes whether the refined elevation will function comfortably in use.
05 / Prepare the order
Alterations and new builds need different surveys
A new building allows the wall grid, head construction and window pattern to be developed together from an early stage. An alteration is constrained by the existing openings, bearing points, services and façade layers. Extending an opening around the angle may therefore involve much more work than its appearance suggests. Commission a competent survey before treating the preferred corner view as fixed. The investigation must cover concealed construction behind finishes as well as visible measurements and the function of the adjoining wall. Verified site dimensions and coordinated current plans carry more weight than an old drawing. Clearly identify discrepancies and areas that could not be inspected, so neither a supplier nor a client mistakes an assumption for confirmed information.
For an older property, the existing design language also offers a useful reference. A two-sash window opening inwards shows a category with two inward-opening leaves; its suitability for the existing elevation or proposed corner remains a separate judgement. In some buildings, distinct sashes arranged against a corner post respect the established façade rhythm better than a nearly frameless junction. A contemporary extension might intentionally create a contrast instead. Assess more than one isolated drawing. Set photographs of the building beside the full elevation, plan and section, then identify which lines should continue and which may change deliberately. Survey the room-facing details as well, including reveals, window boards and linings that an outside photograph cannot record.
Use a clear ordering basis for quotations
To obtain comparable quotations, prepare information beyond the overall dimensions. Identify each face by location, mark fixed and operable lights, and state handing, divisions, handle side, intended internal and external appearance and connection details. Include the wall layers, external datum and the choice between a glass junction and a post. For special shapes, fixed-glazed triangular and raked windows may offer categories for filling further areas of glazing nearby. Their name confirms only the fixed triangular or sloping form; it provides no assurance that they share a corner detail. Every proposed connection needs separate technical acceptance. Ask each supplier to price the same defined alternatives: glazed corner, posted corner and, if useful, two independent openings separated by wall construction. Require the quotation to identify departures from the brief, work not included and decisions still outstanding. Otherwise, apparently similar totals may represent proposals developed to very different levels of detail.
List unresolved matters instead of allowing them to become assumptions. Ask the supplier and project professionals to state the visible widths at the angle, locations of frames and joints, opening lights, controls, cleaning method, governing junction drawings and responsibility for the final measurement. Delivery must also fit the works programme. Bloomcabin gives a lead time of 4–6 weeks following order confirmation, and a 5-year guarantee for windows and doors. Neither statement confirms a project date or technical suitability. Place the order only after the design, survey and responsibilities have been agreed. The final check should record the accepted option, colours, window divisions, opening directions and approved connection drawings.
Common questions
Does a glass corner always outperform a corner post?
No. Glass gives greater visual continuity around the angle, whereas a post introduces deliberate order and a definite frame junction. Compare the interior outlook, structural solution, interfaces, ventilation needs and surrounding window pattern. Either approach can produce a coherent design.
Can every part of a corner window open?
Operable sections can be included in the brief, subject to the construction, proportions, handing and connection details. A common arrangement fixes the glazing at the angle and ventilates through a neighbouring light. This keeps operation and furniture clear of the principal corner view.
What dimensions are needed for an initial enquiry?
For both faces, provide approximate opening height and width, wall construction, façade datum, plan location and site photographs. Mark the proposed glass junction or post, fixed sections, divisions and opening directions. Before manufacture, the project team must verify and formally agree the measurements and details.
How should privacy be planned for a corner window?
Study each outlook on its own merits. Garden-facing glass might remain clear while a side towards a path requires screening. Locate curtains, room-side blinds and exterior shading during design rather than after installation. Their tracks and operating space influence both usability and the intended light appearance of the glazed angle.
Is the corner itself the right place for the terrace door?
Possibly, although another position may work better. Trace the route outside and allow for moving leaves or panels, nearby furniture and terrace use. Keeping the angle fixed and placing the entrance beside it separates circulation from the outlook, often producing a simpler and more practical room arrangement.
Next step
Selecting a glazed junction or a corner post shapes the entire room rather than one isolated detail. Choose glass where continuity of view and a quiet surface matter most, provided the demanding connection is fully designed. Choose a post where the opening pattern and elevation benefit from a visible centre. Begin with outlooks, room use and ventilation positions. Next, coordinate structural support, wall construction, solar control and interfaces with the responsible professionals. A coordinated drawing set and a written schedule of questions provide a dependable basis for pricing, site measurement and the eventual order.
