
How to Prepare a Garden Shed Site on a Slope
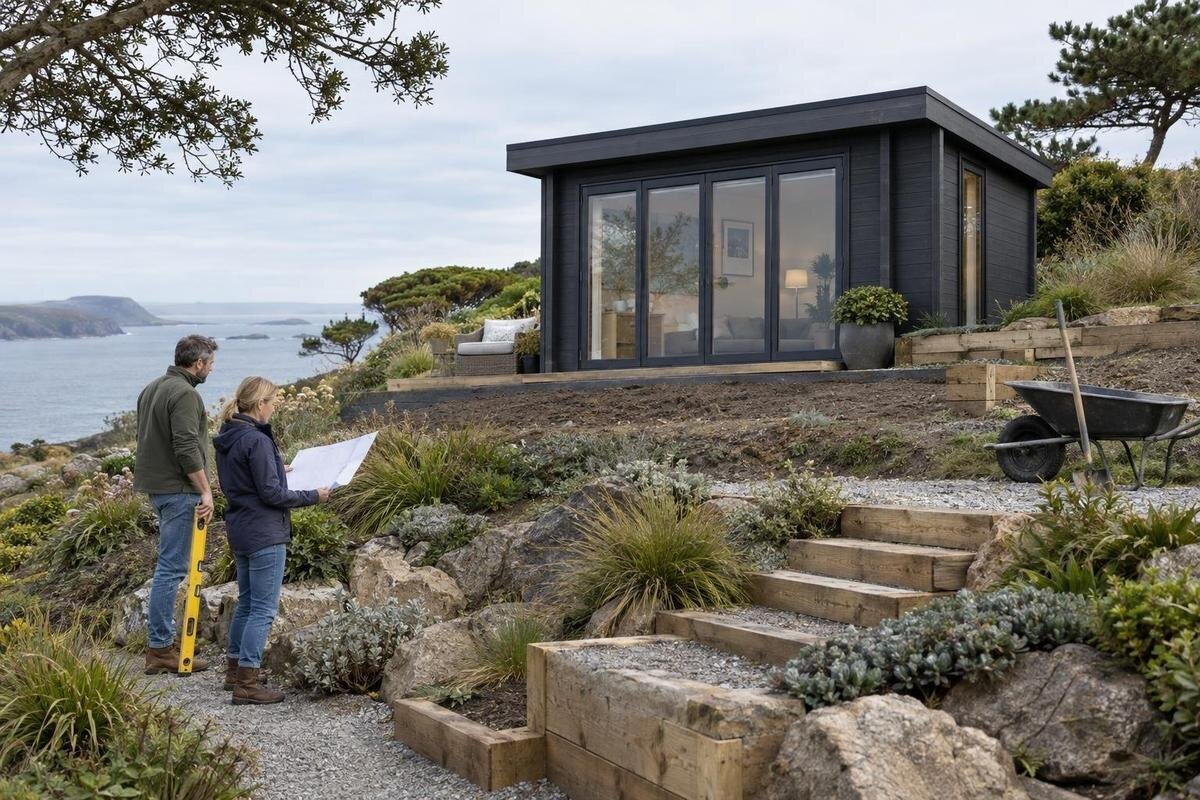
GARDEN SHED SITE PLANNING
Preparing a garden shed site on a slope is not simply a matter of scraping the high side and filling the low side. The ground needs to be assessed across the proposed footprint, the base must match the chosen building’s requirements, and rainwater needs a clear route. A site that looks nearly flat can still fall or dip enough to complicate support and access; a more obvious slope may call for carefully planned foundation and earthworks. This guide covers the checks to make before excavation or ordering installation, and when it is sensible to ask a groundworks professional, installer or other qualified professional to assess the site.

Assess the slope across the full footprint
Begin by looking at the whole area where the shed could sit, not just the point that seems flattest. A sloping plot may fall in one direction, dip across its width or change angle part-way down. Check the ground at all four proposed corners and note hollows, ridges, exposed roots or signs of previous levelling. Marking a rough footprint with pegs and string can make changes easier to see; it is a planning aid, not a survey or a way to decide foundation heights. View the marked area from more than one side, as a cross-fall can be less obvious when you stand uphill or downhill from it. Also consider whether the likely base position would force you to remove established planting, alter a path or work close to a boundary. If the fall is difficult to judge, have the levels professionally assessed before settling on a position.
Choose an actual garden house before fixing the footprint: its external dimensions, entrance position and installation instructions affect how much space is needed. Do not estimate from a photograph or assume the model name tells you the size. The page for the Verdana 1 garden house can help identify the product you are considering, but confirm dimensions and installation details with the supplier before setting out the site. Allow for any clearance the instructions require for assembly and maintenance, rather than making the prepared area exactly the size of the building. A change of model may mean that a different part of the slope works best.
Watch where rainwater moves
Rain can reveal things that are easy to miss on a dry day. When it is safe to do so, look at the area after ordinary rainfall and note where water comes down from higher ground, where it slows and where puddles remain. Include water arriving from nearby paths, patios or roofs, not only the slope itself; a small channel can direct flow towards the proposed shed site. Notice whether water crosses the plot or gathers at a low point. Check again after a longer wet spell if possible, because ground that appears firm after one shower may behave differently once the soil is saturated. Note visible erosion, washed-out mulch or silt lines as well, since these can show the direction of surface flow. These observations are not a drainage assessment, but they give an installer a clearer picture than a general description of a damp garden.
Place the footprint so it does not obstruct an existing flow path or leave a pocket where water can gather beside the base. A raised pad, cut bank or channel can change where water goes, so do not assume one will solve the problem without considering the whole site. If runoff needs to be redirected, or substantial flow crosses the area, ask a drainage or groundworks professional to plan an appropriate response. Check the entrance layout for the specific model too: the Verdana 2 garden house page identifies one candidate, but confirm access and any required clearance from its product information or supplier before choosing an orientation.
Check the ground below the surface
A neat lawn does not prove that the ground underneath is suitable for a shed base. Look for signs of previous filling or disturbance, old paving, buried rubble, exposed roots and places that feel persistently soft or wet. Conditions can differ between the uphill and downhill edges, even across a small footprint. Consider nearby features too: a mature tree, bank, boundary wall or recently altered patio may affect the available working area and reveal a history of changes to the ground. Avoid treating a single test hole or a patch of firm turf as proof that conditions are the same throughout the proposed site. These clues help you describe the site, but they do not establish what the ground can support. If you find mixed ground, signs of movement or uncertainty about what lies below the topsoil, get advice from a groundworks professional before deciding how to prepare it.
Before digging, establish whether services or other hidden features could be in the proposed work area; do not rely on guesswork or an old garden plan. Share what you have observed with the installer and ask for the base instructions for the exact shed you intend to put there. If you are discussing the Durano garden shed, use that product identity when requesting the relevant instructions rather than relying on a generic shed diagram. A supplier or installer can confirm which documents apply; a product name alone does not specify the foundation.
Match the base to the slope and the shed
A level top is not enough if parts of the base are unsupported, rest on loose material or are liable to move. The base needs to provide the support required for the particular garden shed, and the slope affects how that support can be achieved. Do not treat spare paving slabs, loose blocks or a heap of soil as a universal fix. The transition between prepared ground and the surrounding slope also needs consideration, so that the finished work does not leave an exposed edge that is easily washed away or damaged by ordinary garden use. Ask the installer to explain how the proposed base will be supported at both the uphill and downhill edges, how it will meet the existing ground or any properly prepared fill, and how the proposal relates to the manufacturer’s instructions.
The suitable foundation approach depends on the site, the building and the manufacturer’s requirements. A proposal might involve excavation, a designed raised support or a stepped arrangement, but the right choice cannot be made from a photograph or a generic rule. Ask for the proposed approach to be explained in relation to your particular slope, including how the base will remain stable. If you are discussing the Veltor 1 garden house, give the installer the exact product reference and ask them to match their proposal to its instructions, rather than to an assumed specification.
Plan excavation and any retaining work
Cutting into the uphill side and building up the downhill side can seem like a straightforward way to create a level area, but each changes the ground. Excavation can expose different soil or alter how water travels, while poorly prepared fill may settle. Do not simply pile excavated soil against the low edge or remove ground from the foot of a slope without professional advice. Ask whether the proposed cut or fill affects the support needed for the base and what should happen to any loose or unsuitable material.
A retaining structure, where one is needed, is separate from simply making the shed base level. Its design depends on the site conditions and the work involved, so do not improvise one from spare materials. Ask a suitably qualified professional to assess any substantial retaining or earthworks proposal and explain how it relates to the shed base and water flow. When describing the job, identify the intended building as well as the location; for example, the Orello 1 garden house page can identify a product under consideration, but the contractor must confirm the relevant dimensions and instructions rather than infer them from its name.
Manage spoil and temporary ground conditions
Decide where excavated soil, stones and other material will go before work begins. Keep any reusable topsoil separate from subsoil if the groundworks professional advises that it can be retained, and agree how unsuitable material will be removed or handled. Avoid using the downhill edge as an unplanned storage area: a large pile can obstruct access, cover a water path or put extra weight on ground that has not been assessed. Make sure the work plan includes enough room for materials and machinery without blocking the route to the site.
Ground conditions can change between the first inspection and the day of excavation. Wet ground may become difficult to work on, and machinery or repeated foot traffic can leave ruts or disturb the prepared area. Agree with the contractor what will happen if the ground is wetter, softer or more uneven than expected, rather than pressing on with a different method without discussion. Temporary measures should not send water towards the future shed base or neighbouring ground. If the site changes during the work, pause and have the plan reviewed before continuing.
Check delivery and assembly access
Trace the route from the delivery point to the proposed site, including gates, turns, steps, narrow passages and any sloping or soft sections. Do not assume that components can be carried or equipment brought through just because the garden looks accessible from the road. Ask the supplier or installer what package dimensions, unloading arrangements and access conditions need to be confirmed for the chosen building. If machinery may be needed, discuss where it can travel and where it can stand without damaging paths or disturbing the ground intended for the base.
Plan a practical place for unloading and temporary storage, and make sure it will not block the route or an existing water channel. The access plan should account for the final approach to the site, not just the point where a vehicle can stop. Before ordering, share the exact model reference with the people arranging delivery or assembly. If you are considering the Modano 1 garden house, use its product page to identify the item in that conversation and ask the supplier or installer to confirm the details they need; do not infer package size or delivery access from a product photograph.
Set out the entrance and approach
Think about how you will reach and use the entrance in wet weather, as well as where the shed itself will fit. Check whether the approach crosses the fall of the slope, passes through a low point or becomes awkward where the ground changes level. Leave enough space to stand and move items at the entrance, and consider the route around the building for assembly and future maintenance. Confirm the actual entrance and opening arrangement for the selected model from its drawings or supplier; do not assume that a photograph shows every detail.
A clear route should be part of the site plan, rather than an afterthought once the base is in place. Look for obstacles such as hedges, fences, stored items or overhanging branches, and consider whether a different orientation would make access easier without obstructing water flow. Avoid improvising steps or a ramp on an uneven slope; ask a competent professional about a safe, suitable approach if levels make access difficult. For example, if reviewing the wooden garden tool shed M listing, confirm the entrance and clearance details for the exact product before fixing the approach route.

Confirm site and product details before ordering
Before committing to groundworks, bring together the intended shed’s dimensions, installation instructions and base requirements with what you know about the site. Check that the proposed footprint, entrance position and working space still fit the chosen location. A product page such as the wooden garden shed S page can identify which item you are discussing, but confirm the details that matter from the supplier or product documents. This helps prevent a base being set out for a different size or arrangement than the one eventually chosen.
Ask the installer or groundworks contractor for a clear description of what their work includes: site preparation, base construction, any excavation or retaining work, handling spoil and access arrangements. Ask what assumptions they have made about the ground and what happens if those assumptions prove wrong once work begins. If the proposed position raises planning or other local requirements, check with the relevant local authority or a suitably qualified professional rather than guessing. Confirm who is responsible for coordinating the base with the shed installation before work is scheduled.
Know when to bring in a professional
A professional assessment is especially important if the slope is difficult to judge, the site shows signs of movement, the ground is persistently wet or disturbed, or the plan involves substantial excavation, raised support or a retaining structure. Uncertainty about underground services is another reason not to start digging. Depending on the issue, speak to a groundworks contractor, shed installer, surveyor, drainage specialist or other suitably qualified professional. The aim is to have the site and proposed base assessed by someone who can take responsibility for the relevant part of the work.
Before assembly, have the prepared area checked against the installation instructions for the exact shed, including its position, support and access. Confirm that the route is clear and that groundworks have not left loose spoil or changed the way water reaches the site. If the finished base or surrounding ground differs from the agreed plan, ask the installer to review it before the building is put in place. Taking a few photographs and keeping the product documents with the site plan can make that handover clearer and help avoid last-minute decisions.
Frequently asked questions
Can I put a garden shed directly on a sloping lawn?
Usually, the building needs a base prepared to the manufacturer’s instructions; placing it on the lawn or propping up one side is not a reliable substitute. The right approach depends on the ground, the slope and the particular shed. Confirm the base requirements before starting work.
How steep can a garden shed site be?
There is no single slope limit that applies to every garden shed or site. The length and shape of the slope, the ground beneath it, the proposed base and the product’s instructions all matter. If the fall is difficult to judge, ask a suitable professional to assess it before committing to a position.
Can I level the lower side with soil?
Do not assume loose soil will provide dependable support. Fill can settle or move, particularly if it has not been prepared as part of a suitable base design. Ask the installer or groundworks professional how the lower side will be supported and what ground preparation is needed.
Should a shed go at the top or bottom of a slope?
Neither position is right for every garden. Look at water flow, ground conditions, access and the amount of earthworks each location would require. Avoid choosing a low point where water gathers or a position that would need unplanned excavation or retaining work.
Should I order the shed before preparing the base?
Choose the intended model, or at least confirm its dimensions and installation requirements, before fixing the base design. That gives your installer the correct information about the footprint, entrance and support needs. Confirm the details with the supplier rather than relying on a product name or photograph.
A workable sloping site begins with a clear picture of the ground, not with levelling work. Confirm the shed’s requirements, observe water movement, and plan access and any earthworks before the base is prepared. Where the proposal involves substantial excavation, raised support or retaining work, get the site assessed before installation. With the product information and groundworks plan aligned, the finished base is far less likely to need changes at the last minute.
