
Replace windows before or after insulation, render and cladding?
Planning window and façade refurbishment
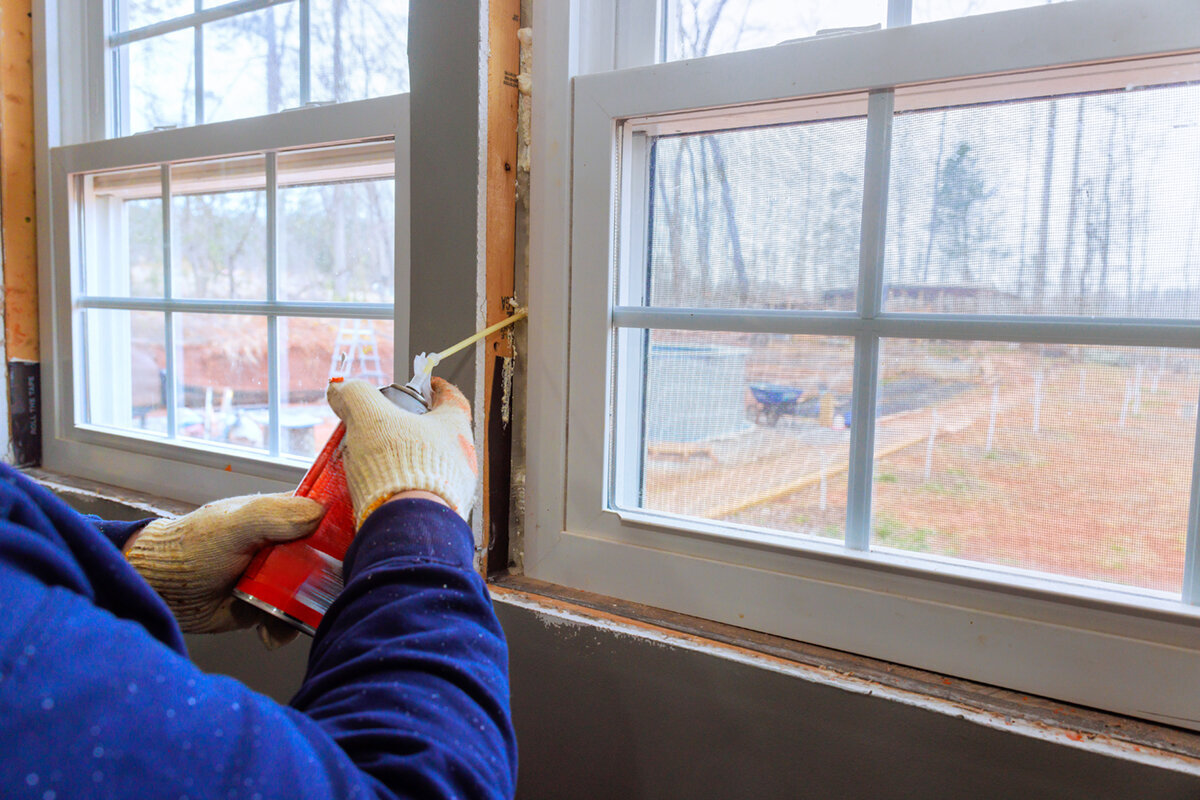
Façade insulation, fresh render or new cladding should be programmed with window replacement rather than treated as unrelated work. A unit’s thermal performance is only one concern. Its depth in the wall controls how the frame meets insulation, the sill, weather seals and the external finish. Installing it earlier can simplify later façade operations, provided its line and junctions are settled beforehand. Leaving replacement until render or cladding has been completed may mean taking finished work apart, patching visible areas and reaching difficult interfaces. The sections below compare suitable sequences for different schemes and identify matters the homeowner, window installer, façade designer and finishing contractors need to settle jointly before an order is placed.
01 / Define the wall build-up
Start with the wall build-up, not the window model
Asking whether windows or insulation should come first misses an earlier decision. Begin with a section through the outside wall, showing the existing masonry or timber structure, proposed insulation, any ventilated cavity, render system, sill and internal lining. Use it to locate the outside face of the replacement frame and its recess from the completed façade. That choice changes reveal depth, available daylight, access to fittings, external appearance and the way each junction can be formed. Without an agreed section, a unit may match the structural opening yet relate poorly to the finished wall package.
For a complete refurbishment, the safer sequence is generally to install the windows while the new outer layer remains open. The installer can use the prepared aperture, after which the façade contractor can form the insulation or cladding neatly around it. Consider the Super Low Uw outward-opening passive-house window as one example. Its name states the selected configuration, but the mounting line, fasteners and interface design must be developed for the actual building. Request a sectional drawing for the project instead of relying on an elevation or a list of dimensions. It should explain the head, jamb and base junctions.
Windows before external insulation: the usual façade-refurbishment sequence
With continuous external insulation, installers generally remove old units, inspect and repair the openings, and fit replacements before the reveal insulation, main insulation and finishing coat. This allows the chosen frame line to be coordinated with the new thermal layer, which can then return neatly to the frame. The sill, drips and base detail can be developed at the same time. Sites still need individual programmes. Scaffold availability, occupation, opening condition and Ireland’s changeable Atlantic weather may call for staged work. Even then, every opening should be completed to the agreed interface design.
Build one trial opening before committing the entire façade. It allows the team to inspect the real reveal, irregular existing surfaces, intended insulation depth and proposed sill. Approve the arrangement for similar openings only after that check. For an inward-opening window with one leaf you must also consider furniture, radiators and internal sills. Its swing is governed indoors, while the outside insulation determines the reveal form. Assign the work explicitly: who creates a sound supporting surface, secures the unit, applies membranes or sealants, and completes the insulation and finish around the frame? A sequence without named responsibility for those tasks is incomplete.
02 / Agree a trial opening
How finished render can complicate a subsequent window change
A rendered façade does not prevent later window replacement, but the meeting line between the old finish and new frame becomes critical. Taking out the unit may harm the render, reveal, sill or adjacent coatings, while a frame of another size or depth may change the elevation’s proportions. The team must choose between a local patch and renewing a wider area to achieve a satisfactory colour and texture. Later replacement remains feasible; the point is to agree the likely extent of repairs, surface protection and expected standard of finish before work begins.
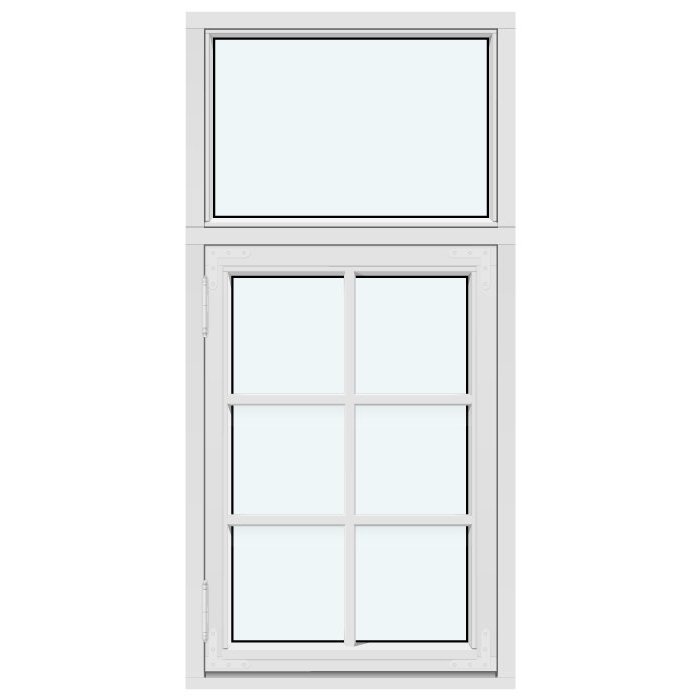
Replacing selected windows after a recently completed render job may still be reasonable when only those units need urgent attention. In that case, have the window installer survey the existing construction and consult the renderer early. Photograph every reveal, agree how completed surfaces will be protected and settle the sill treatment before removal starts. For a divided elevation featuring an outward-opening traditional “Kombi” casement, dimensions alone are insufficient. Match the frame width, division and degree of recess to the existing composition. When the work occurs can influence how successfully the elevation is restored, alongside the selected window form.
Treat the substructure as the interface for façade cladding
A ventilated cladding system is assembled differently from a rendered façade. Behind the visible boards or panels there may be insulation, supporting rails and an air space. Their depth and position must be coordinated with the windows and their fixings before any facing material is cut. Establish the reveal depth, side returns, head weathering and underside treatment. Replacing a unit after the facing is complete will often require panels or trims to be released and altered, potentially disturbing fitted edges, cover pieces and continuous façade lines.
Prepare a horizontal and a vertical section for every window family. At larger apertures, identify the load-bearing elements and account for access during fitting and maintenance. A Patio Life lift-and-slide door shows why this matters: its threshold, the completed floor indoors, the terrace construction outside and the façade line must be set together. A quoted door specification is not a substitute for a drawn interface. State when the facing can finally be closed, which should be after the fixings, perimeter work and designated edge pieces have been inspected.
03 / Measure for windows
The correct installation position is a project decision
The frame may be positioned deeper in the supporting wall, towards its exterior face or beside the future insulation layer. The appropriate choice depends on the building. It governs internal and external reveal widths, fixing conditions, sunlight through deep openings and the shelter afforded to the frame. Replace vague terms such as “flush” or “central” with a clearly identified datum and dimensioned wall section. Where old walls are uneven, the drawings must also identify the alignment surface and the acceptable variation around each reveal.
Frame location must also reflect the operating method. For an outward-opening top-hung window allow clearance for the sash movement and anything mounted outside. Moving an inward-opening unit too far into the room can interfere with broad sills, curtains or internal finishes. Review practical use as well as thermal design on each elevation: consider opening, cleaning, shading and nearby furnishings. Unusual shapes and opening directions deserve particular care. The elevation drawing, cross-section and operating diagram need coordinated datums and levels so that different contractors can spot clashes before construction.
Check reveals, heads and sills separately
Each edge of a window performs a different role. The jambs, head and lower opening may also be completed during separate site operations. At the sides, insulation or facing must be returned towards the frame. The head needs suitable weather protection and a resolved visible edge. At the base, falls, sill ends and the adjoining façade finish meet. Consequently, a jamb section by itself cannot settle the construction at the top and bottom; those junctions require their own details.
Fixed glazing needs equally careful perimeter design. A fixed-glazed window still needs decisions on the surrounding frame, drainage through the assembled wall, the visible glazing and its depth relative to the external finish. Obtain clear answers on three matters: temporary protection at the head before façade completion, the chosen sill and fitting stage, and preparation of the jambs for later rendering or cladding. Resolving these items only after the scaffold is in use encourages improvised work. Formal approval of specific details in advance is preferable to a broad promise that the perimeter will somehow be made suitable.
04 / Connect the façade
Decide early on resized and new openings
Widening, raising or relocating an aperture turns the job into more than a like-for-like window change. Structure, lintel, lower wall, internal finishes, shading, façade composition and the proposed unit must then be considered together. Have suitably qualified professionals review the alteration before selecting the window. Reliable surveying is possible only after the structural aperture, level datums and wall layers are settled. Existing clear dimensions alone cannot support an order for a modified opening. Establish a design-freeze stage, after which revised geometry or heights require renewed approval. Keep a change register naming the aperture, reviewer and effects on dimensions, internal work or the façade grid. This ensures the supplier and the structural and façade contractors all work from the same current information.
With asymmetric, circular or angled shapes, the sequence matters especially because façade lines and junction pieces can rarely be moved freely. A triangular and angled fixed-glazed window needs its actual aperture, frame outline and neighbouring finish to be mapped together. Agree how templates, trims and cut pieces will be checked on site. Alterations become more conspicuous and harder to manage once final render or facing is in place. Order only when the technical opening detail has been approved, rather than from an initial concept drawing.
Plan windows, doors and floor levels as one detail
Sequencing is especially sensitive at doors close to floor level, where external paving, a terrace or drainage meets the façade. Put the completed indoor floor, outside construction and threshold elevation on the same coordinated drawing. Finishing the terrace before changing the door can leave insufficient access or clearance for the intended junction. Adding façade thickness later may also alter the visible door reveal. Site management should issue common level datums before substrates, windows and exterior finishes advance separately. Access needs further planning in an occupied home: an opening used every day may require different protection, a temporary step and a revised working sequence compared with a secondary entrance. Nevertheless, temporary convenience must not override the designed final arrangement or leave paving and façade edges terminating at an unverified level.
Nor is this coordination limited to wide openings. An outward-opening patio door with one leaf needs to be planned with both the terrace use and proposed façade finish. Its description establishes the swing direction, but says nothing about whether the perimeter detail fits the ground or floor construction. Confirm the installation stage, the point when the exterior surface reaches design level and the means of protecting unfinished junctions. Put any interim solution into the written programme. Otherwise, one contractor may follow an earlier datum while another proceeds on the assumption that the later level already governs.
05 / Check the finished surface
Measure and order only after detail approval
A preliminary quotation is useful for budgeting, but the final survey remains essential. Before committing to an order, confirm the real structural aperture, reveal condition, necessary making-good, installation line, completed outside dimension and interior interfaces. Record the opening direction, sash arrangement, operating side, handle level and special elevation for each room. Give every unit a position reference so visually similar windows with different functions are not mixed up, and identify which phase receives each one. The approval table should contain the reference, surveyed aperture, ordered dimension, datum edge, sill, façade construction and person responsible. Reconcile drawings with site conditions before signing. On phased work, label measurements clearly as either existing-state or future-façade dimensions.
For a casement with two outward-opening leaves, width and height are not enough. Establish the primary leaf, its travel relative to the proposed façade and any future obstruction from scaffold, shutters, rails or planting. Do not base an order on an estimated completed reveal if render removal, masonry repairs or another cladding layer are outstanding. Bloomcabin’s delivery period is 4–6 weeks, subject to confirmation of the order. Use that interval for coordination where helpful, but never in place of an approved survey and settled junction design.
Organise responsibilities, protection stages and handover
Interface failures often occur between contractors rather than within one component. A window may be installed before insulation and then render or cladding, while weather, scaffold access and contacts change between stages. Prepare a responsibility schedule before starting. For every aperture, assign preparation, fitting, internal and external perimeter work, sill or cover, completion of the façade and interim protection. Schedule reviews when the opening is ready, once the unit is secured and before the exterior is finally enclosed. Label dated photographs with the position reference. Nominate both the person authorised to pause work over a doubtful substrate and the person who approves restarting. That process stops unfinished dimensions, fixings or seals from being hidden by the next trade. During long gaps, assign checks of temporary coverings and reporting of any damage or movement.
Completion checks must cover function and detailing, not merely the look of the final surface. Verify the specified opening directions and divisions, test every sash, remove films and temporary protection at the correct stage, and compare visible façade edges with the approved drawings. List unfinished items with completion dates. Bloomcabin provides a 5-year guarantee for its windows and doors, so retain the order, surveys, product references and photographs in an orderly file. Careful sequencing cannot by itself guarantee a better façade, but it enables the trades to follow one coordinated envelope design instead of discovering unresolved conditions in succession.
Frequently asked questions
Should I always remove old windows before new external insulation?
It is commonly preferable during a coordinated façade project because the replacements can be located with reference to the new insulation. It is not universal: sound or recently renewed units may remain. Base the decision on their condition, the proposed wall section, junction design and phasing.
Can a window be replaced after rendering?
Yes. Before removal, agree how completed surfaces will be protected, what damage is likely, how the reveal and finish will be reinstated, and what happens to the sill. If matching the existing tone, texture and edges is important, involve the rendering contractor early.
When is the final measurement taken?
Take the binding measurements after inspecting the aperture and agreeing the frame line, wall construction and perimeter details. Existing dimensions remain provisional while masonry repairs, reveal alterations or new façade layers are outstanding. The installer responsible for the work should approve the final basis.
Must façade cladding be finished before window installation?
Usually the final facing should remain open until the frame position and perimeter construction are settled. Supporting rails may still be installed as preparatory work. Use a coordinated drawing that resolves the window, insulation, air space and facing around the full aperture.
Which documents help when speaking to window and façade contractors?
Bring photographs of each elevation, aperture dimensions, a floor plan with swing directions, the intended insulation or facing specification, indoor floor and outdoor paving levels, and any glazing-bar preferences. A reveal section or clear sketch will expose dependencies before an order is placed.
Next step
During an integrated refurbishment, installing windows ahead of insulation, finish render or permanent cladding is generally easier to control. The aim is not an inflexible timetable, but a resolved assembly in which frame location, wall layers, reveals, sills, thresholds and the exterior finish operate together. If replacement is postponed, budget and programme the additional dismantling and making-good. Before ordering, test the design on one opening, complete the wall section and allocate every interface in writing. Product choice, surveying and dates can then be agreed with fewer unresolved dependencies.
