
Setting Out Windows and Doors in a Kitchen Extension
Planning a kitchen extension
More room is usually the first reason for adding to a kitchen, but the position of its glazing and doors has equal influence on the result. Openings govern possible unit locations, daylight at the dining table, the directness of patio access and summer comfort. Leaving these choices until the kitchen arrangement has been settled can create awkward trade-offs among brightness, storage and convenient outdoor circulation. Develop the floor plan, furnishing, outward views and exterior composition as one scheme. The sections below set out a sensible decision order, distinguish fixed panes from operable windows and the principal patio-door formats, and identify information that the designer, builder and customer should settle before an order is finalised.
Pre-purchase check 1
Start with the kitchen routine, not the façade
Start with a scaled plan of credible activity areas rather than choosing an impressive expanse of glass. Show the base and tall cabinetry, sink, hob, island, table and chairs at full depth. Trace journeys into the new room and between the cooking area, table, fridge and garden. This reveals doors that skim an island, sashes that obstruct a passage, or sills that meet the worktop at the wrong level. Include bins, food storage and small appliances in this first drawing. Even a handsome exterior arrangement will frustrate daily use if its openings remove the sole uninterrupted length of wall suitable for cupboards.
List the priorities in order. Decide whether the addition is chiefly a bright place to cook, a dining room oriented towards the garden, or a link from the original house to the terrace. A modest scheme may benefit more from uninterrupted masonry for appliances and storage than from another pane reaching the floor. Conversely, broad glass may transform an addition intended to enlarge the dining area. Identify the main garden exit and less frequent journeys, such as those to bins or herbs. With the hierarchy settled, assign a purpose to each opening: access where passage is essential, and a window where daylight or outlook is the real requirement.
Design daylight as a room-wide pattern
How daylight reaches different parts of the kitchen matters as much as the total glazed area. Glass concentrated at the far end may establish an appealing outlook while leaving worktops nearer the original house in shadow. A side opening or a raised strip of glazing can brighten the depth of the plan without consuming an entire storage wall. Study the proposal in morning, midday and evening conditions. Early sun may enhance breakfast, whereas low rays across a preparation surface or dining place may cause glare. Also choose the outlook from the cooking position deliberately, taking account of nearby properties, boundaries and any screening that could be added later.
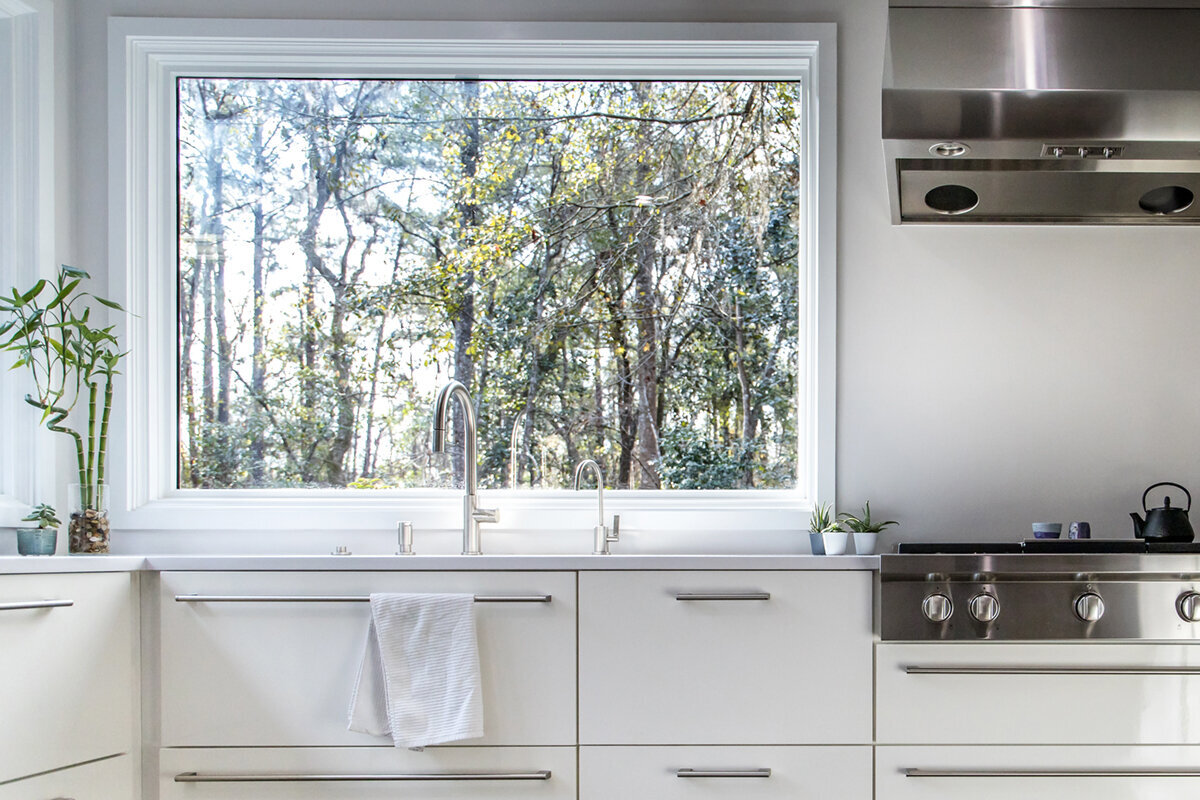
A fixed window aligned for light and views is appropriate where neither regular airing nor access is required. Possible locations include above built-in seating, alongside tall cabinetry or at a point selected to frame the garden. Because no sash swings through the surrounding area, furniture can meet its edges more neatly than it could beside an operable window. The wider scheme must nevertheless provide ventilation and a safe, practical way to clean the glass. Confirm that each face of the pane can be reached and allow for planned blinds, curtains, plants or light fittings nearby. A restrained arrangement usually reads more clearly when each opening has a specific purpose instead of distributing similar windows across every external wall.
Pre-purchase check 2
Coordinate worktop, sill and taps
A window above a work surface can be attractive, provided all levels are coordinated accurately. Consider the opening together with the worktop, splashback, sill and handle, rather than treating width and height separately. If the sill is too low it may break the usable surface; if too high, the view from the sink may be lost. For a sink position, locate the basin, tap, sockets and wall finish before fixing the window. Allow the sash to move without striking a tall tap, drainer or anything stored on the sill. Test this on a scaled wall elevation of the units; a floor plan alone will not reveal the vertical conflicts.
An outward-opening top-hinged window offers useful secondary airing above a work zone where a side-hinged sash would interfere with the kitchen. Assess the mechanism against the intended routine, the exterior appearance and the way the glass will be cleaned in that particular position. Think about the person using it too: the handle should be reachable without an uncomfortable lean across the worktop. Check that everyday items, including the coffee machine and utensils, will not prevent access once the kitchen is occupied. Internal glare control needs the same forethought. Reserve suitable fixing space for it and make sure the blind or shade can operate without fouling handles, taps or overhead cupboards.
Place ventilation openings where they remain usable
Heat and water vapour arise during cooking, yet placing a window immediately behind the hob does not by itself create an effective ventilation approach. Wind through an open sash may disturb air movement, and pots or an operating extractor can make the window awkward to reach. Test the design against distinct routines: refreshing the room in the morning, managing air while food is prepared, clearing it after guests leave, and admitting air during wet weather. Two usable openings on separate walls may behave differently from one broad opening. Agree the project-specific arrangement with the kitchen designer, whoever prepares the ventilation design and the appropriate building professionals.
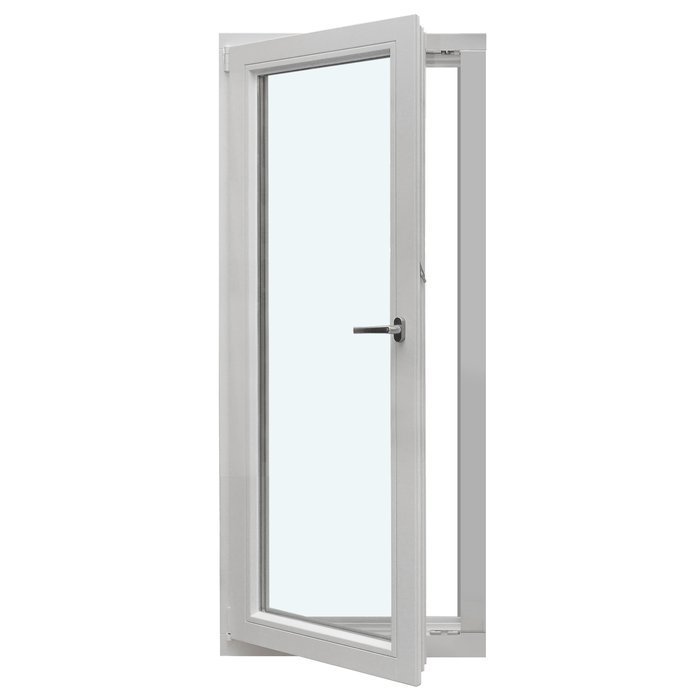
A single inward-opening casement window can serve as an accessible ventilation point that is controlled independently, as long as its arc remains clear of furnishings and window treatments. A sash moving into the room consumes internal space; one moving outside preserves that space but must not obstruct anything beyond the wall. Draw both operating arcs instead of judging the closed appearance alone. This is particularly important beside a confined passage along the side of a garden, where an open window could narrow the route. Label the windows intended for frequent airing and distinguish them from panes included mainly for daylight. Doing so avoids specifying opening hardware where a window would be difficult to reach in normal use.
Pre-purchase check 3
Choose the patio transition around real routes
Locate the patio door by tracing the journey it must support. The most useful position may be offset from the middle of the elevation, close to the dining place or beside the part of the kitchen used when carrying meals outside. Rehearse that journey with dining chairs occupied or pulled back, someone cooking and another person entering from the garden. Access immediately behind the table may look welcoming but disrupt meals when people pass frequently. Moving the exit sideways can protect the dining area, provided the exterior path is arranged accordingly. Map patio seating, barbecue space, containers and shelter at the same time so movement follows one coherent arrangement indoors and outdoors.
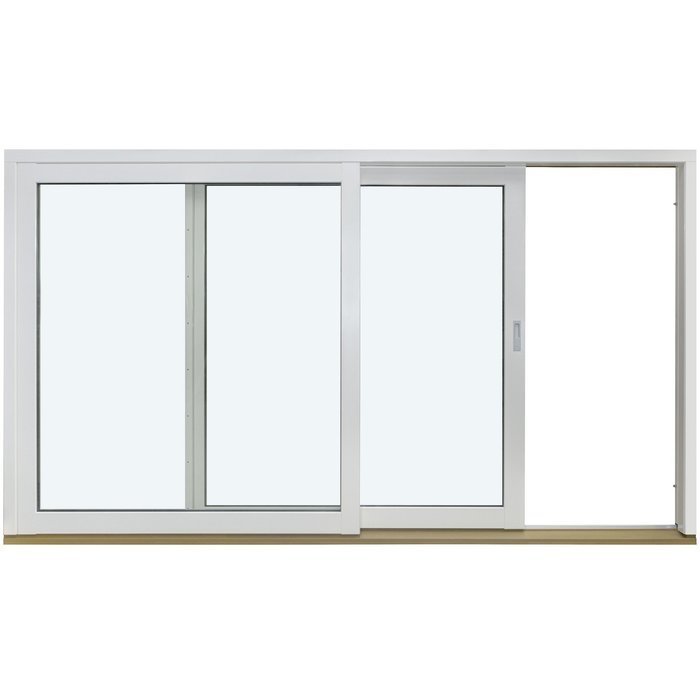
For a generous, direct transition, a Patio Life garden lift-and-slide door may replace a traditional swing door where a broad, straightforward connection is wanted. Judge it by more than nominal opening width: nearby furniture, the composition of the exterior and comfortable daily operation are equally relevant. On the drawing, identify which panel travels and which remains stationary. One preserves the outlook but cannot provide passage; the other fixes the actual exit point. Settle the threshold, floor levels and adjoining construction with the design team early. Interior finishes, the patio build-up, water management and the visual continuity of the crossing can then be coordinated before the final measurements are approved.
Assess swing, slide and fold formats
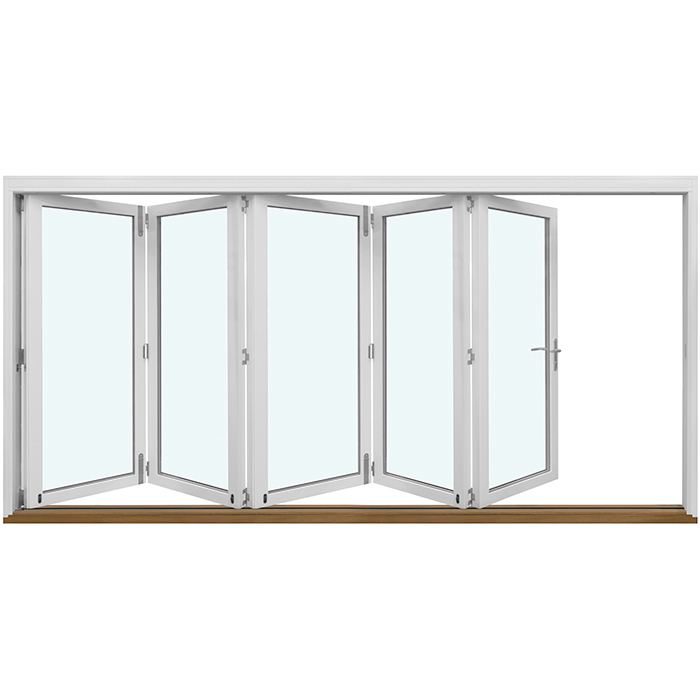
Select a door format by the access it must provide rather than by an idealised photograph. One leaf gives a straightforward everyday exit while preserving neighbouring wall for furniture or a window. A pair of hinged leaves can create symmetry and a wider occasional opening, although both need somewhere to swing. A slider avoids an arc across the floor but, according to its arrangement, part of the glazed span stays closed. A folding set divides a large opening among several panels whose stacked location also affects use. Sketch every panel in its open state, then judge the arrangement during an ordinary dinner as well as when the garden is busy in summer.
An outward-folding glazed door set deserves consideration when the full-width opening will be used often and the leaves have ample room to gather outside. It does not guarantee convenient everyday circulation. For a brief journey to the garden, the first operable section and its relationship to the island or table are particularly important. Draw the furniture with the system both closed and folded back. A sideboard against the exterior wall, for example, must leave enough clearance for operation. Curtains and solar control should also function without becoming entangled with moving panels. Evaluating these details through interior elevations and furnished plans favours a useful, year-round entrance rather than a dramatic arrangement suited only to occasional summer gatherings.
Pre-purchase check 4
Connect the façade rhythm with the existing house
A new addition may look distinctly modern without ignoring the architecture already present. Compare more than frame colours and profiles: study the alignment of sills and heads, important vertical lines, and the balance between solid wall and glass. Carrying a significant existing line across the extension can make a differently sized window feel intentional. However, exterior order cannot override kitchen function; an inherited axis is a poor choice if it cuts through tall cabinetry or coincides with plumbing. Prepare an elevation showing the complete house as well as an interior drawing of every kitchen wall. The position and proportions of each proposed opening must agree between those views.
On a narrow façade section, a single casement that opens outwards provides a restrained proportion when ventilation is required but a sash projecting into the room would interfere with its use. Its name confirms the direction of travel only, so verify every other attribute in the applicable product information and project drawings. Where the original house uses glazing bars, decide whether the addition should use decorative bars, true dividing bars or unbroken glass. Repeating the existing pattern without thought may not produce the best result. Place each division so that it supports the proportions of neighbouring openings without cutting awkwardly across the intended outlook or reducing daylight for no practical reason.
Treat privacy, sun and furniture as one package
Broad areas of glass improve outward views but increase visibility into the kitchen. Examine the room from likely garden positions, adjacent property and the places where people normally sit. Privacy can be achieved selectively: an opaque section of wall, elevated opening or carefully located side pane may admit daylight while shielding the areas that need it. On sunny elevations, allocate a workable location for solar control during design, checking its relationship to opening leaves, garden space and the exterior composition. Blinds or curtains alter the interior character and need suitable clearances. External shading changes the building’s appearance and occupies space outside, so it too should be drawn alongside furniture and door operation.
A triangular or raked fixed-glazed window can introduce light beneath a pitched roof edge or into the upper part of a tall gable. It remains an accent rather than a substitute for well-planned principal windows. Before adopting an unusual geometry, define the outlook it frames, when sunlight will enter and how its outline relates to the internal wall. High glass above dining furniture may interact with pendant lights, curtains or acoustic treatments. Above kitchen units, access for maintenance and cleaning may be the stronger concern. Bespoke shapes are most convincing when their role is precise and adjacent elevations remain visually composed. Finalise them only after the roof, furnishing arrangement and all important internal and external drawings agree.
Pre-purchase check 5
Settle thresholds, floor levels and interfaces at the outset
Much of a garden elevation’s quality is decided at its interfaces. Establish where the interior finish ends, how the patio approaches it, and how frames meet walls and neighbouring construction. These decisions precede ordering because they influence dimensions, the sequence of installation and the perceived level of the glazing. Similar finishes can visually extend the room, while contrasting materials can make the crossing explicit. Either approach requires the inside and outside build-ups to be developed as one detail. Ask the responsible designer and trades to resolve the actual junctions, protection of components and installation conditions. A detail copied from a different property may not perform or fit in this project.
The door handing is also a detail with major impact. A single-leaf patio door opening outwards avoids bringing the leaf into the room and can suit a confined dining space. Its exterior arc must still clear steps, planting, furniture and the path used each day. Picture it held open while people eat outdoors: note the parked leaf, passing traffic and whether wind or someone carrying plates could make operation awkward. Choose the handle side according to this journey instead of exterior symmetry alone. Mark the handing and travel direction of every door and window on both plan and elevation. The kitchen designer, builder and installer will then be working from an identical record of how each component is intended to operate.
Build a full openings schedule before ordering
Compile a dedicated schedule before settling on particular products. Give every opening a reference and record its room, planned structural dimensions, plan location, sill and head levels, operating format, handing, purpose and appearance. State whether its principal function is daylight, outlook, air or passage. Reading the entries together reveals contradictions: an intended ventilation window might be concealed by tall cabinetry, while a wide doorway could occupy the point reserved for an exterior lamp. Ask the project’s designers and builders to supply any missing information for the proposed construction. A preferred product size should not substitute for verified dimensions and installation details.
Review the schedule against the kitchen, electrical scheme, solar control, landscaping and structural design. Frames, handles and moving leaves may overlap sockets, switches, heaters, lights, curtain tracks or cupboards. Resolve these conflicts before confirming the purchase. Bloomcabin windows and doors carry a five-year guarantee. Their delivery period is 4 to 6 weeks, subject to confirmation of the order. During that interval, read through the dimensions, elevations and handing once again. A properly prepared order records how each component is expected to function in the completed extension, rather than concentrating solely on its appearance.
Frequently asked questions
Should the patio door be centred in a kitchen extension?
No. Centring the door may create a composed elevation, but it is worthwhile only when dining furniture, kitchen units and the exterior path also work there. If most journeys to the garden follow one edge of the room, an offset entrance may function better. Test the location on a furnished plan with the chairs shown away from the table.
Can fixed glass work well in a kitchen?
Yes, when its main jobs are daylight and outlook and another dependable means of ventilation has been included. A pane without an operable sash takes up no swing area, making it useful above seating or next to storage. Confirm access for cleaning, privacy measures and solar control before approving its dimensions and location.
Should a patio door open inwards or outwards?
Neither direction is inherently preferable. A leaf opening into the extension needs an internal parking area, whereas one opening away from it needs equivalent clearance outside. The deciding factors are circulation, the dining layout, patio furniture and the chosen handle edge. Draw each arrangement fully open in both plan and elevation before selecting it.
At what stage should kitchen and window planning meet?
Develop them together. First establish the main activities, circulation and approximate cabinet blocks. Use that framework to coordinate sill levels, door locations and the direction of every moving leaf. Before windows are finally ordered, complete a kitchen wall elevation that checks them against cabinetry, taps and electrical sockets.
Do I need several opening windows in a kitchen extension?
It depends on the shape of the extension and its complete ventilation design. Separate operable windows may support different airing routines, but each requires reachable controls and space around furniture. Identify which panes genuinely need frequent operation, then confirm the arrangement with the kitchen designer and relevant technical advisers.
Next step
The best kitchen additions use glazing and access points to make daily routines easier. Daylight reaches the places that need it, useful runs of worktop and storage remain intact, and movement towards the terrace feels natural. Establish activities and furniture first, distribute the openings second, and select particular models only afterwards. Keep a coordinated floor plan, internal wall elevations and an openings schedule throughout. This turns windows and doors into functional parts of the whole room rather than obstacles in the kitchen or decorative shapes considered only from outside.
