
What Comes in a Complete Greenhouse Kit?
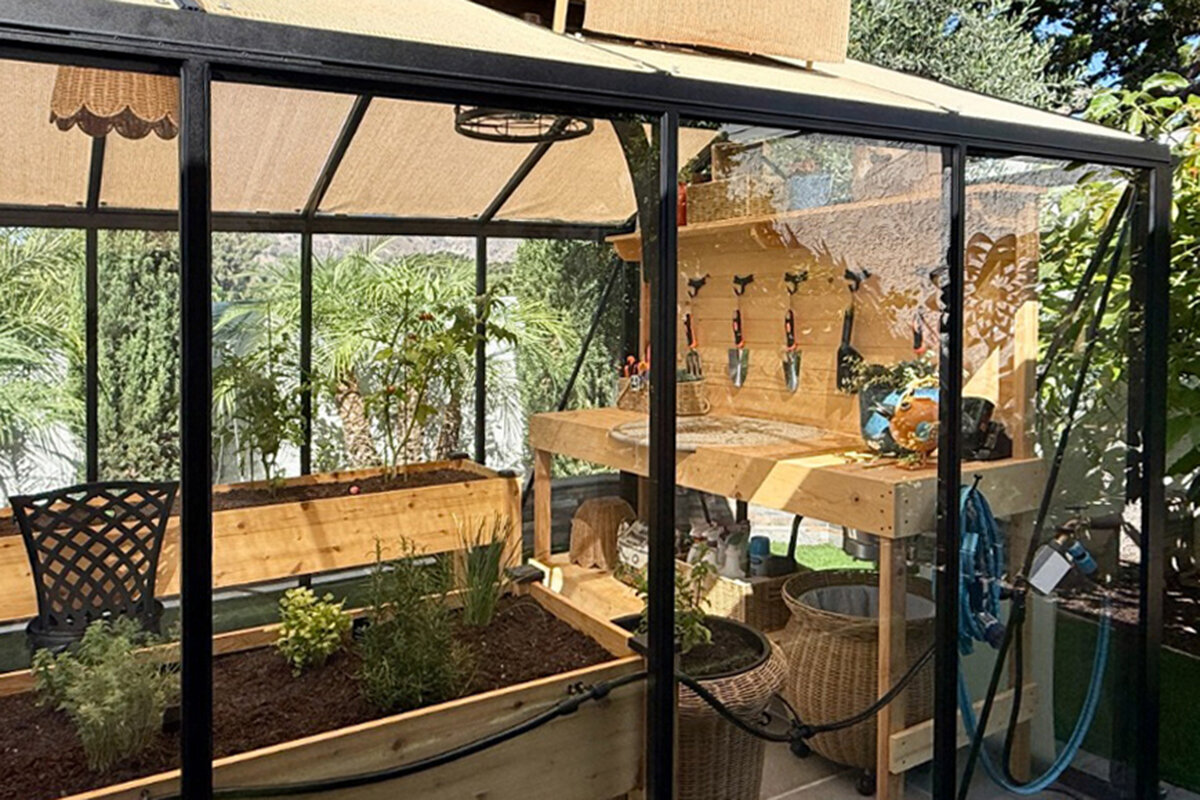

A greenhouse kit may appear to contain everything. Yet its suitability for your garden, plants and build plan is usually decided by details including anchoring, ventilation, doors and internal layout.
When buying a greenhouse kit, look beyond its shape and footprint. Establish which parts are genuinely included, which features are merely prepared for, and which accessories need separate planning. This reduces unsuitable expectations and later add-on orders.
A useful kit brings together the load-bearing structure, glazing, access and the connectors required for assembly. There is still no universal meaning of “complete”. Depending on the model, finish and intended use, a foundation, roof vents, shading, shelves or watering may be included, selectable or left open for a tailored plan.
Use the checklist to examine each offer as a coordinated package. Identify what the build cannot safely or practically do without, what will make routine gardening easier, and which site, assembly and budget questions need answers before you commit.
Core equipment · 01
The frame is the core of every kit
The frame defines the form of the greenhouse, supports its glazed areas and doors, and links the roof, walls and lower structure. The specification should identify every profile, connector, cover and fixing rather than grouping them vaguely. Assembly guidance should also explain how the component sets fit together.
Separate the supplied greenhouse structure from the means used to secure it on site. Some packages assume that an appropriate base has already been built even though no foundation is delivered. Determine the required base early, then establish whether your chosen setting calls for further anchors or fasteners.
Study both the technical drawings and the parts schedule, which often reveal component groupings more accurately than promotional images. Pay particular attention to finishing profiles and small connectors assigned to individual frame sections. Keep the paperwork accessible throughout the build and organise parts according to each stage. This simplifies checking and highlights entries that need clarification before they delay progress.
Create a basic inventory before assembly. Group profiles, hardware, seals and surface panels according to the relevant stage, then match their labels to the manual. Doing so allows absent parts or easily confused pieces to be queried promptly rather than discovered halfway through construction.
- Look for a separate listing of frame sections, connecting parts, cover profiles and the screw connections intended for assembly.
- Cross-reference the declared package with its drawings and manual, ensuring every structural group is supplied rather than offered only as an extra.
For a clearly specified structural example, consider the Classic greenhouse and its documented core equipment.
Glazing · 02
Identify wall and roof components accurately
Transparent surfaces affect illumination, cleaning needs and the finished character of a greenhouse. The package description ought to allocate the correct pieces to its roof and sides while stating whether retaining parts, seals and edge strips accompany them. Images cannot confirm this because optional equipment may appear in the photography.
Give extra scrutiny to vulnerable junctions around the roof, gables, doorway and changes between adjoining surfaces. Where a particular glazing material is wanted, verify that it can be ordered with the precise greenhouse variant under consideration. Otherwise, you may discover that it belongs to a different specification.
Think ahead to washing and inspecting every surface. Map out which wall and roof sections will remain accessible from both directions without repeatedly shifting planting beds or furniture. With a structure adjoining the house, leave adequate room at the wall junction for fitting, cleaning and inspecting its connections. This keeps the panel arrangement workable once the greenhouse is in regular use.
Check the package allocation for each separate panel. Pieces used in the roof, walls and doorway may differ in dimensions or attachment system. An orderly schedule helps with pre-build inspection and provides a useful record if damage, shortages or identification questions arise.
- Look for panels, edge trims and seals under related entries, since all three are needed to form the enclosed outer skin.
- If the illustrations leave doubt, request an allocation for the roof, wall and door infills, particularly on extensions or less conventional forms.
For planning beside a wall, consider a full-size standard lean-to greenhouse with a panel layout unlike a freestanding model.
Access · 03
Door, opening direction and daily practicality
Although access is fundamental to a usable greenhouse, the door specification needs close examination. Compare its quantity, location, operating style and usable width with garden routes, containers and equipment. Include handles, closing hardware and the pieces connecting it with the surrounding frame. Such practical details often shape routine use more than decorative choices do.
Approach the doorway from the surrounding garden. Note where paths, compost storage and the water butt sit, then trace how bulky pots would be moved. For a lean-to, include nearby windows, passages and features of the adjoining building in the exercise. Careful positioning reduces unnecessary carrying and prevents conflict with established gardening routines.
Map the movements needed while furnishing and tending the space, not merely the unobstructed entrance. Soil bags, tools and planted containers will pass through repeatedly. The chosen arrangement should coexist with nearby shelving, garden routes and open vents. Sketch these activities from a user’s perspective so an apparently minor doorway detail does not become a recurring obstruction.
- Record the width of routes and regularly used equipment in advance, avoiding a restricted entrance after construction.
- Review the door position alongside beds and shelves; an unobstructed entrance makes care, cleaning and seasonal rearranging easier.
When planning access and paths, a Classic greenhouse door shows the advantages of a freestanding layout.
Climate · 04
Treat ventilation as a fixed planning task
Reliable airflow helps moderate warmth and moisture during ordinary greenhouse use. Depending on the specification, roof or side vents and automatic mechanisms might be standard, selectable extras or available in several quantities. Assess more than their presence: placement, controls and ease of reach must correspond with the greenhouse dimensions and intended planting.
Compare the package schedule with the plan view. Abundant planting, taller crops and strong sunshine can all alter the amount of ventilation or shade worth providing. Treat the extras as a coordinated arrangement: a vent serves little purpose if furniture blocks it or its control cannot be used comfortably. Observe the plot from morning into evening, noting the effects of trees, buildings and adjacent surfaces on trapped warmth and moving air. Those observations help determine which controls require permanent access and where shading might be worthwhile. Any device should remain safely operable and fit naturally into ongoing care.
Where practical, revisit the proposed location during several periods between morning and evening. Nearby planting, buildings and hard surfaces change both air movement and the places where warmth accumulates. Use those observations to decide which controls require an unobstructed approach and whether shade deserves provision. Also consider routine operation, because an accessory has limited value if maintenance or safe use becomes awkward.
- Establish which vents or opening devices come with the chosen specification and which compatible additions require a separate order.
- Set the ventilation layout before positioning tall crops or shelving, preserving access to vents, controls and circulation routes.
For ventilation planning beside a wall, a full-size standard lean-to greenhouse ventilation can form part of the wider design.
Groundwork · 05
Include the foundation and fixings in the plan
Structural completeness does not necessarily mean that a base is supplied. This reflects the distinction between the manufactured package and preparation unique to the property, rather than a product defect. Create a flat, load-bearing surface compatible with the stated anchoring system, taking account of the plot’s ground conditions, gradient, drainage, greenhouse size and local circumstances.
Choose the site with the base in mind. Allow working clearance beyond the footprint for erection, washing and entry. For an Irish project, contact the relevant planning authority about how the proposal is classified, particularly near a boundary or where the property has constraints. Any exemption has conditions and must be considered against the actual property.
Plan the movement of rain and surface water during preparation. Arrange paths, bed margins and surrounding ground to discourage ponding while retaining practical wet-weather access. A well-ordered work zone also aids accurate alignment. Before discussing materials or assembly assistance, note site dimensions, changes of level and any unusual features. This record gives later decisions a dependable project-specific foundation.
- Check the model’s prescribed anchoring system before purchase, together with every piece of site preparation it requires.
- Set aside level working space around the greenhouse to simplify assembly, upkeep and future maintenance.
Once the site and foundation plan are settled, a Classic greenhouse foundation can be selected sensibly for the garden.
Interior · 06
Do not leave the interior until last
A package will not usually supply shelving, potting benches, hanging systems or paths automatically. Prepare a simple layout before buying instead. Decide whether the space is principally for propagation, tomatoes, overwintered pots or several growing activities. That decision informs the required bench height, available floor area, storage capacity and circulation space.
Reserve sufficient space for tending plants and cleaning. Dimensions that appear ample on paper quickly contract when trays, pots and tools are added. Permanent shelves must avoid the doorway and operating vents. Movable furnishings adapt readily, whereas fixed benches can give repeated jobs a consistent place.
The layout can also determine a sensible installation sequence. Fit certain shelves or suspension points before bringing in plants and movable furnishings where that is easier. Reserve clear areas for potting, temporary storage and washing down. Mark convenient positions for everyday tools and consumables on the drawing. The finished interior will then support your own working habits as well as looking organised.
Plan for cleaning while arranging the interior. Reachable corners, suitable separation from glazing and an organised home for small tools reduce effort during regular upkeep. Keep mobile items easy to reposition when planting changes, or when the greenhouse needs a more thorough seasonal clear-out.
- Make a scaled plan of beds, benches and routes before choosing accessories or further interior equipment.
- Position weighty pots and water containers carefully, preserving clear routes and comfortable access for everyday tending.
Beside the house, a protected working area such as a full-size standard lean-to greenhouse interior can be fitted out around the work you plan to do.
Water and shade · 07
Prioritise accessories by crops and location
The usefulness of irrigation and shade equipment is governed by the crops and local setting. Full sun presents different needs from a sheltered plot receiving partial shade. Trace how water will arrive, where it can be kept and how runoff from watering or cleaning will leave the area. These site services are generally outside the greenhouse package.
Select shading that fits both the structure and the routes used for plant care. Exterior and interior systems attach differently and have different practical effects. Account for the seasons: protection welcomed during summer could restrict useful spring light. Base the choice on planting, aspect and manageable controls. Coordinate hoses and shade fittings with entrances and circulation areas; neither should cross working routes unnecessarily or hinder vents and doors. Avoid fixing final positions until the internal layout and crop needs are understood. That flexibility makes seasonal adjustments easier and reduces later alterations.
Review the interaction between access, watering routes and shade equipment once more before fitting anything. Routinely dragging a hose through a circulation area creates an avoidable nuisance, while attachment points must leave openings and doors free to operate. Retain flexibility until crop and furnishing plans are settled. You can then respond to seasonal needs without having to rework an accessory that was positioned prematurely.
- Locate your supply point, planned hose run and temporary setting-down space before construction rather than improvising afterwards.
- Rank extras according to the plot’s needs: settle airflow and watering, followed by shade, storage and convenience features.
For a flexible seasonal approach, begin with Classic greenhouse accessories and add equipment specifically when it is needed.
Ordering · 08
Check contents, options and documents at the end
Prepare a model-specific schedule of everything expected before buying. Divide it into supplied components, separately ordered choices and work or materials you will provide. Ground preparation, tools, assistance with construction and treatment of the surrounding garden may fall into the latter groups. This comparison is more informative than choosing between names or photographs.
Examine the documentation for assembly, maintenance and warranty too. It identifies required preparation and the instructions governing construction and subsequent operation. If outside assistance might be needed, provide the exact model and property details at an early stage. Access, ground preparation and the sequence of work can then be discussed before they cause difficulty.
Add a brief logistics review to the project paperwork. Decide whether delivered packages can wait securely at the unloading point and be transferred to the build area in assembly order. Extended profiles, fragile panels and bags of fittings each require enough room and unmistakable organisation. Assign responsibility for retaining the manual, identify every required tool and agree how partly completed stages will be left if work pauses. Grouping materials by their role reduces time spent searching and supports an orderly inspection before installation.
Include on-site delivery and unloading in the assembly preparations. Ensure the path from the drop-off point can accommodate the components and offers reasonable protection. Decide beforehand how packages will be opened, sorted and presented for each stage, reducing repeated handling once construction is under way.
- Retain the selected configuration, then reconcile it with your project schedule before confirming the purchase.
- Request clarification for any doubtful line item instead of inferring that an accessory comes from a photograph or broad product label.
For a careful final check, consider a full-size standard lean-to greenhouse contents together with the site and desired equipment.

Comparison
What is commonly in a kit – and what is often optional
Use this table to interpret listings while shopping. The exact model schedule remains decisive, but the categories below show where supplied components and possible extras need separate consideration.
| Area | Often included | Often checked separately |
|---|---|---|
| Structure | Frame profiles and connectors | Foundation, groundwork, site-specific anchoring |
| Transparent panels | Specified wall and roof panels | Alternative materials or special finishes |
| Access | Door and associated hardware | Additional door solutions or convenience options |
| Ventilation | Openings supplied for the model | Extra vents, openers and shading |
| Interior | Empty usable internal space | Shelves, tables, hooks and plant containers |
Check the structure
The model schedule should name its frame sections, corner joints, wall and roof pieces, and fastening system instead of relying on images.
Plan for use
Your crop choice makes ventilation, bench space, routes, plant clearance and access to water relevant when selecting extras.
Allow for extra costs
Budget separately for groundwork, the base, assembly support and chosen upgrades; verify the current configuration before committing.

Match the package to your project in five steps
Begin by understanding the plot and how the greenhouse will work for you, rather than counting accessories. The sequence below separates necessities from additions that may genuinely improve the project.
01
Assess the site
Record available ground, entry points and room for working. Note the aspect, shadows, gradient, nearby water, trees and buildings.
02
Define the use
Choose the intended crops and routine, whether propagation, vegetables, overwintering or a combination. Use this to plan space, airflow and watering.
03
Break down the kit
Mark the structure, panel elements, door and fixing parts in the product specification. Note every item not clearly stated as included.
04
Prioritise options
Give practical additions priority, including extra vents or useful fittings. Consider decorative choices once movement routes and essential operation are resolved.
05
Review the full plan
Combine the package, base, building work and extras in one schedule. Resolve gaps using up-to-date model details and appropriate local advice.
Greenhouse kit buying checklist
Complete each check only after finding a clear, model-specific answer that also works for the property. The result is a dependable order plan.
01. Does the stated package identify every frame section, connector and assembly fastener?
02. Are the infills for walls, roof and door allocated with the correct seals and retainers?
03. Will the doorway location and usable opening accommodate routes, equipment, pots and interior fittings?
04. What ventilation comes as standard, which additions are compatible, and can every control stay reachable?
05. Is the intended foundation type and anchoring clear for both ground conditions and model?
06. Does the property plan deal realistically with watering, shade and drainage?
07. Does a scaled layout cover shelving, beds, the workbench and practical circulation widths?
08. Have you reviewed the latest assembly guidance, package schedule and work excluded from supply?

Questions buyers ask about greenhouse packages
Can a complete kit be assembled straight away?
Not always. The word “complete” may describe only the intended structural components. Site preparation, a suitable base, tools and selected extras can remain your responsibility. Examine both the itemised package and all prerequisites in the assembly instructions.
Is the foundation supplied with the greenhouse kit?
Supply varies with the selected version. The base is frequently treated separately because its construction must respond to the property. Identify the anchoring system specified by the manufacturer, then resolve the ground build-up and any applicable local conditions before starting.
Which accessories are most important?
Focus first on items that govern practical operation: effective airflow, convenient watering and an interior arrangement suited to the work. Shade could also be worthwhile for a particular aspect. Let the property, intended planting and regular maintenance routine determine which addition deserves priority.
Where can I verify glazing and fixing contents?
Consult the schedule written for that particular model. It should connect each glazed element with the necessary retainers, seals and strips. Where marketing material provides only a picture, obtain confirmation of the component allocation before committing to the purchase.
Could my greenhouse require planning permission?
Permission cannot be decided from the product type alone. In the Republic of Ireland, some domestic garden structures may qualify as exempt development only when every applicable condition is met. Earlier structures, boundary position, heritage status and other site constraints can affect the outcome. Seek advice from the relevant planning authority before committing to the project.
Should I arrange assembly help from the beginning?
Early planning can help when access, available time, practical experience or preparation of the ground presents difficulty. Read the manual first and identify work you are equipped to complete. Supply a prospective contractor with precise model and property information so the required effort can be judged properly.
Explore greenhouses
Complete means right for your project
A well-chosen package establishes the essential structure, while the site, base, airflow and internal plan turn it into a practical growing space. Read the contents as an exact component schedule alongside decisions that remain specific to your project, rather than treating “complete” as a marketing label.
With a structured checklist, you can buy more purposefully: identify essential components, plan useful accessories and allow for additional work in good time. Explore Bloomcabin greenhouse solutions and compare every specification with your own intended use.
Find a version whose construction and options suit your garden project.
