
Window and Door Delivery: Checklist for Unloading, Inspection and Storage
Site organisation
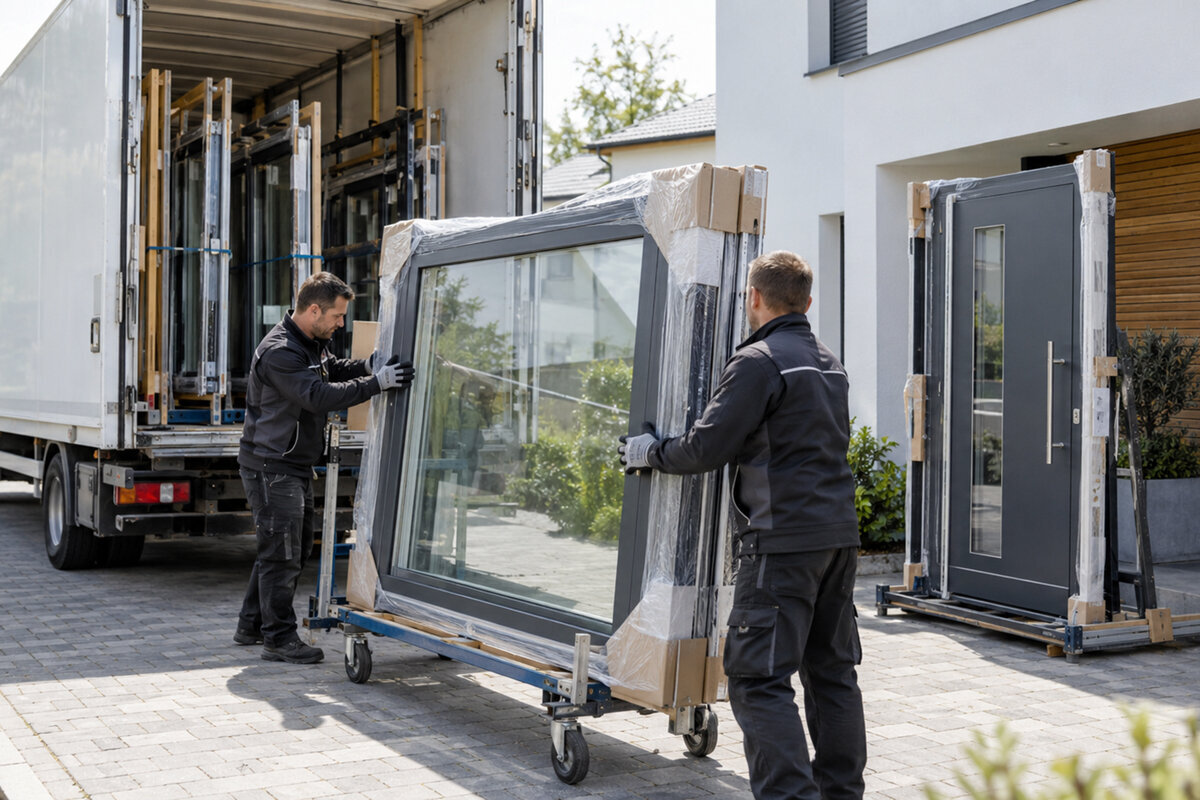
Product quality is decided before dispatch, but delivery planning affects whether each window or door reaches fitting complete, undamaged and on schedule. Renovation sites can be crowded with scaffolding, wet trades, painters, flooring work and installers competing for room. Waiting for the lorry before deciding on access, unloading space or responsibility adds avoidable hazards. This guide joins product preparation to practical site control: identify units needing careful treatment, decide what to examine during handover and arrange suitable holding space before fitting. Nominate the person receiving the goods, the person recording photographs and whoever will raise queries with the supplier or fitter. Any difference can then be followed up without bringing unrelated site work to an unnecessary halt.
Plan delivery from the overall project
Prepare an item schedule before choosing the delivery day. Bring the order, site measurements and fitting plan into one record, listing each room or elevation, position reference, product type, opening direction, sash count, special form and intended installation date. A front door calls for different arrangements than a small fixed-glazed window, whereas a broad lift-and-slide door may need a route quite unlike that for one casement. Check the handing shown on the drawings against conditions on site. An outward-opening unit needs clear external sweep space; materials and ongoing trades must stay clear of the future movement of inward-opening units. Use delivery as the final confirmation of decisions already made, rather than the occasion on which they are first considered.
Windows and doors have a delivery lead time of 4–6 weeks, subject to the confirmed order. Align the expected arrival period with site progress and fitter availability instead of booking an isolated calendar date. If the envelope remains open, suitable temporary storage must be ready. If installation follows straight away, prepare the openings, clear the routes and ensure the relevant contacts can be reached. Decide whether some positions should arrive later because flooring or interior finishes still require protection. Allow a defined period for unloading, condition checks and moving packages under cover, and agree how an apparent mismatch will be handled. This avoids keeping the driver at an unprepared site or asking installers to begin with goods that have not been checked.
Check access and unloading space realistically
Walk the entire journey from the site entrance to the holding area in advance. Tight gaps, restricted headroom, soft surfaces, stairs, sharp turns, skips and newly finished landscaping may all alter the plan. Vehicle access alone is insufficient; there must be a safe way to move the units onwards without awkward rotation, lifting or temporary placement. Measure narrow doorways and stair landings when large products are going inside. Ask the fitter to confirm the people, equipment or lifting aid intended for this particular load. Glazed units and exposed edges should not be taken along an improvised route across rough or unstable ground.
Choose an unloading area that is firm, level and dry, within a practical distance of storage. Leave enough room to handle packages without piling them, dragging them aside or obstructing a walkway. Do not use loose fill, a place beneath rainwater discharge or an area needed later for vehicle movements. During rain, nearby shelter is more useful than an open corner reached only by a long carry. Mark out the space, clear anything likely to cause a trip and have keys or entry codes available. For a drop on private property, nominate someone to open and maintain the route. If public ground, neighbouring access or unusual site constraints are relevant, agree the arrangements with those concerned beforehand instead of trying to resolve them when the vehicle arrives.
Project overview
Prepare acceptance staff and documents
Do not fit goods receipt around unrelated tasks. Appoint a lead person and backup, and give them the purchase order, confirmation, delivery paperwork, position drawing and a phone or camera. They are not expected to assess every technical feature, but they should methodically reconcile product identities, package counts and obvious concerns. A simple sheet can record the position, ordered specification, label received, package condition, image reference and comments. File each photograph against its position as it is taken. An unlabelled image is far harder to interpret later than a short record tied to both the unit and its paperwork.
Set responsibilities among the customer, site supervision, fitter and supplier before arrival. Decide who can qualify the signature on the delivery paperwork, notify a missing unit and choose whether a questionable package stays under cover or is isolated. Otherwise, the team may feel forced either to sign for everything without examination or reject a whole load because one point remains uncertain. A documented route avoids both extremes. Direct the first query to the agreed delivery contact, escalating to the site or installation lead where necessary. Keep contact and order details available independently of one phone, especially where signal is unreliable. State who must decide each matter, the deadline and who will update everyone on site. Several calls then become one managed chain of communication. Receiving the goods concerns their visible state at transfer; it is not professional approval of the completed fitting. Opening dimensions, connections, weather sealing and operation still require their own installation checks.
Match delivery papers with the order
Begin with the listed positions and package count. Reconcile the references, quantities and product categories with your documents. Confirm door handing, window sash numbers and any readily recognisable shapes. A Patio Life lift-and-slide unit needs to stand apart in the schedule from accessories and smaller windows, reducing the chance that it is left in an unsuitable place. Where several elevations are involved, identify items by room or building grid. A correct total is not enough; each assignment must also be credible. Packaging will often reveal which position belongs to a circular, triangular or unusually tall product.
Look separately for components that travel outside the main pack. Cover pieces, accessories, fixings and supplementary parts may arrive in individual cartons and should remain assigned to the relevant product. Note anything absent or unidentified before labels and wrapping become dispersed around the site. Avoid stripping every package merely to inspect concealed details, as doing so may compromise protection needed later. If identification is uncertain, take one image of the label and another of the complete pack, then refer the query to the order records. Careful reconciliation saves time during fitting because the crew can locate each position and handing directly instead of sorting through several similar-looking units.
Inspect visible condition before signing
View all sides of each package wherever that is possible without unstable handling. Check for pierced wrapping, compressed corners, tears, signs of water beneath the cover, distorted edge guards, shifted restraints and glass that is visibly damaged. Take a wide photograph showing the label, followed by a close image of the particular concern. Record observations rather than conclusions—for instance, “lower corner of wrapping open; covered edge not visible”—without assigning a cause or diagnosing a defect. A factual record remains useful if the technical judgement must wait until the supplier or fitter responds.
Sensitive formats deserve an especially calm inspection. A fixed window in a triangular or sloping form rests on different edges and support points from a standard rectangular unit, so examine more than its front face. Give the same care to broad glazed doors and slim side panels. Undo restraints or expose a package only when the manufacturer’s directions and the remaining transport plan allow it. Never force a sash merely to test it while the unit is stored. Uneven support or transport fastenings can place inappropriate strain on seals and hardware. This stage records visible evidence from transport and packaging promptly; it is not a substitute for checks carried out during installation.
Log differences factually, not speculatively
When something appears wrong, enter the observation clearly on the paper delivery record or the agreed electronic handover, and create a photographic record. Include the position reference, how many packs are involved, the time and an objective account of what is visible. Avoid conclusions about responsibility, origin or repair until these are established. The purpose is to preserve evidence of the goods as transferred. File the paperwork and photographs with the purchase records. Send the designated contact a concise notification containing the project reference, affected position, observed condition and supporting images, and ask what action should follow.
Place any questionable unit apart from apparently unaffected stock while keeping it properly sheltered. Add a clear position label and warning so nobody fits it by mistake or repeats the same inspection. One damaged package need not suspend unrelated site activity, while an intact exterior does not prove that the fitted product will operate correctly. Obtain a definite response before taking off protective covering or making any alteration. Where a fitter has been engaged, provide the records ahead of the installation appointment. The crew can then adapt access, sequence and materials to the confirmed stock instead of discovering the matter only after opening the pack.
Project overview
Keep stored units dry, unpressured and correctly identified
A roof by itself does not make a suitable store. The space also needs to be clean, dry, weatherproof and organised so that hurried rearrangement is unnecessary. Follow the manufacturer’s directions together with every instruction on the wrapping and accompanying papers. Typical errors include standing a unit on a wet surface, propping it against unstable materials, sealing coverings so that air cannot circulate, or placing loads on top. Provide appropriate supports and keep packages clear of spray, abrasive dust and active plastering. Effective protection is not simply an airtight, hidden wrap; it is the control of conditions capable of harming the cover, finish or product itself.
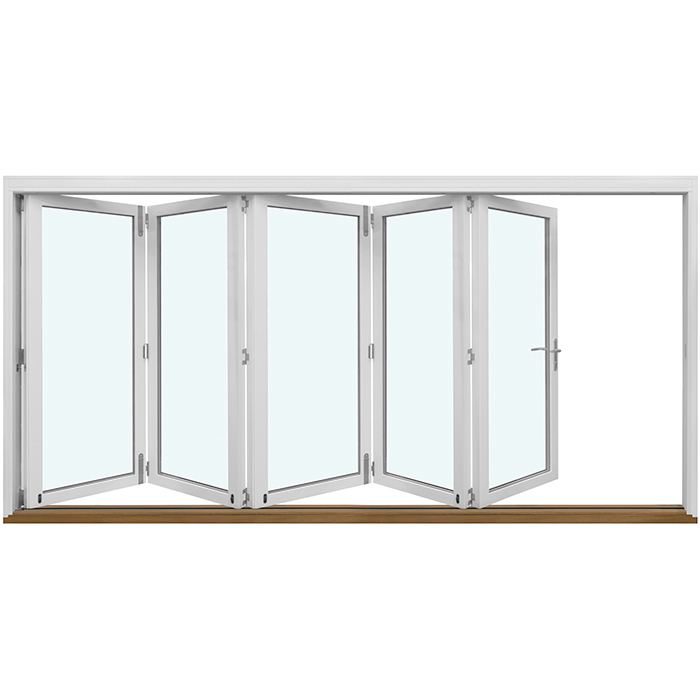
Arrange storage by fitting sequence and construction stage. Heavy or large packages belong where smaller deliveries will not block them. An outward-opening folding-door unit must not be trapped behind pallets or at the far side of a narrow point when it is due to be fitted first. Keep circulation routes open and position labels readable. Basic zoning can separate products by floor or elevation. Reducing the number of moves matters because repositioning creates opportunities for scratches, impacts and mistaken allocations. Revisit the storage conditions after intense rain, moisture-producing work or any change to the site arrangement.
Match handling to form and opening method
Windows and doors differ in how they may safely be held, transported and supported. Wide glazing, tall narrow frames, curved or uncommon forms and operable sashes each need suitable preparation. A centre-pivot roof window needs its own handling plan rather than being treated as an ordinary wall window. Consider the product’s weight and size, available grip points, floor level, turns and opening readiness along the journey to its destination. Confirm the method with the fitter using the relevant product instructions. Hardware, handles, glazing bars and bare edges are not lifting points and must never be used to pull, carry or support the unit.
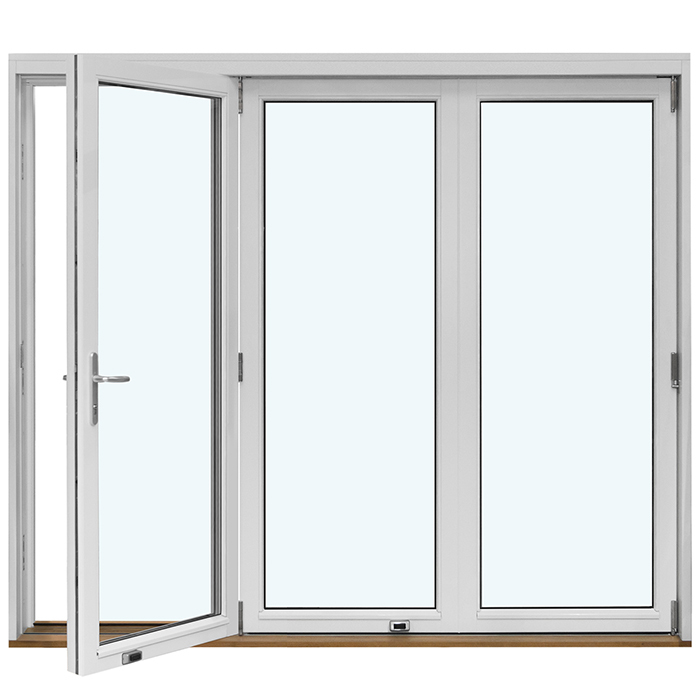
Future operation can also help identify the correct product when it arrives. For an inward-opening patio door with one leaf , keep the handing information readable in storage so the unit can be placed beside its intended opening. Products opening outwards also require the fitting route to provide secure external access. When a zone is being cleared, confirm the next position and move its label, protective materials and separately packed accessories together. Otherwise, the main unit may reach the proper location while an essential associated part becomes difficult to trace.
Separate installation handover from delivery checks
Reconcile stored goods with the installation schedule again before fitting starts. At every opening, installers need the assigned unit, a clear carrying route and room to ready it under control. Verify the prepared opening against the latest plan and remove conflicts from nearby work. Ask a suitably qualified fitter to specify the necessary substrates, junction treatment and protection for the individual project. A delivery inspection cannot determine whether the eventual connection is correct. Its role is to establish a recorded starting condition and help each component reach its assigned opening without preventable handling damage.
Fitting requires a separate assessment: only after installation can the team sensibly judge support within the structure, operation, consistent gaps, finishes, seals and movable parts. For an infill-panel entrance door that opens outwards , also plan protection from later trades and coordinate the threshold with flooring, interior work and the access arrangement. Take off protective materials only as required, never early enough to expose finishes to plaster, paint or tools. Record unresolved matters under separate delivery, fitting and finishing headings. Clear categories distinguish an absent package from an adjustment that remains to be completed after fitting.
Finish with a short site check
Before everyone leaves, spend ten minutes reviewing the completed unload. Confirm the pack count and secure the photographs and signed paperwork. Tie every concern to its position, isolate and label uncertain goods, and make sure the store is locked or controlled, dry and outside later traffic routes. Record the first items due for fitting along with any outstanding access, equipment or decisions. Remove empty stillages, loose wrapping and unidentified small components from carrying routes. Give each unresolved item a named owner and a date for review. Statuses such as “complete”, “being clarified” and “ready for fitting” help prevent a phone update from being treated as final approval. This review is not a technical examination; it protects information as responsibility passes from the driver to the receiver and installation crew, leaving an orderly stock record and a defined next action.
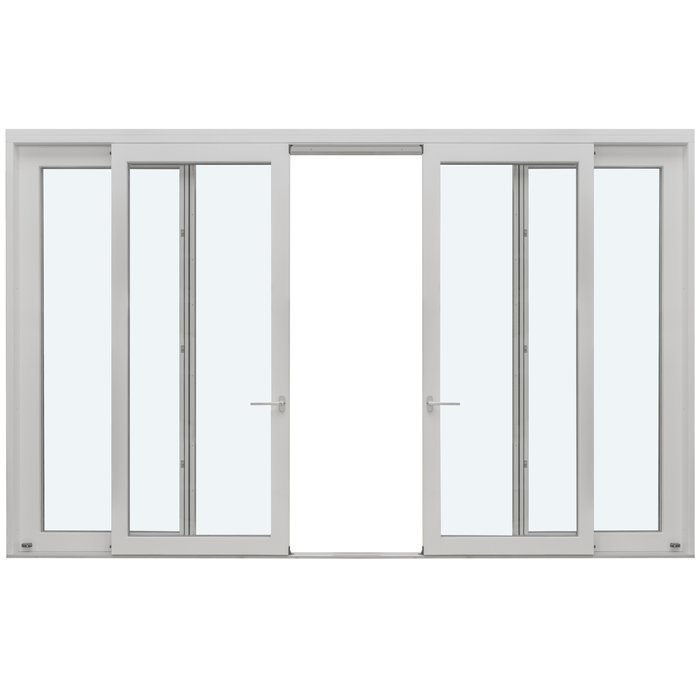
For future queries, file the order, confirmation, delivery record, photographs, correspondence and position drawing together. For sliding doors and positions comprising several matched components, the file should identify which labelled packs travelled together to the fitting location. Add installation records and care instructions afterwards where relevant. Bloomcabin’s commercial guarantee for windows and doors lasts 5 years, so retain the supporting documents. That guarantee should not delay notification of damage or uncertainty noticed during delivery; prompt, objective records make the affected item easier to establish. Reusing the process for each partial shipment gives the project a reliable overview. This is especially helpful when windows, doors and finishing trades reach the site in separate phases rather than all on the same day.
Frequently asked questions
Must I unpack every window on delivery?
No. Begin with the paperwork, identification labels and all safely visible faces of the wrapping. Do not open packages indiscriminately where that would remove protection or release transport restraints. Photograph and record anything apparent. Consult the instructions for the product and seek direction from the designated contact before doing more.
What should I write on the delivery note if packaging is damaged?
State the observable facts: the position reference, quantity involved, where the concern appears and how the wrapping is affected. Attach photographs and keep your own record. “Film torn at corner; product beneath not examined” communicates more clearly than an opinion about responsibility, cause or severity.
How long can windows and doors wait in storage before fitting?
There is no single useful duration without considering storage conditions and manufacturer guidance. Priorities are dry shelter, appropriate supports, readable identification and minimal movement. Recheck the holding area after wet work, severe weather or alterations to site logistics.
Who should accept the delivery?
Nominate someone beforehand who has the order, position drawing and authority to record handover details. They may liaise with site supervision or the fitter. They need to be reachable, have enough time for visual checks and know how to report a difference. Receiving goods is separate from approving completed installation.
May a unit showing a concern remain safely on site?
The answer depends on what is visible and the response agreed with the relevant contact. Label the unit, separate it from available stock and keep it protected; do not fit or modify it meanwhile. Create a complete condition record and refer to its position and photographs when obtaining instructions on what happens next.
Next step
Delivery is the practical connection between the order, the programme on site and eventual fitting—not a minor paperwork exercise. Arrange the approach route, unloading space, records and responsible people beforehand. Reconcile quantities and identification, then note package condition without rushed assumptions. Follow the manufacturer’s storage directions and position each unit so it can travel to the assigned opening with minimal extra handling. Keep the process clear: record visible facts, label uncertainty, and maintain separate checks for receipt, installation and subsequent finishing. This provides an organised starting point for the fitting work.
