
Window draughts: adjustment, seals or installation joint?

Window diagnosis and renovation planning
Even with the heating running, a room may feel uncomfortable in winter and the curtain beside a window may move. Rather than immediately ordering a replacement or altering the fittings, first establish what is happening. Air may pass the operating edge or sash seals, escape through the frame-to-wall connection, or merely seem to enter because cooled air is falling from a cold surface. These causes require different responses. Replacement planning should therefore cover the sash, glass and opening direction alongside the measured opening, wall construction, perimeter details and fitting method. This guide shows how to arrange your observations, avoid unsafe home tests and give installers or suppliers a useful account of the problem.
Pinpoint the air movement first
Treat “draught” as a description of discomfort rather than a diagnosis. Choose a blustery, cool day and trace the opening methodically, covering both sash edges, the hinge and handle sides, corners, sill connection and reveals. Record whether the effect depends on wind, a particular direction, or also occurs in calm conditions. A sharply defined current beside the closing edge differs from a broad chill below the sill. Confirm that every locking point has engaged, as an incompletely closed sash can give a misleading result. A closed curtain or shutter also redirects air indoors, so observations made behind one should not be your only evidence.
Cold inner glass or frame surfaces may create a similar sensation. Nearby room air cools, falls and reaches someone seated below, even though the envelope is not leaking. Unlike a local gap, this movement is usually spread over an area and becomes clearer when outdoor and indoor temperatures differ greatly. Lightweight paper may indicate movement, but convection can move it without any defect being present, so it cannot establish airtightness. Avoid flames, smoking materials and manufactured smoke: these introduce hazards without reliably separating indoor circulation from infiltration. For a useful first record, photograph the suspected area, mark its position on a simple room-side drawing, and note the weather, wind direction and window setting at the time.
What adjusting a sash can and cannot fix
A closed opening sash should make even contact around the frame. An edge that catches or rubs, a handle that has become unusually stiff, or air confined to one corner can justify inspection of the fittings and alignment. Building movement, extensive operation and the weight of a large sash may all affect its original position. Adjustment changes geometry and the way the sash bears on its seals; it does not renew brittle sealing material or close defects beside the masonry. Distinguishing these conditions prevents a fittings adjustment from being treated as a cure for every patch of discomfort near the opening.
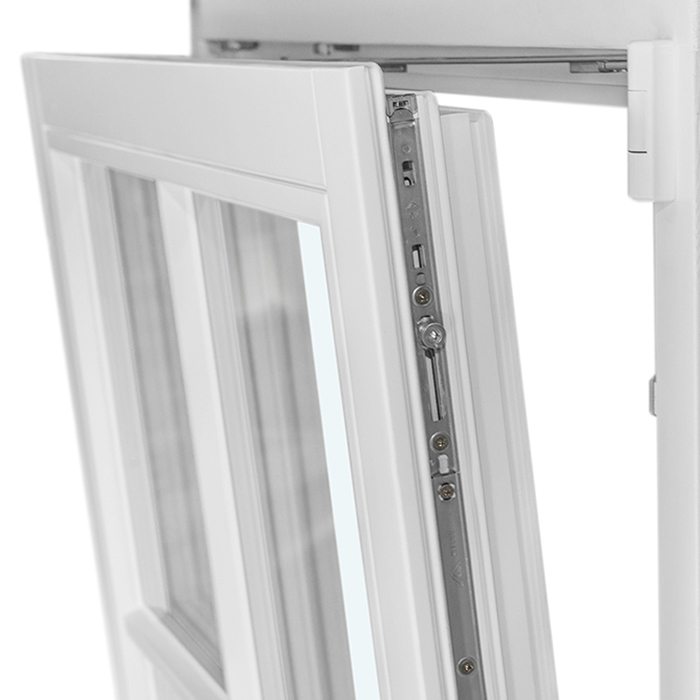
Each hardware system has its own approved adjustment locations. Turning unfamiliar screws without the manufacturer and fittings details can impair movement, create uneven loading or disguise a failed component. Give the technician a precise account instead: identify the affected position, whether locking changes the sensation, any resistance in the sash or handle, and when the issue first appeared. For a proposed replacement, settle the opening direction during the survey. A single-sash window opening inwards identifies only the operating arrangement, not a suitable perimeter detail for the wall. The survey should cover the unobstructed opening, operating space, hinge position and site construction before purchase.
Assess the opening as one connected assembly
Inspect seals without overestimating their role
Seals occupy specific contact lines between the sash and outer frame. Their condition should be flexible, uninterrupted and free of debris. Open the window and look for material pulled from its channel, splits, flattened areas, dirt or breaks at the corners. Even a short detached length may account for a concentrated draught. Lift away surface dust gently using a non-abrasive cloth and an appropriate mild product, since strong chemicals, solvents and unverified treatments may harm the finish or sealing material. Afterwards, shut and lock the window in the ordinary way. Avoid adding adhesive strip over the existing seal as a temporary cover; extra thickness may disturb alignment and make a later diagnosis harder.
Where the defect appears is as important as its appearance. Damage confined to the handle edge, corresponding with the perceived current, suggests that servicing or repair should be investigated. Sound-looking seals combined with air emerging beside an internal reveal or lining point instead towards the perimeter fitting. For two-sash units, inspect the central meeting line as well, because operation, rebate shape and sealing interact there. If the room’s future layout is changing, there is no need to reproduce the present window division automatically. An inward-opening window with two sashes may provide the preferred division, while its interfaces with the wall and sill still require separate design and fitting decisions.
Look beyond the sash to the fitting joint
The fitting zone surrounds the frame where it meets the structure. It brings together materials that move differently, construction tolerances, insulation and weather-sealing layers, as well as the reveals, sill and any outer finish. A route for incoming air may begin remotely from the place where it becomes noticeable indoors, so the coldest corner need not contain the defect. Clues can include currents along one section or several sides, cracking beside the internal frame, loose trim, unexpected staining, or movement near the sill. Each clue has several possible explanations. Mapping its extent and relationship to changing weather gives an inspector more useful evidence than any sign considered in isolation.
Inspection needs to extend past the exposed frame. Ask whether it will cover the room-side perimeter, the concealed space below the sill, both reveals and the exterior face exposed to weather. Refurbishment may also involve plastering, external insulation, sill work, shading and internal trim, all of which affect access and sequencing. Simply filling the visible indoor gap can conceal the exit point while leaving the original route untouched. Where dampness may be involved, obtain competent diagnosis before enclosing cavities or applying permanent finishes. Keep a structured record of the initial observation, any area opened for examination and what was discovered. That sequence is more informative than an isolated image with no weather or construction context.
Telling condensation apart from draughts
Moisture on the inner glass, wet margins and a generally cold window do not by themselves demonstrate air infiltration. Water appears when moisture-laden room air reaches a surface cold enough for vapour to condense. Ventilation patterns, indoor humidity and surface temperature may each contribute. Leakage can alter those conditions, but the presence of moisture does not identify it as the cause. Record the wet areas separately from the locations where a current is perceived, including whether they appear together. Bathrooms, kitchens and bedrooms, and rooms affected by recent construction, may behave very differently from dry living spaces. Evidence from a single morning is therefore a poor basis for choosing repairs.
The same distinction matters when much of the window consists of immovable glazing. A fixed-glazed window contains neither an operating sash nor its fittings and perimeter sash seal. Investigation therefore shifts towards the outer frame, glass perimeter, surrounding fit and conditions within the room. A fixed light is not automatically more or less resistant to unwanted air; it simply presents a different set of possible fault locations and functions. Before replacing it, review the room’s temperature and moisture production, nearby furniture and intended means of ventilation as one picture. Persistent dampness, odours or visible deterioration warrant qualified investigation rather than assuming that a newly ordered unit will resolve every symptom.
Investigating draughts at larger openings
Patio and lift-and-slide doors require a broader check than a small casement. Their long thresholds, upright frame sections, moving panels and floor interfaces can each produce a different sensation. Establish whether the current is strongest beside the moving panel, at an upright, below a removable cover or where the floor meets the door. Changes in use are relevant too: note altered running, incomplete travel into the closed position or an unfamiliar locking action. Noticeable airflow across the threshold should prompt examination of the door, floor and outside details as a connected arrangement rather than a glance from the room. Leave paving, weathering details and drainage paths unchanged until suitable advice has been obtained.
Opening format influences use, construction and installation planning. Models such as Patio Life lift-and-slide door systems describe a particular operating arrangement, not a ready-made cure for a fault around an existing frame. An enquiry should document the opening dimensions, floor construction on both sides, proposed finishes, access for fitting and the direction in which the panel will travel. Identify in advance who prepares and completes each adjoining area. Door supply, window fitting, floor work and façade tasks must be placed in a practical order. Agreeing those interfaces before work begins avoids leaving several trades to settle the construction details independently after they arrive on site.
Plan around the entire wall opening
Treat replacement as a building project, not merely a purchase
Choosing a replacement involves more than selecting a frame appearance. Begin by documenting the structural opening and wall type, where the unit sits within that wall, its exterior and interior perimeter details, and every later finishing task. Next consider everyday use: inward or outward operation, available swing space, nearby furniture and any insect screen all matter. One possible choice is an inward-opening single patio door but suitability for the building depends on its size, hinge arrangement, threshold and coordinated interfaces. Compare tenders only when their assumptions and included work are genuinely alike.
Ask each quotation to distinguish the unit itself from measuring, removal, fitting, sealing, perimeter construction, sills, waste disposal and making good. Without that detail, a price presented as comprehensive may omit significant tasks beyond the frame. Establish how concealed differences in the existing construction will be recorded and authorised once uncovered. This is particularly useful in older buildings, where removal may expose unexpected details and decisions should not be improvised under site pressure. Bloomcabin provides a five-year guarantee for windows and doors, with delivery stated as four to six weeks from order confirmation. These terms do not replace an accurate project survey or agreement about the sequence and responsibility for installation.
Put performance values in their proper place
Individual ratings can dominate product comparisons, although comfort after fitting depends on how the unit, supporting wall, chosen installation position, perimeter and room use function together. A window designed for demanding energy performance may belong in a coherent upgrade plan, yet it cannot settle whether the reveal, sill and exposed outer detail have been designed correctly. For example, the Passive House Window Super Low Uw, outward-opening is the named configuration only. Request the performance information offered for the actual project and a written description of what supply does and does not include.
Check what every quoted figure measures, not merely its headline value. Determine whether it applies to the glazing, frame or assembled window, and whether the compared units share the same dimensions, divisions, operating format and shapes. The proposed position within the wall also matters. Ask how the head, sill, lower interface and both reveals will be formed in this particular opening. Product literature alone cannot answer that construction question. Sequence later work carefully as well: external insulation, room-side plaster and flooring may all depend on details prepared during window fitting. This approach links the purchase to the actual wall and adjoining work instead of allowing one promotional expression to drive the choice.
Allow carefully for unusual shapes and traditional design
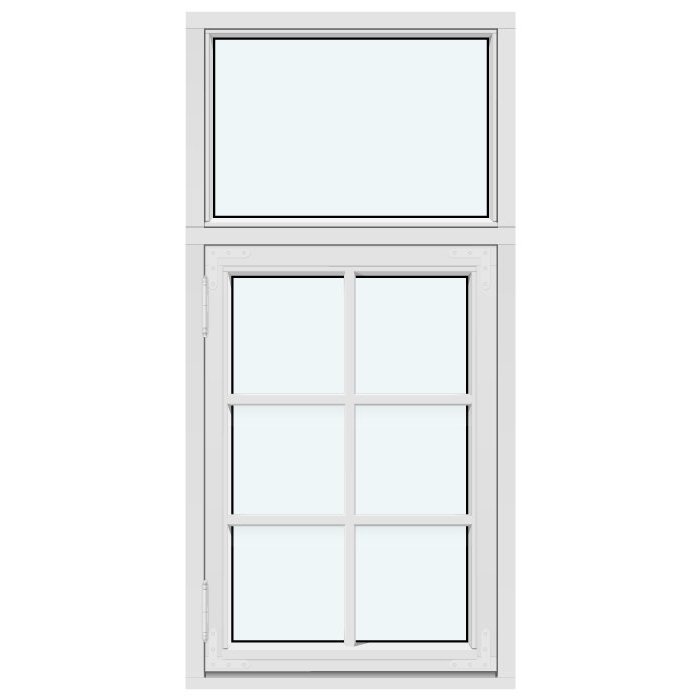
Curved or sloping frames, glazing-bar patterns and period-inspired designs add visual interest, but their construction still governs fault tracing. The perceived current may vary along corners, subdivisions and perimeter lines. Rather than reporting only a problem “at the old window”, mark whether it occurs beside an operating sash, glazing bar, curved frame or reveal. The appearance of a glazing bar cannot identify the route taken by air. For a replacement, use a drawing that marks the elevation and subdivisions, opening direction and whether every section is fixed or operable. Clear functional information helps prevent the ordered arrangement from differing from the intended design.
A historic-style outward-opening “Kombi” casement window may be considered when preparing a style shortlist. Its wording indicates a traditional appearance, Kombi format and outward operation; it does not confirm dimensions or suitability for the existing wall or a building with conservation constraints. Survey information for an older property should not be inferred from its front elevation. Supply photographs taken from the room and outside, measured wall depths, sill construction and evidence of deterioration in plaster or linings. Where design controls or permission may apply, seek project-specific guidance from the appropriate professional and authority before committing to an order. The product description cannot be used to infer a general rule for a particular property.
Turn your observations into a precise inspection brief
A precise brief is more useful than reporting only that a window feels draughty. Begin with the desired outcome: diagnosis of one symptom, planned maintenance, or preparation for replacement. Identify the room and opening, estimated age if available, element type, affected edge and conditions in which the effect appears, supported by views from outdoors and indoors. State whether engaging the locks changes anything and record cracks, dampness or unusual operation. Ask for separate findings on sash alignment and hardware, sealing, frame condition and the perimeter connection. With a complicated symptom, commissioning diagnosis before requesting replacement prices can ensure that later quotations respond to an established requirement rather than an untested assumption.
Before appointing anyone or placing an order, confirm who completes the final survey, verifies handing and opening direction, designs perimeter details, removes and restores finishes, and authorises changes. Agree which records will be supplied at handover and who will address later adjustment or reported defects. For roof-level work, include the interface with the roof construction from the outset. A centre-pivot roof window names an operating type rather than the detail needed for a particular roof. Record dimensions, discussions and approvals so the basis remains clear, whether the outcome is servicing, perimeter repair or complete replacement.
Questions customers often ask
Does moving paper confirm that a window is leaking?
Light paper responds to indoor circulation as well as incoming air, so movement alone cannot confirm a defect. Use it only to locate an area for further investigation, recording the exact position, weather and window setting. Professional examination offers firmer evidence when choosing between sash repair and work around the frame.
Should I increase the closing pressure myself?
Not unless the fittings and window system are known. Altering an incorrectly aligned sash or damaged mechanism without guidance may make operation worse, and extra pressure cannot restore perished sealing or a defective perimeter. Provide the observed symptoms and ask a competent technician to determine whether adjustment is appropriate.
What points towards a seal rather than the frame fitting?
Suspect the seal when the current is concentrated along its contact line and the same area is torn, dirty, flattened or displaced. If the sensation instead comes from a reveal, the sill zone or several frame edges, include the surrounding installation in the investigation.
Does a draught always mean the whole window needs replacing?
No. The appropriate response may be realignment, attention to the fittings, seal maintenance or repair of the surrounding connection. Full replacement becomes relevant where the unit’s condition, future use and wider renovation plan justify it. Establish the fault before selecting a new product.
What should I send an installer for an initial opinion?
Send interior and exterior images, identify the room and opening, and give the approximate age and operating type. Mark where the effect occurs and describe the weather at the time, alongside any cracks, dampness, staining or handling problems. Replacement pricing also requires verified measurements, wall information and an agreed scope for perimeter work.
Next steps
Window draughts do not all represent the same fault. Air concentrated at the sash calls for investigation of alignment, fittings and seals, whereas a chill beside the reveal or sill brings the complete perimeter into question. Record location, weather and operation, and arrange assessment of concealed interfaces before substantial work begins. A replacement project must coordinate the selected appearance and operating format with the wall and the trades that complete adjoining surfaces. Defining the inspection task and fitting responsibilities clearly allows quotations to be compared on equal terms and supports a properly informed decision.
