
Window reveals, sills and finishing trims when replacing windows
Window planning in detail
A sound replacement plan begins at the opening, not with the frame dimensions. Removing the existing unit exposes the actual reveal, the condition where wall and frame meet, the internal sill position, and the arrangement that sheds rain clear of the exterior wall. If these matters wait until fitting day, plaster repairs, cover strips and sill work become last-minute decisions. Survey the entire opening instead: record the wall construction, room-side finish, exterior interface, solar shading and desired appearance alongside the window. Differences in frame width or depth make this particularly important. The guidance below separates appearance from technical detailing, assigns responsibilities before work starts, and identifies what a useful quotation and order should contain.
Buying checks 1
Treat replacement as a junction project
Allow for a perimeter gap: the window unit sits within the structural opening rather than filling it. The term reveal means the wall faces at the sides and head, whether seen from the room or outdoors; it does not mean the frame. Taking out the former unit may uncover unstable plaster, aged sealants, wallpaper margins and hidden irregularities. A replacement with similar visible dimensions can still expose a different amount of wall because the profile widths differ. Survey accordingly. Photograph each location, take repeated opening measurements, record internal and external depths, and annotate nearby radiators, roller-shutter housings, tiling and sills. This information turns selection of a window into a manageable interface between the unit and the building fabric.
Start by defining the surfaces that should be seen when work is complete. A fully plastered, seamless reveal calls for a different finishing programme from an opening edged with cover strips. In an occupied home, that decision also governs protection from dust and the order in which removal, fitting, remedial work and decoration take place. For an inward-opening single-leaf window , confirm that the replacement sill will not foul either the opening sash or its handle. Opening direction is a product attribute; it does not settle the perimeter detail. Itemise the quotation by task: taking out and disposing of the old unit, installation, sealing, sill work, reveal repair, cover strips, decoration and cleaning. An itemised scope identifies the installer’s obligations and any work left for another trade.
Inspect each reveal before dimensions are finalised
No two points around an older opening should be presumed identical. Walls may lean, plaster thickness can fluctuate, and the treatment on the left may not mirror the right. Take horizontal and vertical readings in three places—upper, middle and lower—and check depth around each edge. Note where the old frame lies through the wall: aligned with the room face, nearer the centre or towards the exterior. That placement controls how much reveal is seen and whether the room-side sill reaches adequately beneath the new profile. Draw the opening from a stated viewpoint as well. The sketch is especially useful when tiling occurs on one face only or timber covers just part of the reveal.
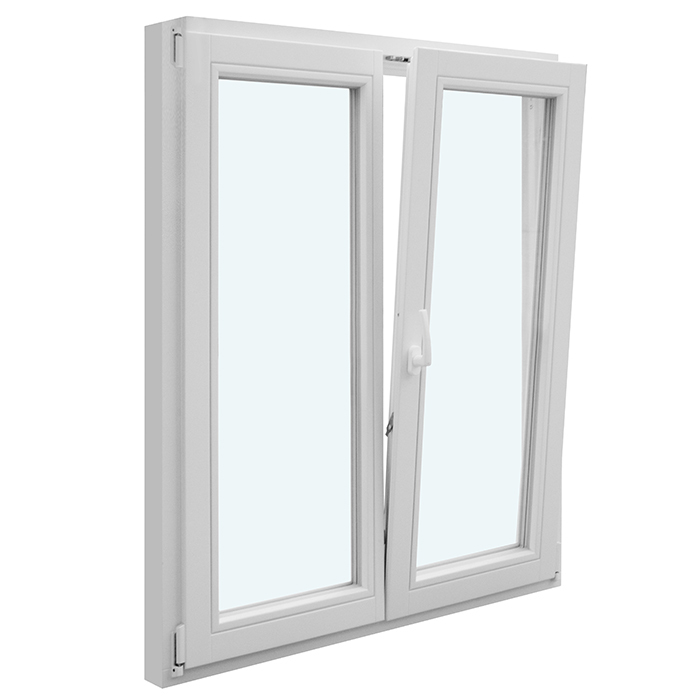
During the survey, record evidence that dimensions cannot capture, including flaking arrises, damp staining, fractures, yielding material, voids and previous patching. Do not infer the underlying cause from these signs; arrange assessment by the appropriate specialist before concealing the area. For a two-leaf inward-opening window , plot the travel of each sash as well. Neither a projecting deep sill nor a side panel should interfere with operation. Specify whether the room-side faces are to stay square, splay into the room or follow an established treatment. Splaying can change how daylight is perceived, but the additional face requires intentional plaster or board detailing rather than a leftover sliver improvised during fitting.
Buying checks 2
Installation depth changes visible proportions
Frame placement through the wall controls the visual depth on both room and exterior faces. Shifting the replacement relative to the old unit can leave the retained sill without enough reach, make the outside finish incompatible, or alter the meeting point with a lining. The opening method brings its own clearance requirements. For an outward-opening single-leaf casement window , opening does not occupy indoor space, but the sash needs an unobstructed arc past the outside reveal, sill and adjacent features. Check the elevation and overall size alongside a wall section, or prepare a scaled sketch showing the wall, profile and both sills. The drawing will reveal likely steps or edges and indicate which surfaces require remedial finishing.
Setting the profile flush can give a restrained modern appearance, though an out-of-true wall may offer little room for adjustment. Moving it deeper into the opening draws attention to the reveal and may respect the building’s proportions, but creates longer exposed returns. The answer is project-specific and must reconcile the wall build-up, exterior treatment, room and chosen look. For every dimension, name its datum: unfinished structural opening, completed internal plaster, final outside face or old frame. Allow now for the eventual thickness of insulation, cladding or finishes scheduled later. Otherwise, a unit that appears suitable on a drawing may conflict with the sill or return once interior layers are installed.
Room-side sills: bearing, projection and practical use
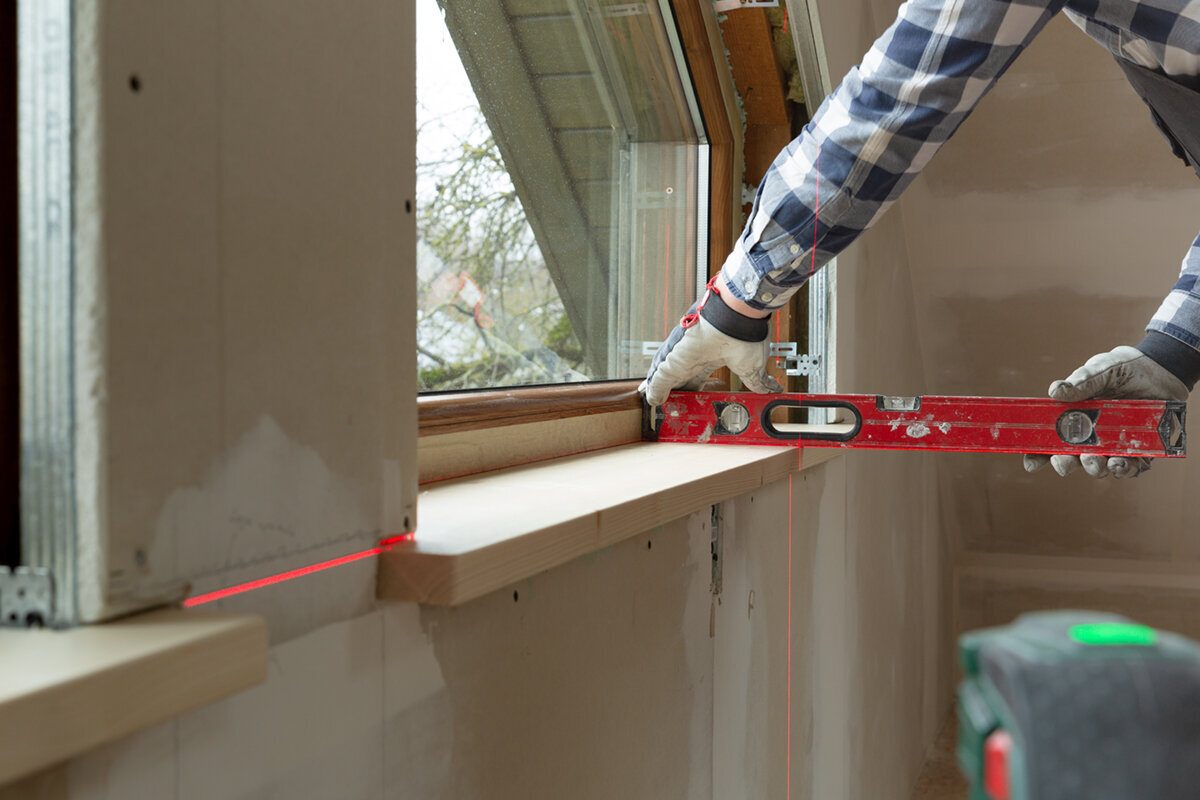
The room-side sill serves as a usable ledge and completes the lower interface. Depending on the building, its ends may enter wall pockets, stop against the profile or receive separate caps. Before removal, decide whether the existing piece is sound enough to retain, vulnerable to breakage, or due for renewal. Record its length and exposed projection, plus the concealed distance beneath the old frame. Select a front edge that suits the interior and map every meeting point with tiles, a recess, worktop or wall finish. Treat the new sill as part of the opening rather than an unattached decorative shelf: frame contact, support and junctions with both side reveals need to be resolved together.
Everyday operation depends on space around the handles, sashes and nearby fittings. Even with correct frame dimensions, curtains, pot plants or an over-deep ledge may impede use. At an inward-opening patio door with one leaf , the lower interface deserves separate treatment because it meets a floor, not a conventional room-side sill. When reviewing samples, note the chosen material, colour, edge shape and end treatment. Also allocate the practical tasks: lifting the existing sill, preparing its substrate, and reinstating plaster or floor finishes. Naming each responsibility prevents gaps between the window installer, builder and decorator.

Buying checks 3
Designing the outside sill at the façade
An exterior sill has to finish the base of the façade opening while directing rainfall clear of the wall. Review its slope, end conditions, attachment beneath the frame and meeting line with the façade as a single detail. During removal, the present sill might remain sound, suffer damage, or prove unusable once the frame position changes. Nearby shutters, rails, shading equipment and projecting façade features may also reduce access for the work. Photograph the opening obliquely as well as straight on; this angle records drips, overhangs and perimeter details that a frontal image may miss.
Choose this component while the window detail is still open, not once installation is complete. Establish its bearing, treatment at each end and appearance against the exterior finish. Render, brickwork, timber boarding and sheet cladding require different responses, so the solution must follow the actual construction. Across a broad opening—for example, Patio Life doors with lift-and-slide operation—the base is commonly detailed as a doorway threshold adjoining the patio, rather than as an ordinary sill. Coordinate paving or decking, water disposal, finished levels and door travel within that detail. Similar-looking replacement units do not necessarily suit the surrounding construction. Agree the drawing first so everyone knows which existing items remain, which are modified and which must be renewed.
Cover strips should finish the detail, not define it
Cover strips can provide a precise finished margin between an installed frame and the room wall. They may conceal a narrow working joint, guard a fragile plaster arris or bring consistency to several openings. Their purpose is visual; correct design and sealing of the underlying joint still remain essential, and concealed defects or unexplained movement need investigation. Before ordering, state whether strips are intended on the interior, exterior or each face, then choose their width and relationship to skirting boards and door architraves. Check them against the actual texture of the wall, because a straight strip can make pronounced unevenness more noticeable.
Another approach is to carry plaster, fine filler or a selected lining neatly to the profile. The effect is simpler, although it relies on well-made arrises and an agreed sequence among the trades. For fixed-glazed windows , sash movement creates no clearance issue. The lining decision must still accommodate profile depth, the exposed frame margin and cleaning access. View samples from several positions: face the opening, sight along the wall, and compare the profile, strip and reveal colour under natural light. Establish which joints will remain on view. If future inspection or redecorating may be necessary, ask whether the strip can be taken off without damage. A suitable strip has a defined job, position and termination rather than merely concealing the last unfinished edge.
Buying checks 4
Plan plaster, wallpaper, tiles and timber lining properly
Extracting the existing profile can disturb adjacent decoration. For wallpaper, consider whether a local repair will blend in or whether the broader wall should be redecorated. Around tiles, record where the last tile and any edging profile finish, and keep spare matching material if available. Timber boarding, exposed brick or stone, and textured render each call for a tailored perimeter treatment. Before work begins, document colour, relief, repeat and the direction of boards, grain or joints. This matters most when neighbouring windows in the same room will not be changed. Prepare or approve a representative finish instead of relying on the vague instruction “match existing”.
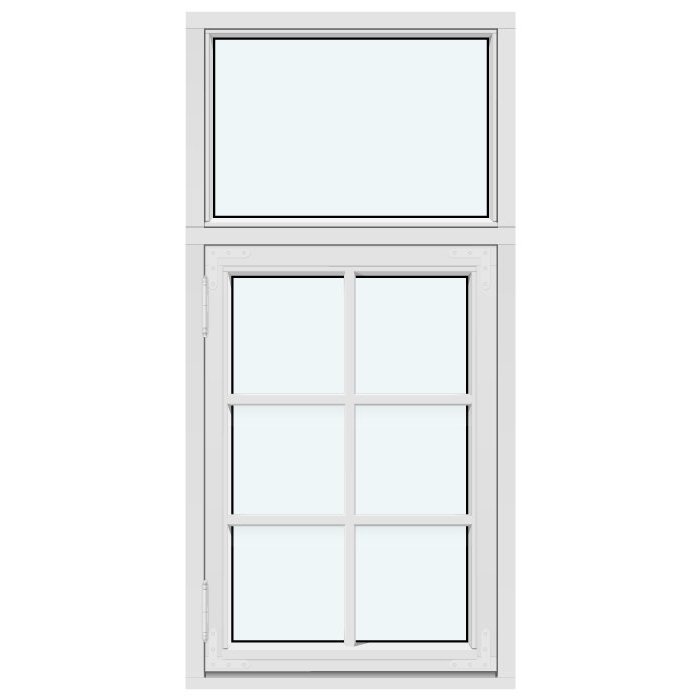
Use a practical work order: protect the room and remove the old unit; install and seal the replacement; then make good visible areas after the profile has reached its final position. Plastering, filling and painting belong in the price only when expressly listed. For an outward-opening “Kombi” casement in a traditional style , coordinate the new appearance deliberately with retained glazing bars and the characteristic depth of the opening. This is not an instruction to reproduce every period feature. Instead, study the composition before approval: profile width, bar layout, sill, façade aperture and the line where the reveal ends. The comparison shows whether a plain modern perimeter will read as purposeful contrast or introduce visual disorder.
Give non-rectangular openings a dedicated solution
Round, angled and segmented openings cannot reliably be planned using the template for a standard rectangular window. With a circular window with fixed glazing , concentrate on the full curved perimeter. Mark where the plaster or lining terminates, assess whether the exposed frame margin remains even, and decide how the radius will be finished. Standard straight cover strip cannot simply follow that geometry. Where the masonry is uneven, capture its form with a physical template, dimensions and photographs. Also establish the cleaning route for fixed glass—access may be needed from the room, outdoors or both—before deep linings or permanent furniture restrict it.
Rooflights, bays and walls with unusually deep openings require separate treatment too. A centre-pivot rooflight involves the complete internal lining through the roof slope, including how its edges are expressed in the room, rather than just two vertical returns. Details suitable for an upright wall window should not be transferred without review of this different position. On a drawing of any sloping opening, label the head, sides, base and any meeting line with the ceiling. Then state where crisp alignment is essential and where small deviations in the old fabric can remain. That prevents the final design being improvised by whoever carries out the last filling work.
Buying checks 5
Specify quotation items so each can be checked
A quotation is useful only if it goes beyond a count of units and their overall sizes. Give each opening an individual reference and record the operation, handing, profile colour or surface, position through the wall, both sills, reveal treatment and making good to retained finishes. Number the accompanying photographs so terms such as “left window” cannot be misread. Doors need a separate note describing the floor. Where a one-leaf patio door opens outwards, for instance, the internal and external floor connections should be designed as doorway details, not mistaken for a window sill. List unresolved matters as inspections or provisional decisions rather than allowing them to vanish from the stated scope.
Allocate every responsibility in writing. Identify the person taking site dimensions, the person approving size and handing for manufacture, and the trade protecting furniture and floors. State who removes unstable plaster, rebuilds the returns and delivers the specified surface quality. If samples, marked photographs or drawings define the result, ask for them to be incorporated into the order. Distinguish necessities from aesthetic choices: the retained sill might physically fail to reach the replacement, whereas an extra-wide decorative lining may be optional. Quotations can then be compared on equal work packages, instead of appearing cheaper or dearer because important tasks were left unnamed.
Check carefully before release and after fitting
Before authorising manufacture, walk through the window schedule in the corresponding rooms. From inside, verify handing and travel, handle location, sill projection and the photograph assigned to each opening. Add radiators, built-in furniture, electrical sockets, curtain rails, tiles and exterior obstructions to the relevant sketch. Confirm the indicative 4–6-week delivery period against the order acknowledgement, then arrange later trades around it. Bloomcabin’s commercial guarantee for its windows and doors lasts 5 years. Delivery and guarantee information assists with programming and administration, but the precise works included still need to be agreed for this project.
Inspect the completed appearance before decorative repairs obscure the installation area. Compare the order with the installed frame location, handing and unit count. Operate every sash and check that it clears the floor, sill and returns. Verify the agreed finishing treatment on the room and exterior faces, and record damaged surfaces that still need attention. Take well-lit photographs from both sides of every opening. This visual record supports a shared list of outstanding tasks; it is not a substitute for any specialist inspection the project requires. Completion should be judged across the whole composition—window, sills, cover strips and surrounding finishes—not from the frame in isolation.
Questions customers often ask
Does window replacement always require a new reveal?
No. Retention may be possible where the existing reveal is sound, compatible with the replacement position and suitable for the chosen finish. Even so, extraction can break an edge or expose an undecorated band. Decide beforehand whether the scope includes local making good, fresh plaster, a lining or cover strips, and assign the task to a named trade.
Can the old internal sill stay?
Consider its condition, method of fixing and relationship to the proposed profile. Record the bearing area and projection, then test the available space beneath the opening sash and handle. Retaining the old sill may still leave an unfinished perimeter that requires attention. The order should say whether it is to be protected in place, modified or taken out and renewed.
Are finishing trims always the simplest answer?
Sometimes, but their appearance will not suit every interior. A flush reveal finished in plaster may give a cleaner result. More importantly, cover strips are a finish rather than a remedy for an unresolved perimeter defect. Approve the proposed width, location, material and joint arrangement using a drawing or physical sample.
What matters most with a new external sill?
It should complete the base of the exterior opening, integrate with the frame and reveals, and shed water across the existing façade detail. Identify all side interfaces and assess how altered frame placement affects the retained sill. For doors near floor level, design a threshold, drainage and floor connection rather than defaulting to an ordinary sill.
Which information helps the fitting contractor most?
Provide repeated dimensions, views from indoors and outdoors, and a keyed sketch for each location. Include the wall finish, sill construction and neighbouring components. Define the intended appearance—plastered flush, edged with a cover strip, or lined—and identify later trades so their sequence and duties can be settled before manufacture is authorised.
Next step
Window replacement looks complete only when the reveals, sills and cover strips have been resolved with the frame. These elements control the meeting with the wall, the finished character of the room and the amount of remedial work still due. Survey every opening separately: take dimensions, photograph retained surfaces, decide the frame position, and develop the room-side and exterior details in their own right. Compare quotations by their stated tasks, not merely the selected unit. Joint approval of the profile, sill work, exterior interface and interior treatment greatly reduces last-minute decisions during fitting.
