
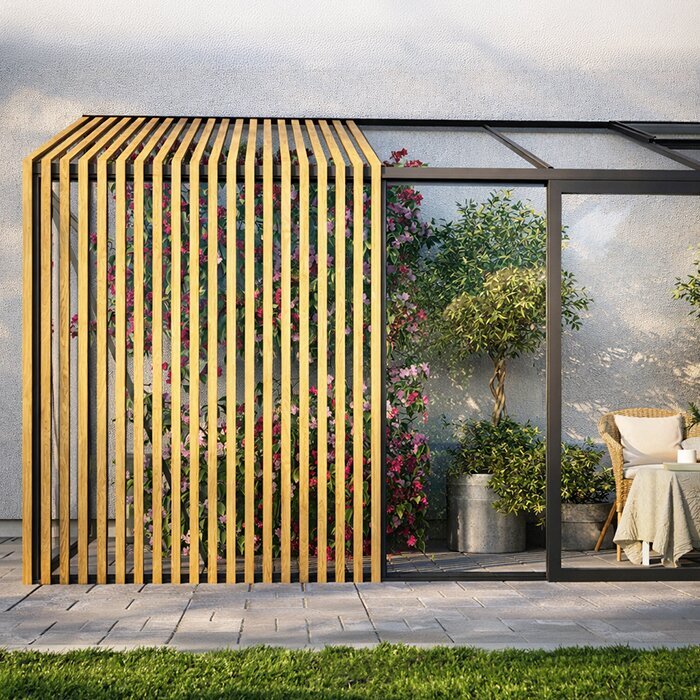



Limited Edition Lean-To Greenhouse with Accoya
Premium lean-to greenhouse with Accoya detailing, designed for installation against a suitable wall
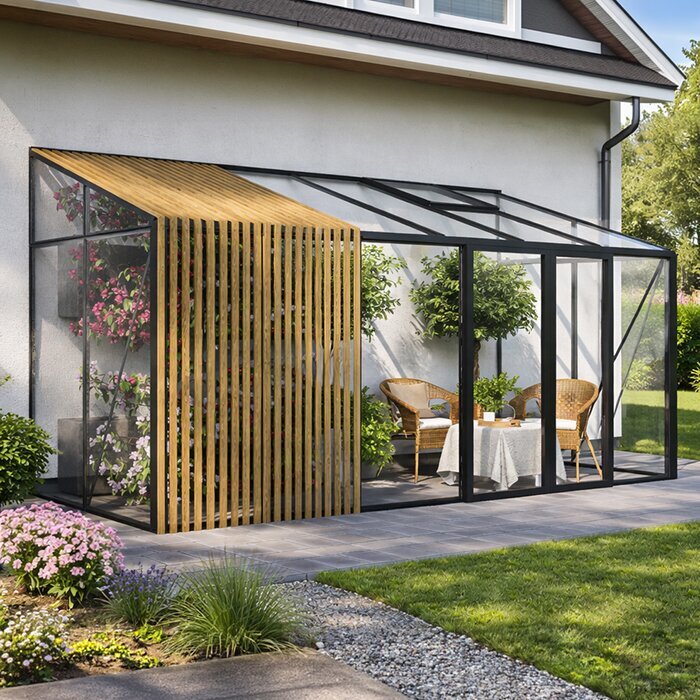
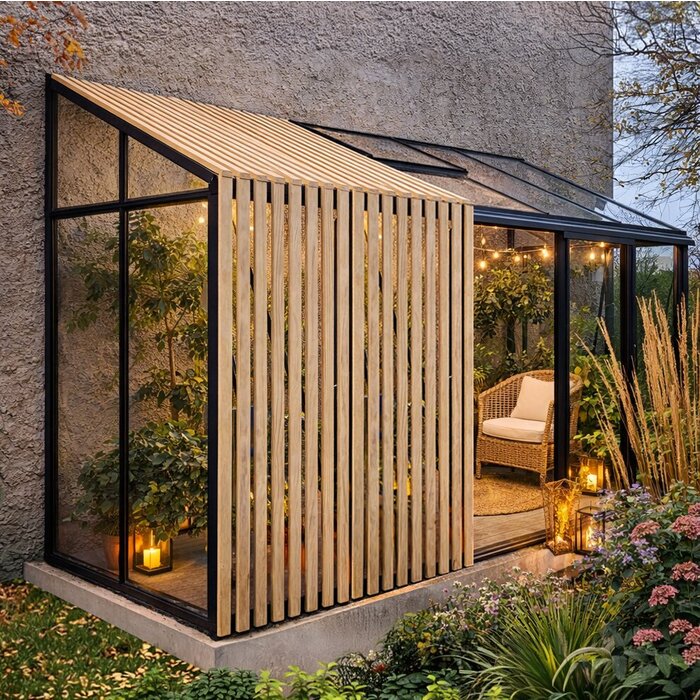
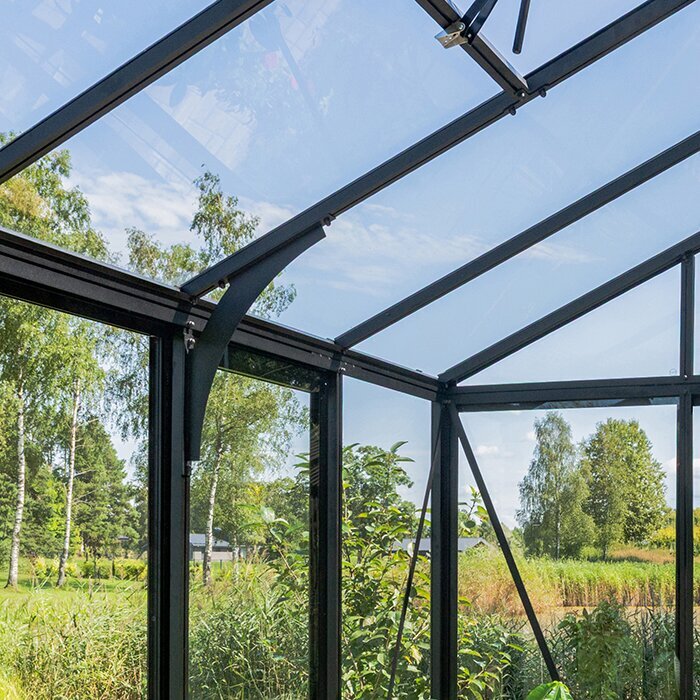
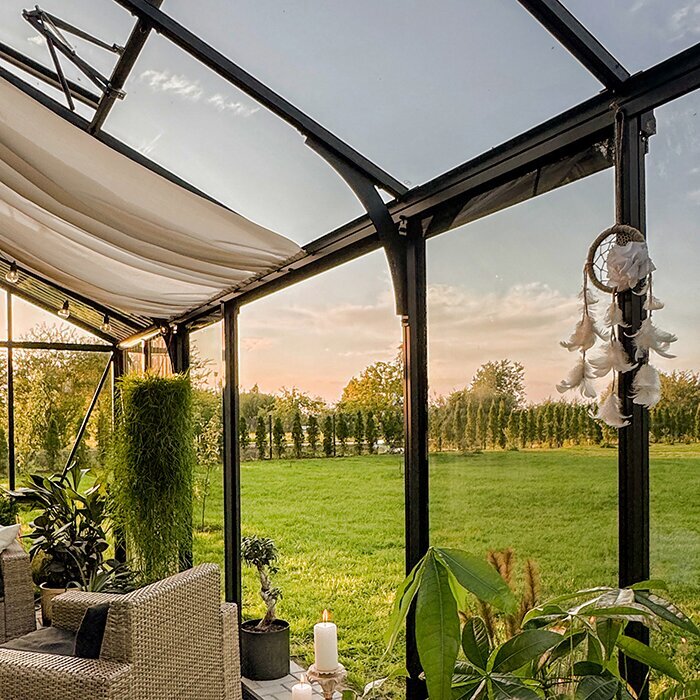
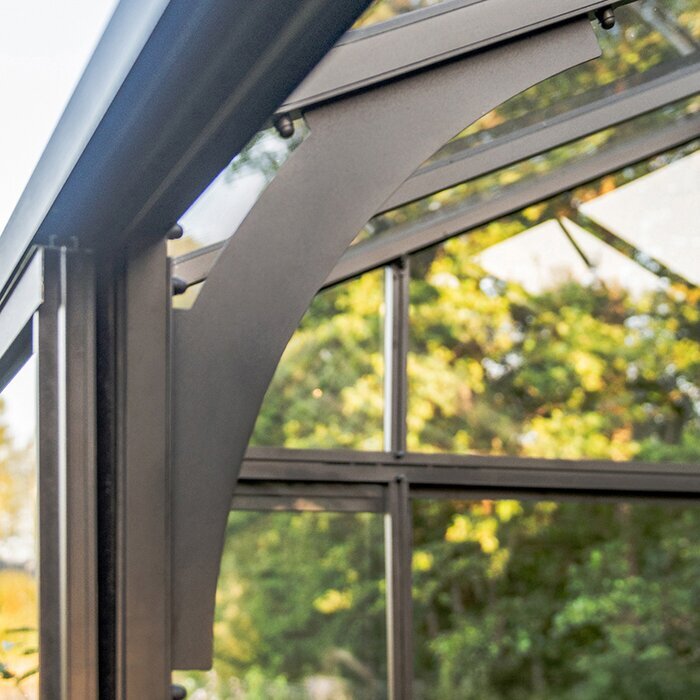
The Bloomcabin Limited Edition lean-to greenhouse with Accoya detailing combines practical growing space with the appearance of a carefully designed garden feature. Fitted against a suitable building wall, it works particularly well on patios, in courtyards and along side gardens where space is limited and the greenhouse will remain in view throughout the year. The aluminium frame gives the structure its clean lines, while untreated Accoya details add the natural warmth of wood alongside planting, paving and the materials of the house.
The model is currently available in 12 sizes, so you can match the greenhouse to the available wall length and your preferred growing layout. Glazing is available in polycarbonate or 4 mm toughened safety glass. Roof vents, integrated gutters, a built-in aluminium base and sliding-door access are included.
Before choosing a position, check the condition of the wall, ground levels, drainage, exposure to wind and the everyday route from the house. You can also explore our wider range of greenhouses and conservatories.
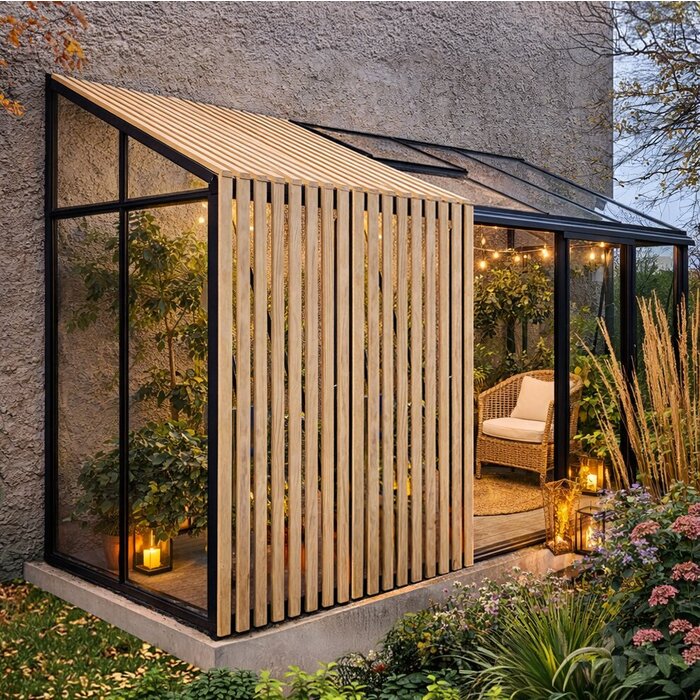
Premium wall greenhouse design
A wall greenhouse designed to complement your home
This model is for customers who want a working greenhouse that also looks at home on a well-designed terrace, courtyard or garden. Its finish suits a prominent position, but good growing conditions, ventilation and straightforward maintenance should still guide the choice of site.
Fitting the greenhouse against a suitable wall makes efficient use of garden space and can extend an existing patio naturally. A position close to the house also shortens the route for watering, harvesting and checking plants, provided it does not obstruct doors, windows, drains or everyday movement.
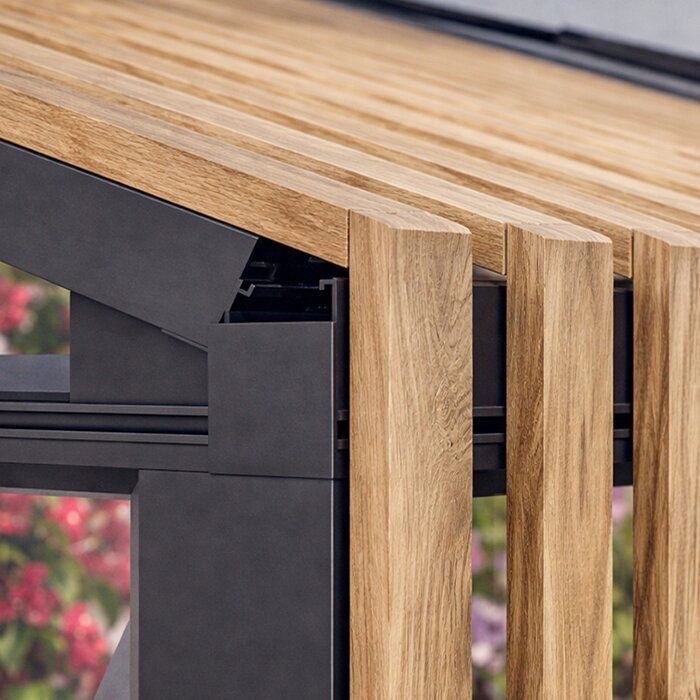
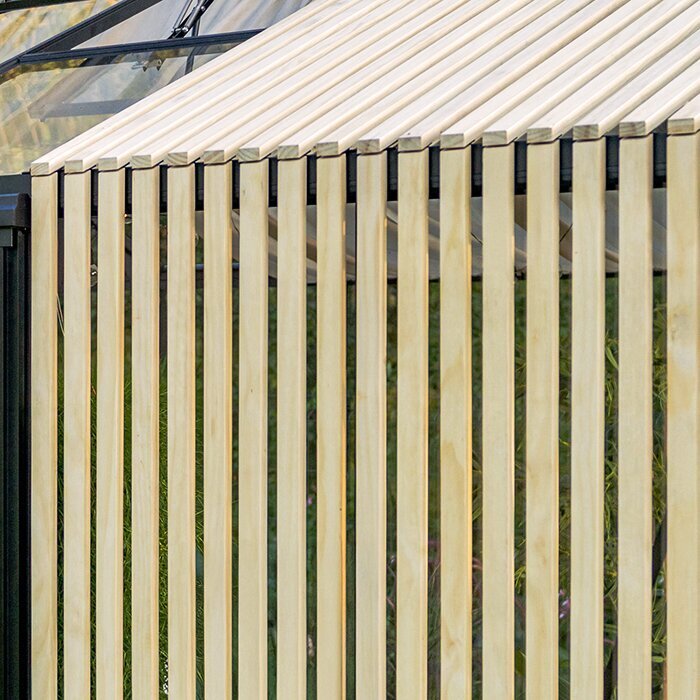
The Accoya details add natural texture to the crisp aluminium construction; they do not turn this into a timber-framed greenhouse. This is important when planning care and maintenance, as the untreated wood will change naturally while the aluminium, glazing, doors and vents have their own cleaning requirements.
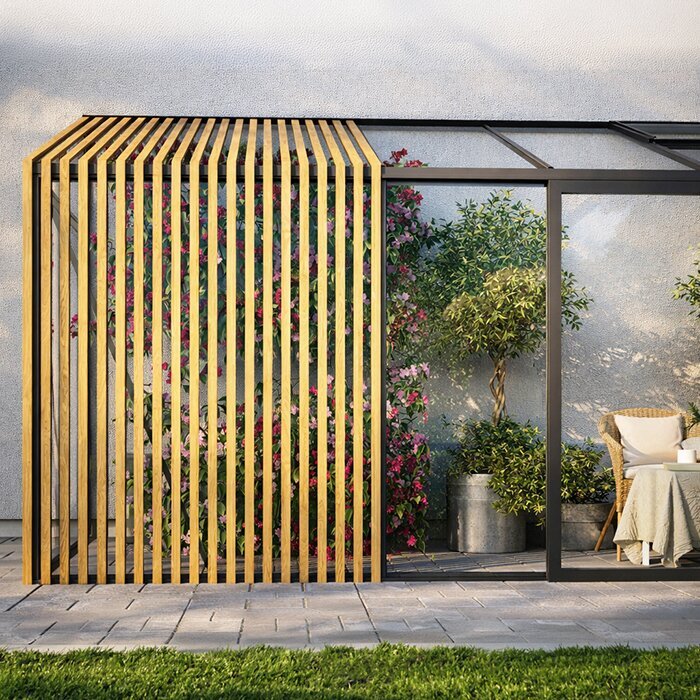
Natural Accoya detailing
Untreated Accoya creates a warm natural contrast with aluminium
12 size options
Configurations for compact sites and longer stretches of wall
Polycarbonate or glass
Choose polycarbonate or 4 mm toughened safety glass
RAL frame colour
Choose a frame colour to complement the house, paving and natural Accoya details
What makes Accoya different?
Accoya detailing warms the look of the aluminium frame
Accoya is used selectively as a design detail; this remains an aluminium-framed greenhouse. The untreated wood adds visual depth and warmth, while the aluminium construction provides the clean structural and glazing lines.
Its natural colour works well with brick, stone, render and planting. Untreated exterior wood changes in appearance over time, so this edition is best for customers who welcome a naturally evolving finish rather than expecting the wood to retain exactly the same colour as when installed.
This combination is especially effective when the greenhouse can be seen from the house or forms part of a patio or courtyard. When choosing the RAL frame colour, view it alongside the Accoya, the house windows and doors, and permanent paving or stonework rather than considering the aluminium alone.
Planning the installation site
Four points to settle before ordering
A lean-to greenhouse depends on the relationship between the wall, the fixing area and the prepared ground below. Measure the clear usable wall rather than the entire façade, allowing for rooflines, sills, pipes, vents, drains and space to use the sliding doors. Complete these checks before choosing the final size and door arrangement.
01
Installation wall
Make sure the proposed wall provides a continuous, suitable fixing area. Record how the wall is built and finished, and note any render, cladding, cavities, weak mortar, services or damp that may need further assessment before installation.
02
Base and level
Prepare a stable, accurately level foundation for the built-in aluminium base. Set the final indoor and outdoor levels at the same time so the threshold, paving and drainage work together without later alterations.
03
Door route
Walk through the intended approach with the door open and allow for carrying trays, compost and large pots. The most practical door position may not be central; it should follow the actual route from the house or garden without creating a bottleneck beside furniture or planting.
04
Rainwater
Decide where the integrated gutters will discharge and how overflow will be managed during prolonged rain. Water should be directed away from the house wall, threshold and foundation without blocking the route around the greenhouse.
Configuration and specifications
Limited Edition lean-to greenhouse specifications
Model type
Lean-to wall greenhouse
Lean-to aluminium greenhouse with Accoya details. When installed in accordance with the applicable requirements, it has a 30 m/s wind rating and a 210 kg/m² snow load.
Available sizes
12 sizes
A choice of configurations for different wall lengths
Glazing
Polycarbonate or 4 mm toughened safety glass
Choose the glazing according to the appearance you prefer and how the greenhouse will be used. Toughened safety glass provides a clear view and crisp finish. Polycarbonate gives a more diffused appearance and has different weight, light and thermal characteristics.
Accoya
Untreated Accoya details
A warm, natural contrast with the aluminium frame
Doors
Single or double sliding doors
Double doors are available on compatible wall widths from approximately 3.10 m
Ventilation
Roof vents
Roof vents provide an opening at roof level through which rising warm air can escape.
Water & base
Integrated gutters and built-in aluminium base
Both features are included with this greenhouse
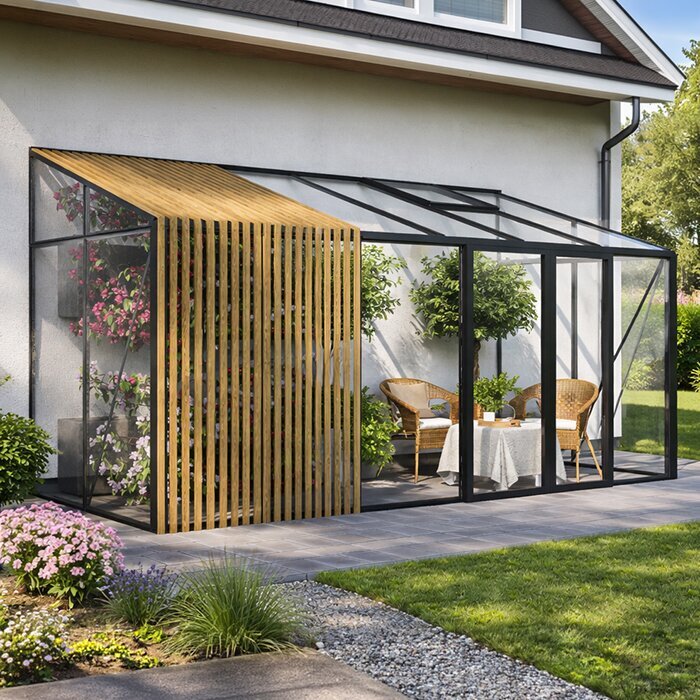
Why choose a lean-to greenhouse?
A lean-to greenhouse makes efficient use of space beside the house
A lean-to greenhouse fits against a suitable wall of a house or garage, or another appropriate masonry wall, with the glazed roof and outer sides enclosing the growing space. The wall is an essential part of the installation and must be assessed accordingly, rather than treated simply as a backdrop.
The shallower footprint can be useful on a narrow plot, beside a path or at the edge of a patio where a freestanding greenhouse would obstruct movement. Measure both the usable wall length and the outward projection so enough space remains to walk around it comfortably.
The adjoining wall can influence conditions inside the greenhouse. Assess reflected warmth, drainage from the roof above and access to every exterior surface that will require cleaning or maintenance.
How can it be used?
Productive growing space that also complements a patio or courtyard
01
Kitchen garden support
Use the greenhouse to raise seedlings and grow herbs, salads and seasonal crops within easy reach of the kitchen. Organise the growing area according to each crop’s watering, light and harvesting needs.
02
Terrace backdrop
Plan the area outside the greenhouse as carefully as the interior. Arrange chairs, tables and planters so the entrance remains easy to approach and the sliding doors can operate without obstruction.
03
Plant display
Use the glazed structure to display citrus plants, decorative pots or a favourite plant collection. Different heights can create an attractive view from outside, but keep foliage away from the glazing, roof vents and areas needed for cleaning.
04
Growing space with a place to sit
If space allows, include a seat for tending plants or enjoying the garden. Choose furniture suited to a humid greenhouse environment and keep the routes to the doors, vents and working areas clear.
Wall and services
Survey the whole wall before choosing a size. Measure the clear fixing area at several heights and mark anything that could affect installation or future access, including eaves, windows, outside lights, taps, cables, boiler outlets, air bricks and rainwater pipes. Consider whether the wall behind the greenhouse may need inspection or repair later.
Brick house walls
Brick can look particularly attractive beside Accoya and aluminium, but appearance alone does not establish whether it provides a suitable fixing surface. Inspect the masonry and mortar carefully, especially on older, weathered or altered walls, and repair loose material, cracks or weak patching before installation.
Prepare a measured drawing of the wall showing windows, sills, vents, drains, pipes and changes in paving height. Check how windows open as well as their fixed dimensions: a window may sit above the proposed roofline but still clash with the greenhouse when opened.
Air bricks and ventilation outlets must continue to operate as intended, and existing rainwater pipes should remain accessible. If a household service conflicts with the preferred position, consult an appropriately qualified professional before moving the service or changing the layout.
Wall condition
The fixing surface must be reliable along the full installation line. Even a wall that looks flat can have projections, uneven areas or weak finishes, so check its condition and alignment. Render and cladding may require a different fixing approach from sound exposed masonry.
Look for persistent damp, failed pointing, hollow render or movement around nearby openings, and identify concealed services before drilling. If the construction or condition of the wall is uncertain, obtain advice from a qualified professional on a fixing method suited to the building.
Finish repointing, masonry repairs, painting and other wall maintenance before installing the greenhouse. Completing this work in advance avoids taking dusty equipment through a finished growing area or risking damage to the glazing and Accoya details.
Water supply and irrigation
A nearby outdoor tap makes watering easier, but route the hose away from the sliding-door threshold and main walkway. Plan where it will be stored and drained after use, especially when the entrance opens directly onto a busy patio.
If you plan to use drip irrigation, decide where the supply will enter and how the pipework will reach each growing area before fitting benches. Keep it clear of door runners, sweeping routes and places used for moving pots.
Connect the integrated gutters to a suitable discharge or collection point. Place any rainwater container on a secure base where it can be reached without narrowing the entrance, and provide an overflow route that directs water away from the house and greenhouse base.
Site conditions and ventilation
Conditions beside a house can differ from those in the open garden. Paving may shed rain quickly, masonry can retain warmth and reflected sunlight can raise the temperature inside. Observe the proposed position through the day and plan ventilation and water disposal for the conditions you find.
Wet weather
Finished paving should direct surface water away from both the greenhouse and the building. Check the base junction and low areas near the entrance, where standing water would make access unpleasant and splash dirt onto the lower frame and glazing.
Check whether runoff from the main roof could fall directly onto the greenhouse or collect at the wall junction. Existing roof drainage should remain effective, with no discharge onto the greenhouse entrance or foundation.
Keep the threshold and sliding-door runner free from silt, gravel and leaves carried by rain. A well-drained entrance is easier to use with loaded trays or wheeled equipment and reduces the dirt brought into the greenhouse.
Frame colour and house materials
View frame colour samples beside the property in natural daylight. Window frames, doors, brick, roof finishes and paving can all change whether a colour appears understated or deliberately contrasting.
The chosen RAL colour needs to work with both the house and the untreated Accoya. Because planting changes with the seasons and the wood will weather naturally, base the decision on permanent materials rather than a temporary display.
A restrained colour can help the lean-to blend with the house, while a contrasting shade can make it a stronger garden feature. Either approach works best when it is considered alongside the whole patio or courtyard.
Floor and threshold
Set the finished floor height with the aluminium base and sliding-door threshold in mind. It will affect drainage, ease of entry and the usable space beneath staging, so resolve it before laying the final surface, particularly where an existing patio slopes.
Choose a firm internal surface suited to watering, sweeping and the repeated movement of pots. Paving provides a tidy working floor, while well-prepared gravel has different drainage and maintenance characteristics. Either option must remain stable and be compatible with the required foundation.
Compare the levels inside the greenhouse, outside the doors and along the house wall. Coordinating them early helps prevent an awkward step, a doorway that slopes towards the interior or a narrow channel where water and debris collect.
Practical interior layout
Arrange the interior around the way you will work: entering, storing tools, potting, watering and reaching plants. Keep the roof vents and doors usable when the greenhouse is full, and leave an aisle wide enough for the largest pot or tray you expect to move.
South-facing patios
A sheltered south-facing position can warm quickly in bright weather, even during spring and autumn when the outdoor air still feels cool. Check conditions inside regularly rather than relying on the temperature outside.
Keep roof-vent controls and sliding doors within easy reach. Opening the high roof vents and lower doors together gives accumulated warm air an escape route while allowing replacement air to enter.
Leave gaps between dense foliage, the wall and the glazing so air can move through the growing area. Arrange vigorous plants where they will not cut off a corner or prevent nearby crops from being inspected.
Ventilation through the growing season
In summer, direct sunlight and warmth held by the building can make early ventilation important. Respond to the conditions inside the greenhouse rather than opening it at a fixed time, and adjust the routine as plants grow and change the airflow.
Use the roof vents to release rising warm air and the sliding doors to admit replacement air. Before leaving the greenhouse unattended, allow for changing weather and make sure every door and vent is secured in the intended position.
Keep tall crops, trailing growth and shelves away from vents and door openings. Train or move plants before they obstruct the mechanisms rather than forcing a door or vent against foliage.
Maintenance access
Keep access to both sides of the doors, the gutters, roof vents and reachable glazing. Also allow for household fittings near the greenhouse that may need servicing, and avoid placing permanent benches in front of important wall junctions.
Place large planters and patio furniture where they can be moved without dismantling the growing layout. Do not store materials against glazing panels or in door corners, where they obstruct cleaning and can hide leaves, moisture or pests.
A small amount of clear working space is more useful than filling every edge with staging. It allows panels and gutters to be cleaned and plants to be turned or removed without disrupting the rest of the layout.
Everyday use through the seasons
For lasting practicality, plan around real routines rather than an ideal display. Consider how often you will water, where compost and clean pots will be stored, which crops need daily attention and how the layout will change when tender plants are brought under cover.
Kitchen access
Place frequently harvested herbs and salads near the entrance for quick trips from the kitchen. Keep plants needing quarantine, messy repotting or less frequent attention in a separate part of the greenhouse.
Keep the route from the house adequately lit and free from hoses, loose pots and projecting tools. A clear approach is particularly useful when carrying a full watering can or a tray that hides the threshold from view.
Check the door approach in both directions and with the doors fully open. Make sure it will still work when patio furniture is in use and nearby borders have matured, not only while the site is empty.
Interior benches
Divide benches according to tasks and plant needs instead of using the same depth along every wall. A clear potting area avoids repeatedly moving plants, while narrower shelving can make use of bright perimeter space without restricting the main aisle.
Set the main working surface at a comfortable height for regular potting and pruning. Keep cleaning access beneath or behind it, and ensure stored items cannot touch the glazing or obstruct ventilation controls.
Movable staging allows the greenhouse to accommodate propagation trays in spring, larger summer crops and overwintering pots later in the year. Before buying it, check that each section will pass through the selected single or double sliding doors.
Seasonal workflow
Keep a clean sowing and potting area available in spring before trays begin to multiply. In summer, give priority to ventilation and harvesting access. During autumn, decide which tender plants will come under cover and remove spent material before the interior becomes crowded.
At each seasonal change, clear unused trays and reorganise the layout before bringing in new plants. Furniture that can be moved independently makes this easier without requiring the entire growing area to be dismantled.
Store labels, ties and hand tools somewhere dry and visible. Keep compost bags, chemicals and heavier equipment where they cannot spill into the door runner, and remove empty pots regularly so storage does not gradually take over the working space.
Before you order
Turn your chosen configuration into a practical site plan
Put the final wall measurements, fixing conditions, foundation levels and clear space in front of the greenhouse on one plan. Confirm that the selected size fits the usable wall and that all components can reach the site through gates, passages or side access.
Plan the interior before ordering benches or shelving. Check that the chosen furniture will pass through the selected doors and leave enough room for ventilation controls, cleaning and the pots you expect to move.
Agree in advance who will prepare the foundation, assess the wall, arrange the rainwater discharge and clear the installation area. This prevents unresolved pipes, drains or paving levels from delaying assembly after the greenhouse components arrive.
Practical checks after ordering
1
Recheck the finished site
Compare the confirmed size and door arrangement with the finished wall, base and access clearances before assembly begins. Make sure completed wall repairs or changes to paving have not altered the usable space.
2
Plan component access and storage
Decide how the packaged components will reach the installation area and where they can be kept without blocking household doors, paths or the working space beside the wall.
3
Clear the working area
Move patio furniture, pots, hoses and stored materials away from the installation area. Keep the approach clear so components can be carried to the site without disturbing planting or household fittings.
4
Confirm the ordered configuration
Once assembly is complete, compare the finished greenhouse with the ordered size, glazing and door configuration before adding benches or plants. Resolve any discrepancy while the interior and installation area remain clear.
Frequently asked questions
FAQ: Limited Edition lean-to greenhouse
How do I choose the right size?
Measure the clear usable wall rather than the full wall length. Allow for pipes, windows, vents and rooflines, then check the greenhouse projection, external walkway and space needed to use the sliding doors.
Which glazing gives the clearest view?
The 4 mm toughened safety glass gives the clearest view through the greenhouse and provides a crisp finish. Choose polycarbonate when a softer, more diffused appearance is preferred.
Will the untreated Accoya keep its original colour?
No. As untreated exterior wood, the Accoya will change naturally over time. Choose this edition if you are comfortable with an evolving wood finish alongside the aluminium frame.
When are double sliding doors worth choosing?
Double doors are worthwhile if you regularly move large pots, wide trays, staging or equipment. Check whether they are offered with your selected wall width.
How should I ventilate the greenhouse?
Use the roof vents to release rising warm air and open the sliding doors when replacement airflow is needed. Keep vents, controls and door openings clear as plants grow, especially in warm, sunny conditions.
What foundation preparation is required?
The built-in aluminium base still needs a stable, accurately level foundation. Set the finished floor, external paving, threshold and drainage levels before installation so the doors and rainwater arrangements work as intended.
How should rainwater from the gutters be handled?
Route the integrated gutters to suitable drainage or a stable collection point. Provide a clear overflow route and keep discharged water away from the house wall, greenhouse foundation and main access path.
What warranty does the greenhouse include?
Warranty cover is provided for 12 years, subject to the applicable warranty terms.
Bloomcabin Limited Edition
Bring productive growing and natural detailing together beside your home
The Limited Edition Lean-To Greenhouse with Accoya combines a precise aluminium frame and natural wood detailing with practical growing space beside the home. A carefully assessed and prepared site helps the sliding doors, roof vents, integrated gutters and interior layout work effectively from the outset.
Checks after installation
✓ test the sliding doors and roof vents before adding benches or plants
✓ confirm that the gutter outlets discharge as planned during rainfall
✓ keep the door runner and threshold clear of gravel, compost and leaves
✓ position staging so every control and household service point remains accessible
✓ inspect the wall junctions and exterior surfaces while access is still clear
✓ retain purchase, installation and maintenance documents for future reference